Day by day, FormGet is enhancing it’s every feature to give ease to their customers in every aspect. Recently, Another super-quick online payment processing channel in form is being added, ie. Stripe, through which FormGet clients can easily collect payment via their FormGet online payment forms.
So, If you are a FormGet user, you can easily make payment channel on forms, and collect payments online either by PayPal or Stripe.
Stripe Payment Channel overview-
-
- Make Online Payment Form for One Time Payment Collection/Recurring Payment Collection.
- Make Online Payment Form that collects payment for single product/multiple product.
Important Instructions to keep in mind!
- On one Form, you can either collect recurring payment or One-time payment.
- Add a Checkbox Field in the form to collect payment for multiple products.
- Add a Radio Field/Dropdown Field to collect payment for single product.
To start collecting online payment via forms with the help of Stripe payment collection gateway, just learn these simple steps, before that you need to have Stripe Extension activated in your account.
1. How to activate Stripe Extension :
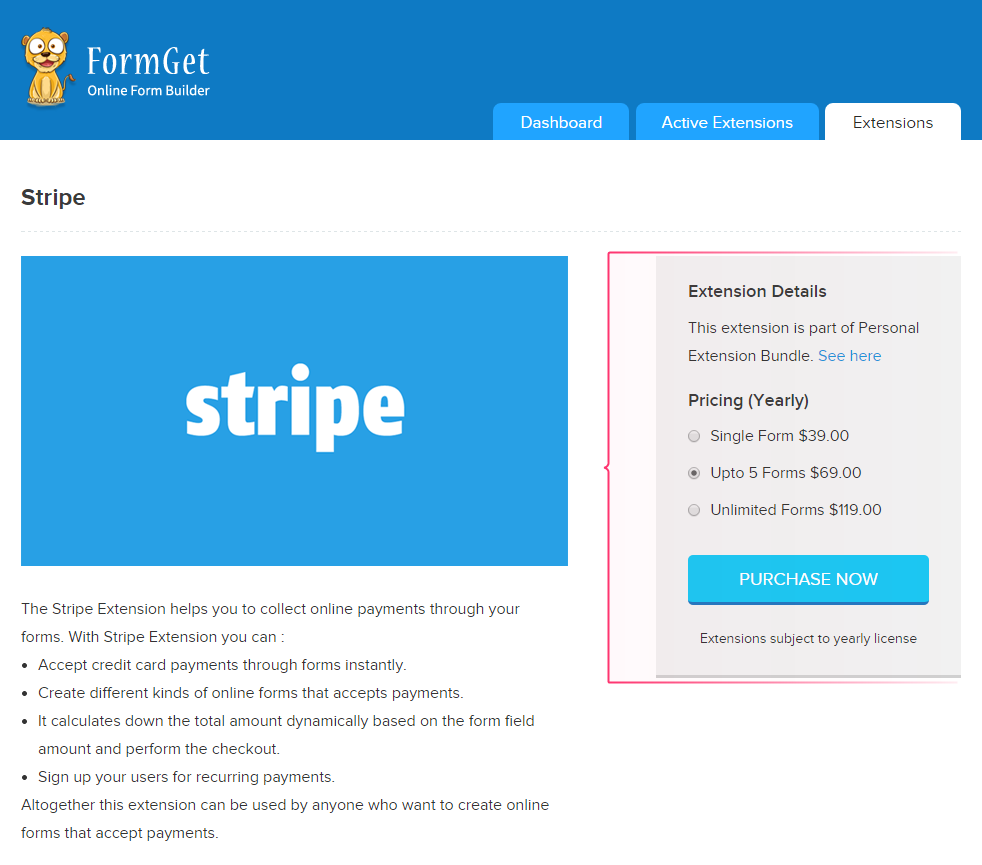
- Click on Extension option provided in your FormGet dashboard.
- There you will find Stripe Extension.
- Click on it and select the relevant pricing plan that suits the best and buy it.
- After that Stripe Extension will get added in your Active Extensions section.
2. Create a Payment Form in FormGet app page.
- Just open your FormGet Dashboard click on Create New Form.
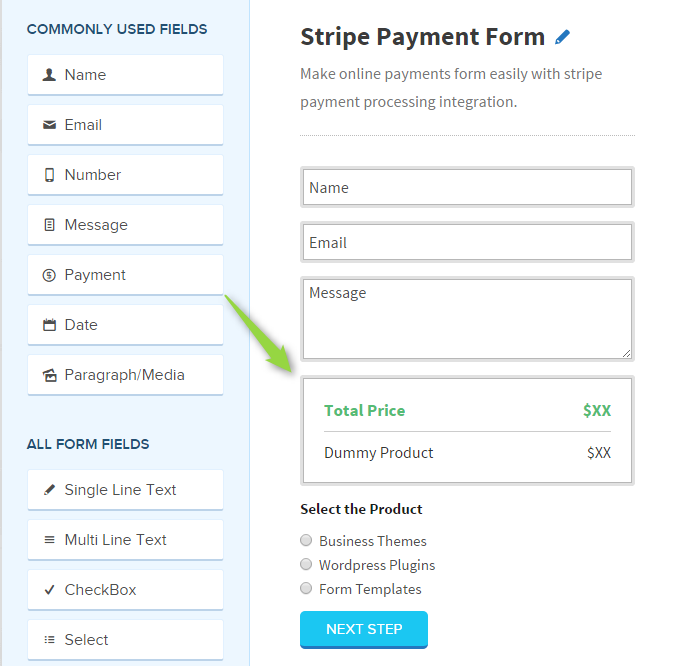
- Add fields in the form as per your requirement.
- You must Add the Payment Field on the form as shown below. This is the most important step to create payment form. After completing the form click on Next Step.
3. Set the Payment settings for the products Using Stripe Extension.
- Whatever the product price customization you want to make in payment forms you have to do it in the Stripe Extension under Active Extension Page or just select configure Extensions option.
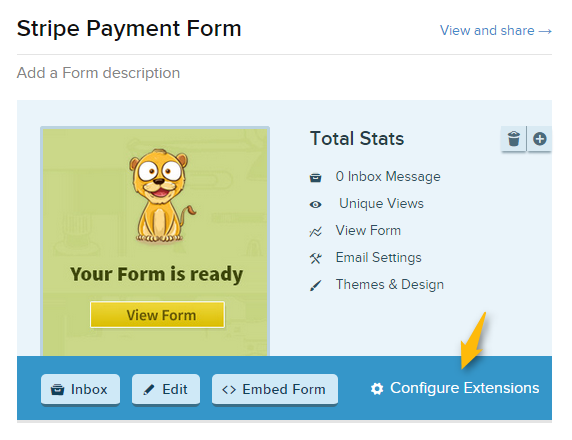
- Now Active Extension page will appear. Click on Setup Now. Make sure that before clicking on Setup Now option for Stripe Extension you must have selected a form first in which you require to do settings.

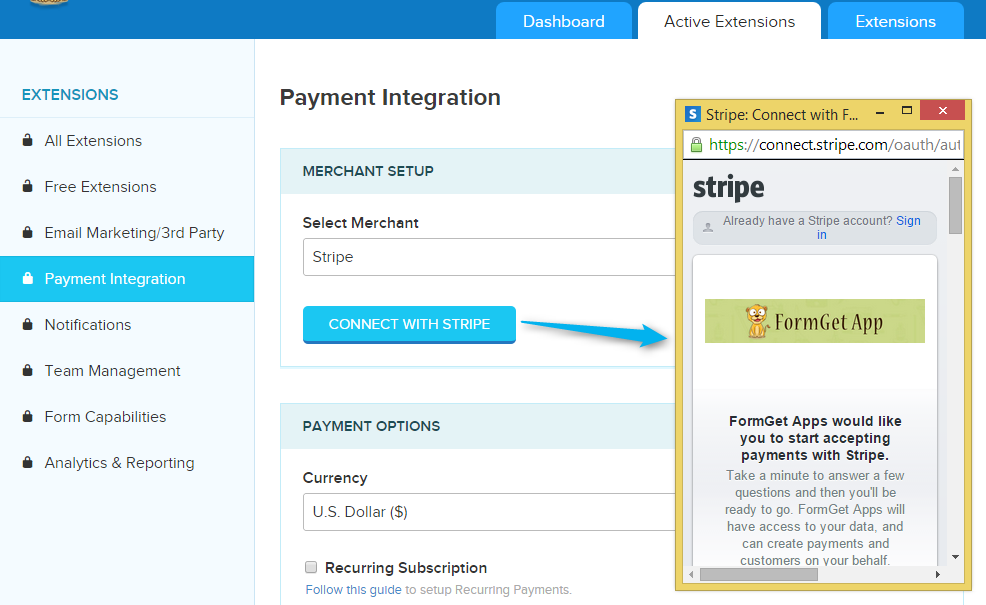
- Then in Payment Integration page select Stripe as Merchant Setup.
- Most Important Step– Connect the Stripe with FormGet. Make the connection by clicking on the button as shown below.
Now, If you want to collect recurring payment for a single product or want to collect single time payment for multiple products you have to follow different steps. Focus on the steps given below.
Steps To Collect Online Payment For Single Product (Radio Button Field, Dropbox field)
- Once you created the payment form, for instance, you have added payment field and input product menu as Radio/Dropdown field, you have completed half of your payment forms.
- Once the connection is completed, you are ready to customize the product price. Firstly, choose the product field from the Choose Field option. In the next step, Set the product price.
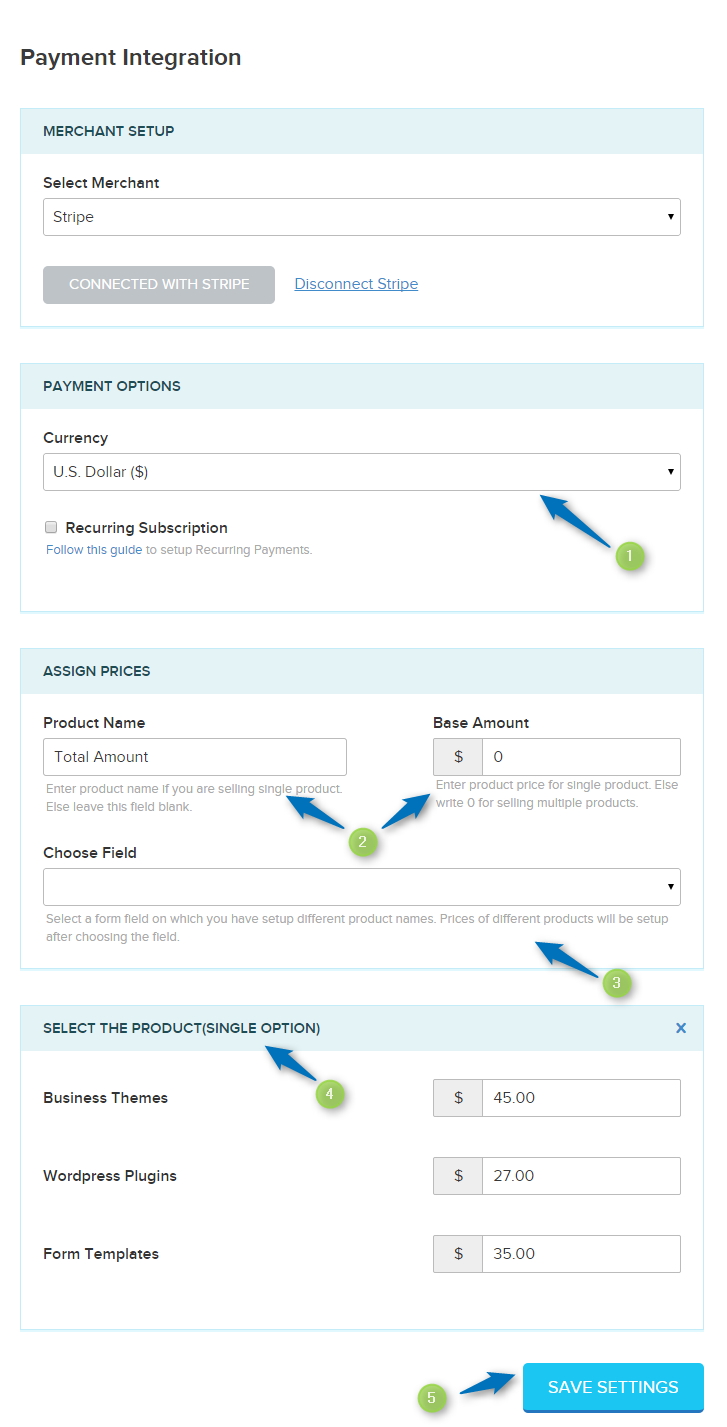
- Now go back to your FormGet dashboard to view the form.
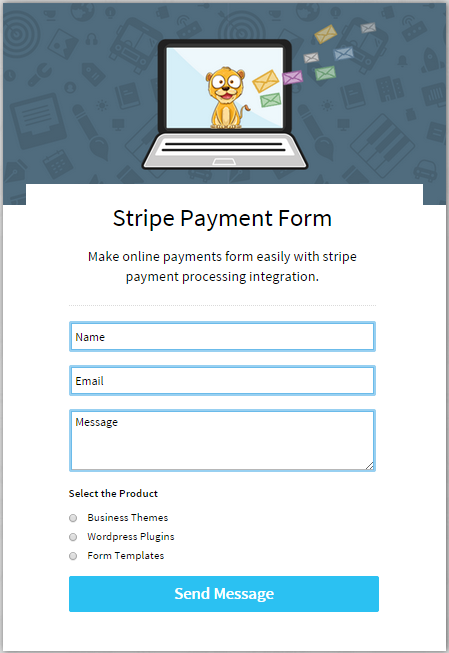
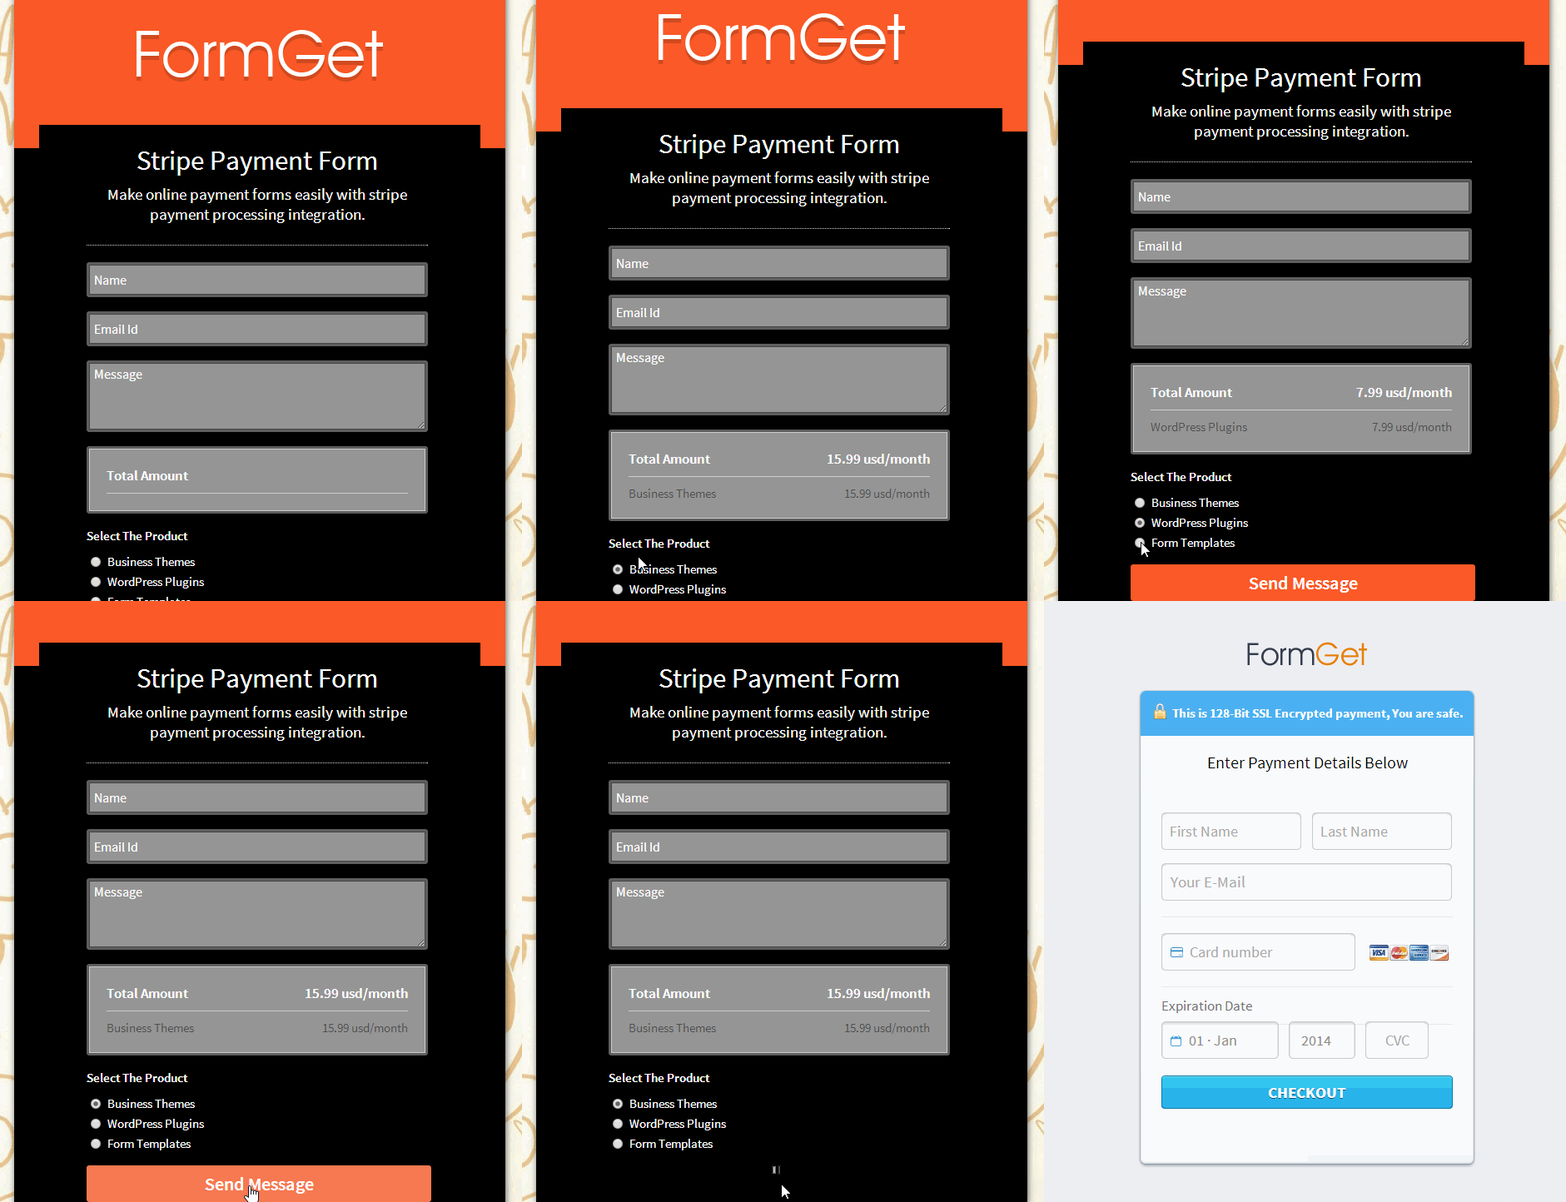
It will give output as shown below
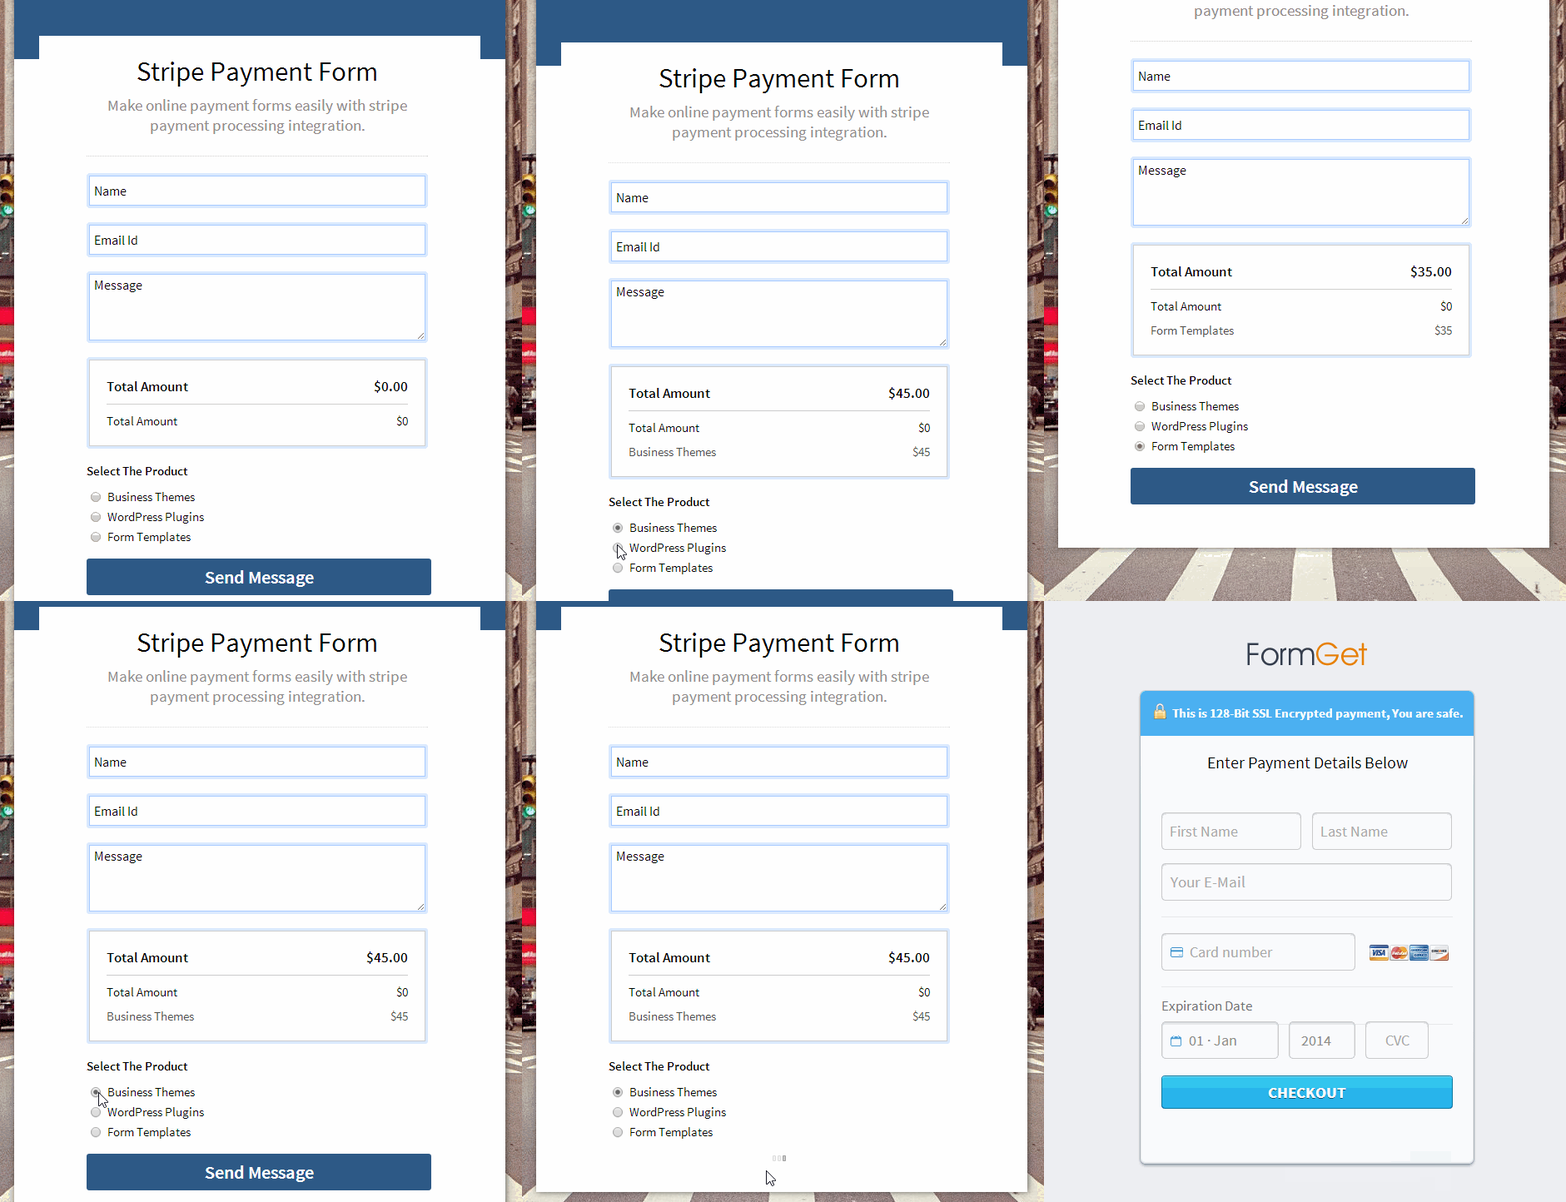
You can have a look on the online payment form working
Steps To Collect Recurring Payment Via Form
Note- Recurring payment option works with Drop-down field and Radio button field only.
If you want to get recurring payment for your products monthly/weekly/yearly wise, you have to input your products in drop-down/radio field and set the recurring payment plan as given in below steps-
Step1. Go to Stripe.com.
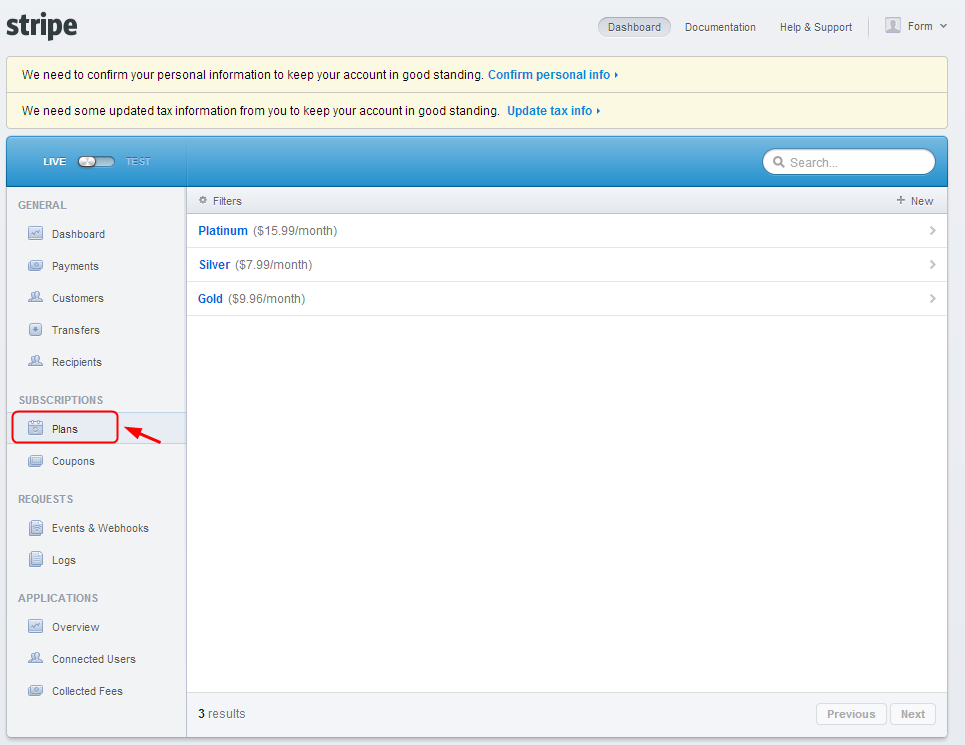
Step2. Login to your account. Create different payment plans here. Go to Plans option as shown below-
Step3. Create a New Plan. To create a new plan click on “New“. See the below image for reference-
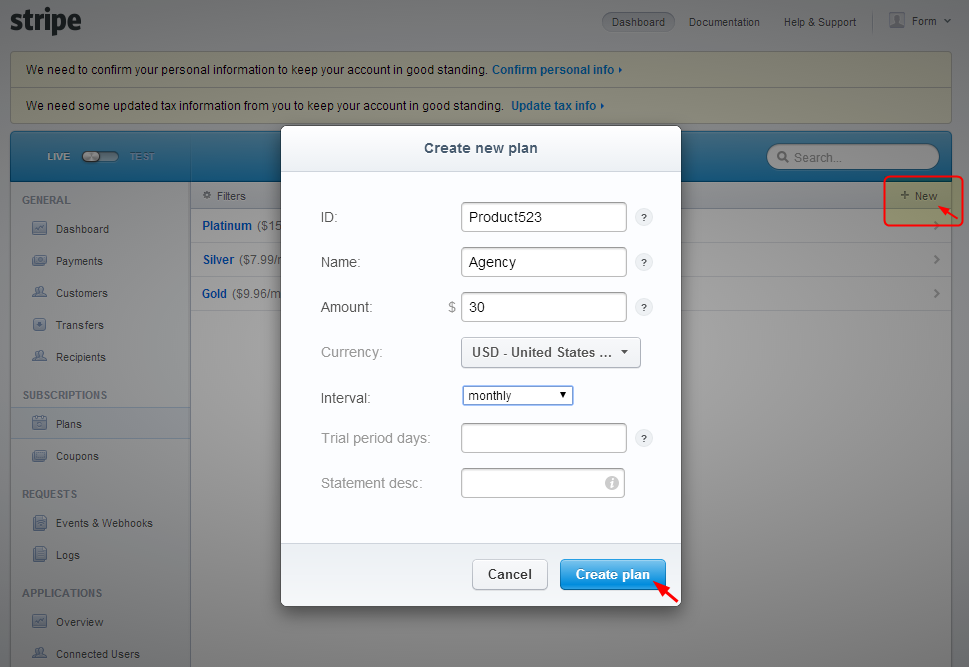
- To create a plan you have to fill certain fields.
Id – It is the product id, you can give it in the alphanumeric combinations.
Name – Here, you can give the plan name.
Amount – Here, you can set the plan amount.
Currency – Here, you can set the currency.
Interval – In this, you can set the time interval as month/week/year.
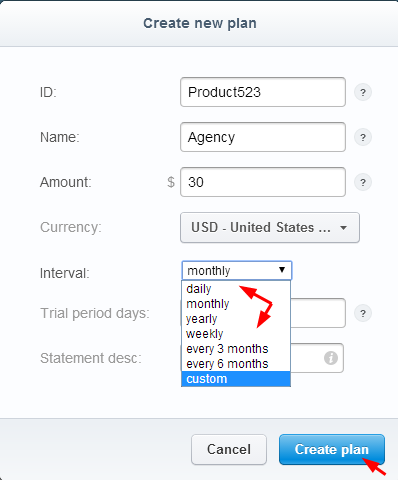
- Finally click on the Create Plan button.
- Your plan will be created as shown below-
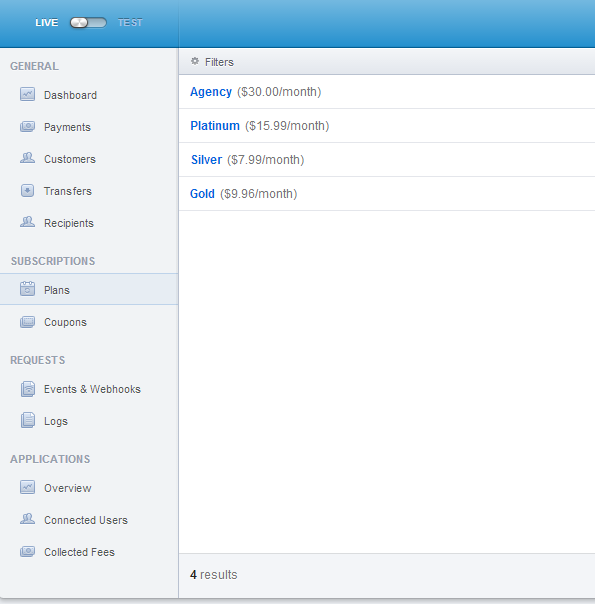
- Now Go Back to the Stripe “Payment Integration” page.
- Click on the “Recurring Subscription” checkbox in Payment Options.
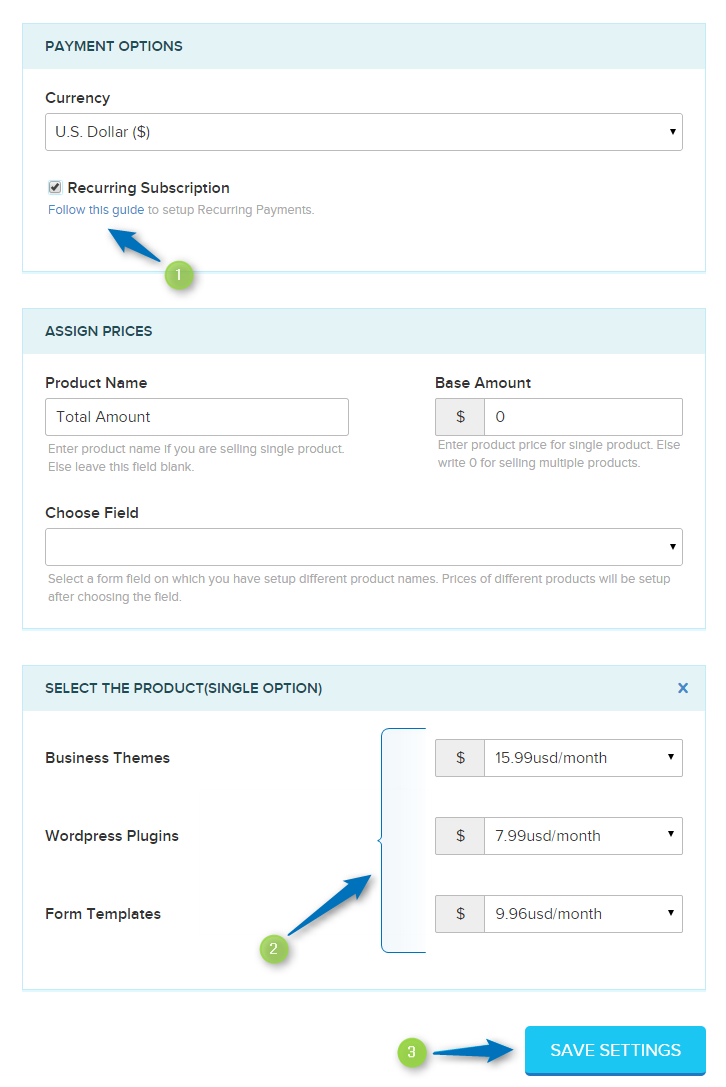
- In the next step, choose the plan for each product from the DropDown menu next to each product.
- Once you completed the final step the form will give the output as shown below-
Steps To Collect Online Payment For Multiple Products (Checkbox Field)
Note: Recurring Payment does not work with checkbox field (multiple product select option).
- Create form in the dashboard as shown below-
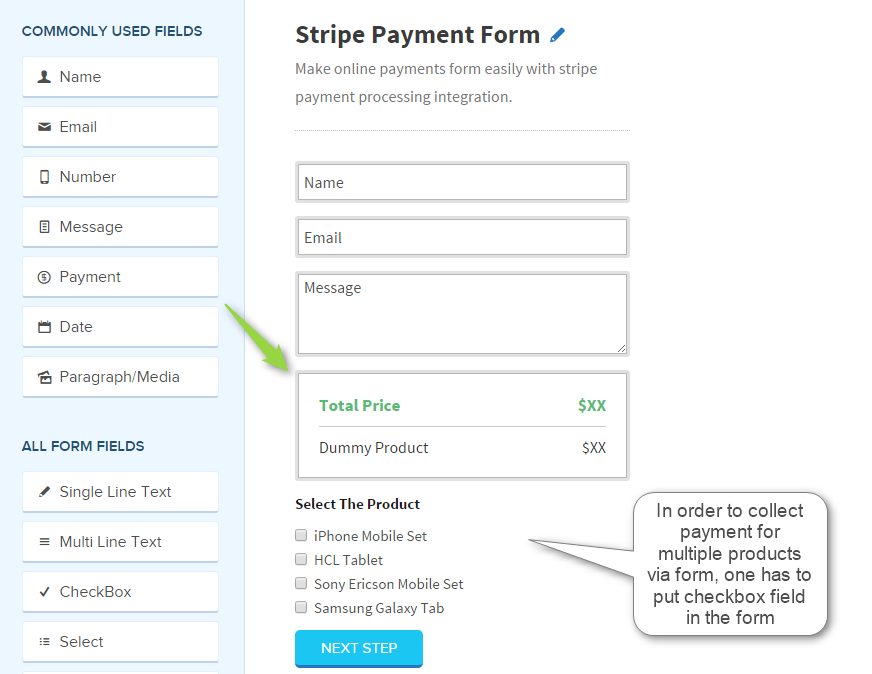
- Add a Checkbox field in the form. It will enable to choose multiple products on users perspective. Next, set the payment for multiple products as given below.
- Go to the “Payment Integration” page present inside Configure Extensions > Stripe Extension.
- Choose product field from “Choose Field” dropdown.
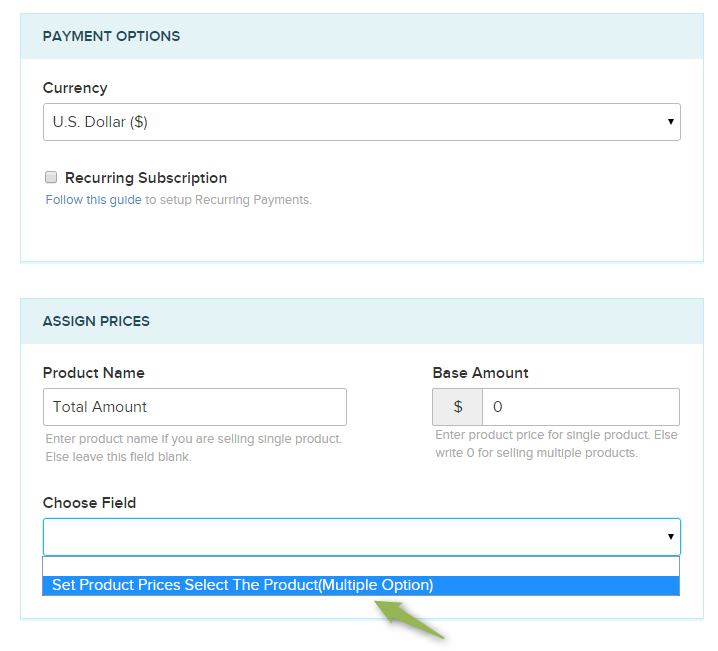
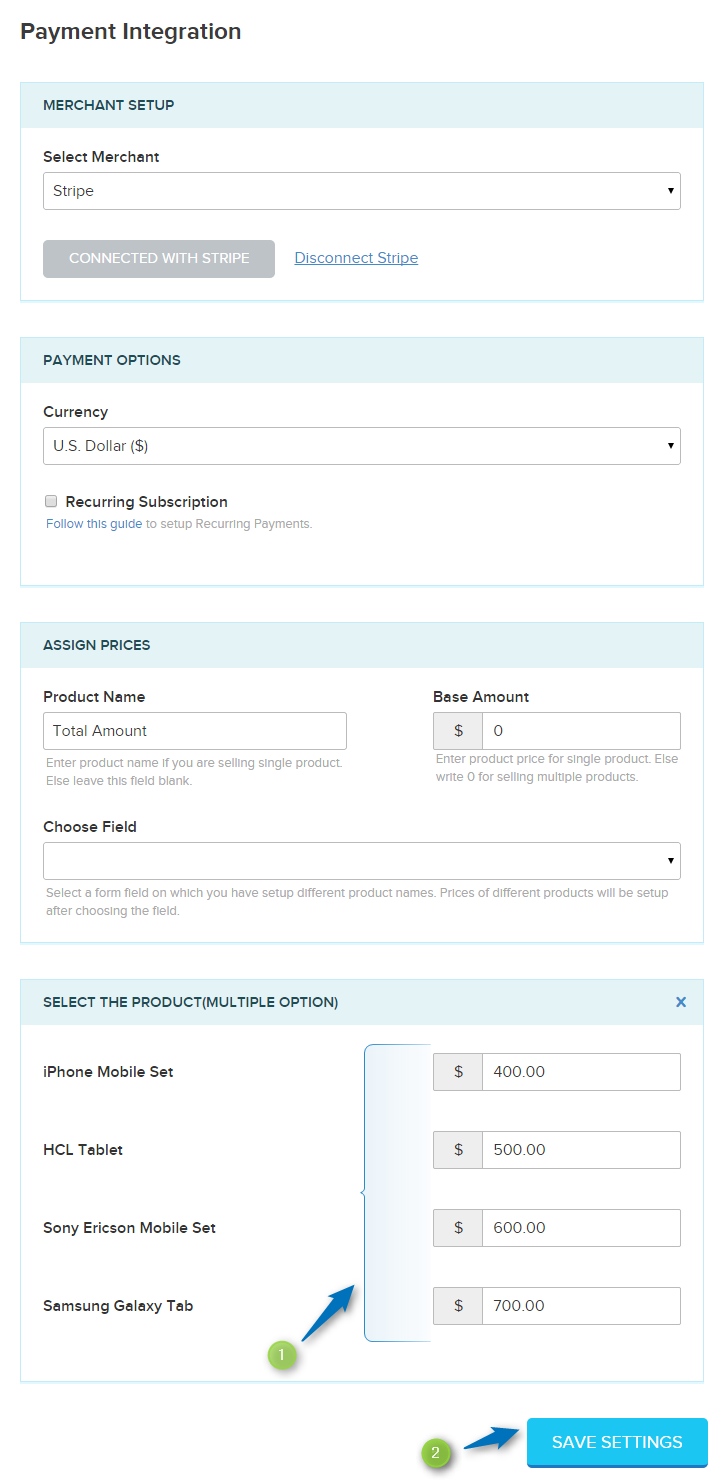
- Set the payment for different products.
- Click on Save Settings option.
- Now Go back to your FormGet dashboard to view the form.
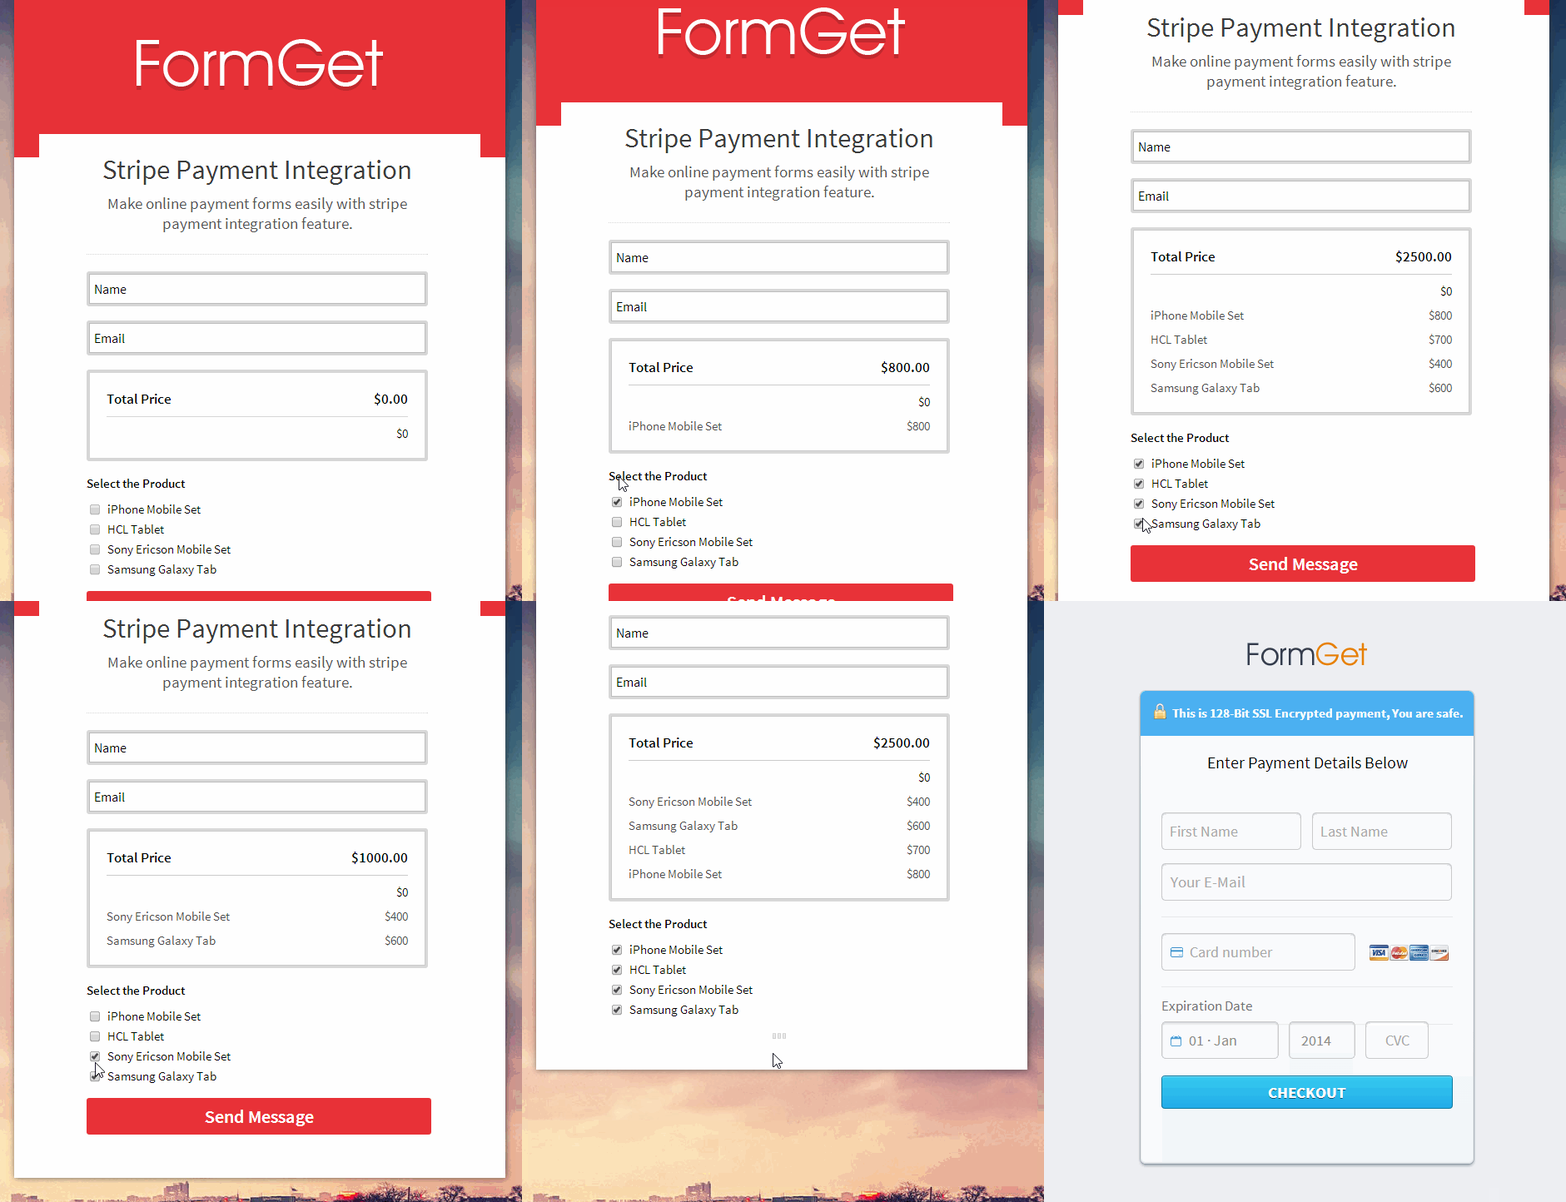
The final output of the form is given below
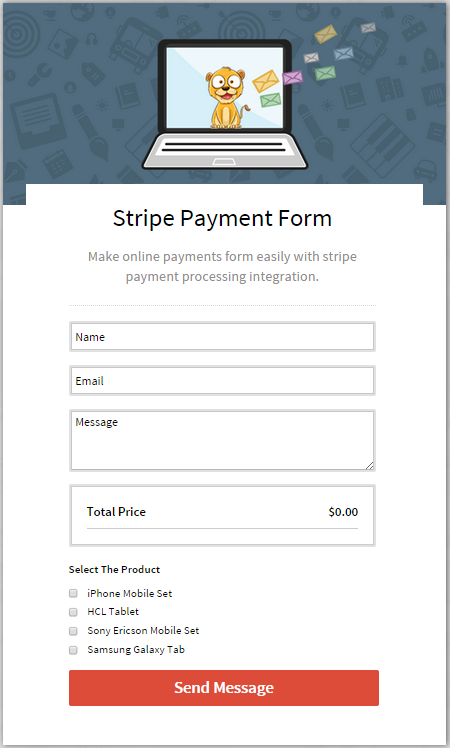
Here is the working of the form
Conclusion
I hope, the above tutorial helps you to create payment form with the help of stripe payment integration.
So, if you want to create online payment forms super easily, build the form right now.


One Reply to “Stripe Integration : Create Online Payment Forms”
Is there a way to brand the strip payment page?
Also can this page display the amount to be charged?