
You might have seen text editor in review form of WordPress.org. It is having a rich text editor in their review comment form.
Another example is, Blogger post text editor, working on it’s text editor is also fun. They help to create rich content where, you can easily bold the text or make it italics, adjust the font size. You can format your text in one click.
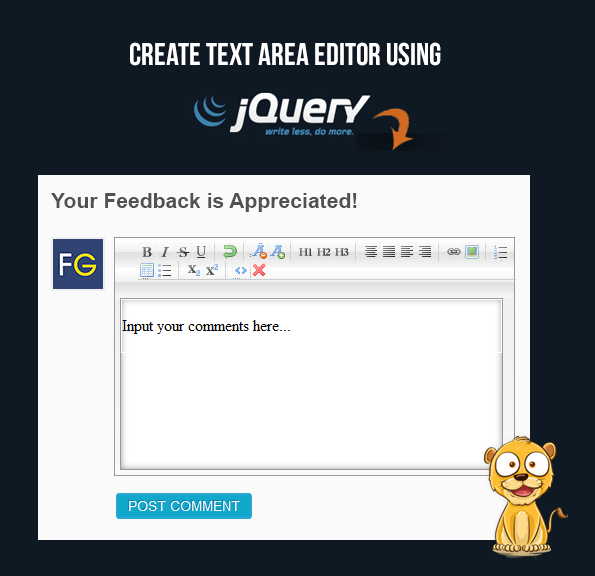
In this tutorial, we are going to share a file that creates Text Editor using jQuery/JavaScript/HTML.
Below is our complete code with download and live demo option
Here is a code for simple text editor named “HtmlBox” built on jQuery library. It’s created by Remiya solutions.
You can directly use the codes to create Text Editor in any of your project. It includes 9 files. 8 Javascript files and one main Html file. These files are mentioned below:
textarea_editor.html: The main HTML file that includes links to all JavaScript/jQuery files.
htmlbox.content.js: Add WYSIWYG text editing events into the Text editor.
htmlbox.full.js – Appending toolbar. Styling it’s height, width. Insert Toolbar images. Append buttons. (e.g. Bold, Italics)
htmlbox.syntax.js – Contains HTML codes for Textarea and JavaScript codes to call various text form functions.
jquery-1.2.3.min.js – It’s a pre-define jQuery library.
xhtml.js – HTML to XHTML parser.
htmlbox.colors.js – Contains colors that will used in text color changer.
htmlbox.min.js – Defines each function of toolbar that are used in text formatting.
htmlbox.styles.js – Give proper design to the HtmlBox.
htmlbox.undoredomanager.js – Execute undo redo functions. Here I am showing codes for the main HTML file. To see codes for other files, you can download the “textarea_editor” zip folder from the link given above.
HTML File – textarea_editor.html
<!DOCTYPE html>
<html>
<head>
<title>Textarea TextEditor</title>
<script src="js/jquery-1.3.2.min.js" type="text/javascript"></script>
<script src="js/jquery.codify.min.js" type="text/javascript"></script>
<script src="js/htmlbox.colors.js" type="text/javascript"></script>
<script src="js/htmlbox.styles.js" type="text/javascript"></script>
<script src="js/htmlbox.syntax.js" type="text/javascript"></script>
<script src="js/htmlbox.undoredomanager.js" type="text/javascript"></script>
<script src="js/htmlbox.min.js" type="text/javascript"></script>
</head>
<body> <!-- Textarea Editor Heading.-->
<h2>Textarea Editor</h2> <!-- An ordinary textarea which will change into fancy text editor. -->
<textarea id="htmlbox_silk_icon_set_blue">Type Here....</textarea>
<!-- Added js of body part of Textarea editor (which is shown in browser as an output) -->
<script src="js/htmlbox.content.js" type="text/javascript"></script>
</body>
</html>
Adding (WYSIWYG-what you see is what you get)in htmlbox.content.js
 // Add WYSIWYG editing events into the Text Editor.
var hb_silk_icon_set_blue = $("#htmlbox_silk_icon_set_blue").css("height", "300").css("width", "600").htmlbox({ toolbars: [ ["cut", "copy", "paste", "separator_dots", "bold", "italic", "underline", "strike", "sub", "sup", "separator_dots", "undo", "redo", "separator_dots", "left", "center", "right", "justify", "separator_dots", "ol", "ul", "indent", "outdent", "separator_dots", "link", "unlink", "image" ], ["code", "removeformat", "striptags", "separator_dots", "quote", "paragraph", "hr", "separator_dots", { icon: "new.png", tooltip: "New", command: function() { hb_silk_icon_set_blue.set_text("<p></p>"); } }, { icon: "open.png", tooltip: "Open", command: function() { alert('Open') } }, { icon: "save.png", tooltip: "Save", command: function() { alert('Save') } }] ], icons: "silk", skin: "blue" });
Conclusion:
This tutorial has shared a complete JavaScript/jQuery code to create a text editor. So someone who wants to make their own text editor can take the help from here.
Recommended blogs –
- jQuery Enter Key Form Submit
- jQuery Password Strength Checker