
Ideal for – All the TV manufacturers, television sellers, retail TV shop owners and other merchants can use this method to take their TV selling business online.
For selling televisions online, you need some space where you can manage all your products and payments just like a cashier does around the counter. The way a cashier creates and give out the receipt and collect payments. Not only this, but he also maintains a record of daily sales and goods in stock.
Now that you have decided to start selling your televisions online, all you need is a page or a checkout page where you can show the products you have in your shop or warehouse along with all payment details.
Once, the page is created, you just have to share it with your customers on Facebook, Whatsapp, message, via email, etc and BINGO!. Your payment collection is all set.
This is how your checkout page will look like after creation
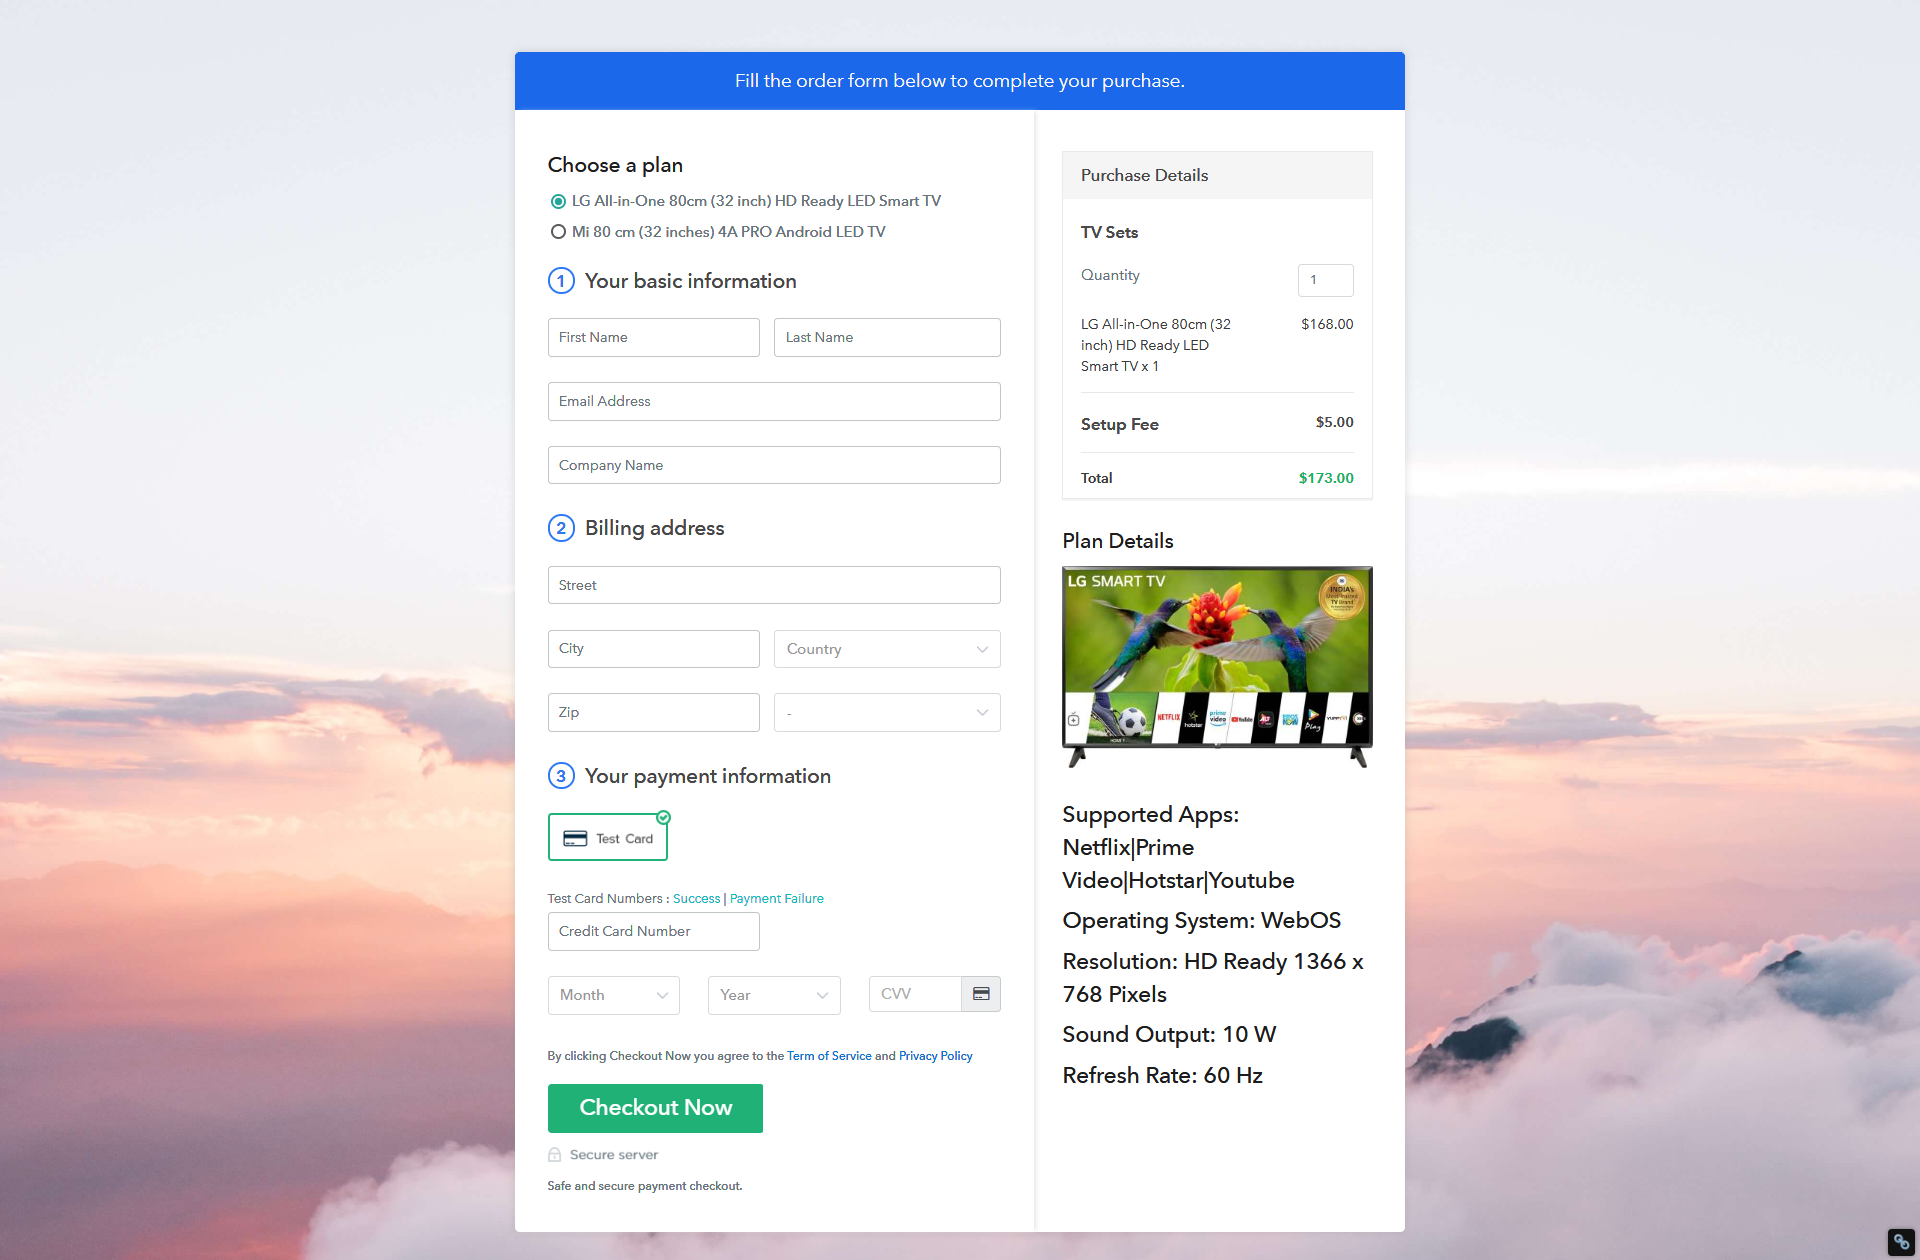
Preview Checkout Page Get Pabbly Subscription Billing
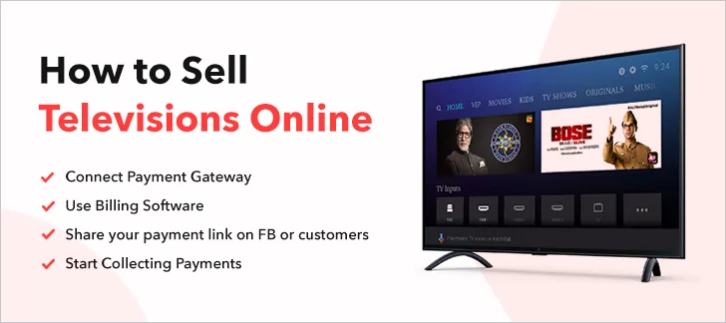
Let’s see How to Sell TVs Online (step by step)
In order to sell TVs online, all you need to do is to follow the plan of action mentioned below-
- Sign Up & Login
- Access Subscription Billing
- Setup Your Account
- Connect Payment Gateways
- Add Product
- Add Plans
- Create a Multiplan Checkout Page
- View Checkout Page
- Copy Link & Share on Social Media
- Embed Checkout Page on a Website
So, let’s get started…
Step 1 – Sign Up & Login
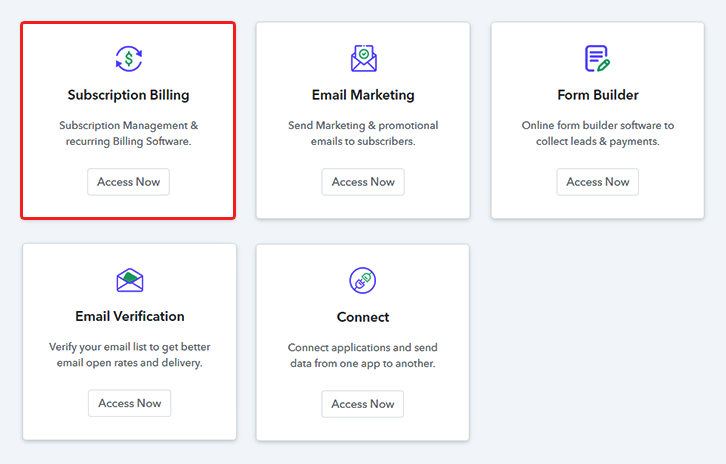
Step 2 – Access Subscription Billing
Step 3 – Setup Your Account
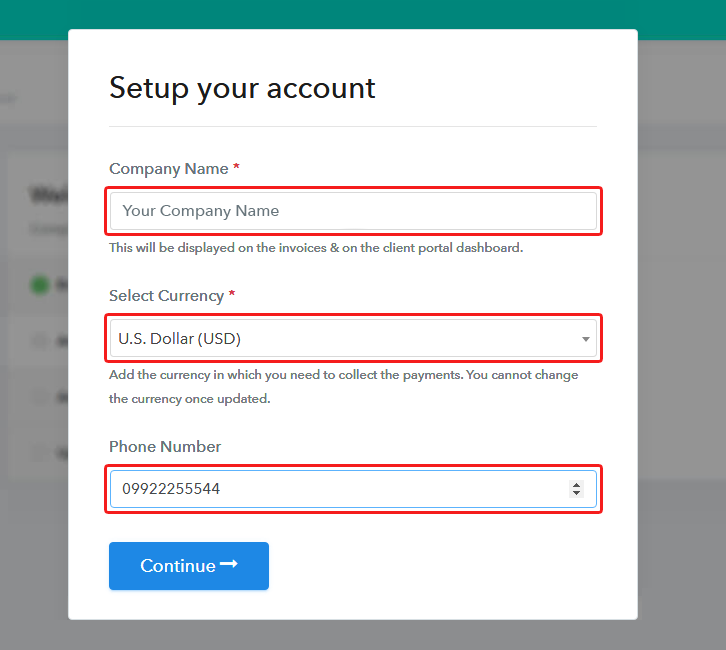
Once you’re done with the signing up process, a dialogue box will appear asking you to fill in your business-related details like your company name, the currency you want to deal with & a phone number.
Step 4 – Connect Payment Gateways & Sell TVs Online
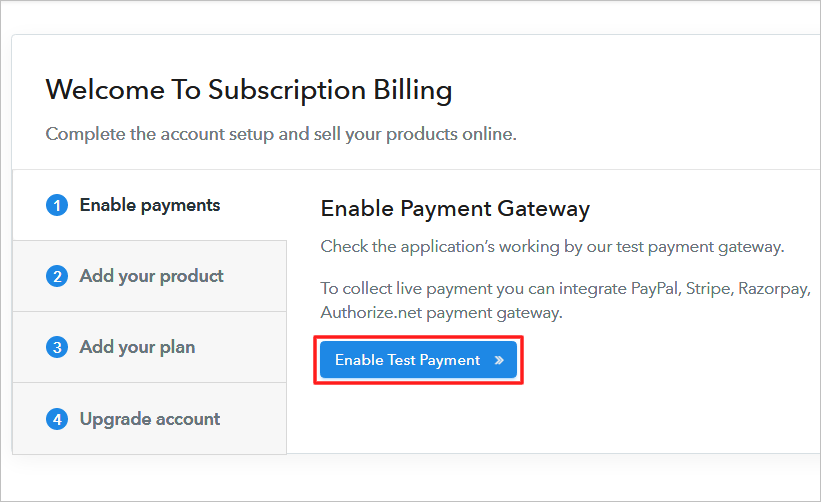
For collecting payments, you need a payment mode. In this blog, we’ve used the “Test payment gateway option”. You can also integrate with other payment gateways, here’s the complete guide-
Step 5 – Add Product

On clicking ‘Add New Product’, a dialogue box will appear where you can add the product.
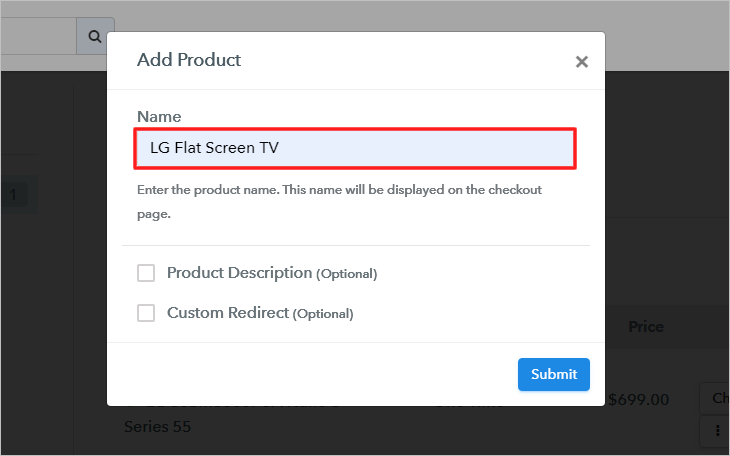
Here, you can fill in the details like the name and its description.
Note – Here you can add all the products related to the similar category by creating plans for each of them.
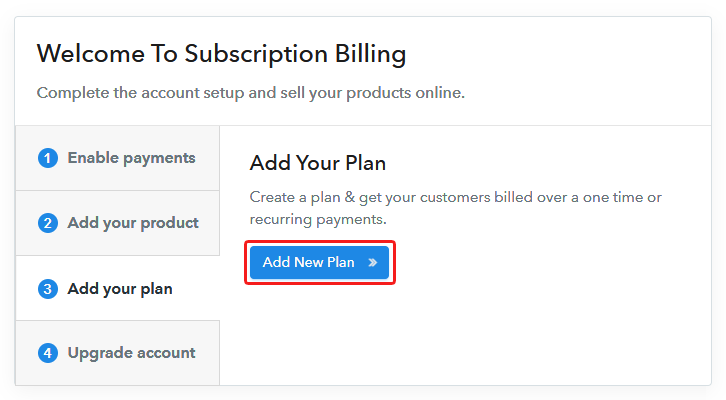
Step 6 – Add Plans
Let’s create the plans for all the different models of television available in your store.
(a) Click on Add New Plan
(b) Fill Out The Pricing Details
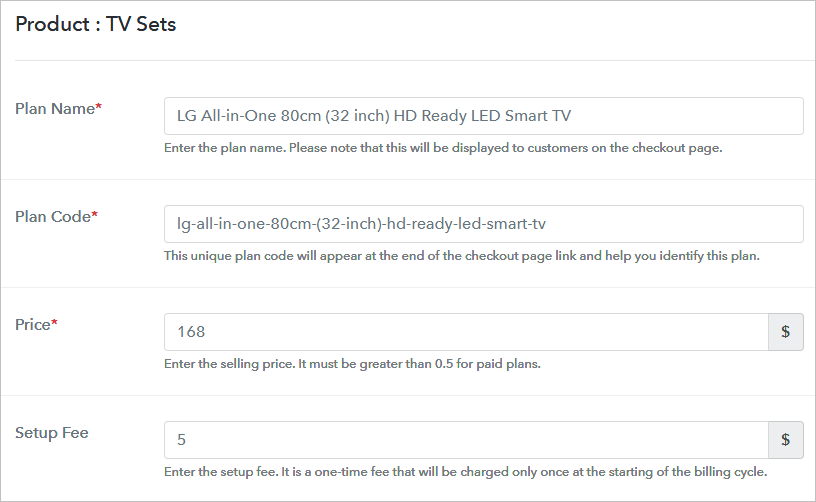
Once you add the product, you need to add the pricing related details for selling it like –
- Add the items’ name & specify the price, setup fee and currency in which you wanna sell the product
- Set the billing cycle i.e the amount you will receive will be one time or on installments
(c) Upload Image
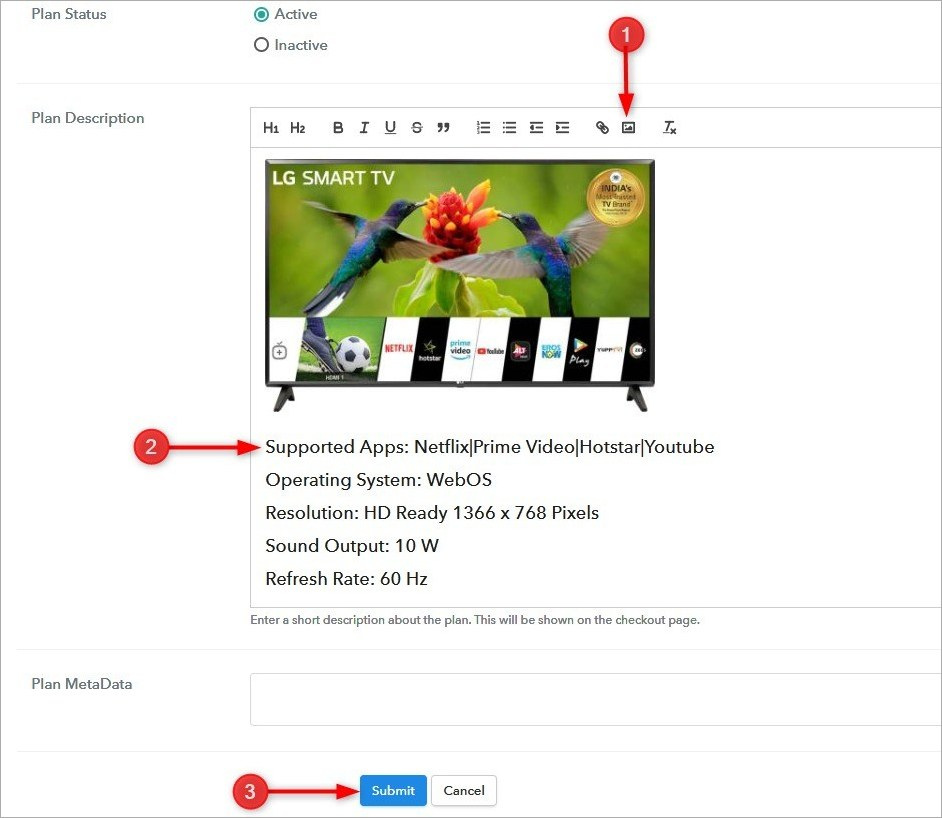
Write a description of the product with bullets, links, images, etc
On hitting the submit button, your plan will be successfully added.
Similarly, you can create more plans and add all the electronic products that you want to sell online.
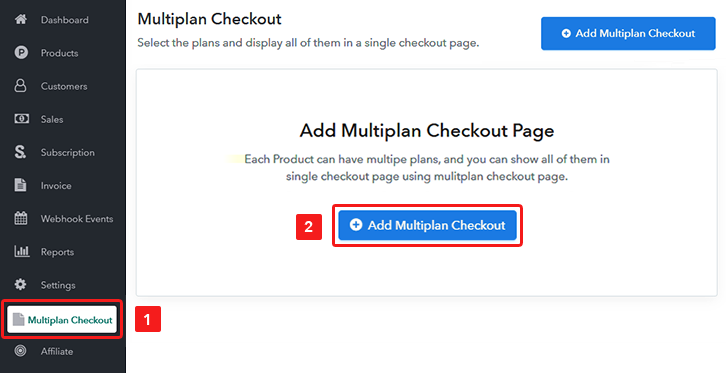
Step 7 – Create a Multiplan Checkout Page
Note – In case you want to sell multiple products via a single checkout page, you create a multi-plan checkout page otherwise skip this step.
(a) Click on Add Mutiplan Checkout
(b) Fill out the Checkout Page Details

On hitting the submit button, all the selected plans will be added in a single checkout page.
Step 8 – View Checkout Page
Go through this sample checkout page to see how it works.
Step 9 – Copy Link & Share on Social Media
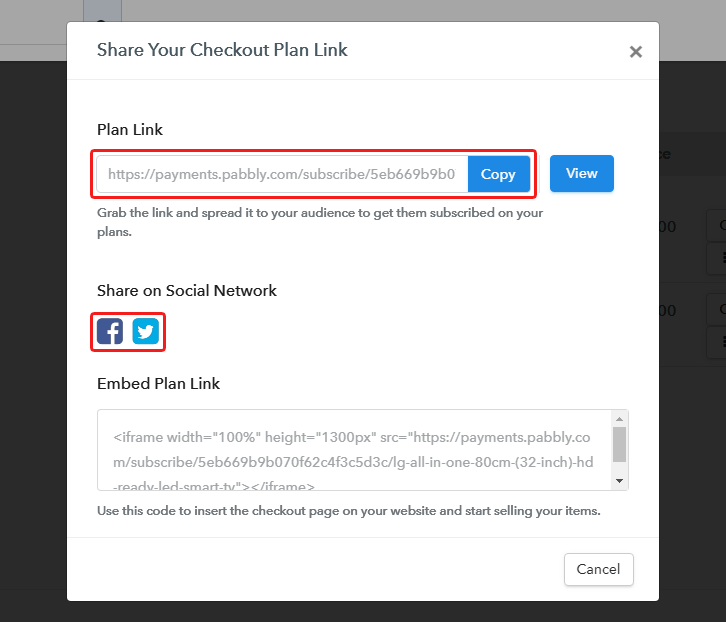
- You can simply copy the link & share it directly with your customers.via Whatsapp, SMS, email, etc.
- It can also be shared on social networking sites like Facebook and Twitter.
This way the customers will easily be able to find your products just by sitting at home & you can sell TVs online without any hassle.
Step 10 – Embed Checkout Page on a Website

To embed the checkout page in an e-commerce website, simply copy the plan link and directly add it in the buttons or images wherever you’re showing all the television products to your customers.
(a) Go to the text version of the WordPress editor & paste the link here
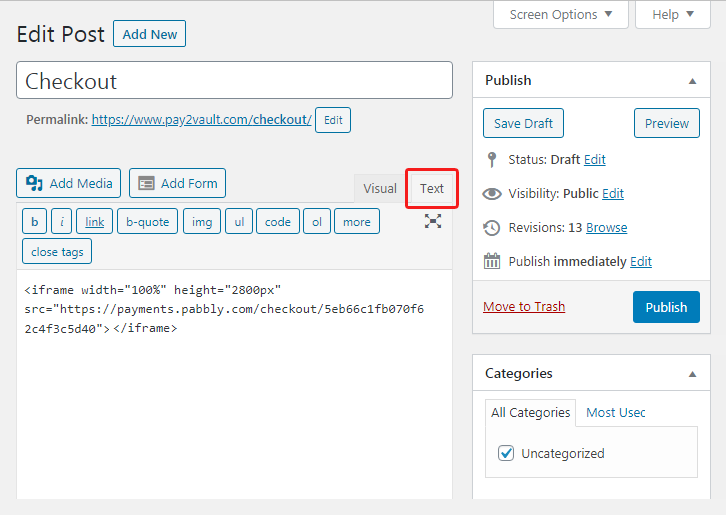
(b) Save & publish the draft and preview the page
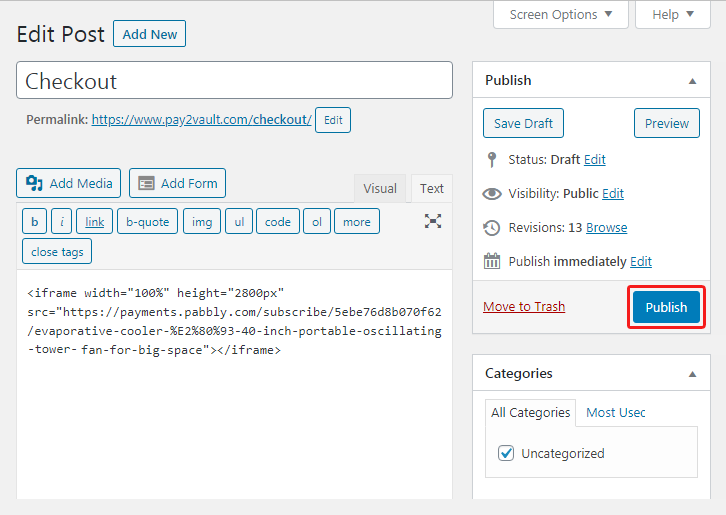
(c) The final look of checkout page on your WordPress SIte

Try Pabbly Subscription Billing
Wrapping Up!
Here, I have explained all the steps to sell TVs online. The best way is to use a subscription billing software which can automate all your tasks and manage all the details at a single place. Seamless options to integrate with diverse payment gateways and much more to assist your sales.
For any more queries, you can reach out to us.