
The helper is used as a function library, by this we can just load a helper class in the controller or view as well. CodeIgniter provide different types of helper class, such as url_helper, captcha_helper ,email_helper etc. They all are located in system/helper.
In this tutorial we are going to explain how you can create your own helper class. Here we have created helper called imagetodata. By using the function, we can convert image to data
Step to creating imagetodata helper
- Create a new file called imagetodata inside application/helper folder.
- Define function here.
- Load that helper in controller or even you can load in view as well.
- Now you call their functions.
You can also refer our live demo or download the Script file. Extract the downloaded files, save it in your local server and run it using given path
Controller File: image_controller.php
Copy the below code in your Controller File and save as image_controller.php. In controller first load helper in constructor and use their function.
<?php
class image_controller extends CI_Controller {

function __construct() {
parent::__construct();
$this->load->helper("form");
$this->load->library('form_validation');
$this->load->helper("imagetodata_helper");
}
function index(){
$this->load->view('image_view');
}

function image_to_data() {
$URL = $this->input->post('img_name');

// Validation for image url.
$this->form_validation->set_rules('img_name', '', 'callback_checkimgurl');
if ($this->form_validation->run() == FALSE) {
echo "<script type='text/javascript'>
alert('Please Enter Image URL');
</script>";
$this->load->view('image_view');
} else {
$data['data_image'] = convertToBase64($URL);
$this->load->view('image_view', $data);
}
}

// Check image format, if input image is valid return TRUE else returned FALSE.
function checkimgurl($img) {
if (preg_match_all('!http://.+\.(?:jpe?g|png|gif)!Ui', $img)) {
return true;
} else {
return false;
}
}
}
?>
View File : image_view.php
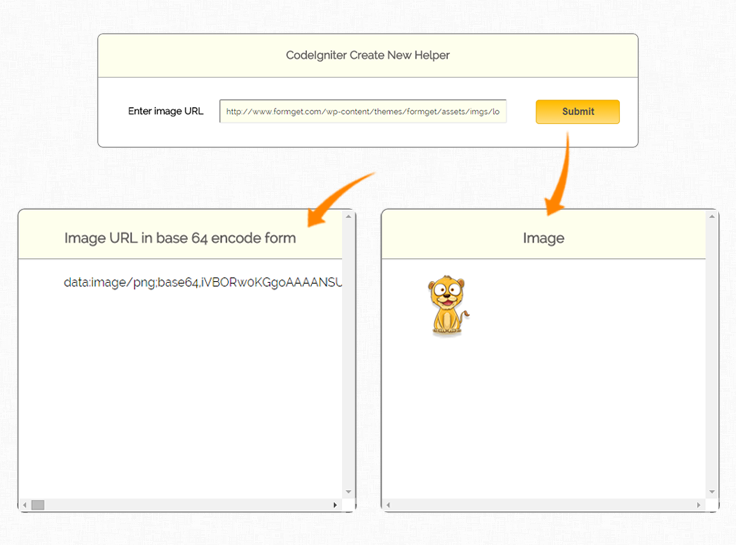
Copy the below code in your view and save as image_view.php. For encoding image to data by base64 just put image URL in given input box and press submit button.
<html>
<head>
<title>CodeIgniter Create New Helper</title>
<link rel="stylesheet" type="text/css" href="<?php echo base_url(); ?>css/style.css">
<link href='http://fonts.googleapis.com/css?family=Source+Sans+Pro|Open+Sans+Condensed:300|Raleway' rel='stylesheet' type='text/css'>
</head>
<body>
<div class="main">
<div id="content">
<h3 id="form_head">CodeIgniter Create New Helper</h3>
<div id="form_input">
<?php

//create form open tag
echo form_open('image_controller/image_to_data');

//create label
echo form_label('Enter image URL');

//create data input field
$data = array(
'name' => 'img_name',
'class' => 'input_box',
'placeholder' => "Please Enter Image URL",
'required' => 'required'
);
echo form_input($data);
?>
</div>
<div id="form_button">
<?php echo form_submit('submit', 'Submit', "class='submit'"); ?>
</div>
<?php
//Form close.
echo form_close(); ?>
</div>

<!-- Result div display -->
<?php if(isset($data_image)) { ?>
<div class="encode_img">
<div class="result_head"><h3>Image</h3></div>
<div class="data">
<img src="<?php echo $data_image; ?>">

</div>
</div>
<div class="real_image">
<div class="result_head"><h3>Image URL in base 64 encode form</h3></div>
<div class="data">
<?php echo $data_image; ?>
</div>
</div>
<?php } ?>
</div>
</body>
</html>
Helper File : imagetodata_helper.php
Helper function convertToBase64 it will take image URL and encode to base64 and return the data.
<?php if ( ! defined('BASEPATH')) exit('No direct script access allowed');

if (!function_exists('convertToBase64'))
{
function convertToBase64($path)
{
// $path = FCPATH.$path;
$type = pathinfo($path, PATHINFO_EXTENSION);
$data = file_get_contents($path);
$base64 = 'data:image/' . $type . ';base64,' . base64_encode($data);
return $base64;
}
}
CSS File : style.css
Styling HTML Elements.
body {
font-family: 'Raleway', sans-serif;
}
.main{
width: 1015px;
position: absolute;
top: 10%;
left: 20%;
}
#form_head{
text-align: center;
background-color: #FEFFED;
border-bottom: 1px solid #9A9A9A;
height: 35px;
margin: 0 0 -29px 0;
padding-top: 23px;
padding-bottom: 13px;
border-radius: 8px 8px 0 0;
color: rgb(97, 94, 94);
}
#content {
position: absolute;
width: 900px;
height: 187px;
border: 2px solid gray;
border-radius: 10px;
margin-left: -90px;
}
#form_input{
margin-left: 50px;
margin-top: 65px;
}
label{
margin-right: 6px;
font-weight: bold;
}
#form_button{
margin-left: 700px;
margin-top: -75px;
}
.input_box{
height:40px;
width:480px;
margin-left: 20px;
padding:10px;
border-radius:3px;
background-color: #FEFFED;
font-family: 'Raleway', sans-serif;
}
.result_head{
text-align: center;
background-color: #FEFFED;
border-bottom: 1px solid #9A9A9A;
height: 35px;
margin: 0 0 -29px 0;
padding-top: 8px;
padding-bottom: 22px;
border-radius: 8px 8px 0 0;
color: rgb(97, 94, 94);
}
.data{
margin-top: 50;
}
.encode_img{
position: absolute;
height: 400px;
width: 445px;
margin-left: 370px;
margin-top: 220px;
border: 2px solid gray;
border-radius: 10px;
overflow: scroll;
}
.real_image{
margin-top: 220px;
border: 2px solid gray;
border-radius: 10px;
position: absolute;
height: 400px;
width: 445px;
margin-left: -93px;
border: 2px solid gray;
border-radius: 10px;
overflow: scroll;
}
.submit{
font-size: 16px;
background: linear-gradient(#ffbc00 5%, #ffdd7f 100%);
border: 1px solid #e5a900;
color: #4E4D4B;
font-weight: bold;
cursor: pointer;
width: 140px;
border-radius: 5px;
padding: 10px 0;
outline: none;
margin-top: 20px;
margin-left: 15%;
}
.submit:hover{
background: linear-gradient(#ffdd7f 5%, #ffbc00 100%);
}
Conclusion:
In this way, we can create own helper class in CodeIgniter. Hope you might have understood it properly, keep reading our other blogs posts for more coding tricks.
One Reply to “CodeIgniter : Create Own Helper”
i am a beginner in codeigniter can you provide me a example for helper ..it`s just for my practice please help me..