
Checkout the Drip/Automated Email Campaigns Explainer Video here.
Drip campaign feature in MailGet provides you a scheduled communication strategy with your subscribers or customers to eliminate the communication gap.
MailGet drips are automated sets of emails that go out based on specific timelines or user actions.
The main advantage is, not only you can save time but can also increase the conversion rates of your marketing campaign by staying in touch with prospects frequently.
In MailGet, Drip emails will be sent to that subscribers only whose information is inserted in the list used for drip in the Drips tab. You can add emails on that list either by Embed Web Form, by List Importing or by Importing Contacts manually.
So,
Follow these steps to set up a Drip Campaign in MailGet –
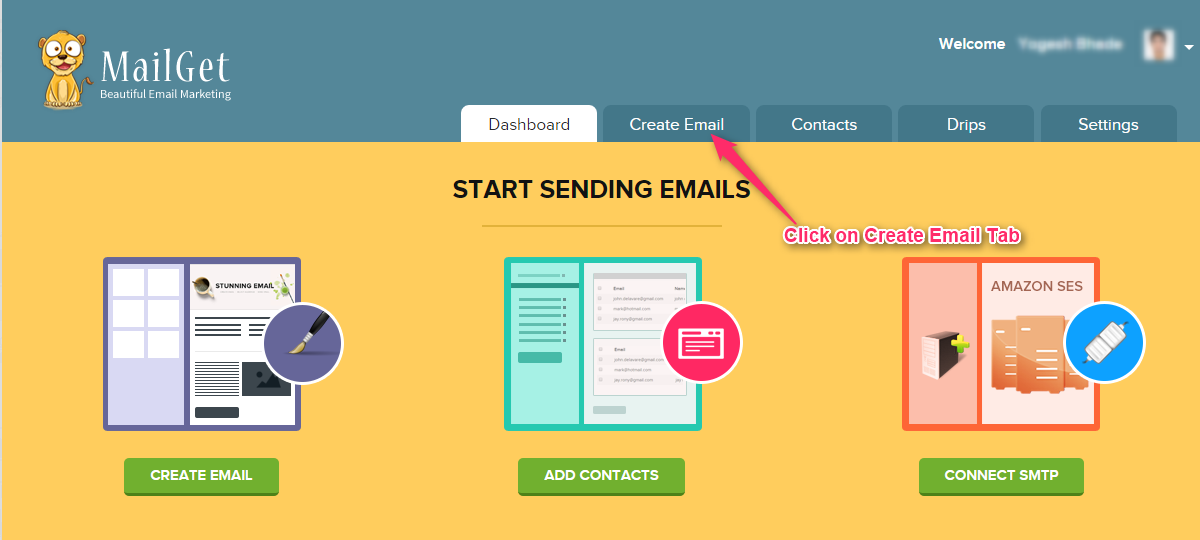
Step 1: Click on Create Email tab in your MailGet dashboard.
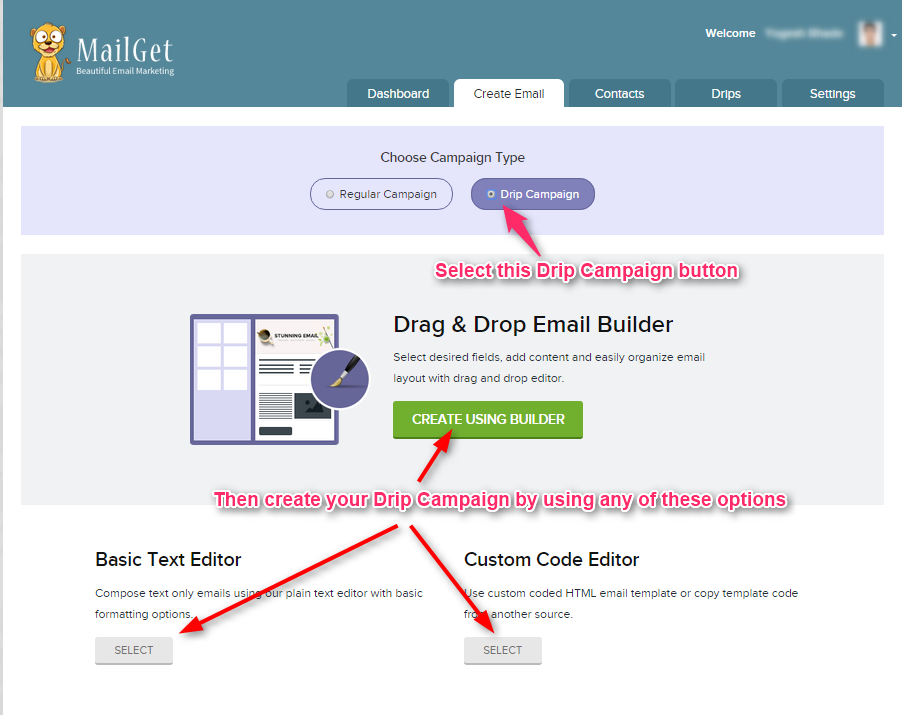
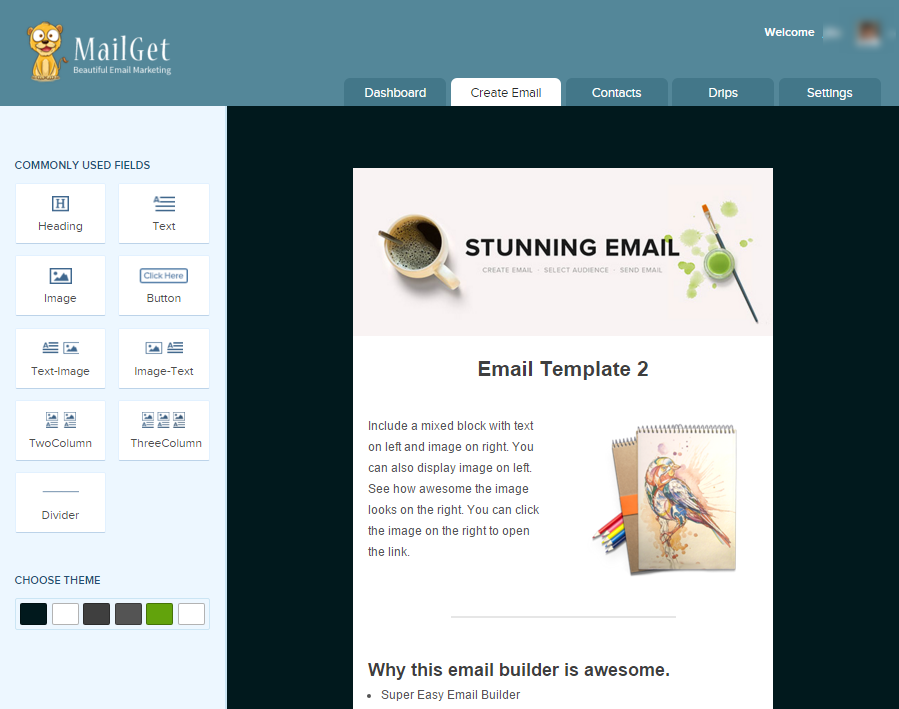
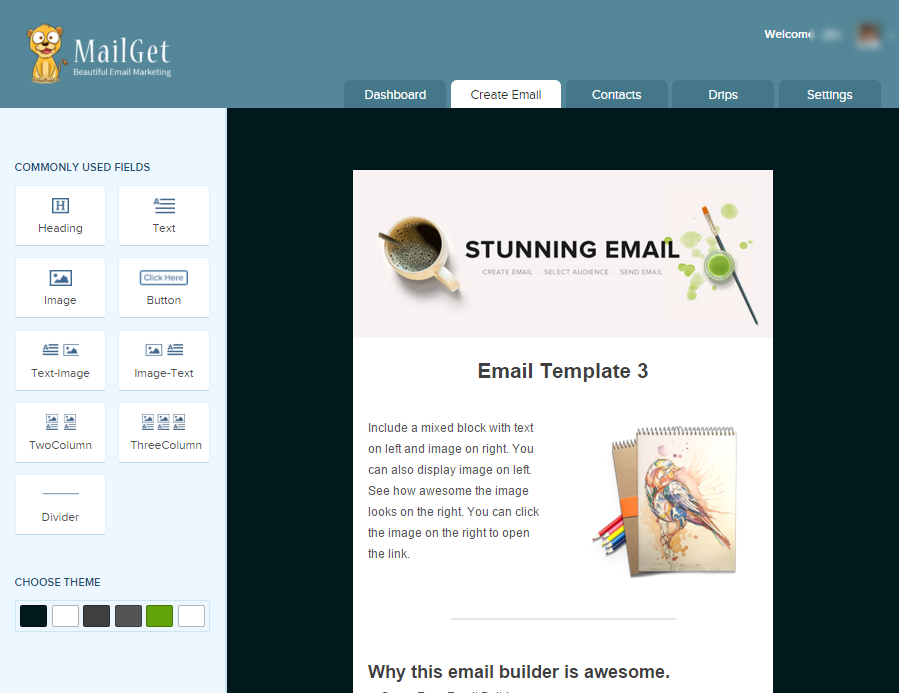
Step 2: Click on Drip Campaign button and build Email Template by using either option – Drag and Drop Email Builder, Basic Text Editor or Custom Code Editor.
For this documentation, I have used CREATE USING BUILDER to build Drip Email Template.
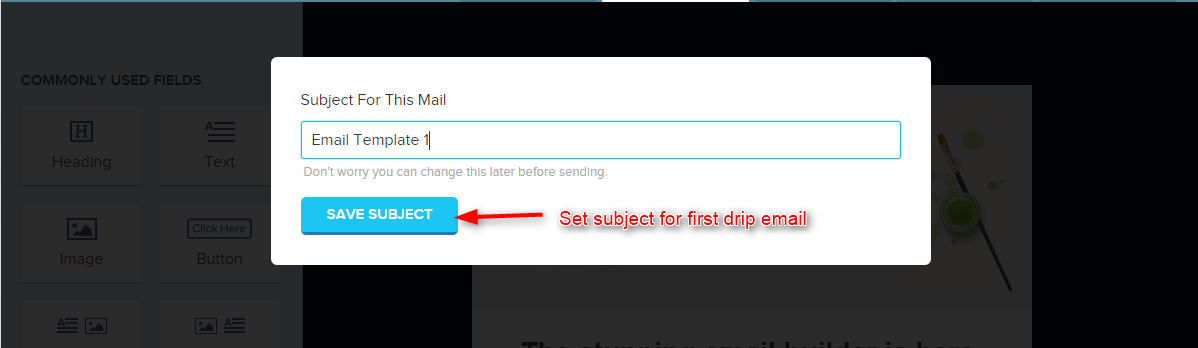
Step 3: Create three email templates for three drips.
Email Template 1 –
- Write the subject name for first Drip Email Template.
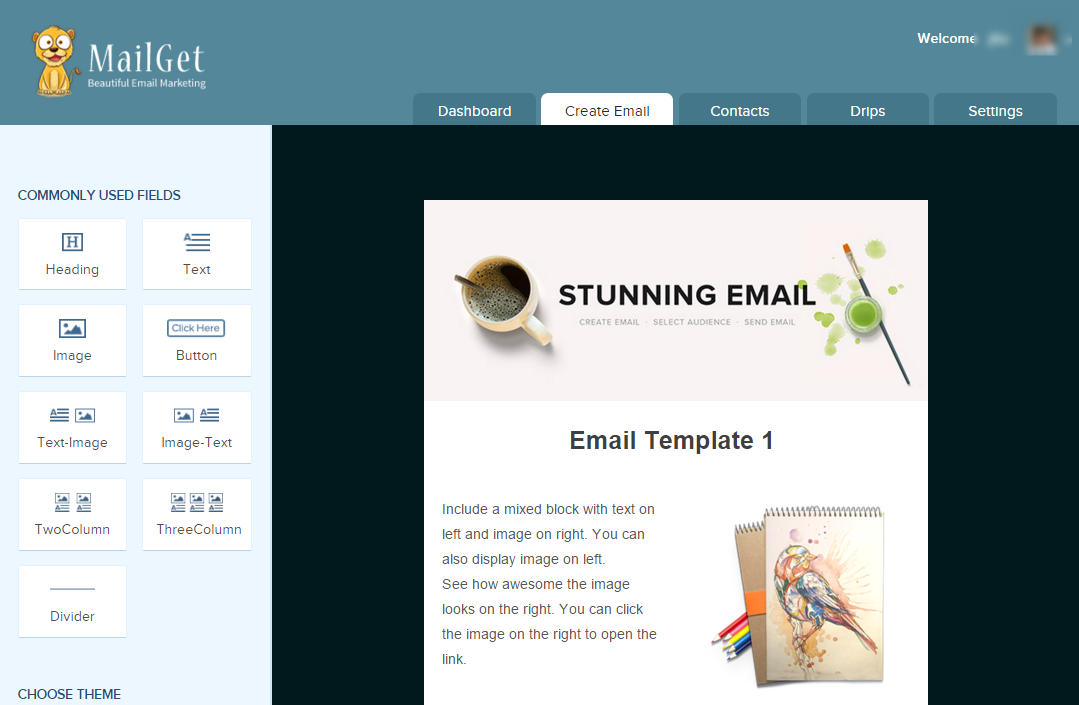
- Now build Drip Email template.
- After making Email Template click on SAVE & CONTINUE button.

Email Template 2 –
- Write the subject name for this Drip Email Template.
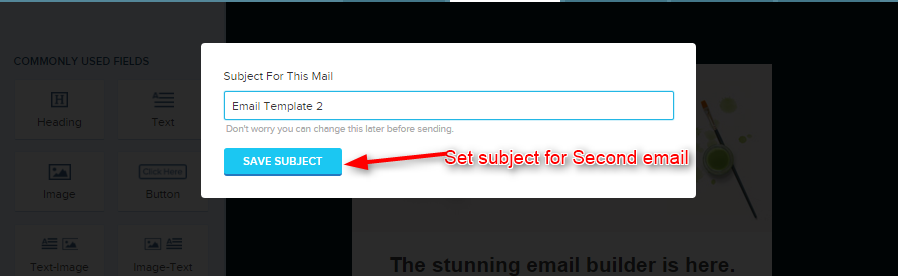
- Now make Drip Email template.
- After making Email Template click on SAVE & CONTINUE button.
Email Template 3 –
- Write the subject name for this Drip Email Template.
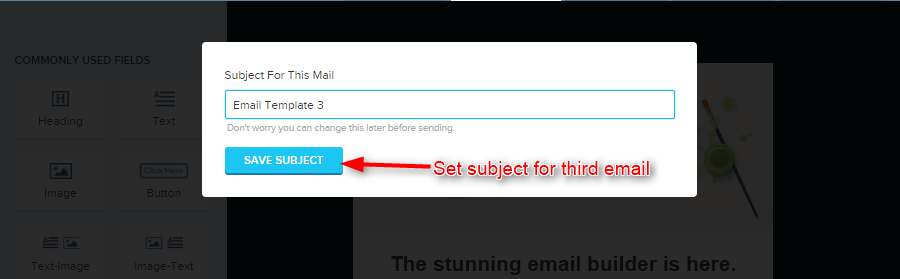
- Now make Drip Email template.
- After making Email Template click on SAVE & CONTINUE button.
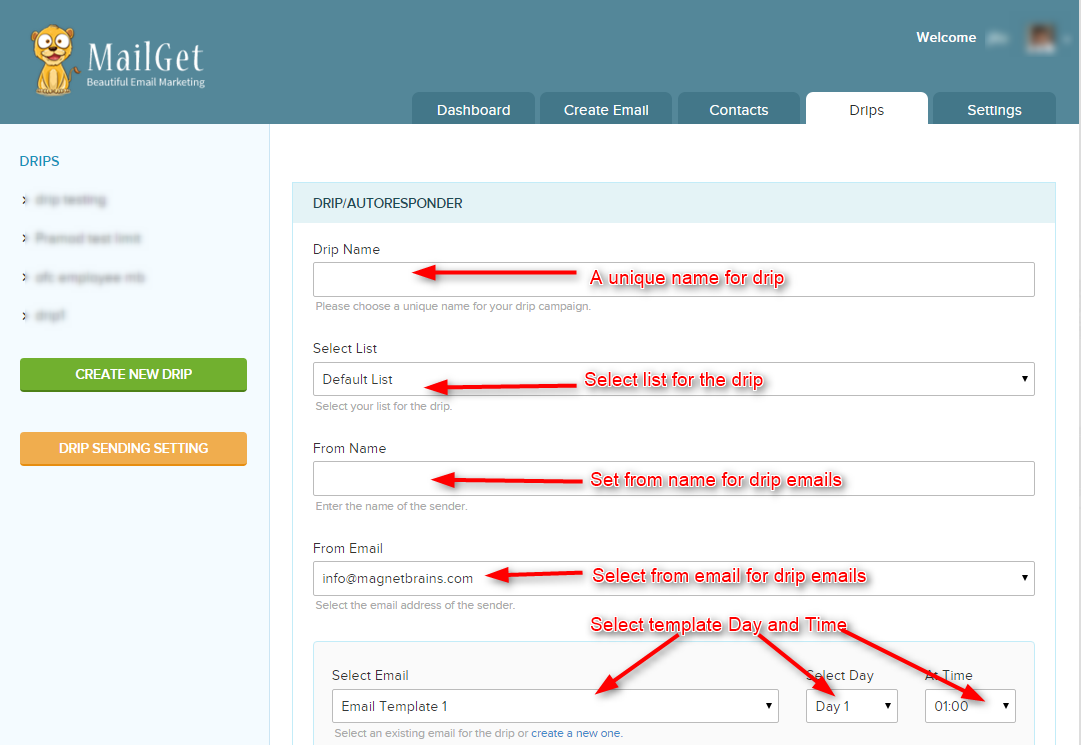
Step 4: Now go to Drips tab in the header and click on Create New Drip tab. Fill all the details for your Drip as shown in the image below –
- Set Day and Time for all three drip template.
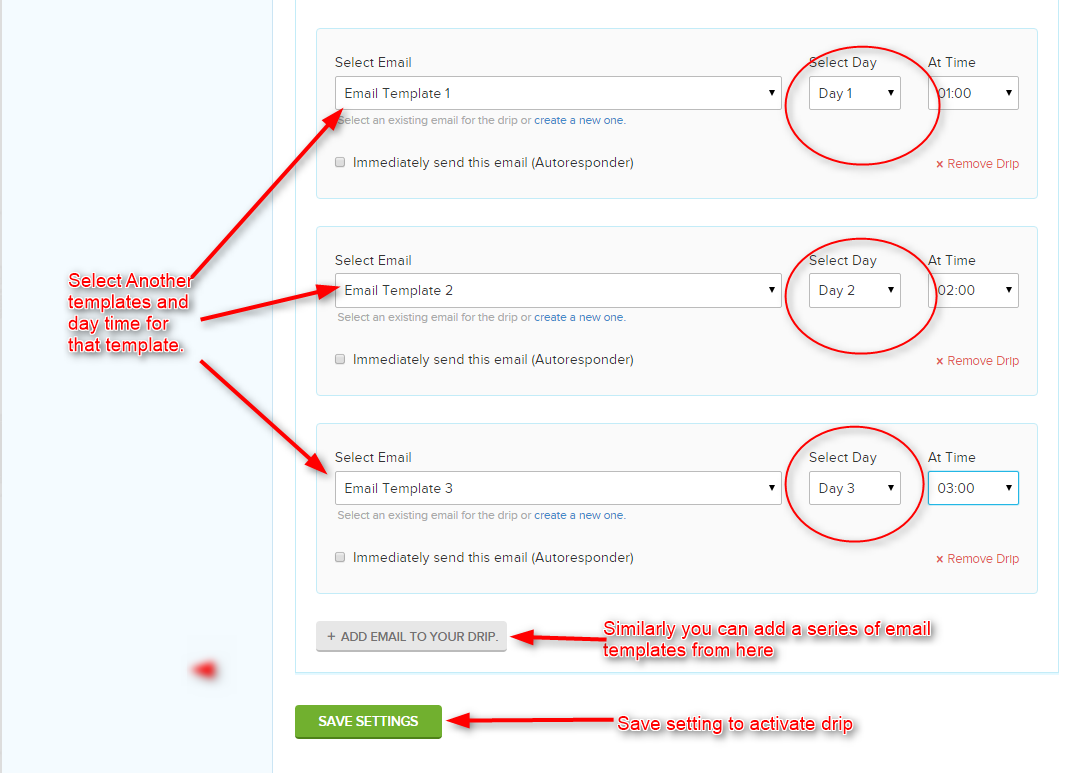
- Once completed with filling details click on Save Settings tab. Now, your Drip is all set to go.!
If any email get stored in your drip list then this drip will automatically send to that email.