
Form-scheduling is a process to where you can prompt or call up your form on the basis of:
- Specific dates
- Form Entries
How to make it specific on the basis of date?
It’s simple and amazing too!
Specific Dates:
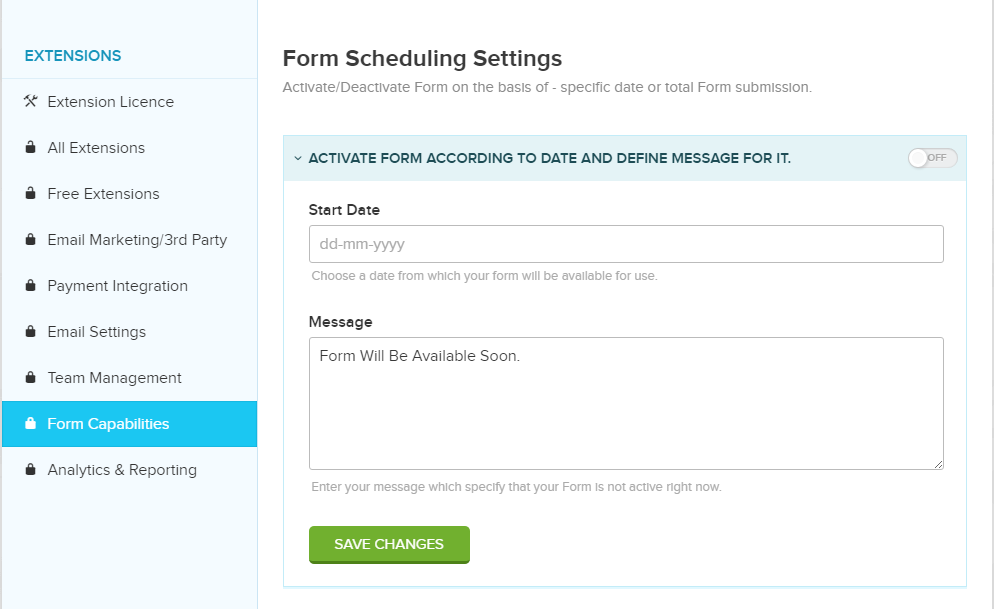
On the basis of a specific date, you can activate or deactivate your form.
Activate:
On the basis of date, you can either activate or deactivate your form.
Let’s say, you have created a form and set an activation date using Form Scheduler after 4 days then this form will be activated after four days as per our date set.
Until the form gets activate user will see a message “Form will be available soon” whenever user will visit the form.
Note: Before using this feature please make sure you make a Turn on the setting as shown at the right top in the image shown below.
Deactivate:
Same as for form deactivation: Say you have created one form and set a deactivation date using Form Scheduler after 2 days then this form will be deactivated after two days.
And after the form gets deactivate, the user will see a message “Sorry! this form has been expired” whenever user will visit the form.
Note: Before using this feature please make sure you make a Turn on the setting as shown at the right top in the image shown below.

Form Entries:
Here, you can set a limit to the form entries, and form will not accept any further entry after it reaches the limit and form will be deactivated.
Say, you have set a limit of 5 form-entries then your form will accept only five entries and will be deactivated then.
And after the form entry reaches the limit, the user will see a message “Sorry form has already received the targeted submission entries” whenever user will make one more entry in the form.
Note: Before using this feature please make sure you make a Turn on the setting as shown at the right top in the image shown below.
