Directives are one of the core features of AngularJS. Angular provides a large number of built-in directives and makes it easier for the user to add and control various functionality in their application.
But, sometimes users have their own demands and they want to add a different functionality to their application.
In such condition, built-in directive can’t help them. But there is no need to worry because angular allow their users to create their own custom directives and use them in their application whenever and wherever they want.

To create a custom directive, angular provides a guideline for the user to follow. So, in this tutorial, we will guide you and explain how you can create and use a custom directive in your application.
First we will explain you the basic concepts to create a basic custom directive and will explain it deeply as we go further in this tutorial.
So, let’s start with creating a basic custom directive.
Note: – We will explain the main configuration and edited files in this tutorial. We are not including .css, images or other files in the examples. You can download the complete code for each example from the download button available just after each each example.
Create Custom Directive: –
Like a controller, first we need to register a custom directive on module in order to configure and use it.
For this use .directory() method and connect it to module by a dot(.) operator, i.e chain rule.
For Example: –
// Application module
angular.module("myApp", [])

// Registering custom directive and adding a template in the directive
.directive('myProduct', function(){
return{
...

...
};
});
Here, directive() method contains two argument in which first argument, i.e myProduct, is the name of the custom directive that you want to create and second argument is a factory function.
The factory function returns an object having different options which tell the behaviour of the directive, i.e how the directive should behave when matched. This function is invoked only once when the compiler finds and matches the directive for the first time.
Note: – You can use services into the factory function in the same way as we did for controllers. To know about angular services in details, read our blog AngularJS – Services.
Now, to use newly created custom directive you will have to write it in your HTML page between tags, i.e <my-product> </my-product>.
<html ng-app="myApp">
<head>
...
</head>
<body>
<div class="container">
...
...
<!-- Custom directive in lowecase and having dash-delimited format
<my-product></my-product>
...
...
</div>
</body>
</html>
myProduct tag will add all the functionality and bahaviour in that HTML page that you added during creating it.
Note: – Directive are case-sensitive and their name should written in CamelCase, e.g ngModel. However, HTML is case-insensitive so, should be written in lower case having dash-delimited attributes, e.g ng-model.
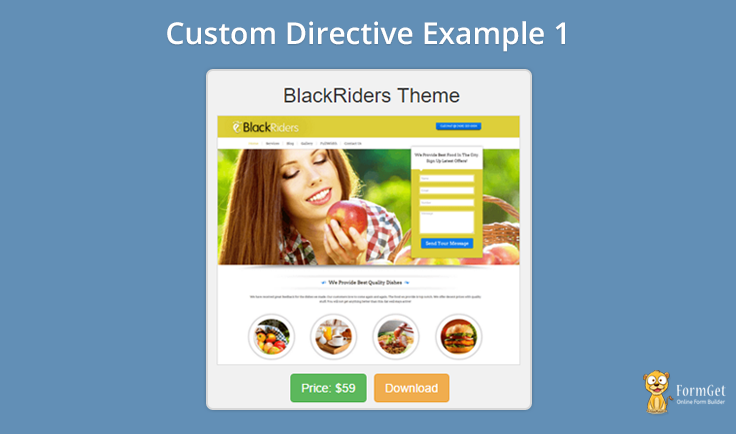
Custom Directive Example:
To create a custom directive, we will require minimum two files,
1. JS file: – To register and configure directive for the application.
2. HTML file: – Use custom directive to display its data.
myController.js
angular.module("myApp", [])
.controller("productController", ['$scope',function($scope){
$scope.product_name= 'BlackRiders Theme';
$scope.product_img_link='Black_Riders_theme';
$scope.product_price = '$59';
$scope.product_dwl_link = 'https://www.inkthemes.com/market/lead-generation-wordpress-theme/';
}])

// Registering custom directive and adding a template in the directive
.directive('myProduct', function(){
return{
template : "<div class='product-wrapper col-md-4 col-md-offset-4 col-xs-6 col-xs-offset-3'><h3 class='text-center'>{{product_name}}</h3><div class='product'><img ng-src='img/{{product_img_link}}.png' alt='{{product_name}}'/><div class='clearfix'></div><div class='button text-center'><button class='btn btn-success'>{{product_price}}</button><a href='{{product_dwl_link}}' class='btn btn-warning'>Download</a></div></div></div>",
controller:"productController"
};
});
index.html
<html ng-app="myApp">
<head>
<title>Custom Directive Example1</title>
<!-- Including AngularJS library file -->
<script src="https://ajax.googleapis.com/ajax/libs/angularjs/1.5.0-rc.0/angular.min.js"></script>
<script src="js/myController.js"></script>
</head>
<body>
<div class="container">
<div class="row">
<h1 class="text-center">Custom Directive Example1</h1>

<!-- Custom directive in lowecase and having dash-delimited format
<my-product></my-product>
</div>
</div>
</body>
</html>
Output:

Download complete code from the link given below.
Download Script
In the above example, you have noticed that controller and template properties were returned by custom created directive.
// Registering custom directive and adding a template in the directive
.directive('myProduct', function(){
return{
template : "<div>... ...</div>",
controller:"productController"
};
});
Controller property allows users to define the name the controller that they want to use in that particular directive. They are also allowed to write their own controller for the directive.
template property allows to add templates, such as div, paragraph, text etc, in the directive to show in the HTML page.
templateUrl:
template property is simply used to show a small amount of text or other data. But, when you have a large amount of HTML or text data, then it becomes messy and difficult to add these data in template property.
To resolve this problem, angular provide a solution, i.e templateUrl property.
Angular tells users to create a separate template, let say product_page.html, for their custom directive and write their HTML code or text data in it.
Now, write only the path of that created template in the templateUrl property.
product_page.html
<div class='product-wrapper col-md-4 col-md-offset-4 col-xs-6 col-xs-offset-3'>
<h3 class='text-center'>{{product_name}}</h3>
<div class='product'>
<img ng-src='img/{{product_img_link}}.png' alt='{{product_name}}'/>
<div class='clearfix'></div>
<div class='button text-center'>
<button class='btn btn-success'>Price: {{product_price}}</button>
<a href='{{product_dwl_link}}' class='btn btn-warning'>Download</a>
</div>
</div>
</div>
myController.js
// Registering custom directive and adding a template in the directive
.directive('myProduct', function(){
return{
templateURL : "templates/product_page.html",
};
});
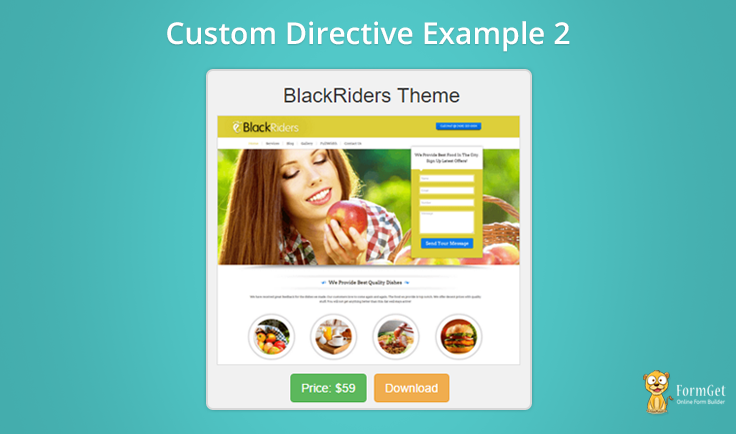
Output:

Download complete code from the link given below.
Download Script
You will see that the directive will work in the same way as earlier did but, the main thing is that now the codes are properly managed and easy to use. Whenever you need to edit the template, you will have to only edit that template HTML file.
Custom directive types: –
Angular allow us to create custom directives based on
1> Element
2> Attribute
3> Class
- Element: – To create an element or tag based directive, use restict property with value “E” in the factory function.
// Registering custom directive and adding a template in the directive
.directive('myProduct', function(){
return{
restrict: "E",
...
...
};
});
Now, you can use the directive as an element in the HTML as
<my-product></my-product>
- Attribute: – To create an attribute based directive, use restict property with value “A” in the factory function.
// Registering custom directive and adding a template in the directive
.directive('myProduct', function(){
return{
restrict: "A",
...
...
};
});
Now, you can use the directive as an attribute in the HTML tag as
<div my-product></div>
- Class: – To create a class based directive, use restict property with value “C” in the factory function.
// Registering custom directive and adding a template in the directive
.directive('myProduct', function(){
return{
restrict: "C",
...
...
};
});
Now, you can use these class in the HTML tags as
<div class="my-product"></div>
Note: – To use your directive in the combined form of element, attribute and class, you can just write restict:”EAC” in the factory function.
Conclusion:
Hope we suceed in providing the basic concepts of AnglarJS Custom Directives. Use the concept and create your own directive. Don’t forget to share your feedback with us. Use the space given below to send your valuable feedback.
