
MailGet allows you to connect multiple SMTP services with your account to send email campaigns.
In this article, we will guide you step-by-step to connect Gmail SMTP with MailGet in order to send bulk emails. You should know that Gmail only allows you to send 150 email in a day, in the initial phase.
Are you looking to create custom email addresses and send emails using Google Apps for Work SMTP which include your domain name like – [email protected] rather than [email protected]. ?
Then you should not miss our post – Google Apps SMTP Settings – Complete Setup.
There are 2 setting modules which will contribute to the complete setup of Gmail SMTP with your MailGet account –
1. Changes in Gmail settings –
Before connecting Gmail with MailGet, You have to make some changes in your Gmail account settings.
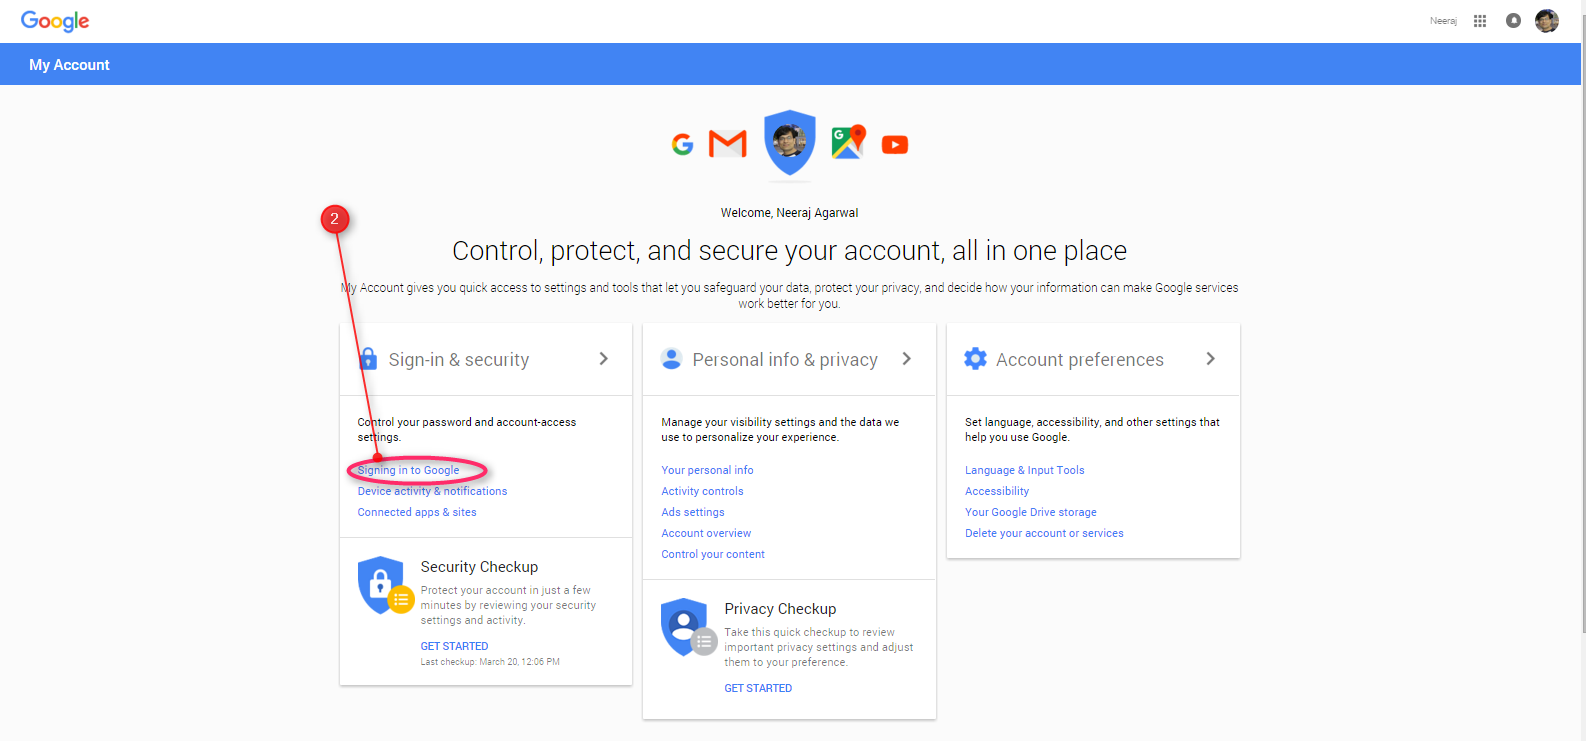
Step 1: Go to your Gmail dashboard and Click on the “My Account” tab.

Step 2: Then click on Signing in to Google link.
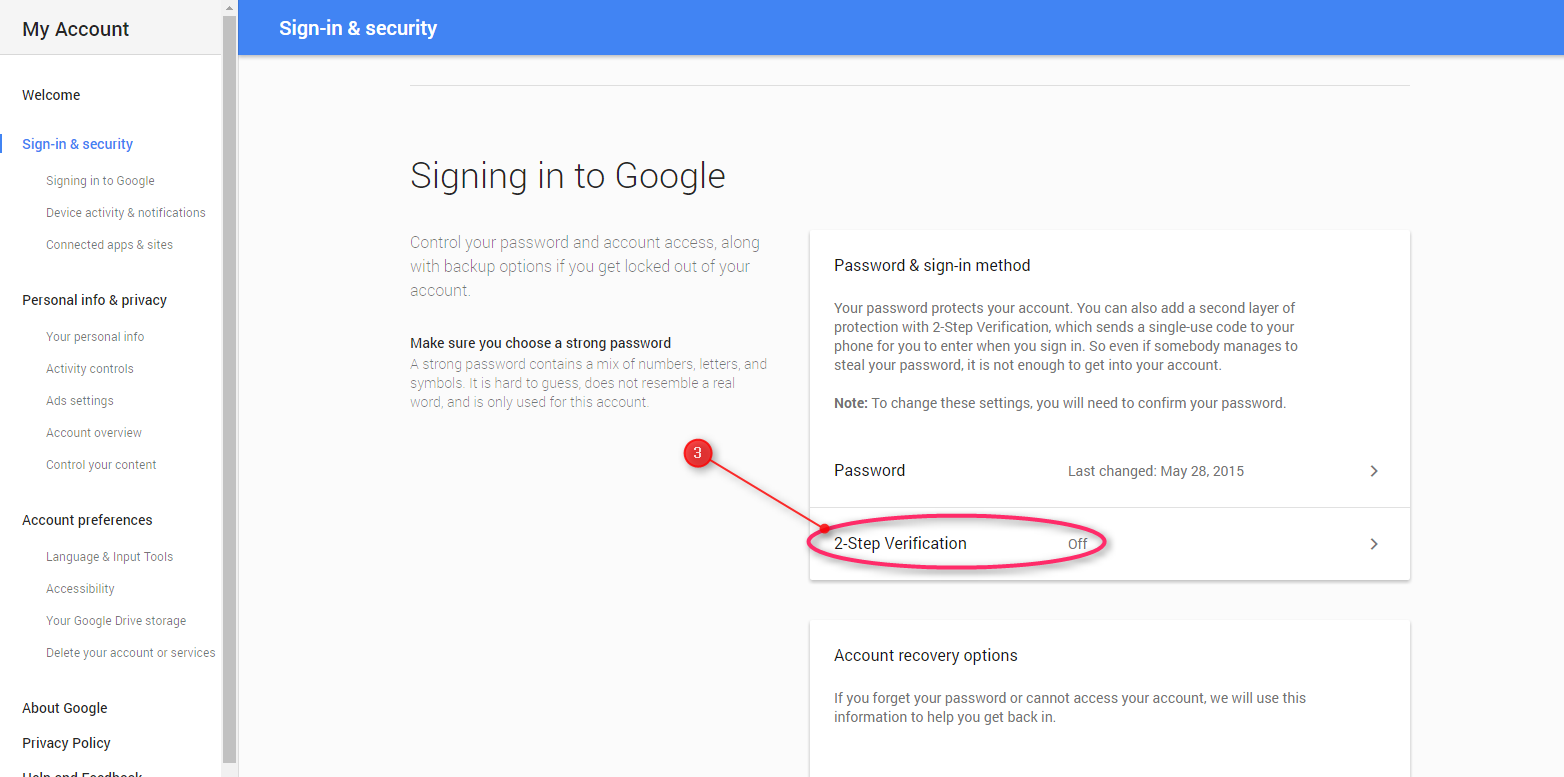
Step 3: After clicking on Signing in to Google, a new page will open. You have to keep the 2-Step verification OFF if it was set to ON.
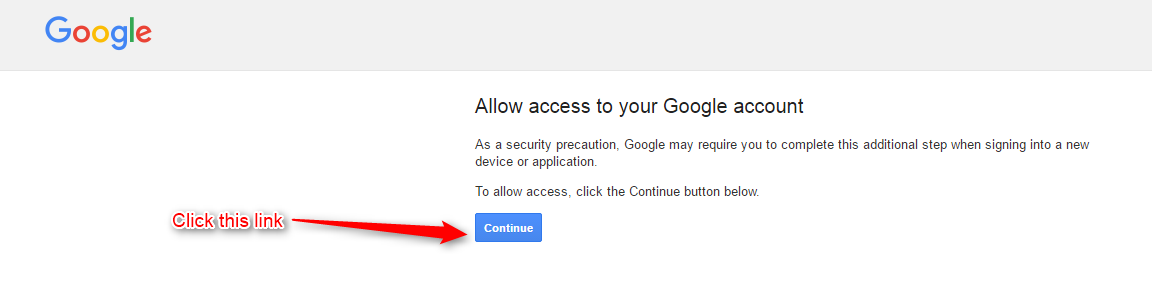
Step 4: Now, click on this link http://www.google.com/accounts/DisplayUnlockCaptcha, and make sure you are logged into your Gmail account.
If you are not logged in then please make a Gmail login to your account by clicking this link.
By clicking this link we automatically enable the google captcha security. See the image below:

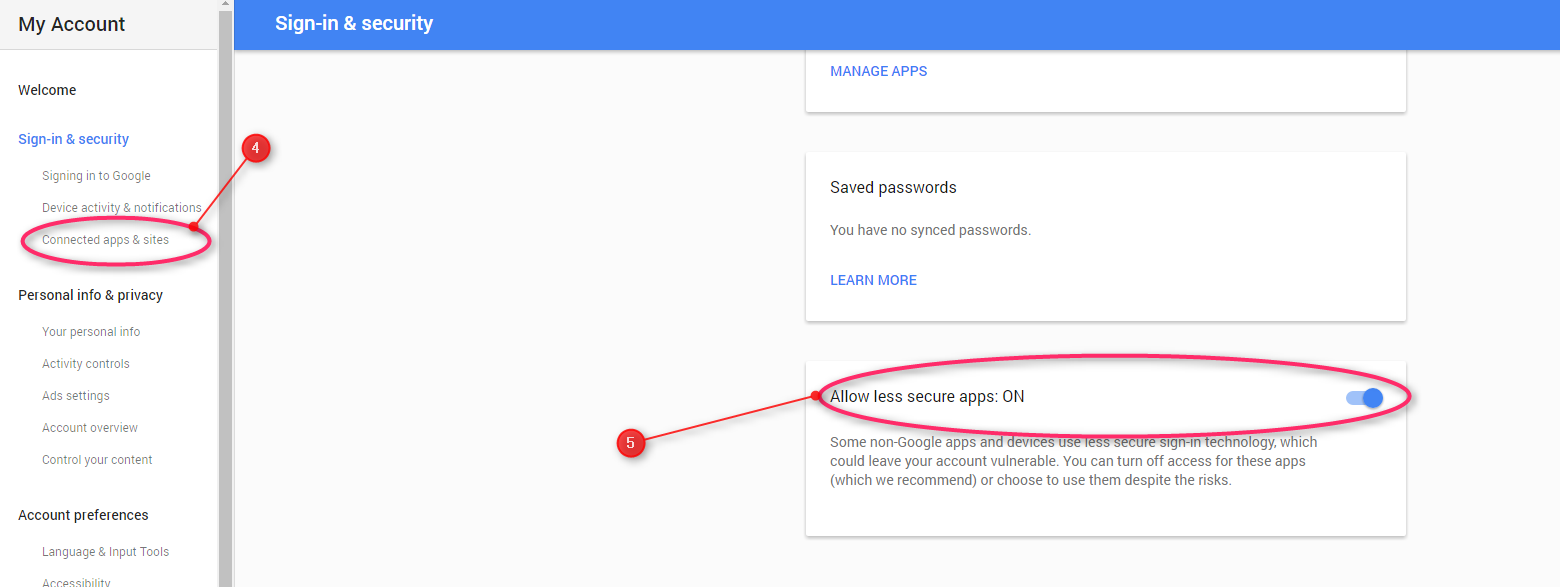
Step 5: Now click on “Connected apps & sites” link on the left panel.
Step 6: And in the last step set Allow less secure apps: ON.
2. Connect Gmail SMTP with MailGet –
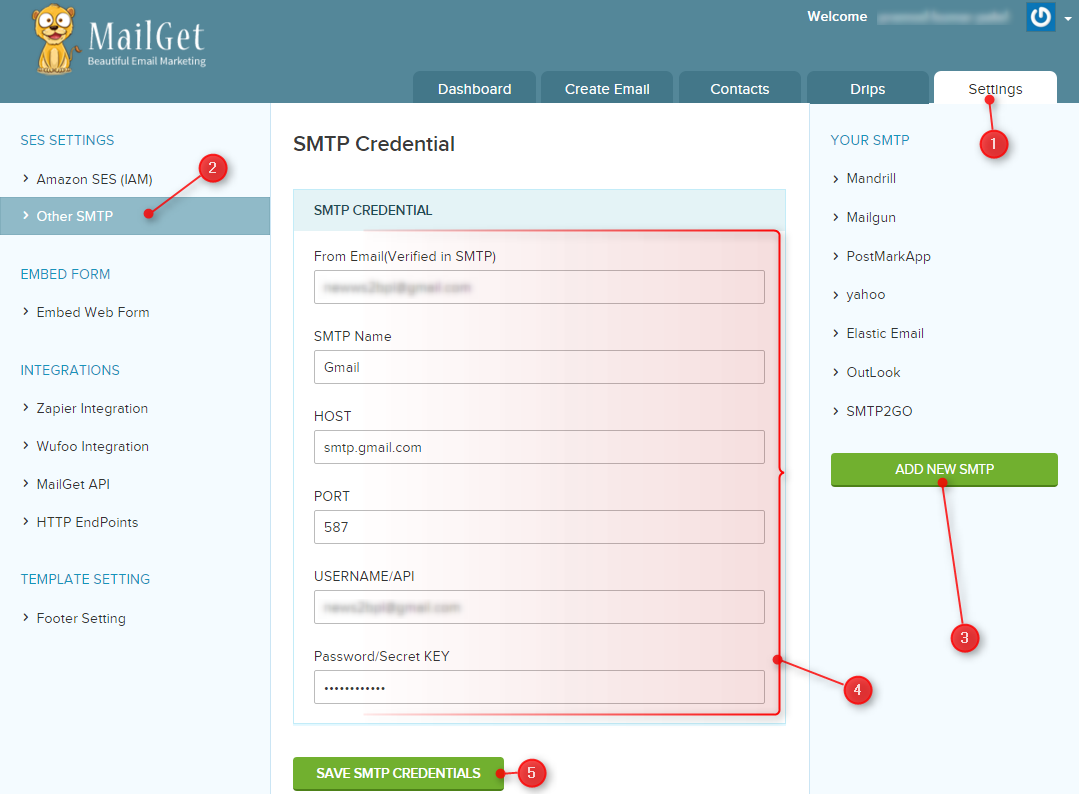
Step 1: Go to your MailGet Dashboard and Click on the “Settings” tab.
Step 2: First, you need to click on “Other SMTP” on the left panel. Now SMTP section gets visible where you can add a new SMTP service.
Step 3: Now click on “ADD NEW SMTP” button at the bottom of the right panel to add new SMTP service.
Step 4: Fill all the required information in the form.
From Email: Add email address from which you want to send emails. Eg: [email protected] (Senders email) In your case it’s your email address.
SMTP Name: You can set any name to recognize Gmail SMTP.
HOST: smtp.gmail.com
PORT: 587
USERNAME/API: Gmail accounts login email address.
PASSWORD/Secret KEY: Gmail account login password.
Step 5: Now hit the green button to “SAVE SMTP CREDENTIALS” to save details.
If the information is correct, then you are ready to send emails. Otherwise, you will get an error message like so –

And, if you have entered all the information correctly, you will get a success message –

This indicates that you have successfully connected your MailGet account with Gmail SMTP and you are now ready to send bulk emails.