
SendBlaster 4 is a bulk email software to manage your mailing lists and set up email marketing campaigns in few easy steps. SendBlaster combines
into one product with the practicality of a mass email software and with the flexibility of a bulk email web service.
With SendBlaster 4 you can create newsletters and manage lists directly on your desktop.
You can also track your email sending statistics to improve your email campaigns.
In this tutorial, we will be learning how SendBlaster 4 works. How to Install it and How to configure SMTP in SendBlaster.
1. Download SendBlaster 4
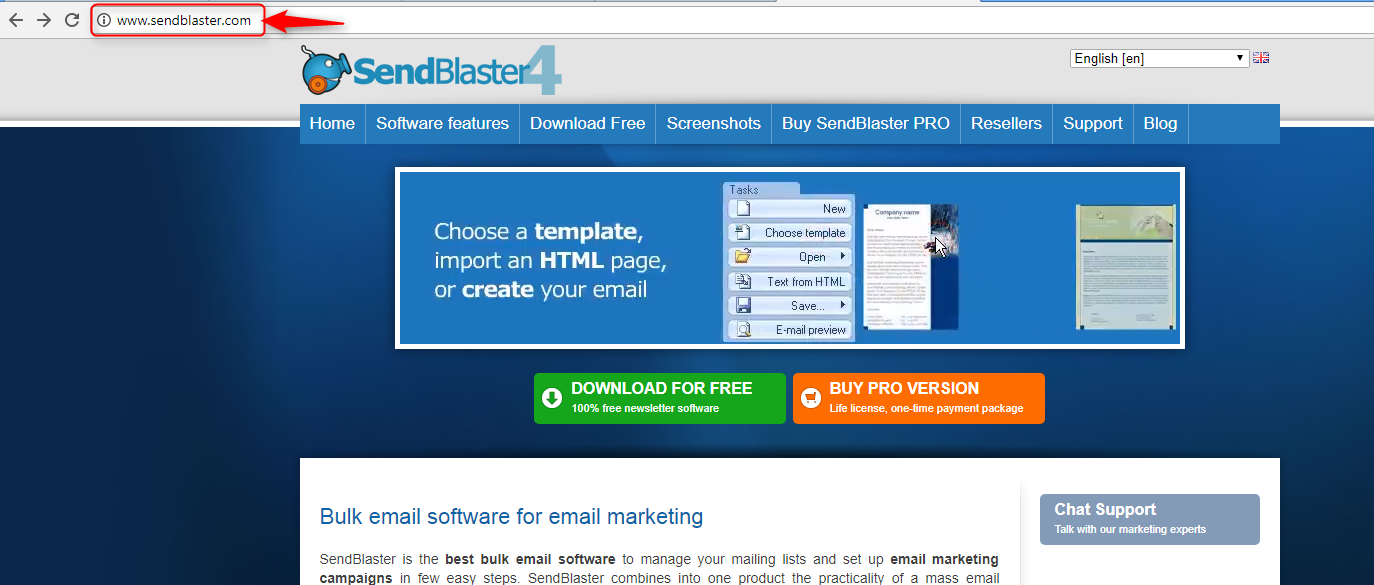
To download SendBlaster, go to it’s website www.sendblaster.com
Click on [Download For Free] button to download the free version of for initial use.
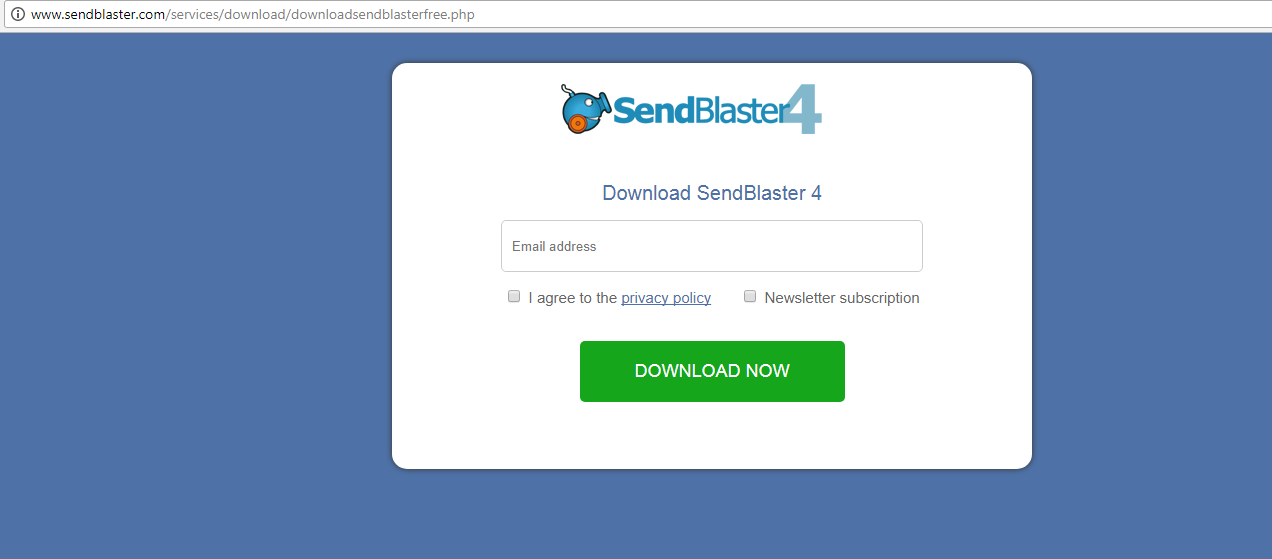
After clicking on Download For Free, a download window will pop-up.
Enter the valid email address and click on the checkbox to agree with the privacy policy.
Click on the [Download Now] button to start the download process.
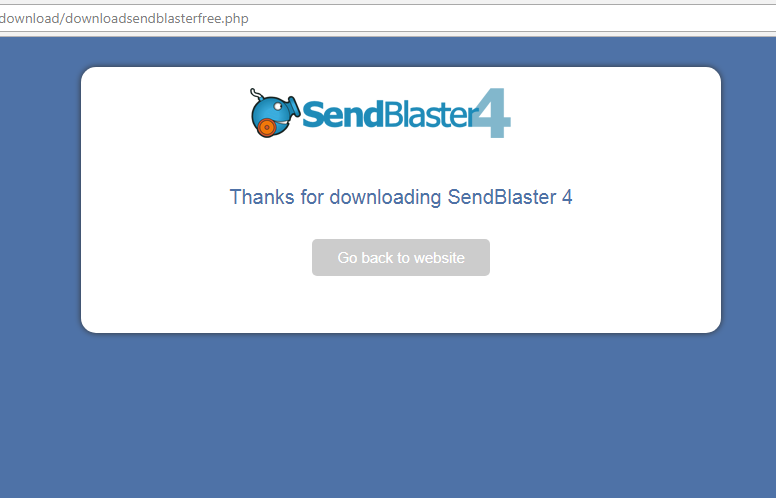
Once SendBlaster is downloaded, you will receive the following message.
You can click on Go back to website if you wish to visit the website again.
2. Install SendBlaster 4
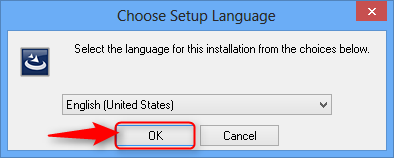
Go to the download folder in your computer and open the downloaded SendBlaster file.
In the pop-up select the language you wish to operate in and click on the OK button to continue to the next step.
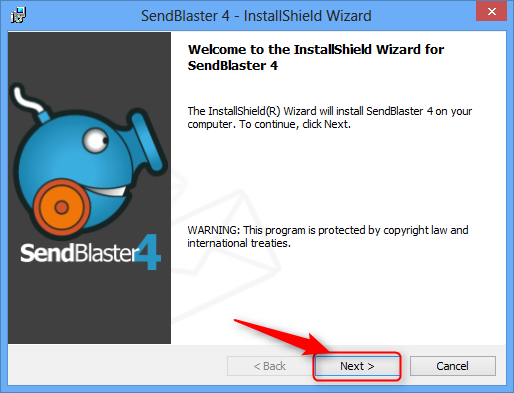
Once you select the language, you will get a Welcome to SendBlaster window.
Click on Next button to continue to the next step.
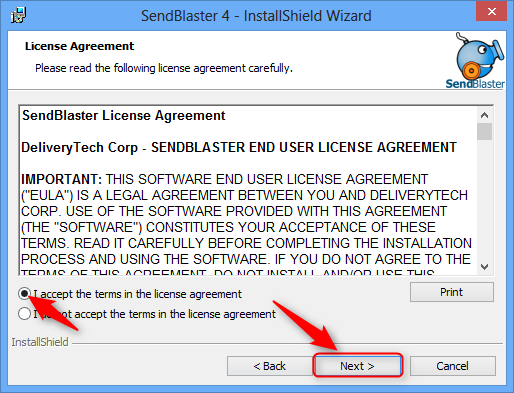
On reaching the License Agreement page accept the terms and click on the next button to continue to the next page.
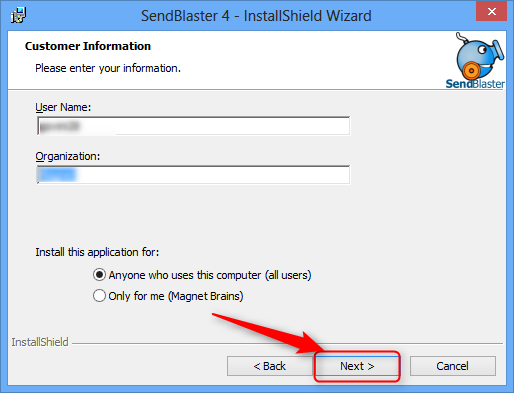
Fill the Customer Information on the next screen.
Fill in the User Name and Organization name and click on the Next button to go to the next page.
Select the destination folder to install the SendBlaster and click on the Next button.
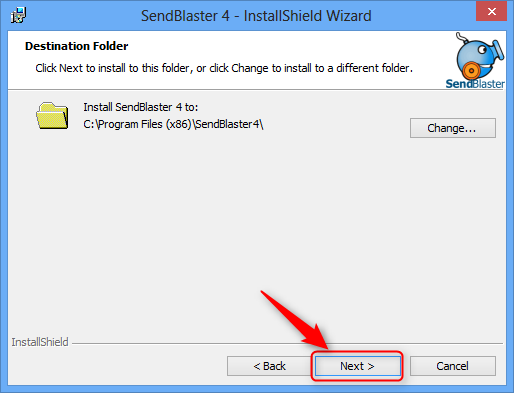
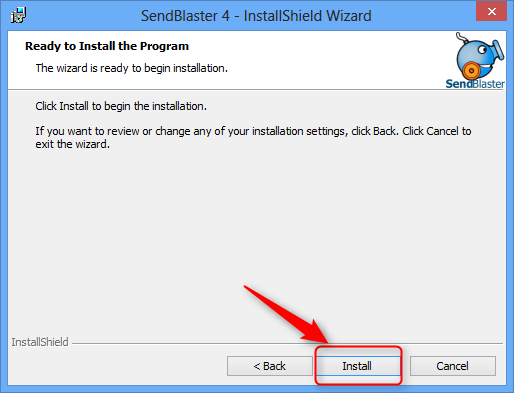
Once the installation folder is selected, SendBlaster is ready to install.
Click on the Install button to complete the installation process.
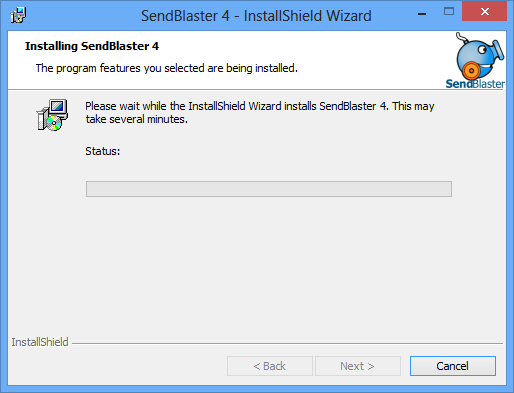
The installation process is now started. Wait till the software is completely installed.
There are some other easy to use Email marketing tools which serve as a great SendBlaster alternative like Mailget and Mailget Bolt. You need not download or install any application for it, just register directly on MailGet website and start sending bulk emails.
3. Integrate SMTP with SendBlaster 4
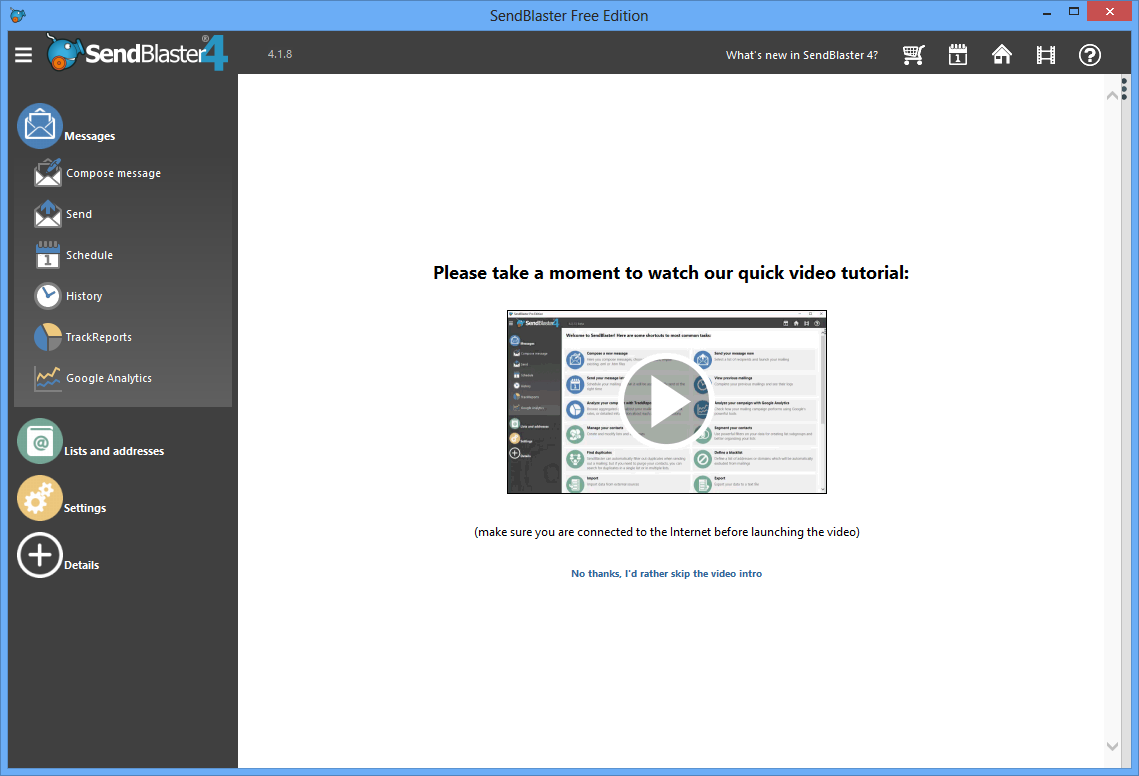
Once the installation of SendBlaster is complete, login to your SendBlaster account and go to the homepage.
On the homepage of your SendBlaster account go to the menu on the left side of the page and click on Messages.
In the Messages option select Send option.
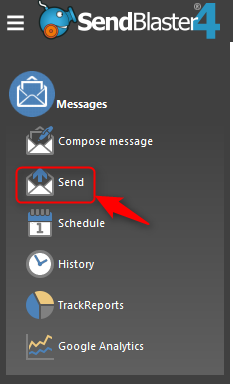
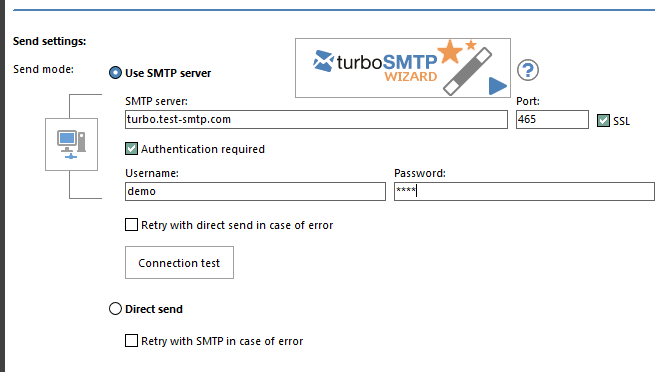
Once you click on the Send button you will be redirected to the page with all the settings for sending the email campaign.
In the send settings, select Use SMTP server as Send Mode and proceed with the SMTP setup.
Go to your Mailget or your SMTP account and fetch all the SMTP details.
Note: In this tutorials, we are using MailGet SMTP as an example.
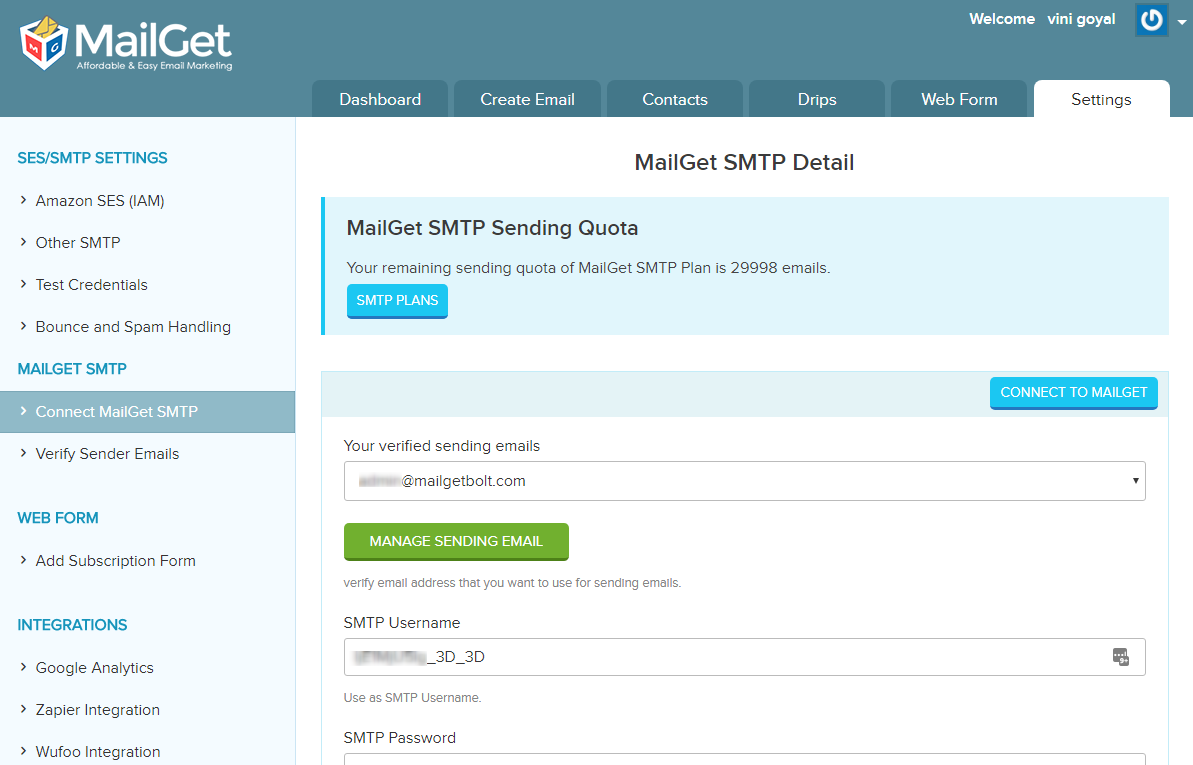
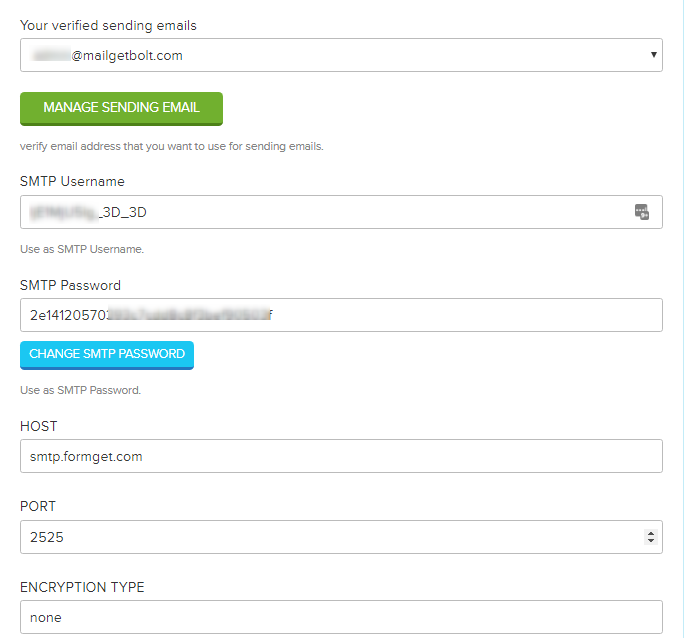
Take all the details like Sending email address, SMTP username, SMTP password, Host from your SMTP account.
Fill-in the respective details in the SendBlaster SMTP settings option.
SMTP Server: smtp.formget.com
Port: 2525
Username: As mention in your SMTP account
Password: As mention in your SMTP account
Note: Make sure to un-check checkbox for SSL
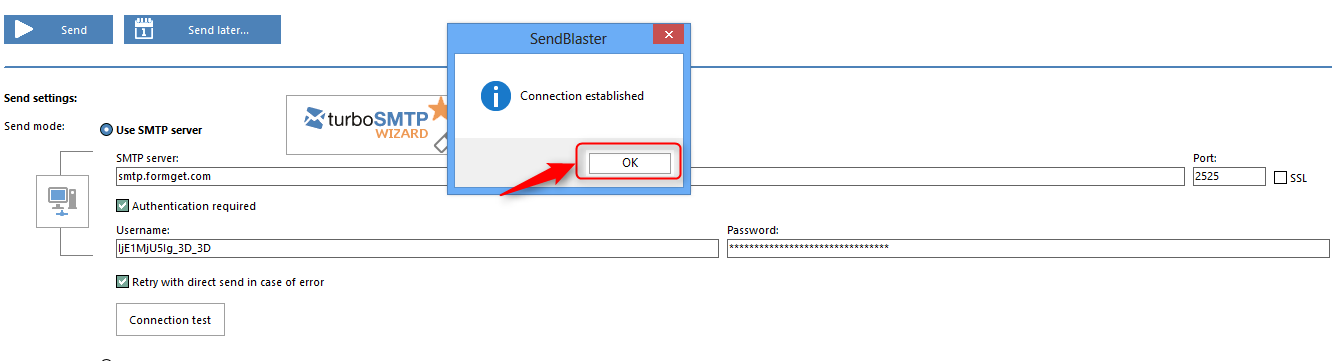
After filling all the details click on Connection test to set up the connection of the SMTP with SendBlaster.
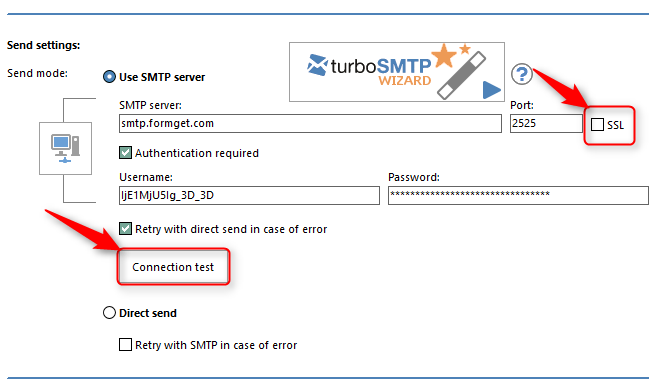
A popup with Connection established message will be displayed after the credentials are verified and the connection is successfully made.
After following all the above steps, you have learned.
- To download SendBlaster 4 application
- Installing it.
- Integrating MailGet SMTP with SendBlaster.
You are now good to proceed with creating an email list and start sending your bulk email campaign.
You can also refer to similar tutorials on SMTP-