
What is Outlook?
Microsoft Outlook is an email application that let the user send and receive emails.It comes as a part of Microsoft Office Suite. Other that send and receiving emails, outlook also includes calendar, task manager, contact manager etc. This tutorial explains Outlook SMTP settings in very detailed, simple and easy to replicate steps.
Microsoft Outlook can be purchase from internet from the below mentioned link.
https://www.microsoft.com/en-us/store/d/outlook-2016/cfq7ttc0k5cf?activetab=pivot%3aoverviewtab
Multiple SMTPs can be configured in your outlook account. In this blog we will be using MailGet SMTP to demonstrate the SMTP configuration procedure for outlook.
Outlook SMTP settings:
1. Open Outlook on your system
Once you have downloaded Microsoft Outlook from the link above, open it on your system and create your outlook account.

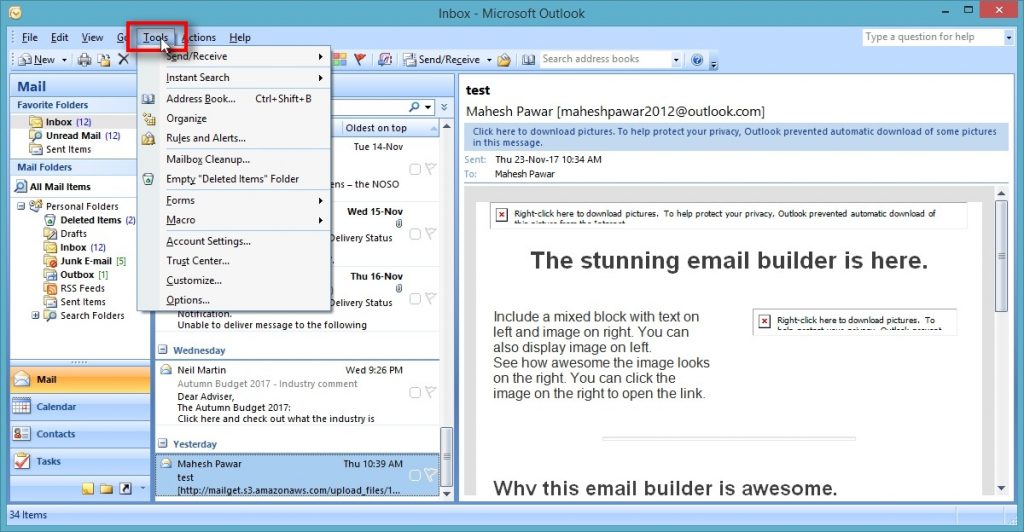
2. Click on “Tools” menu
Click on Tools menu to start the SMTP configuration process.
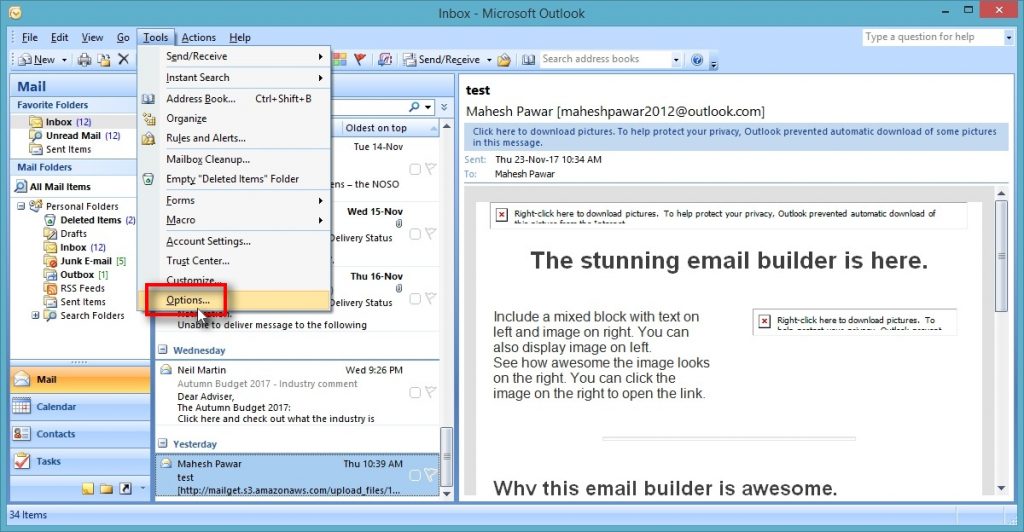
3. Click on “Options” menu
Select Options from the Tools menu to got to the mail set up window.
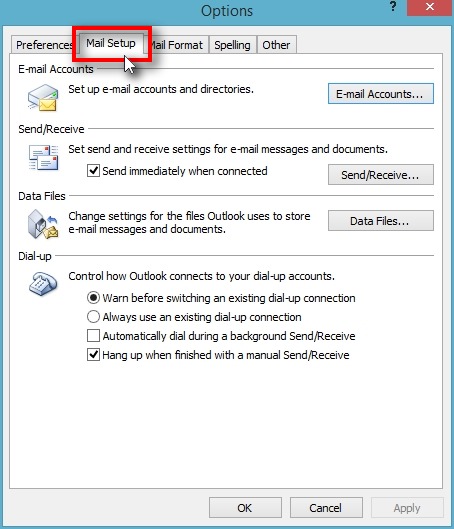
4. Click on “Mail Setup” tab
Click on Mail Setup to configure your email account details.
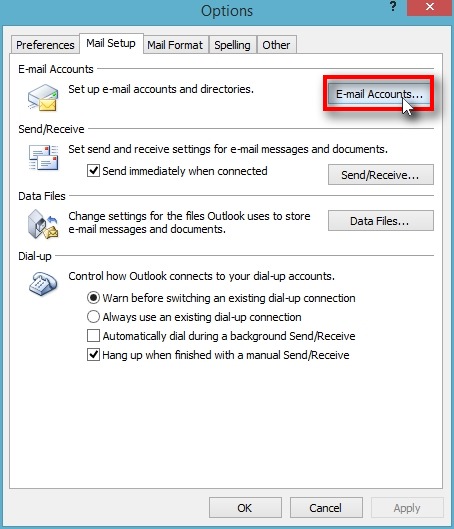
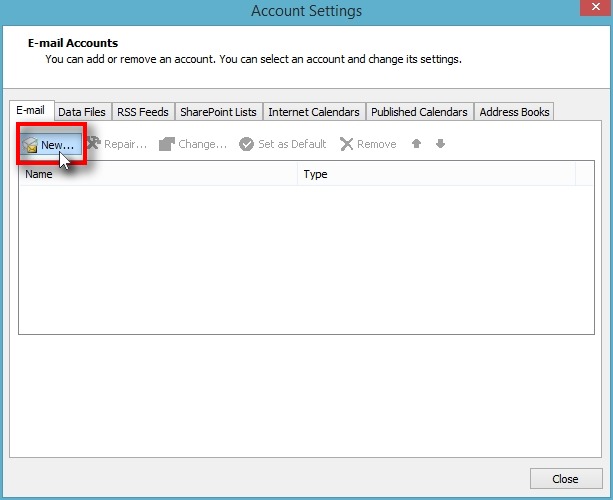
5. Click on “E-mail Accounts” button
Click on “E-mail Account” button to set-up new accounts and directories.
6. Click on “New” button
Click on “New” button to add your new e-mail ID.
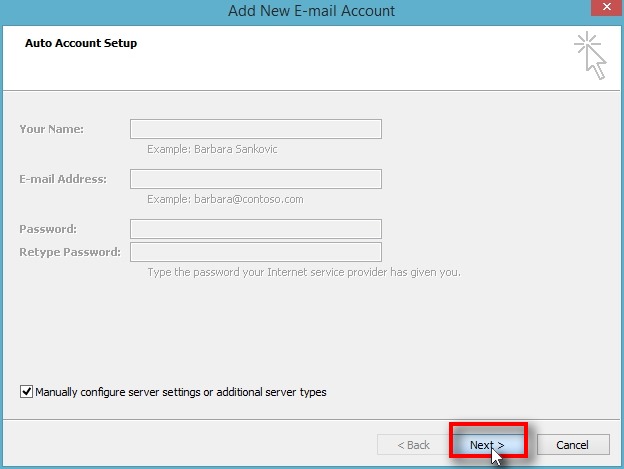
7. Configure E-mail manually
Select “Manually configure server settings or additional server types” and click on “Next” to go to the next screen.
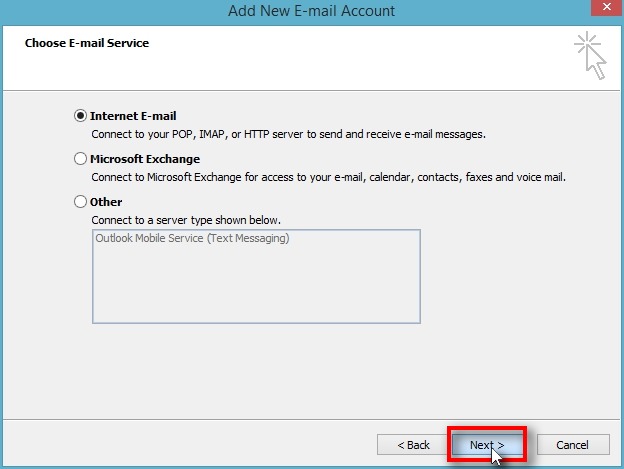
8. Select “Internet E-mail”
Select “Internet E-mail” from the options and click on “Next” button.
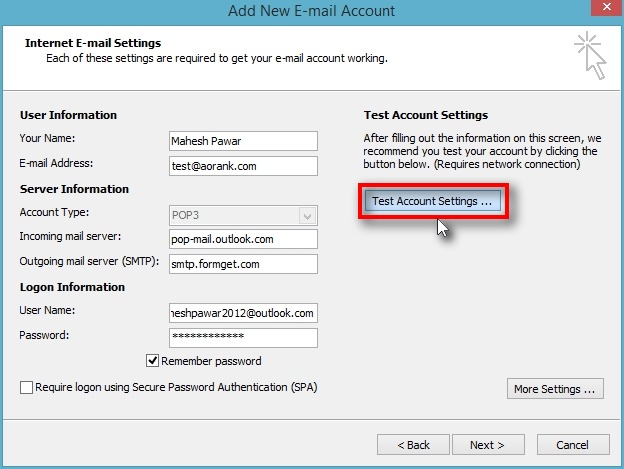
9. Fill in User Information
In User Information section fill-in :
1. Your name
2. Your email address from which want to send the e-mail campaign i.e. your sender’s e-mail ID
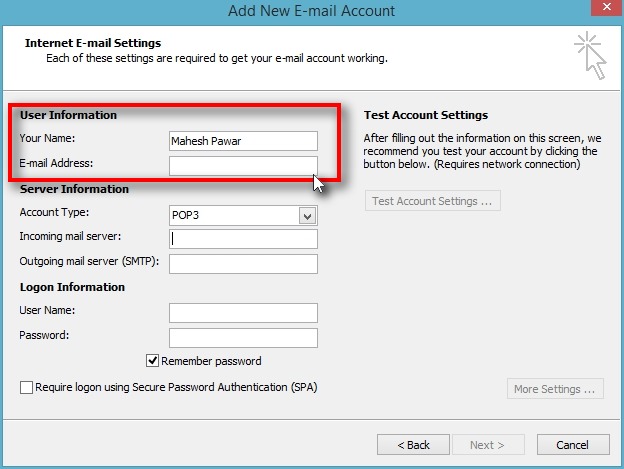
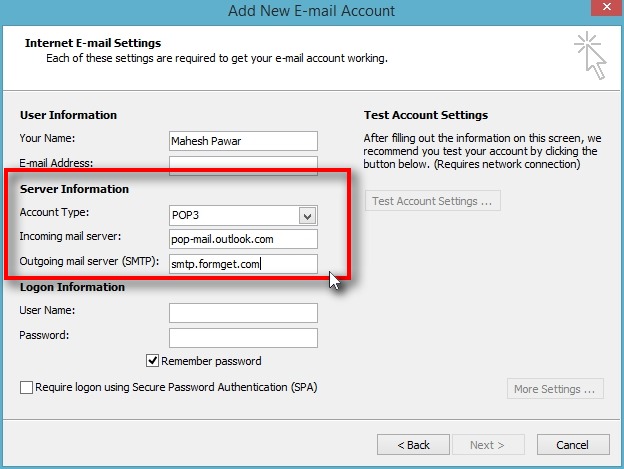
10. Fill-in Server Information
In the server information section fill in the following:
1. Account type: POP
2. Incoming Mail Server: pop-mail.outlook.com
3. Outgoing Mail Server(SMTP): smtp.formget.com
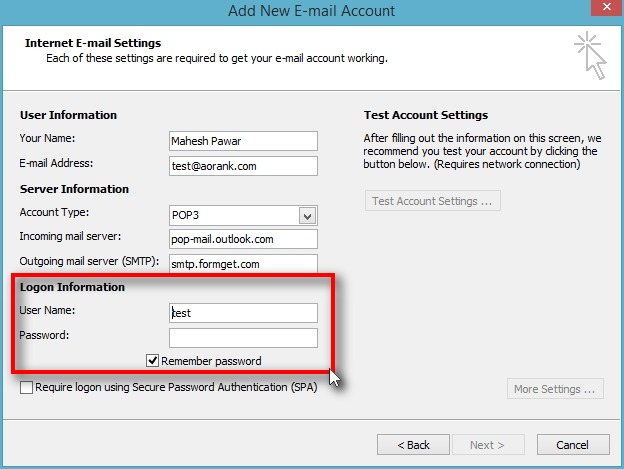
11. Fill-in the Logon Information
In this section fill-inyor Outlook account credentials i.e. your out look username and password.
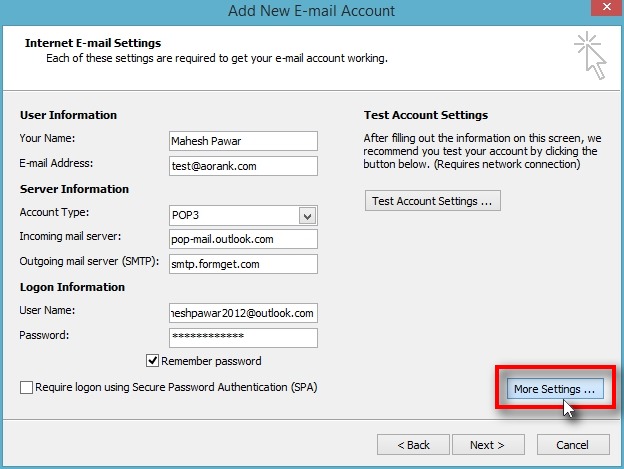
12. Click on “More Settings” button
Click on “More Settings” button to go to the outgoing server setting options.
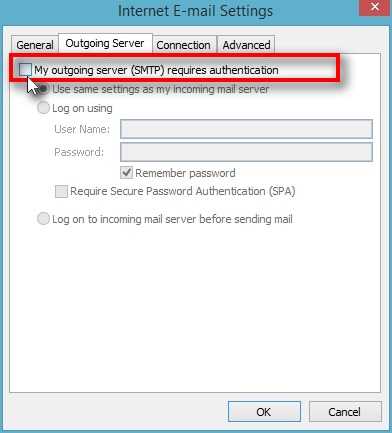
13. Click on “Outgoing Server” tab
Click on “Outgoing Server” tab and check “My outgoing server (SMTP) requires authentication“
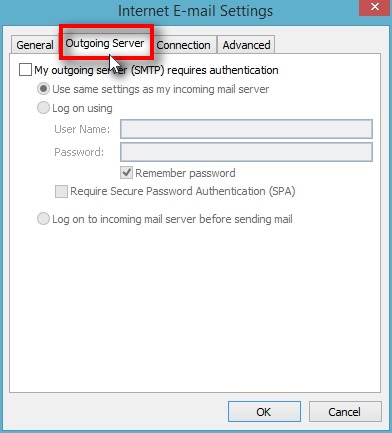
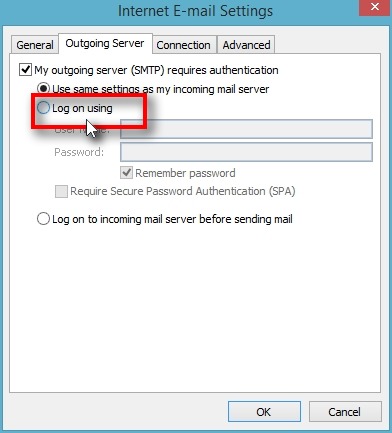
14. Choose “Log on using” option
Choose “Log on using” option to to create new Log on credentials for outgoing server.
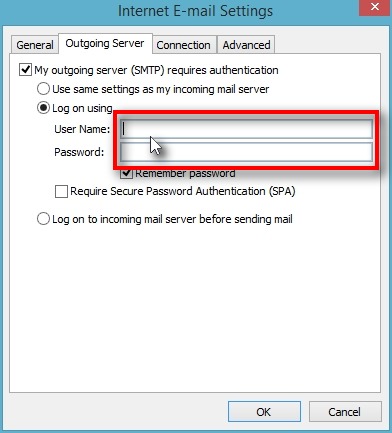
15. Fill in the “User Name” and “Password”
Fill in new “User Name” and “Password“.
Note: Make sure to un-check the “Require Secure Password Authentication(SPA)”
16. Click on “Advanced” tab
Click on “Advanced” tab to make changes to advanced server setting.
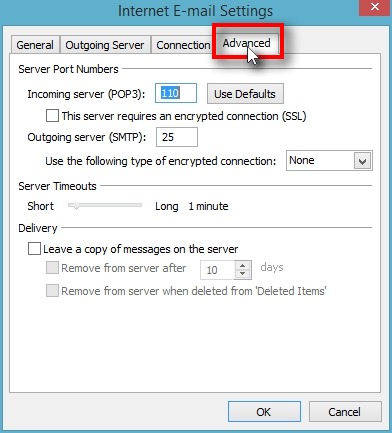
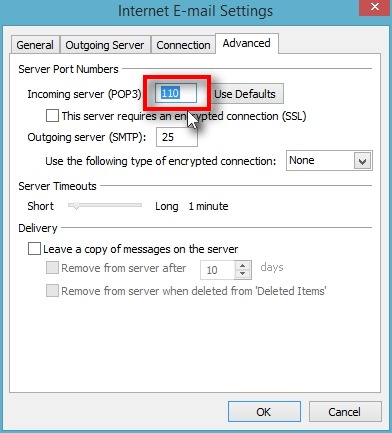
17. Click on “Incoming server (POP)“
Click on “Incoming server (POP3)” and change the default port number of the incoming server to 995.
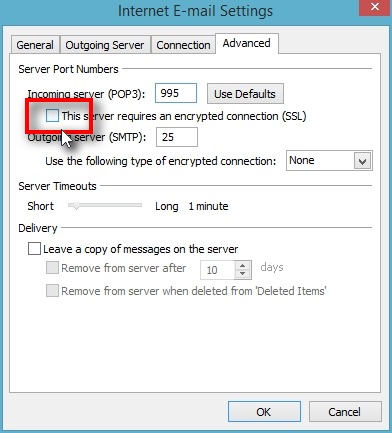
18. Check “This server requires an encrypted connection (SSL)“
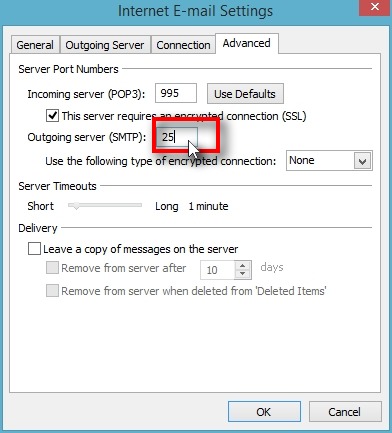
19. Click on “Outgoing server (SMTP)“
Click on “Outgoing server (SMTP)” and change the default port number of the outgoing server to 2525.
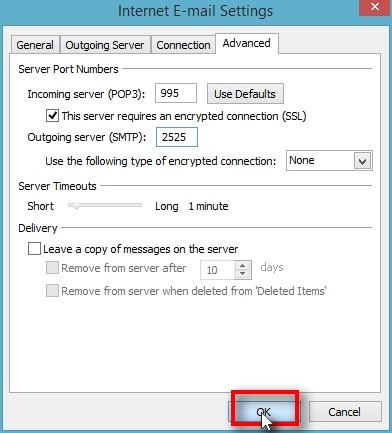
20. Click on “OK” button
Click on “OK” button to complete the set-up process.
21. Click on “Test Account Settings” button
Click on “Test Account Settings” button to check whether all the modifications have been successfully implemented and the SMTP configuration is complete.
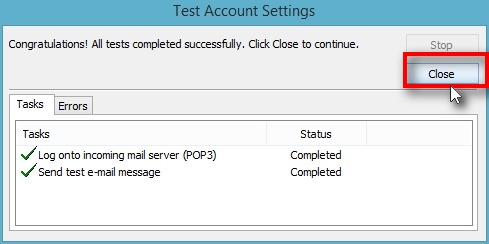
22. Click on “Close” button after verification
When the account settings have been test and the Green tick marks appear adjacent to all the tasks in the tasks column, account setting are completed successfully.
Click on “Close” button to close the window and go back to Outlook Dashboard.
Your Outlook accounts now connected successfully with MailGet SMTP. You can now start sending your e-mail campaigns now.
You can also refer to our other SMTP related articles: