
MailWizz Email Marketing Application is simple to use, efficient and full-featured E-mail Marketing application with and impressive feature set. In this MailWizz tutorial we will be going through the following steps to setup MailWizz:
A. Installing XAMPP and Creating Database for MailWizz:
Downloading and installing XAMPP server and creating database by phpmyadmin.
B. How to install MailWizz :
Installation of MailWizz involves downloading MailWizz application and setting it up using server and database.
C. Server setting for the MailWizz account:
This requires integration of MailWizz to the SMTP. In this tutorial we will be Demonstrating integration of MailWizz with MailGet SMTP. This is done at the backend on the system.
D. How to create subscriber lists and send email campaign:
This process is done at the frontend of the system.
Note: You can leave any step step if you have already completed it.
So, lets start with the following steps:-
1. Download the XAMPP server
To run MailWizz script on your local computer, you need to download and install XAMPP server.
XAMPP is the short form of Apache, MySQL and PHP. This software installs all the required software in one package.
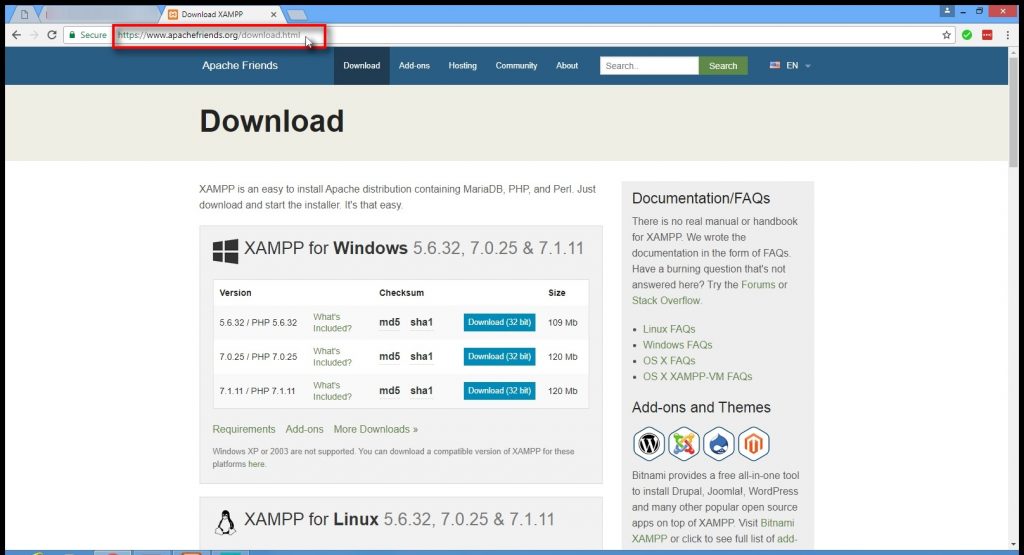
To download, go to “https://www.apachefriends.org/download.html” and download XAMPP server for your system.
I have downloaded the latest version – 7.1.22/32 bit for this tutorial.
2. Install XAMPP server
To install XAMPP server on your local system-
1. Go to download folder.
2. Double click on the XAMPP installer to start the installation process.

3. Start XAMPP server
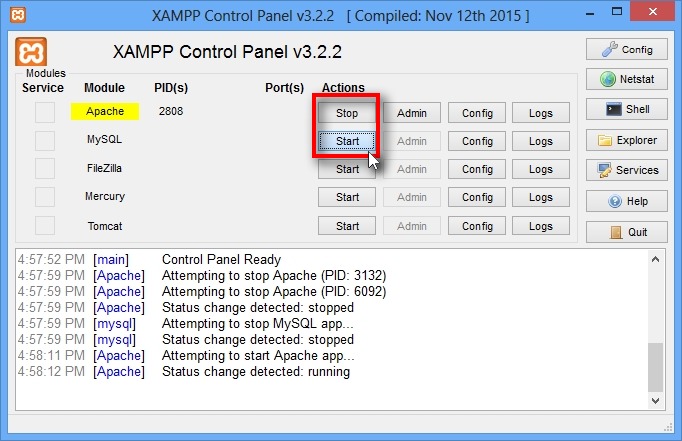
Once XAMPP is installed, you can start XAMPP application.
1. Open the XAMPP server application by clicking its icon on your computer.
2. Click on start in front of Apache and MySQL to start them.
Note: Make sure you don’t have software like Skype or Teamviewer running on your computer as it may hinder with XAMPP startup.
4. Starting PHPMyAdmin to create database
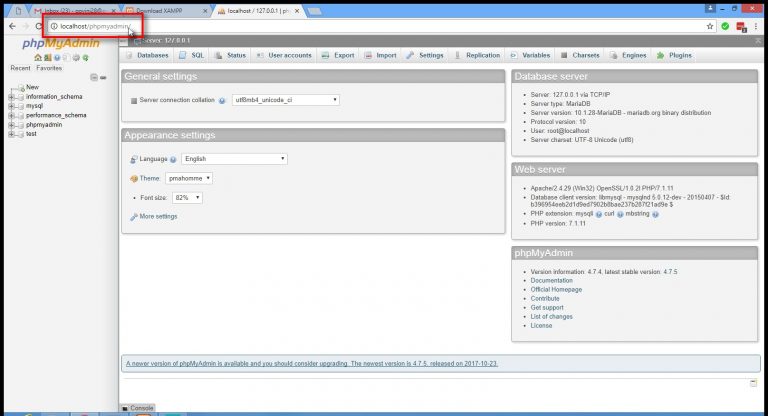
Once Apache and MySQL is running through XAMPP.
Go to your web browser and open the link below.
localhost/phpmyadmin/.
We will be creating database using MySQL PHPMyAdmin for MailWizz.
For creating Database:
In phpmyadmin, click on Databases to create a new database.
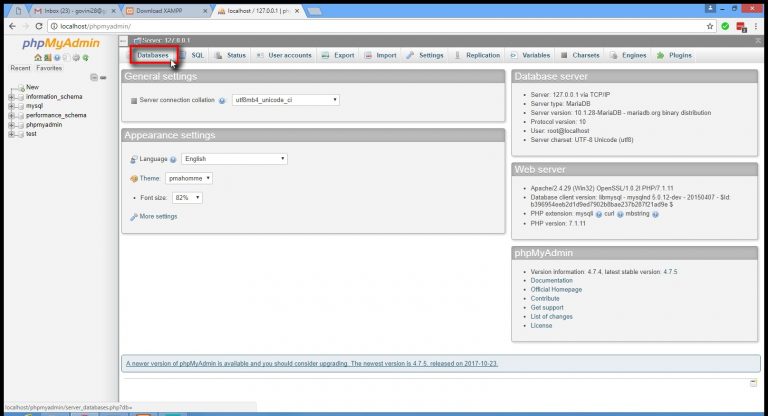
In databases, create a new database for your MailWizz account.
Give it a suitable name.
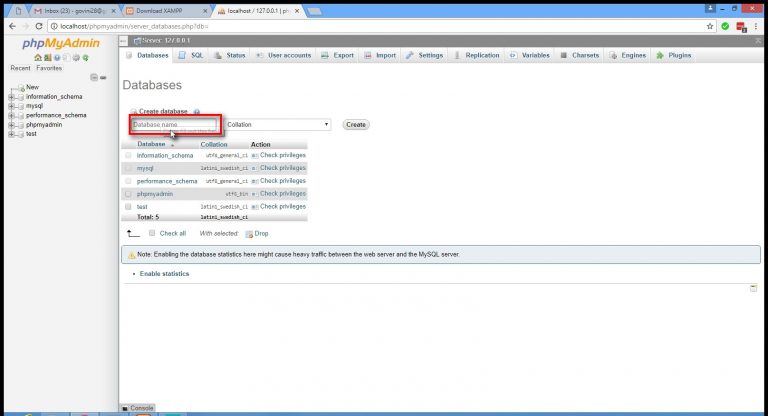
In the tutorial I have taken mailwizz as my database name.
Click on create button.
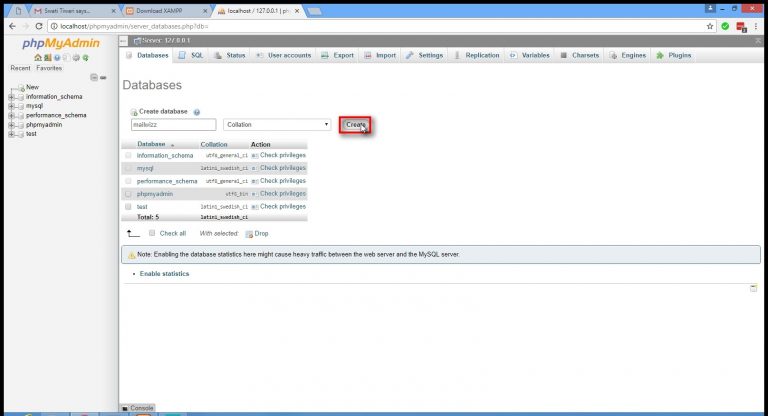
Your database is successfully created.
5. Install MailWizz
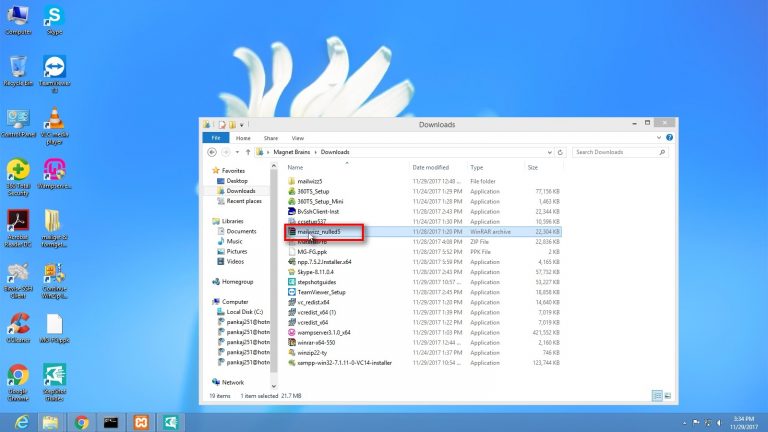
Go to https://www.mailwizz.com/ and download mailwizz.
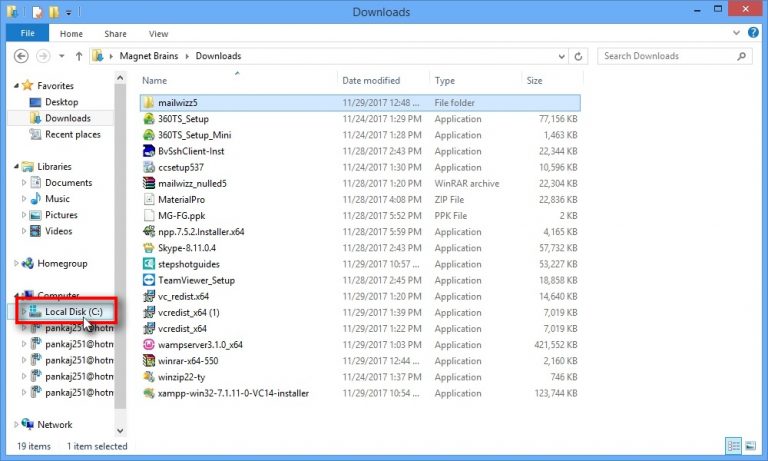
Go to the download folder of you computer and extract all files from MailWizz compressed file.
Copy the MailWizz file from the download folder to place it in the XAMPP server folder.
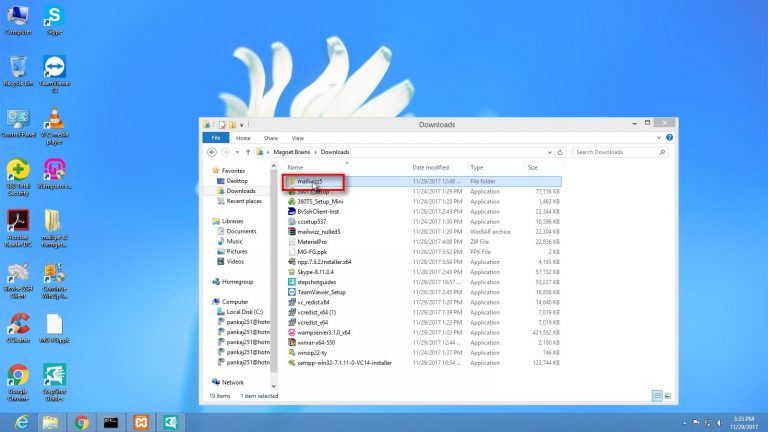
Go to Local Disk (C:) [C drive] of your comuter.
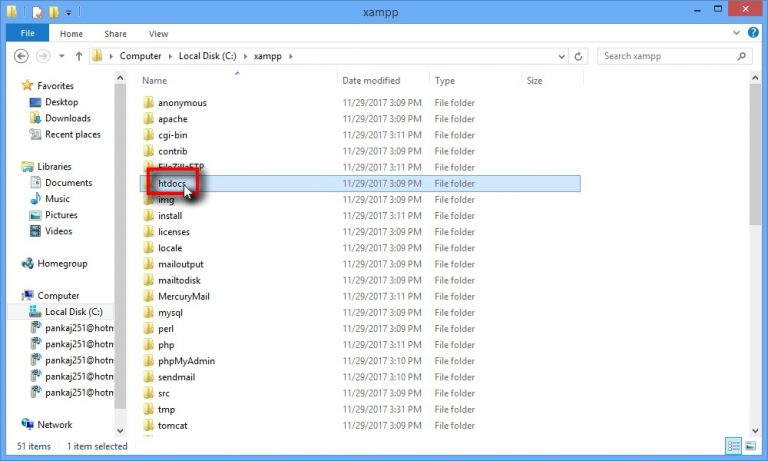
Open XAMPP folder created earlier in the C drive.
Go to htdocs folder and open it.
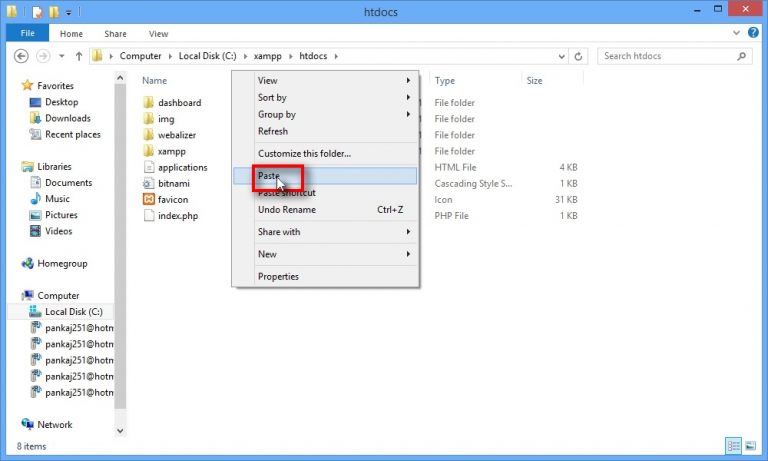
Paste MailWizz folder in the htdocs folder of the XAMPP server.
Once you are done with setting up the MailWizz in the required folder, it’s time to start with the installation process.
To install MailWizz on your system,
Open web browser and type –
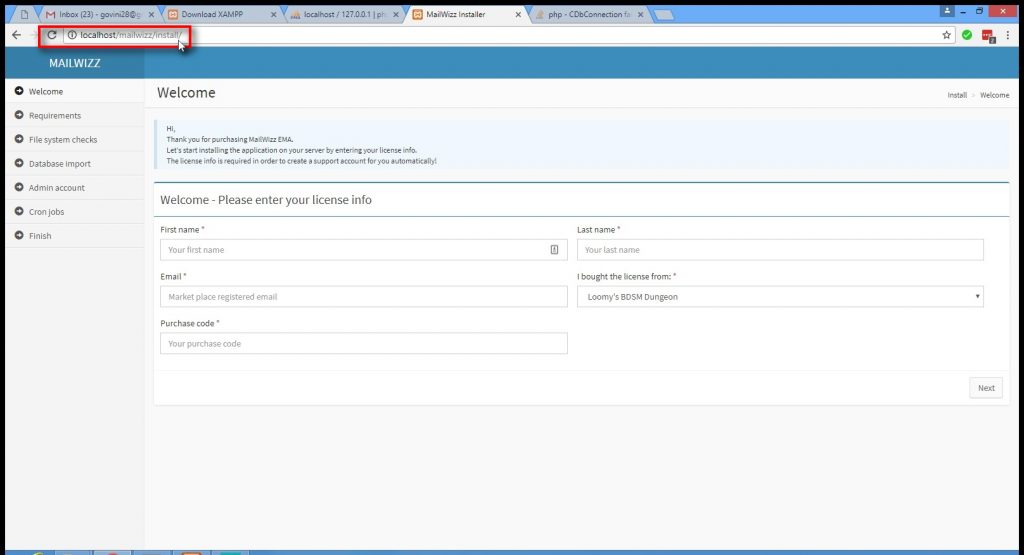
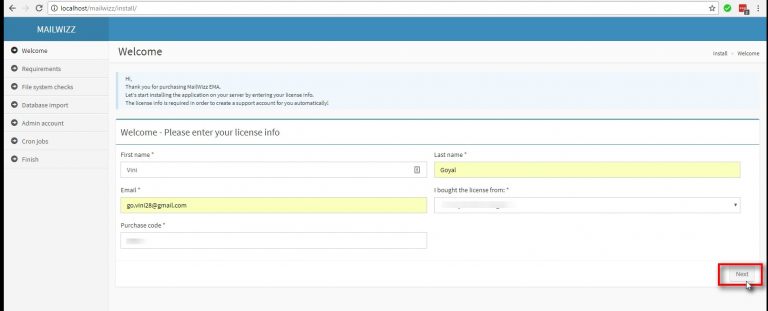
On the Welcome page, fill in all the basic details.
Your first and last name, email address, source from where you bought the software and the purchase code.
Click on the Next button to continue.
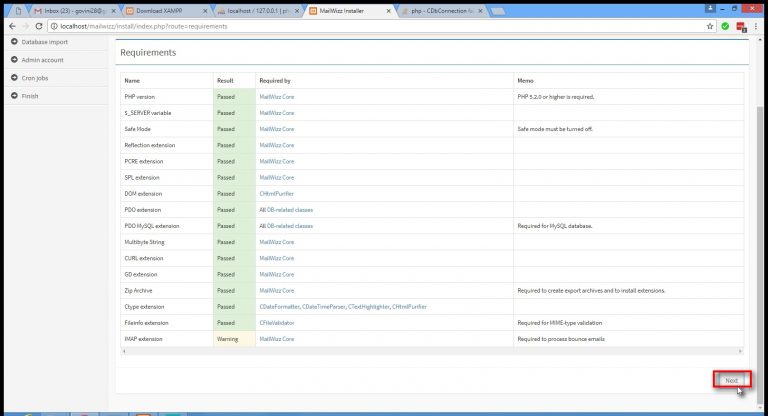
On the Requirements screen it MailWizz will tell you if all the pre-requisites are installed properly on your system.
It will also give you the warnings and error messages, that needd to be sorted out for the successful installation of MailWizz.
Click on Next button once you get the confirmation message that all the requirements bt MailWizz EMA are satisfied.
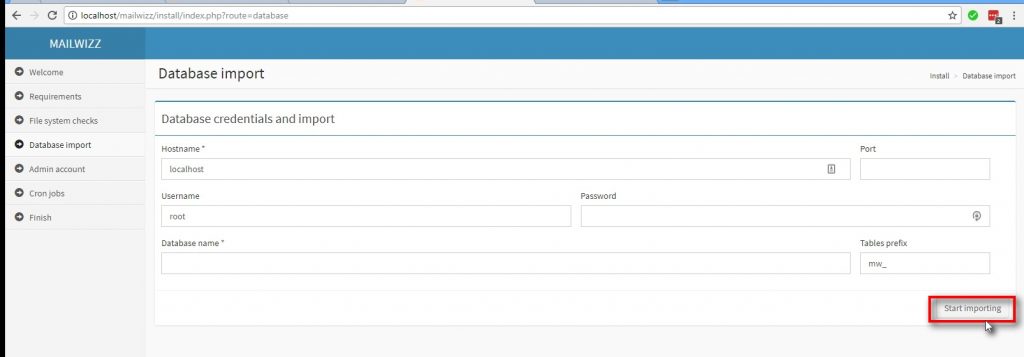
To connect database to your MailWizz account-
Fill in all the details of your database created earlier.
Hostname: localhost
Username: root
Database name: mailwizz
And click on Start importing.
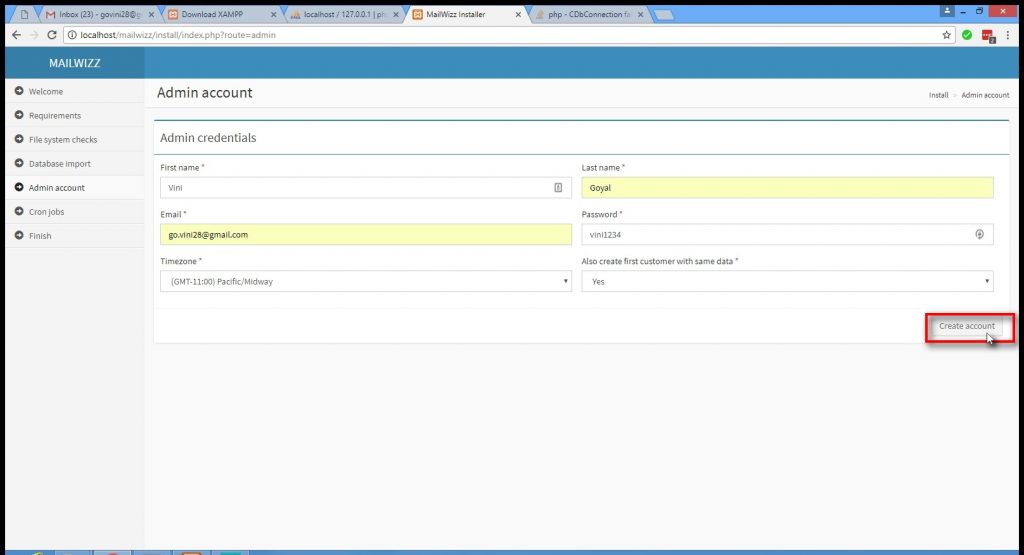
Fill in all the required details to create a new Admin account.
And click on Create account.
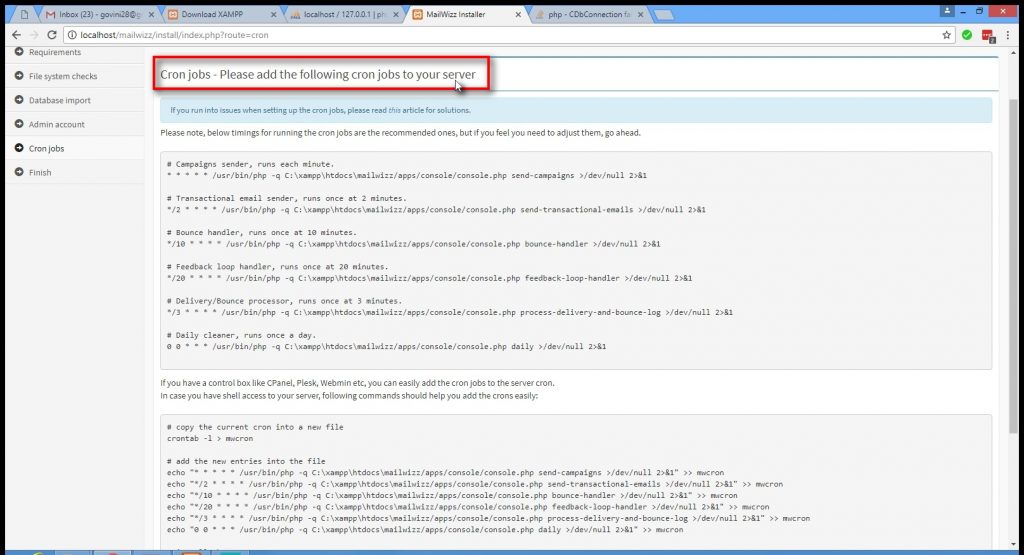
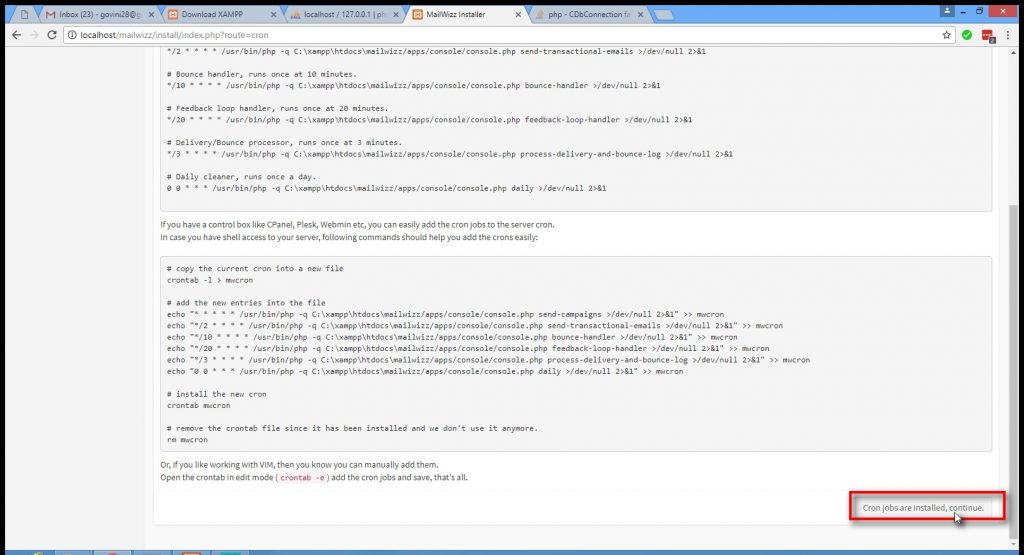
Cron Jobs: Cron jobs automatically triggers the file on predefined schedule to send the email.
Cron jobs are to be added to your server to start sending your email campaigns.
Once you have installed all the cron jobs on your server, click on Cron jobs are installed, continue.
Your MailWizz account is successfully installed on your system.
Once you are done with the installation process, go to MailWizz backend set-up to integrate the server with your MailWizz account.

6. Integrate SMTP with MailWizz account
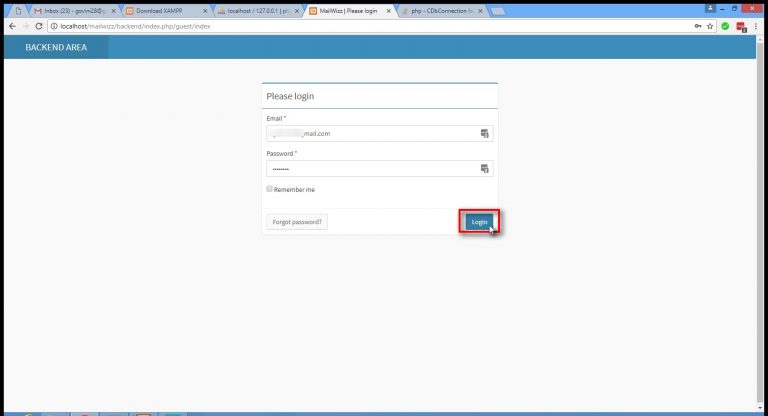
To complete the SMTP integration will your Mailwizz account, log in to the backend of the Mailwizz application.
To log-in to the MailWizz backend-
1. Either click on the backend hyperlink on the last page if the installation set up.
2. Or type localhost/mailwizz/backend in the web browser.
Fill in the log-in credentials created earlier and click on Login.
Go through all the instructions on how to set-up the server details in your MailWizz account by clicking on next arrow button, and once complete click on End the tour or Close for now.
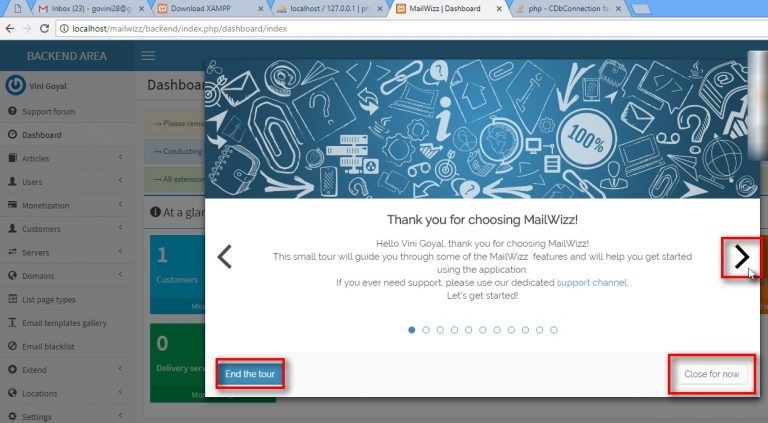
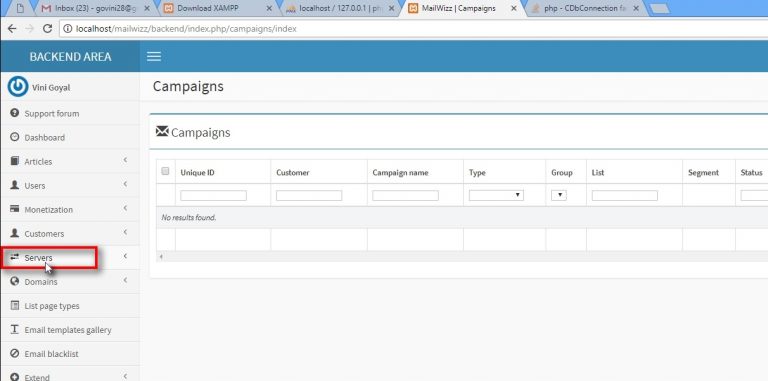
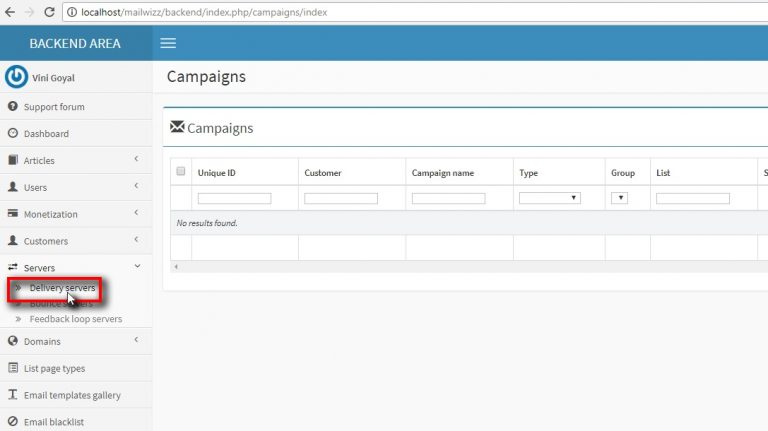
Once you are through with all the instructions on the setup procedure, click on Servers in the list on present on the left side of the screen.
Click on Delivery servers present in the dropdown menu of Servers.
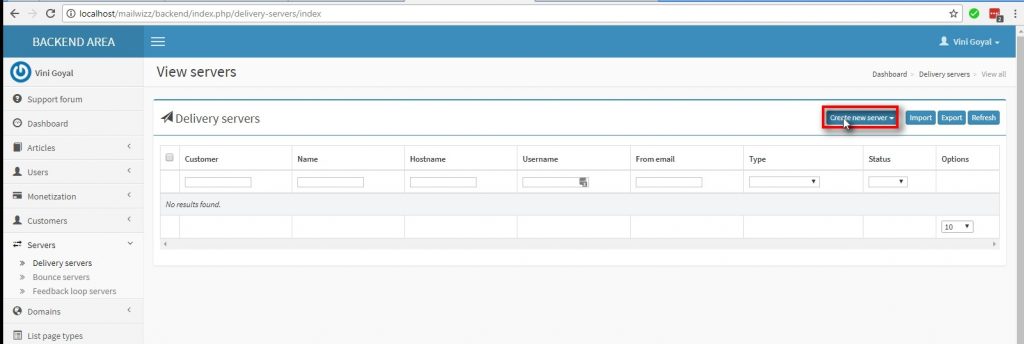
In the Delivery servers, click on Create new server to continue with the server set-up process.
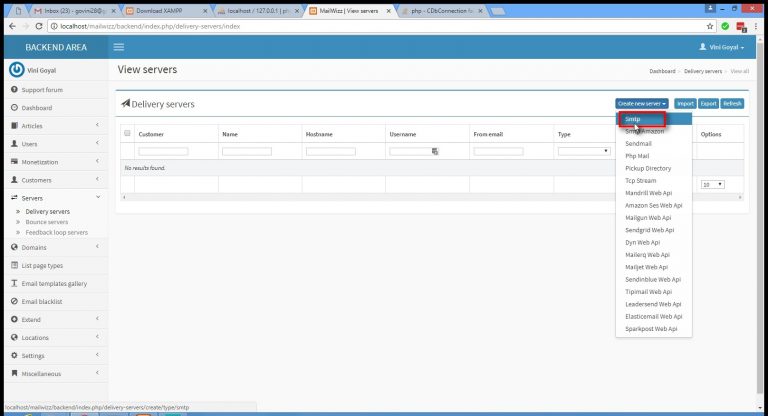
Note: In this tutorial we will be setting up MailGet SMTP to the Mailwizz account.
In the Create new server dropdown menu select SMTP option from the list.
Once you click on the SMTP, you will have to fill in all the necessary server details to create new delivery server.
All the important fields are –
Name: MailGet SMTP
Hostname: smtp.formget.com
Username: As given in your MailGet account.
Password: As given in your MailGet account.
Port: 2525
From E-mail: Your email address from which you will send the e-mail campaign.
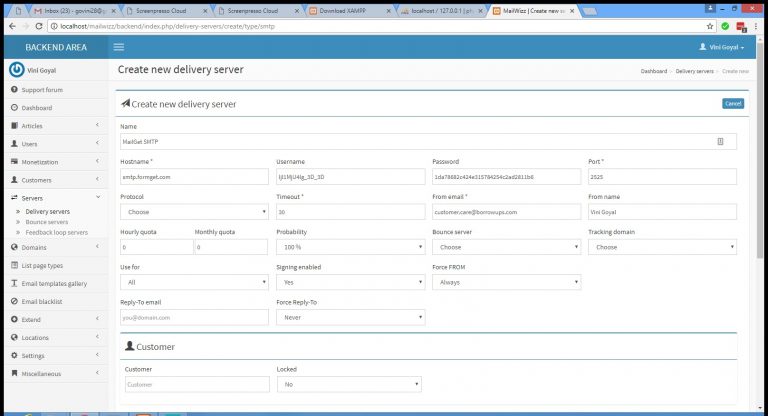
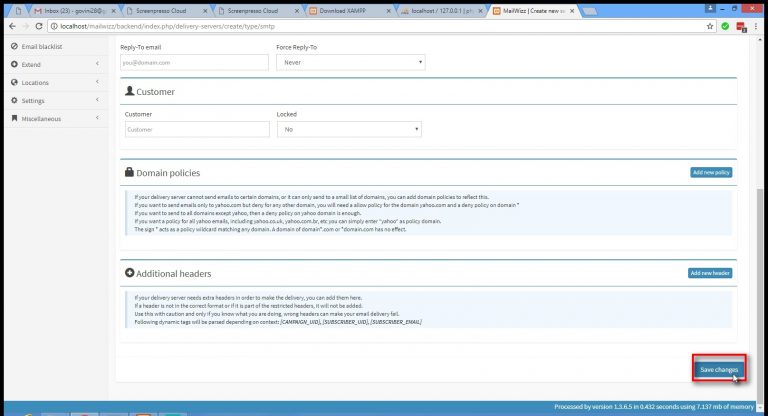
Once you fill-in all the details required, scroll down and click on the Save changes button on the bottom left corner.
Once all the server details are saves in your account, you will need to validate the server.
For that you have to enter your preferred E-mail address in the box provided and click on Validate Server.
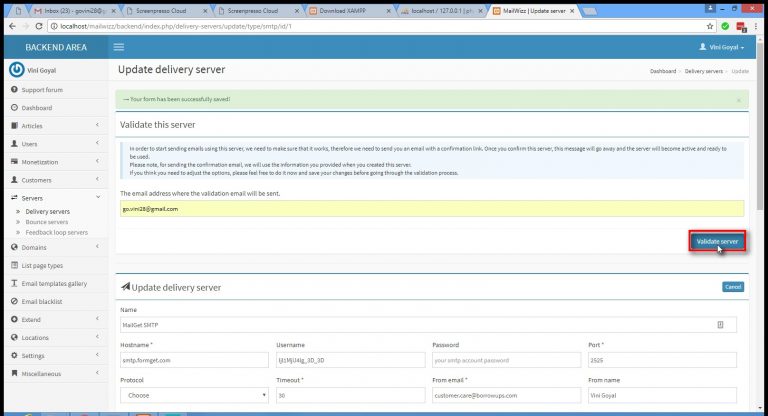
When you click on Validate Server, you will receive a confirmation e-mail to the E-mail address provide.
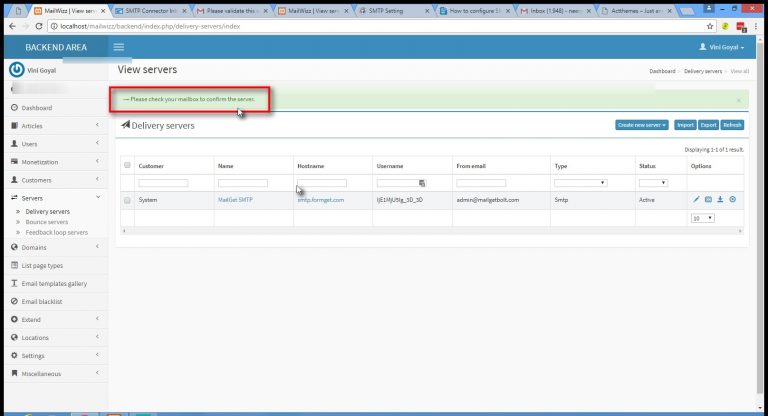
If you don’t receive any e-mail, check your server details again and make sure you have added correct details.
Open the e-mail received in your mailbox, and click on the confirmation link provided in blue.
Note: In case you do not receive email for sometime, check your spam folder as well.
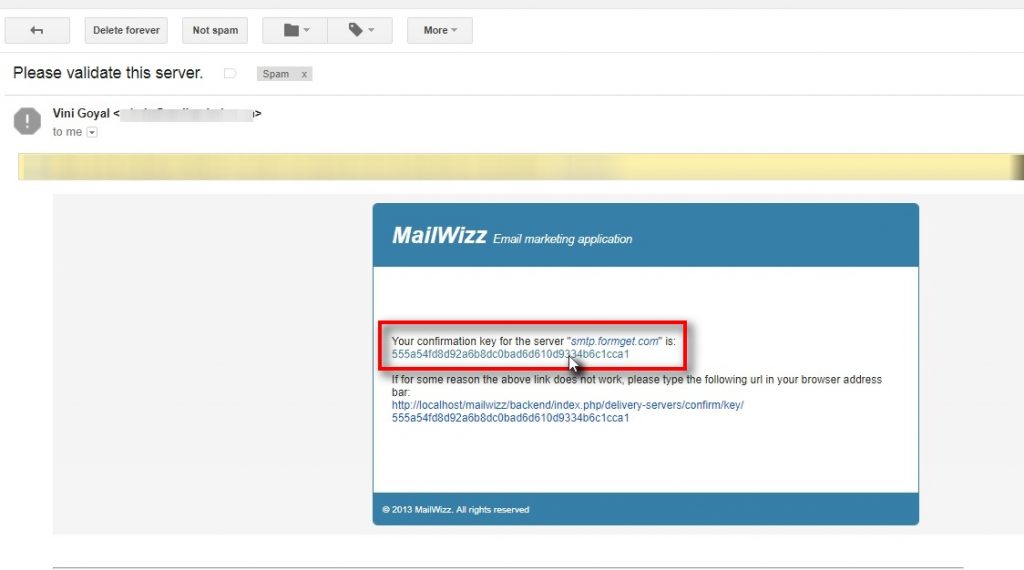
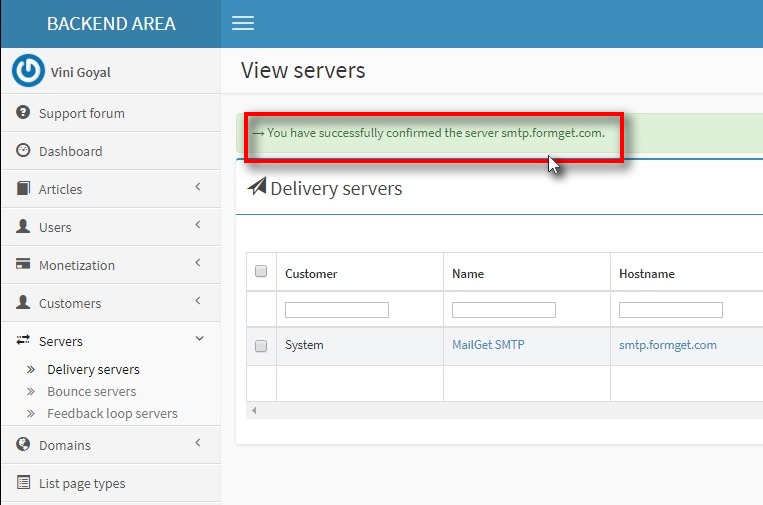
After clicking on the confirmation link in the mail, you will be redirected back to the MailWizz backend page.
The backend page should have a confirmation message – You have successfully confirmed the server smtp.formget.com .
7. Create E-mail list and campaign
The last part of our MailWizz account set-up that is from E-mail list creation to sending the first campaign is done from the Frontend of the application.
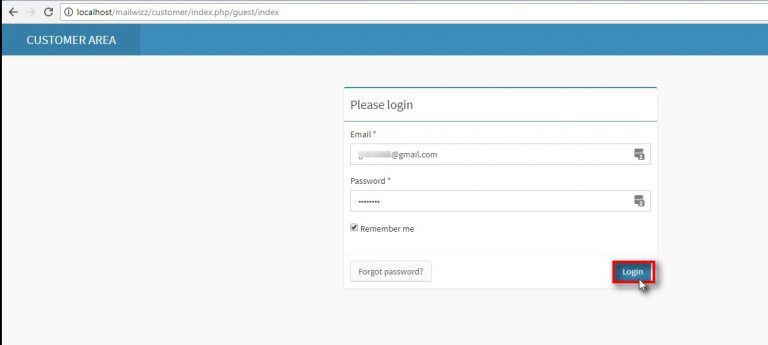
You can go to the Frontend of the application by –
Openning localhost/mailwizz/customer/ in your web browser.
Log in with your user credentials.
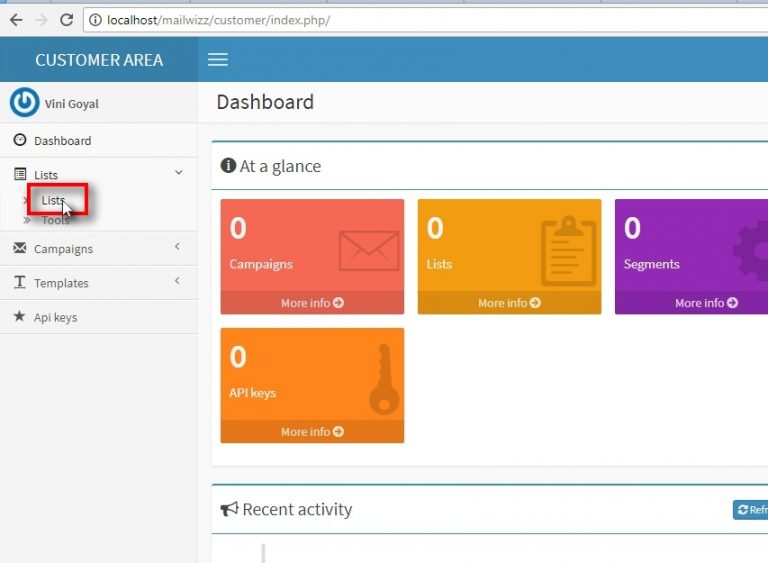
Once you are logged into the Frontend or the Customer Area, click on the Lists option from the menu on the left side of the screen.
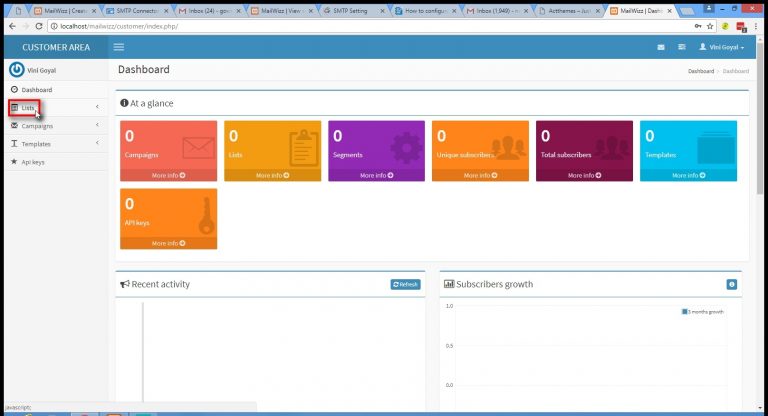
In the Lists dropdown menu select Lists option.
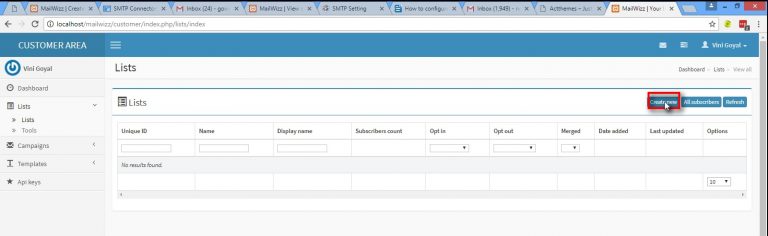
In the Lists section, click on Create new for creating new e-mail list.
Fill in all the required details like Name, Description etc.
Default details will be pre-populated form the account settings.
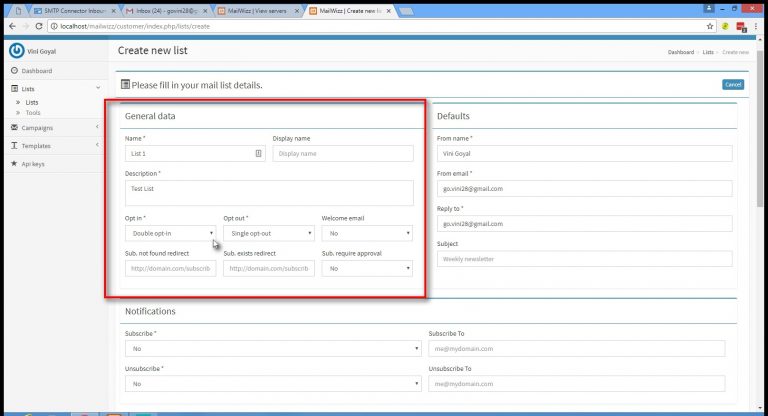
Fill in all the Company details like Name, Country in which your company is established, address.
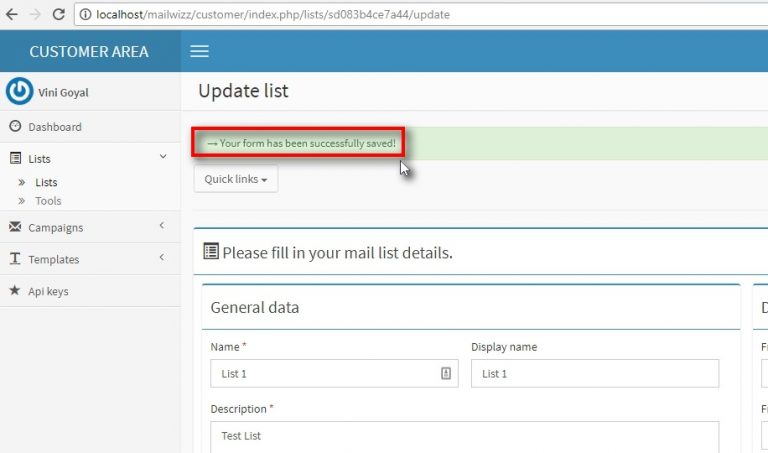
Once you have filled in all the details click on Save changes.
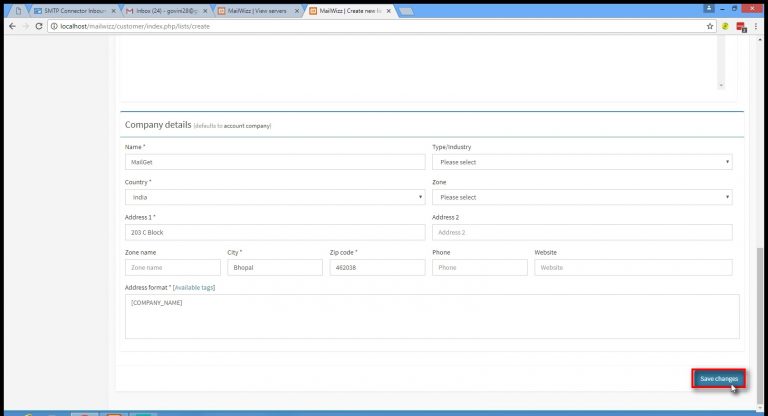
When all the details are correctly filled in the List form, you will receive a message “Your form has been successfully saved!“
To add subscribers to the list created earlier, click on the Lists in the menu on the left of the screen.
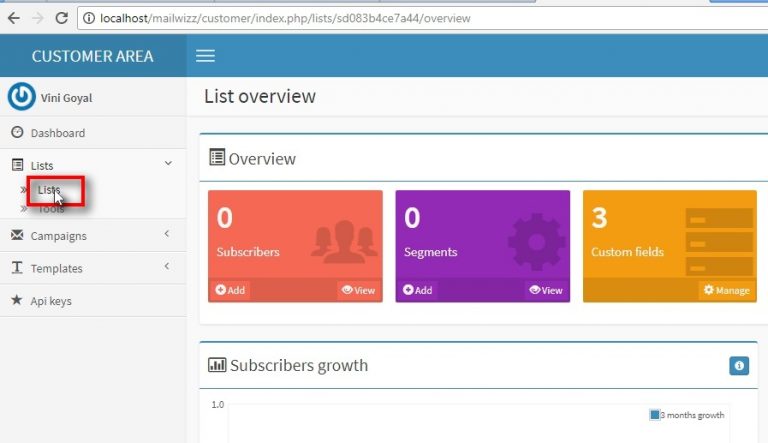
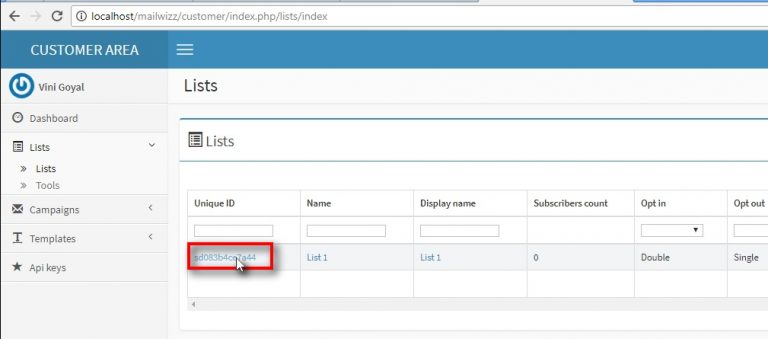
When you click on the lists, you will be redirected to page with the series of the list created earlier.
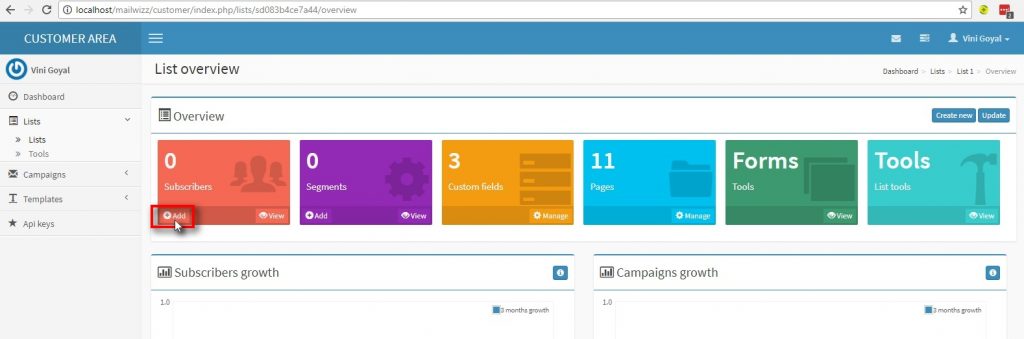
In the Lists section, open the list your created from the options.
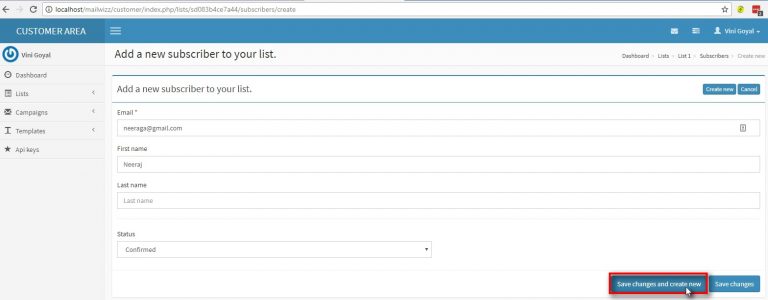
To add subscribers to the list, click on Add button in the Subscribers block.
When adding a new subscriber to your list, fill-in all the required details like First name, Last Name, Email and Status.
Note: Make sure to change the status to Confirmed .
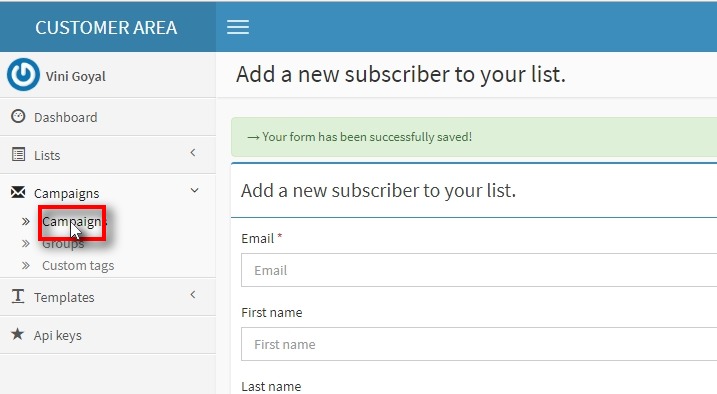
Once you successfully create your list and receive the message “Your form has been successfully saved!“, you are ready to send your first campaign.
Click on Campaigns from the Campaigns dropdown menu.
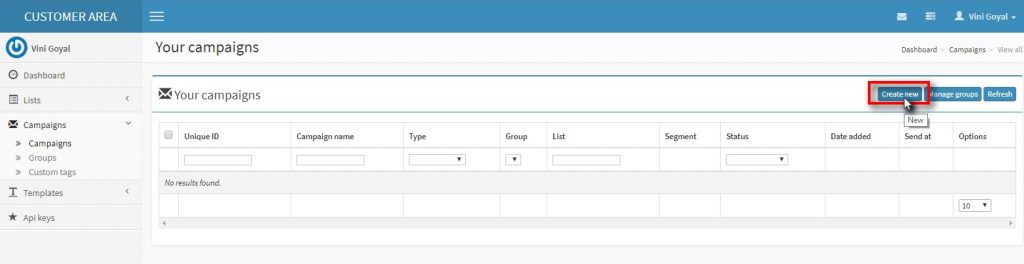
Once to reach to Your campaigns screen, Click on Create new to create a new campaign.
In Create new campaign, give the campaign your preferred name and select the list to which you want to send the campaign to.
After filling all the details click on Save and next to continue with sending your first email campaign.

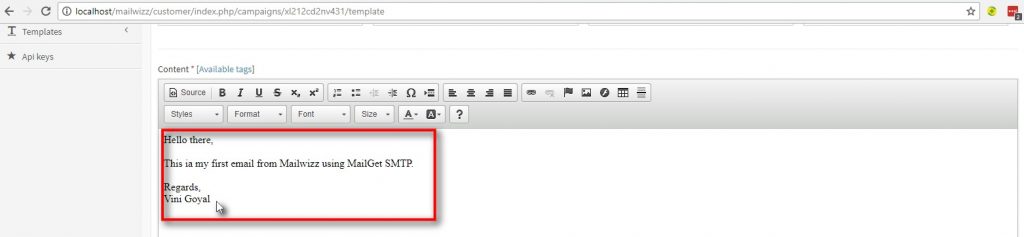
Once you have filled all the campaign details, you are all set to draft your campaign and send across your subscriber list.
Draft your e-mail campaign and click on Save and next button on the bottom left.
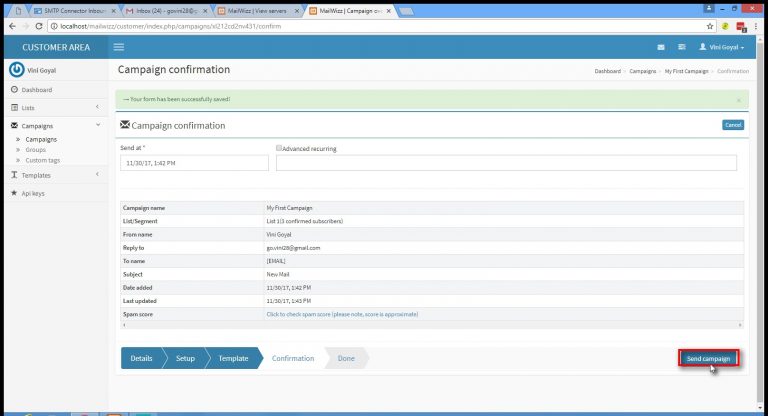
After saving the draft of the email campaign , you are redirected to a screen to check all the details like campaign name, List name, From name, etc.
Click on Send campaign to successfully send the campaign.
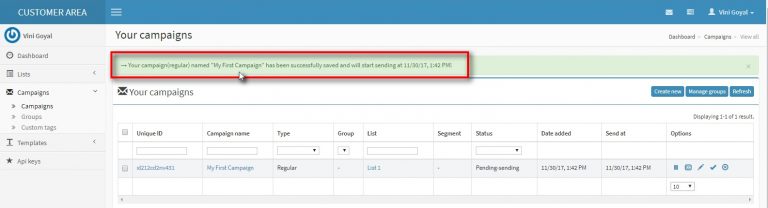
Once you have send the email campaign you will receive a message “Your campaign (Regular) named “My First Campaign(your campaign name)“has been saved and will start sending at 11/09, 1.22PM(Date and time scheduled by you)!”.
Congratulations!!! you have successfully created a MailWizz account, connected it to MailGet SMTP and send you first email campaign.
I hope our MailWizz Tutorial was helpful to you.
In addition to this you can also refer to other tutorials related to SMTP: