
Want to add a logo in your Google Forms?
Logos are an effortless and unique way to portray your brand or services in the market.
Generally, to enhance the business or to maintain customer relationships, companies/firms organize surveys. To make their surveys more honest and eye-catching they started using logos in their forms too. It spreads security and reassurance of your brand which makes your organization good for the long haul.
Why use Google Forms over other form builders?
One of the biggest reasons is that Google Forms is a free tool that empowers you to create beautiful online forms like survey forms, feedback forms, and much more. Furthermore, it offers you pre-designed templates where you will find an option for adding a logo or image in the header or in the form itself.
In spite of numerous advantages, Google Forms might not be the most suitable one for your use due to some of its limitations.
Restriction of Google Forms with Logo Image
- The insertion of a header image demands certain requirements to fit in forms.
- Other than this, the customization options are limited like you can’t change the background color of the header.
- Also, it doesn’t provide any option to insert the URL in the logo image.
Other things that upset most of the creative users that Google Forms is so ordinary and offers very basic functionalities. For business owners who wants to allure their customer using the same, the interface is quite unprofessional.
So if you are looking for a simple and effective alternative of Google Forms, we have one for you named Pabbly Form Builder. It fulfills all the limitations of Google Forms that are mentioned above. Along with this, it offers advanced features like unlimited file upload, payment options, submissions and much more.
If you are looking for a way to add a logo in your forms then give it a read.
Process of inserting a logo in Google Forms.
There are two ways to insert the logo in Google Forms.
1. How to insert a logo in the header of your Google Forms?
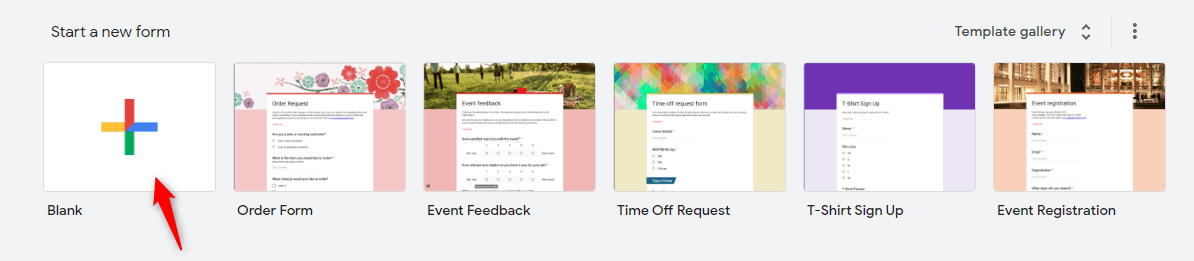
Step 1: The first thing all you have to do is to open Google Forms. Select the ‘Blank’ form or you can also use pre-designed templates.
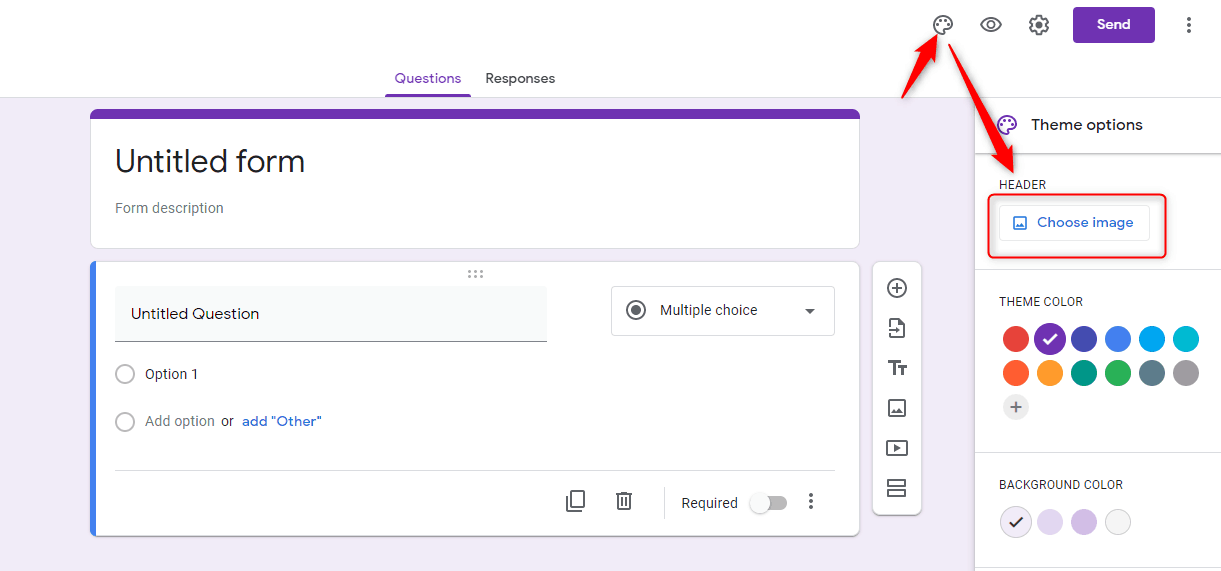
Step 2: After doing that, you have to click on a color palette button appear on the top right corner and thereby clicking on the ‘Choose image’ option.
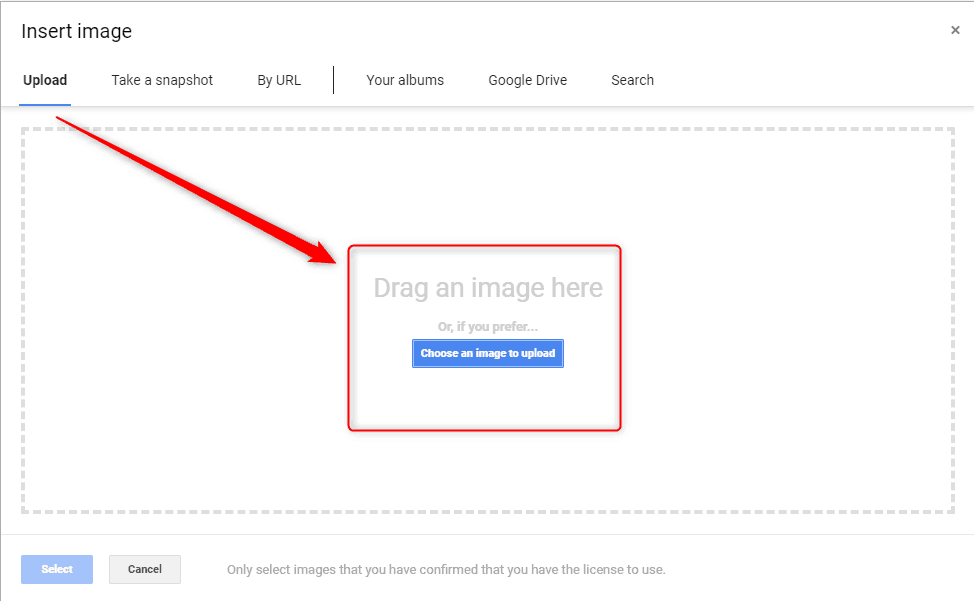
Step 3: Further, click on the ‘Upload photos’ which will offer you the option of ‘Drag a photo here’ or ‘Select a photo from your computer’.
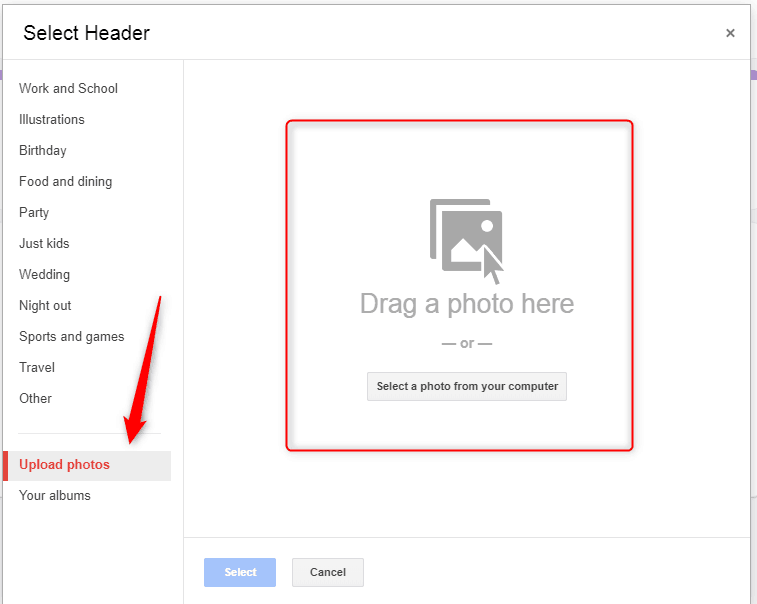
However, the size of the image must follow the criterion which is at least 200 pixels tall and 800 pixels wide.
2. How to insert a logo into the Google Forms itself?
Step 1: To insert a logo into the forms you have to click on the image icon showing on the right side.
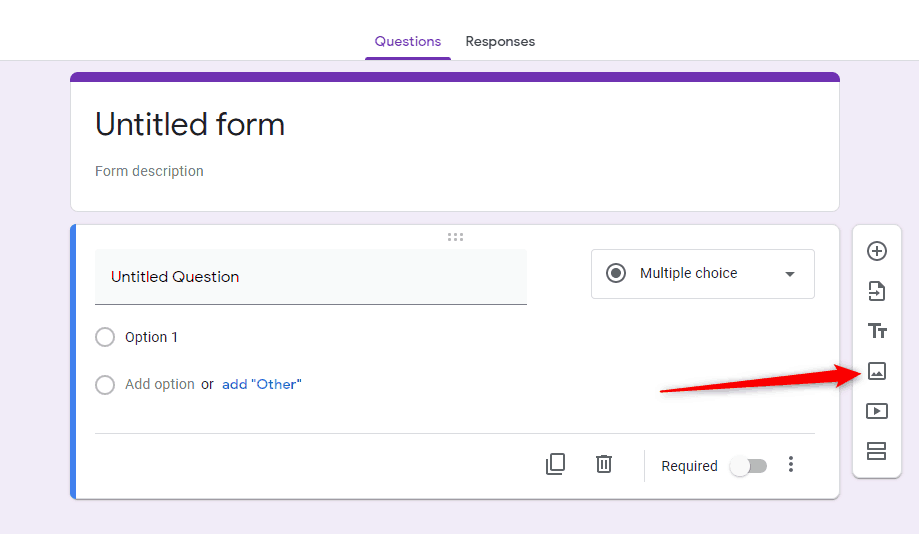
Step 2: Further, insert an image by clicking on the ‘Upload’ option.
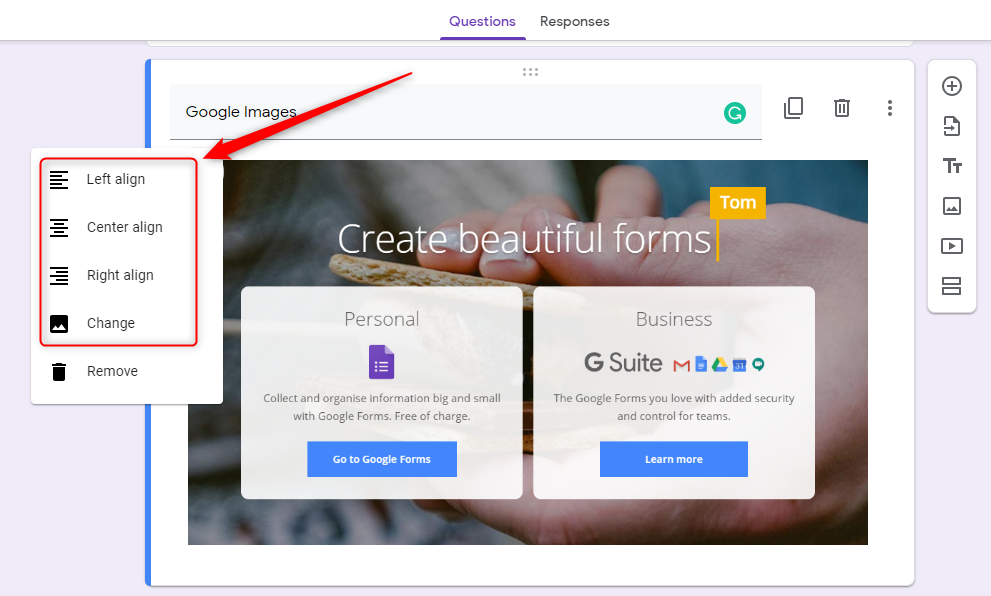
Step 3: Align the image accordingly.
As discussed earlier the best suitable alternative of Google Forms which doesn’t restrict you on features and allow you to create forms without any trouble. Certainly, for those who have vast needs and looking for an easy way out.
Let’s cast some lights on the Question, how one can insert the logo using Pabbly Form Builder?
The software offers two different ways of inserting a logo image in a form.
1. How to insert a logo in the header via Pabbly Form Builder?
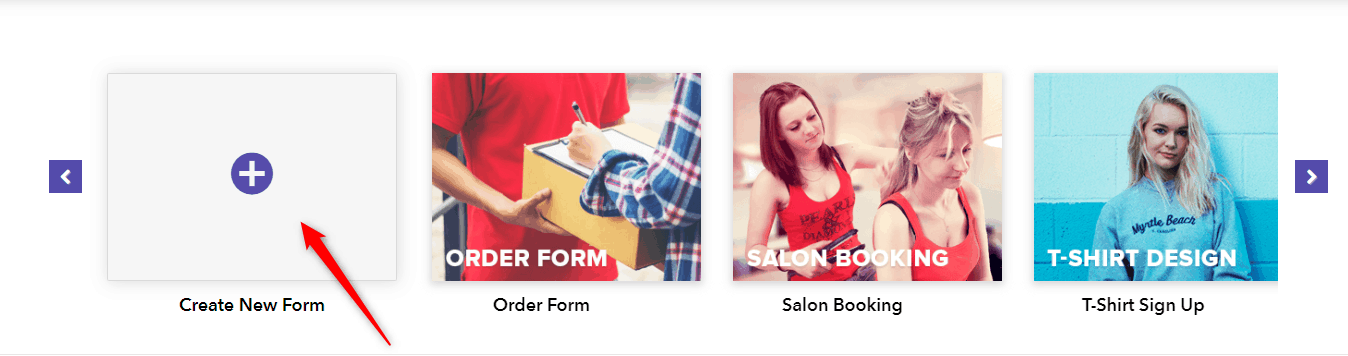
Step 1: Start working on your form by signing in to your Pabbly Form Builder account. Thereby clicking on ‘Create New Form’ or you can use pre-designed templates too.
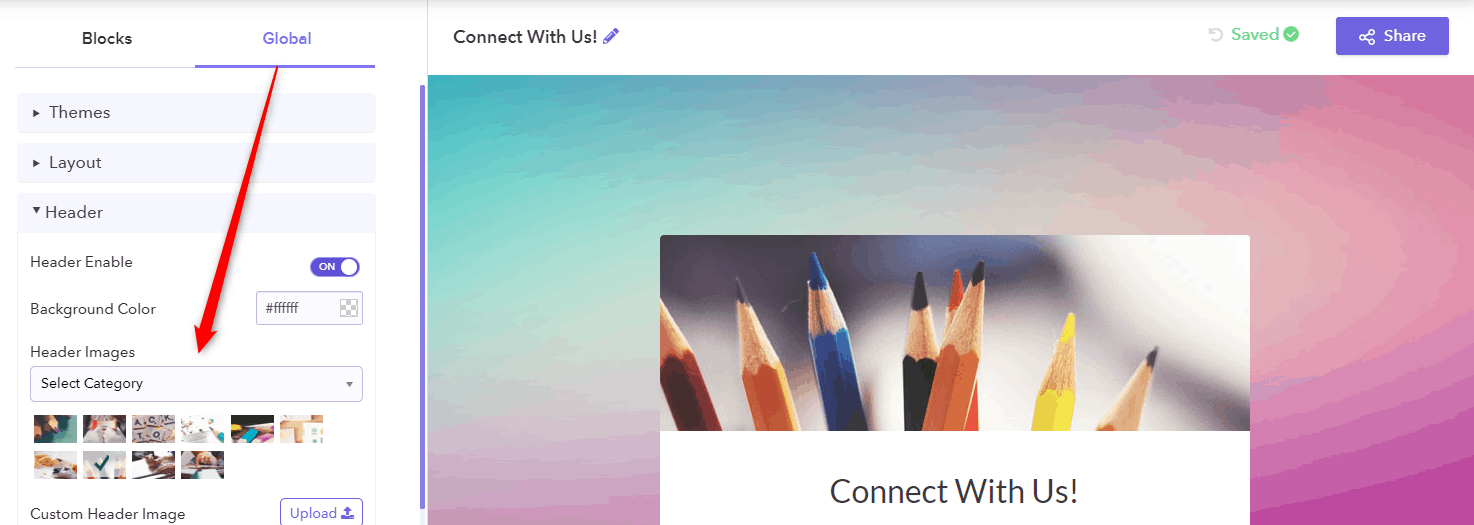
Step 2: Design your template accordingly. To add a logo in the header, you have to click on the ‘Global’ option. Further, click on the ‘Header’. Here you can add your custom image by clicking on option ‘upload’.
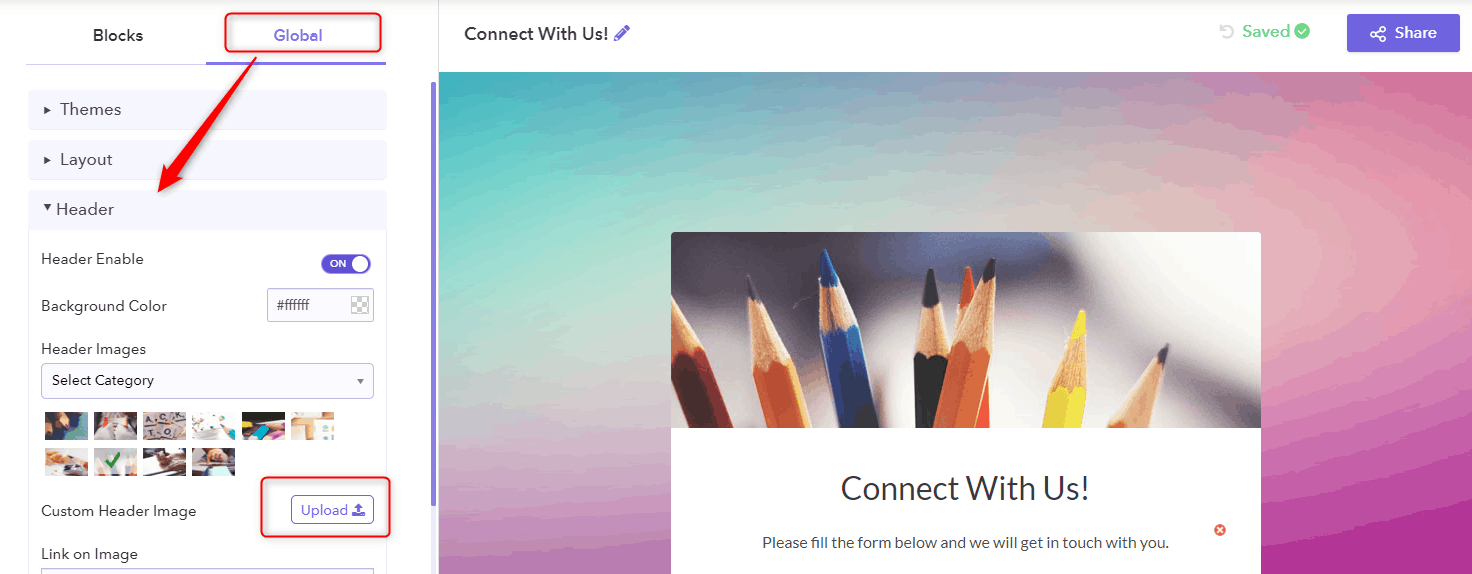
Additionally, it also lets you attach the URL to your custom image which Google Forms restricts.
Step 3: Also, you can choose an inbuilt image by clicking on the ‘Select Category’. Here you will find different categories according to your form.
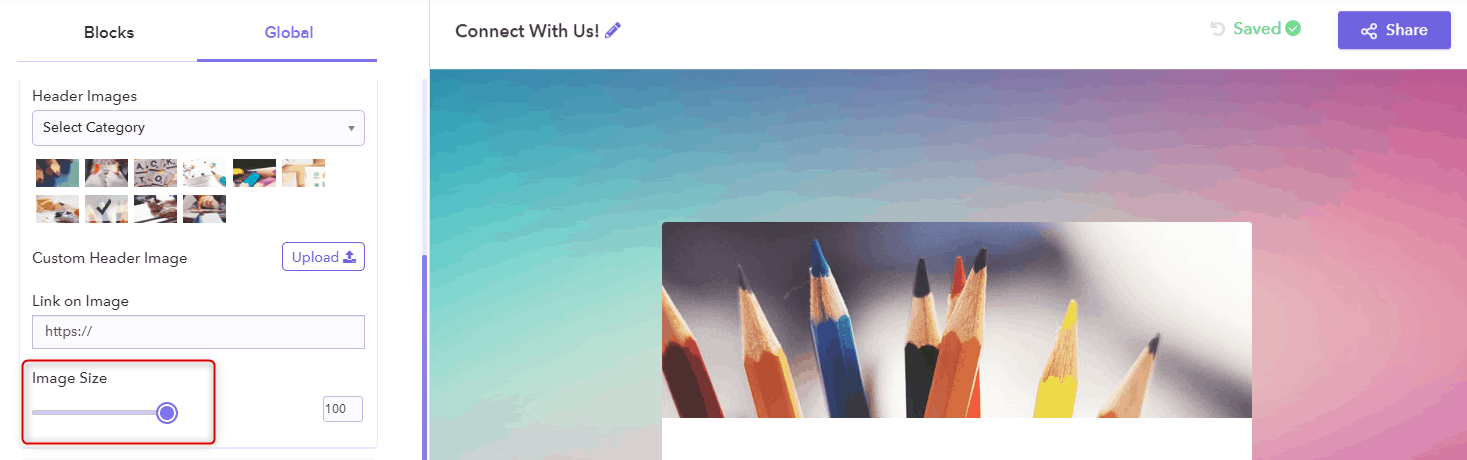
Step 4: Besides, you can resize your image by simply sliding on the ‘Image Size’ option.
2. How to insert a logo in the form itself via Pabbly Form Builder?
Step 1: You can easily insert the logo into your form by clicking on Blocks options.
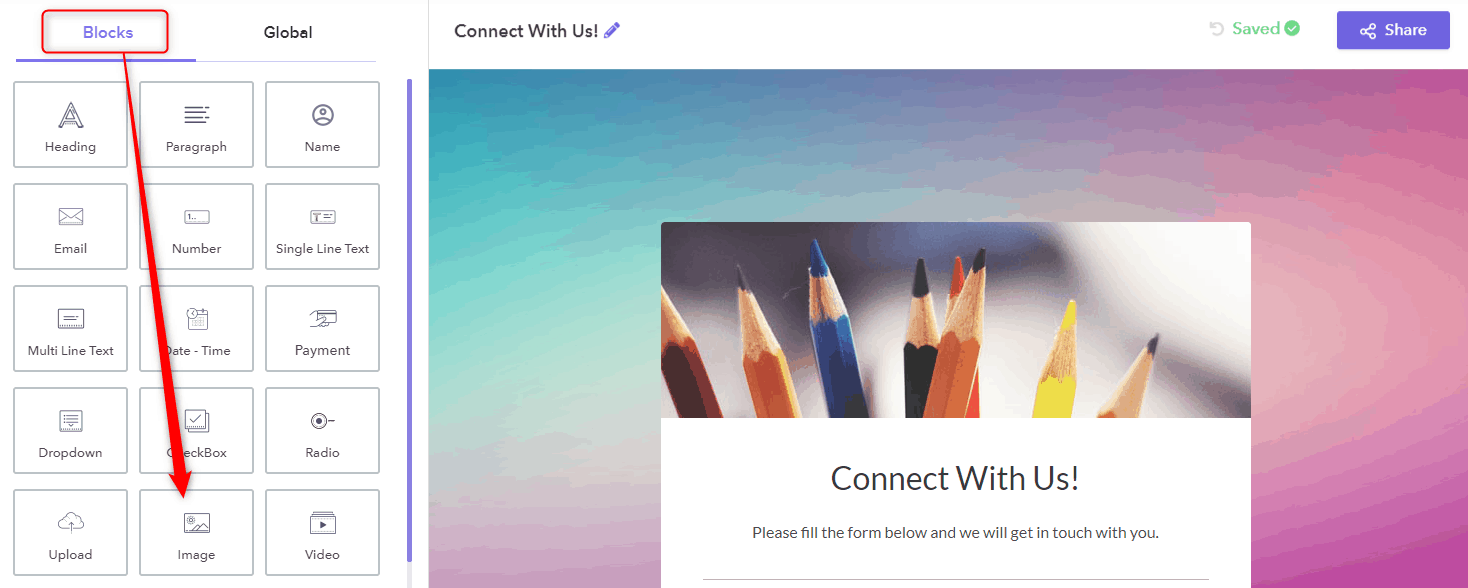
Step 2: Further, clicking on the ‘Image’ icon in the Block field. Here already assigned image will appear which you can change by clicking on the ‘Upload’ option. Also, you can connect the URL in an image too.
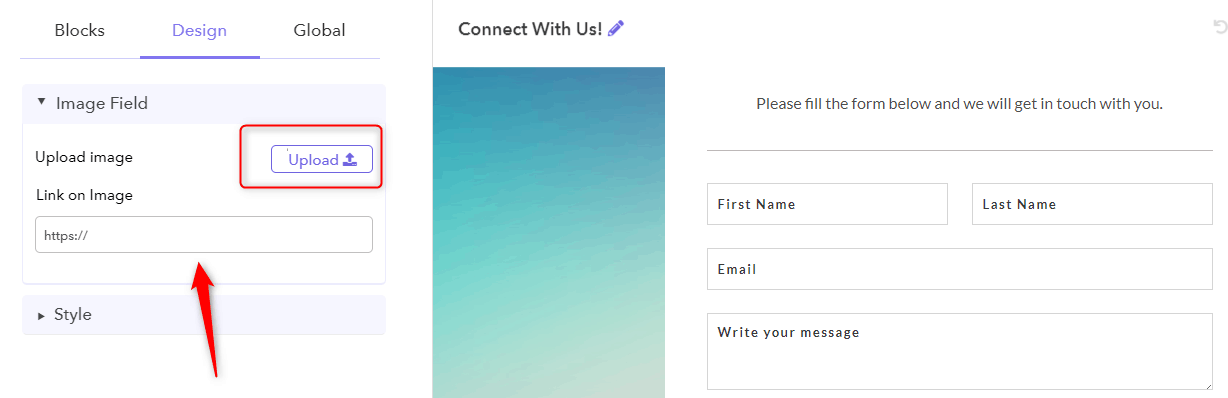
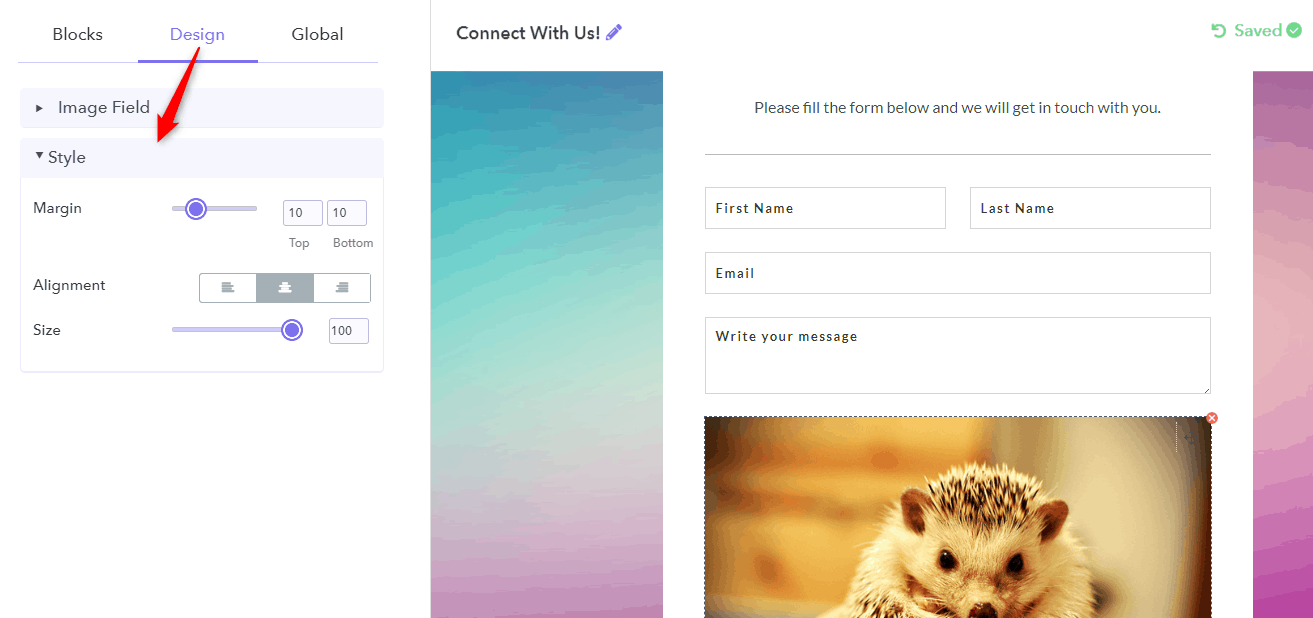
Step 3: Moreover, the ‘Style’ option makes the resizing of the image handier.
Unquestionably, in Pabbly Form Builder, there are a plethora of features and can go with every customer’s needs. All you have to do is drag and drop and voila your form is ready within a couple of minutes.
Conclusion
That’s all, follow the above-mentioned steps and you are more than ready to go. We are hoping that this tutorial will help to clear your confusion about the same.
No doubt Google Forms is free and provides most of the features but there is no denial in a fact that the forms created are so general and outdated.
Whereas Pabbly Form Builder fills that void by being the handiest and creative form building tool in the market.
Other than this, it also allows you to explore the platform by offering a free trial.
So what are you waiting for? Go and try your hands on the software and I know for sure you will be amazed by its features.
Let us know your views in the comment section.
For further information, you may also like to read: