

We all know that Google Forms is one of the best tool for creating forms. But, many people didn’t like their branding at the header and bottom of the forms i.e “Powered by Google Forms” or “Create your own Google Forms”.
Form branding is something that exhibits your organization’s uniqueness. It is a very important factor to promote your business because it makes a memorable impression on consumers.
As an entrepreneur, you can differentiate yourself from competitors by reinforcing your brand in forms but unfortunately, Google Forms doesn’t allow you to remove branding from forms.
Therefore, considering its limitation I would recommend Pabbly Form Builder that allows you to change the form branding.
It would be awesome if you could remove branding text & customize the appearance of the form according to your website’s theme.
Customize The Branding Of Your Form With Google Forms Alternatives
Make your brand recognizable across several channels including web pages, emails, online forms, etc. with Google Forms alternative named Pabbly Form Builder. It not only helps you to express a unique identity among competitors but also makes a strong impact on your clients.
Furthermore, it is the only form builder that doesn’t restrict you on features like unlimited form submissions, payment collection and many more.
Let’s take a look at some of the closet features that it offers to customize the branding:
- Using Pabbly Form Builder, you can easily add your company’s brand image/logo to the header section of the form.
- In addition, you can change the header image of your form by choosing the upload option.
- You can also attach hyperlinks to the branding image for redirecting the users to your website.
- Display your brand name on a thank you page message, which appears after submitting the form. It will increase your sales and spread brand awareness.
- Get more leads and people’s attention by adding the brand image/logo into your email signature.
Now, Let’s See How To Customize The Branding Of A Form Via Pabbly Form Builder:
Pabbly Form Builder not only allows you to add the brand image in forms header but also allows you to add the brand image in thank you page and email signature.
1. Add Brand Image In Form’s Header
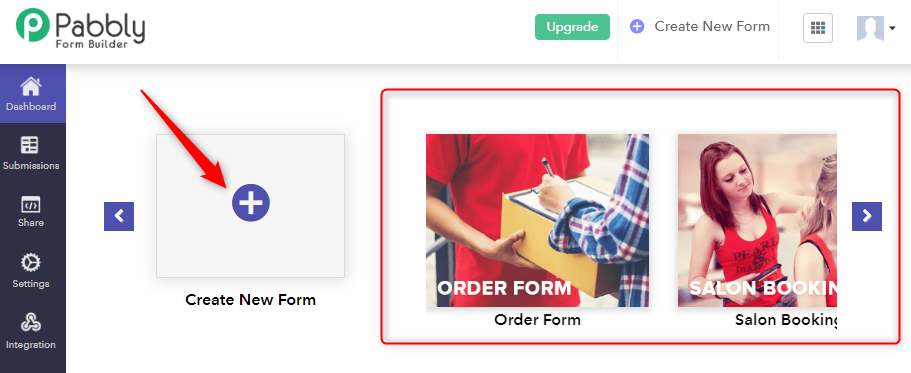
Step 1: Create/Select Your Form
After signing into your Pabbly Form Builder account, you can create your new form or choose the pre-defined templates from the dashboard.
Step 2: Select Header Option
Now, select the header part of your form where you find the multiple options such as header image, custom header image, link on the image, etc. From here, you can change the brand image and insert the logo of your business or company.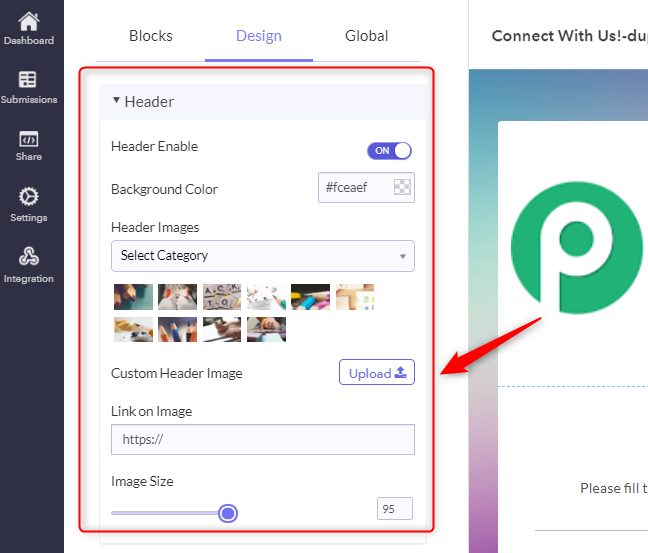
Step 3: Image Customization Option
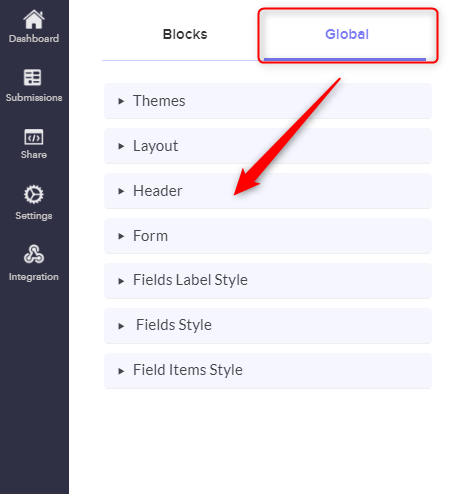
After adding the logo, you can customize its design and size accordingly. Now all you have to do is, click on the ‘Global’ option and find the desired field from the menu.
2. Add A Logo To Your Autoresponder Emails
Step 1: Go To Settings Option
You can also add the logo of your company in the autoresponder emails as an email signature. Just go to the “Setting” option then click on the “Autoresponders” tab. Here, you can customize the content for email notifications and add the logo of your brand to create a consistent image on the clients.
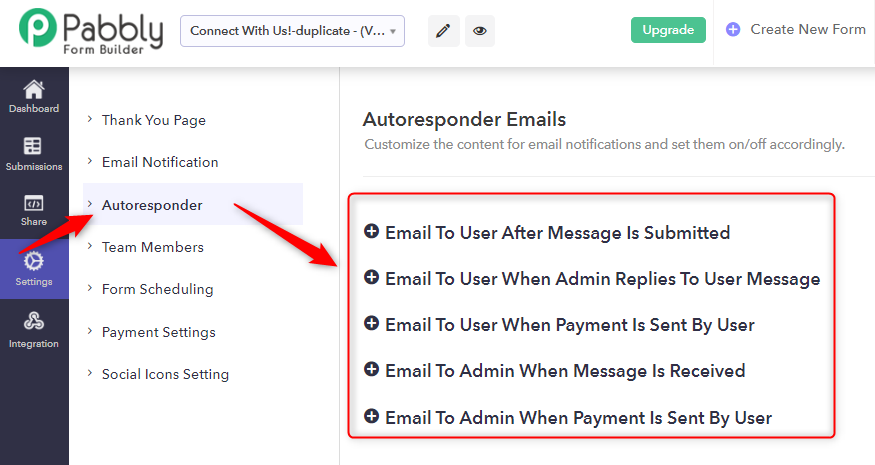
Step 2: Upload The Image In Autoresponder Emails
Now, click on any of the mentioned options of “Autoresponder Emails” where you will get multiple options of email customization. Further, go to the “Type Your Message Here” section and upload the image of your brand with message.
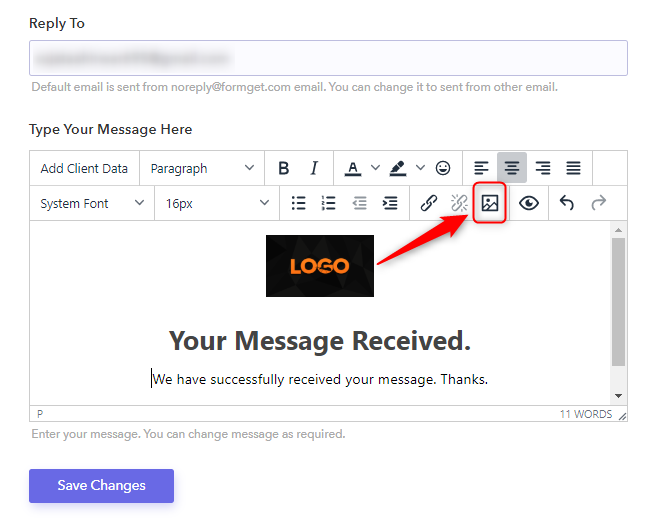
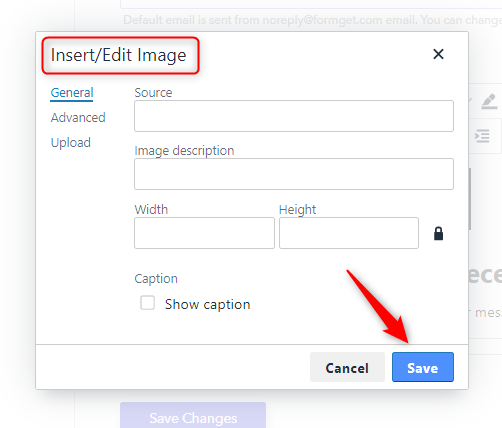
Step 3: Insert/Edit Image
After uploading the image you can edit the image, set the border width, style, horizontal & vertical space, and enable/disable caption option.
Save all the settings and your branding is ready to create trust in your target market.
3. Add Brand Image On Thank You Page
Step 1: Thank You Page Option
Go to the “Thank You Page” option and edit the form submission message for adding the brand image.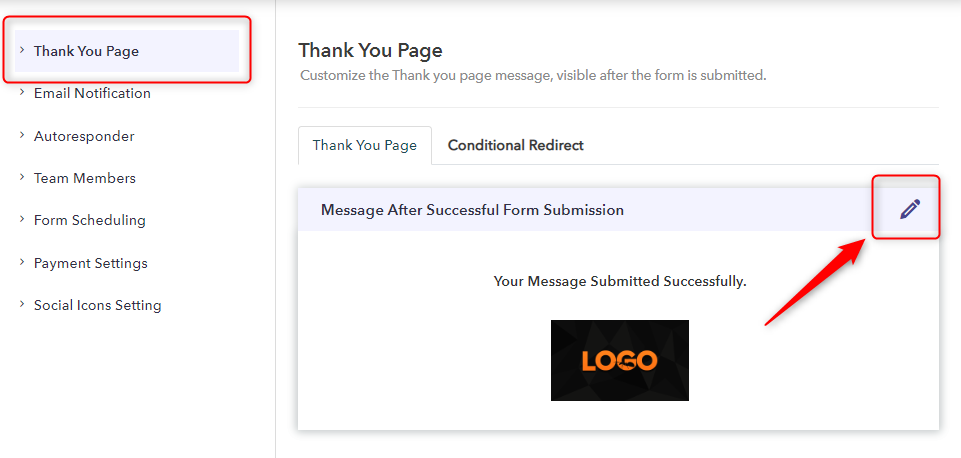
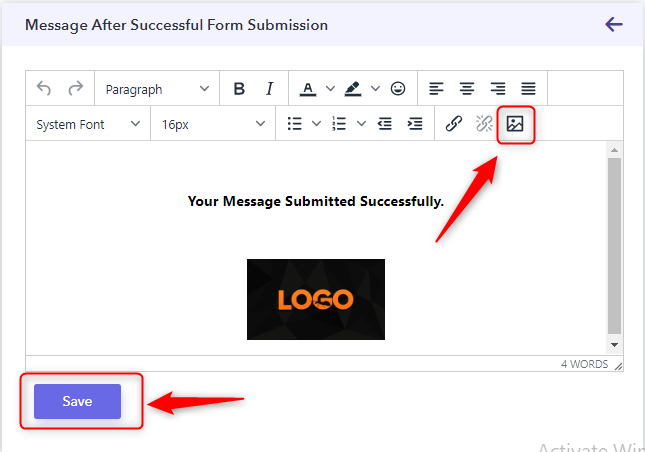
Step 2: Upload Image & Save
Now, upload the image by clicking on the image icon and save the settings.
That it! Now you can share your form with your customers and leave the first impression on their mind with brand image.
Conclusion
Remember, images make a quick impression on our brains than text, so images and graphics are the first thing that visitors notice. Therefore, it is important to show your brand on the thank you page and email responses because it helps to build a trusting relationship with customers.
Unfortunately, you cannot remove the Google Forms branding. That is why we are discussing about the Pabbly Form Builder, it not only allows you to remove the branding from the forms but also allows you to add the brand image to emails and thank you pages. So that, you can quickly build your audience and increase online business in the bigger picture.