
MailGet Bolt is an email marketing service for sending bulk emails to all your subscribers. Here, you can simply add your sender email address, verify it and then, can start sending emails.
With MailGet Bolt, email sending is quick, easy and cheap. It allows you to create newsletters with just few click and then you can send to your audience right away with getting the best inbox deliverability rate.
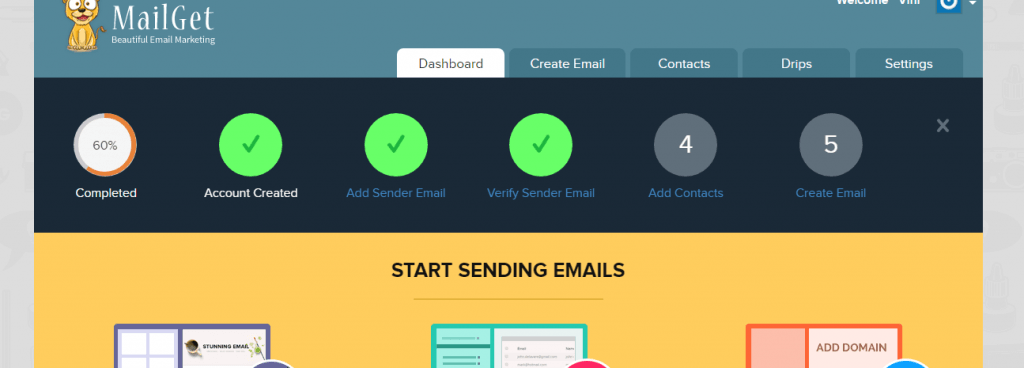
You can now set up your MailGet Bolt account, just by following the below steps –
STEP 1: CREATE A NEW ACCOUNT
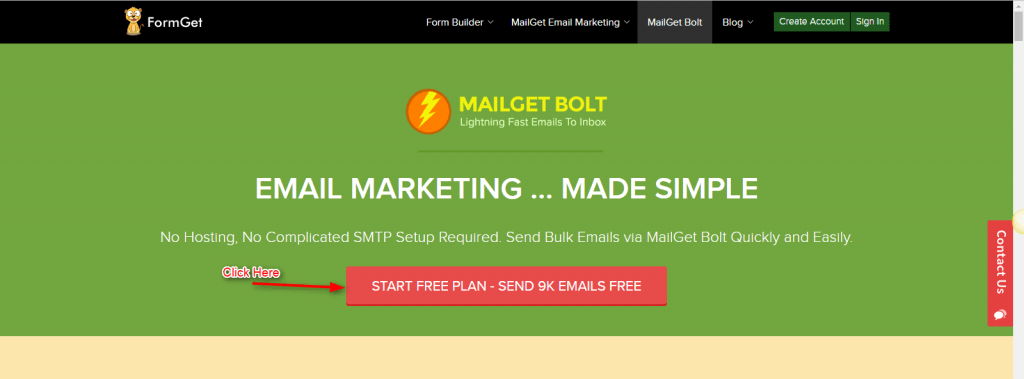
- Go to MailGet Bolt and click on the red tab- “START FREE PLAN- SEND 9K EMAILS FREE“.
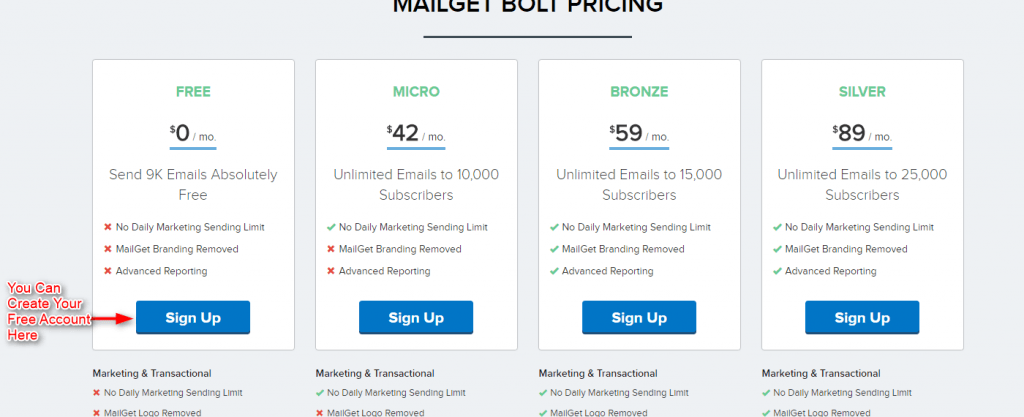
Select the suitable plan from the options provided and click on “Sign Up” Button.
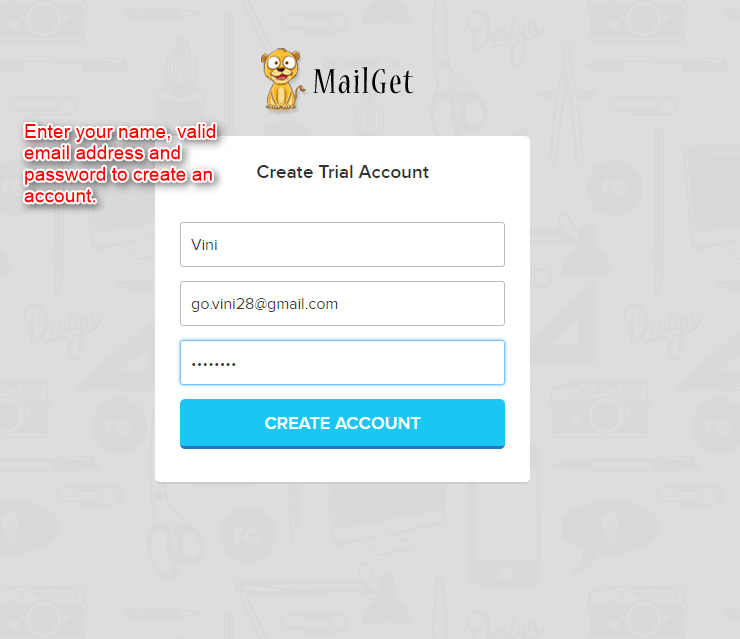
- Enter your Name, valid Email address and a Password in the text boxes and create your account with MailGet Bolt.
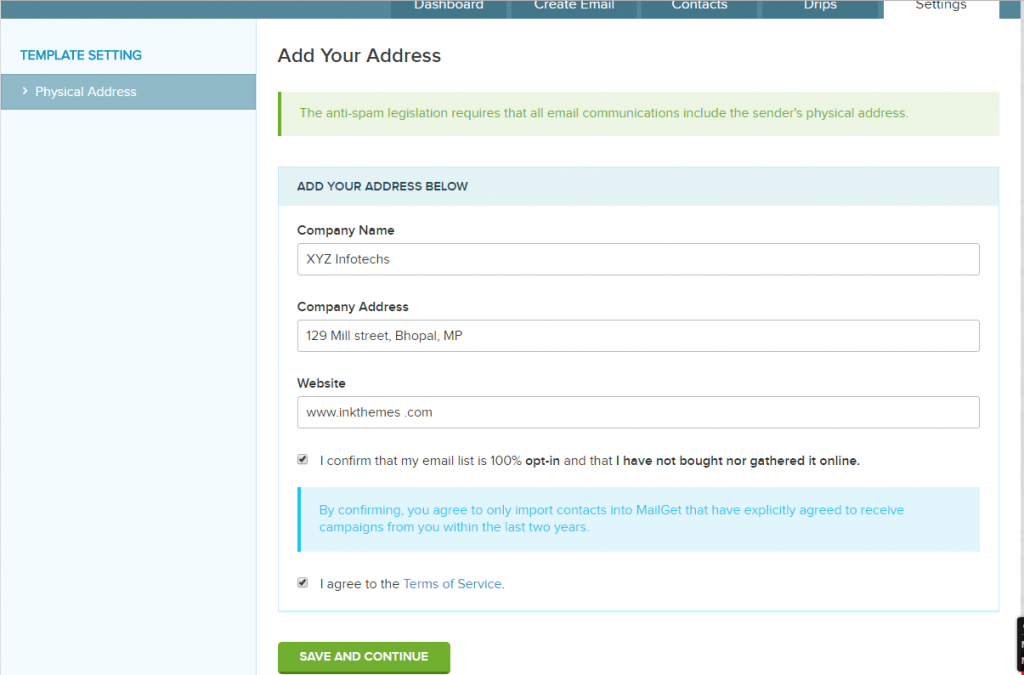
- Fill in your Physical Address Details and select the check boxes to confirm to the terms and conditions.
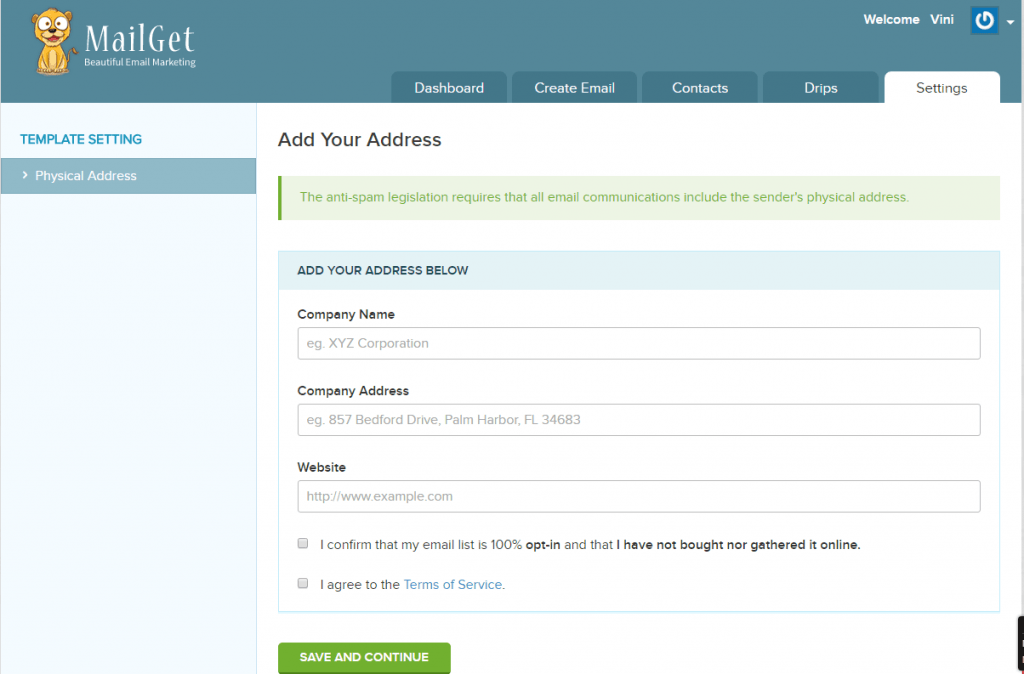
- Click on “SAVE AND CONTINUE ” Button, to save your address details.
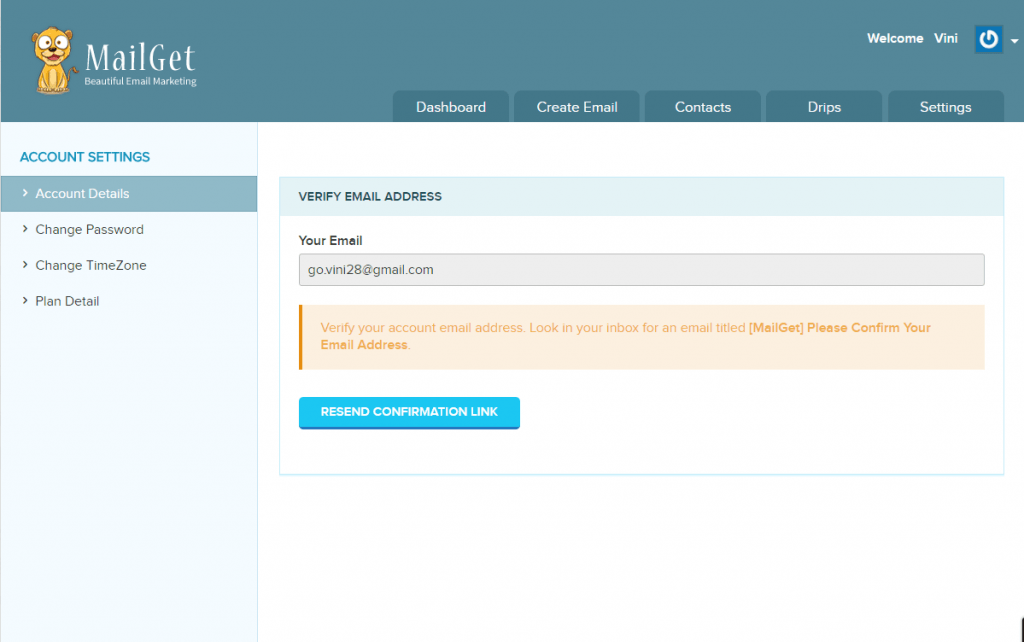
- You will receive a mail with a confirmation link at your email ID, that you mentioned at the time of Sign Up. And incase, if you do not receive any email click on the “RESEND CONFIRMATION LINK” as shown on the screenshot below.
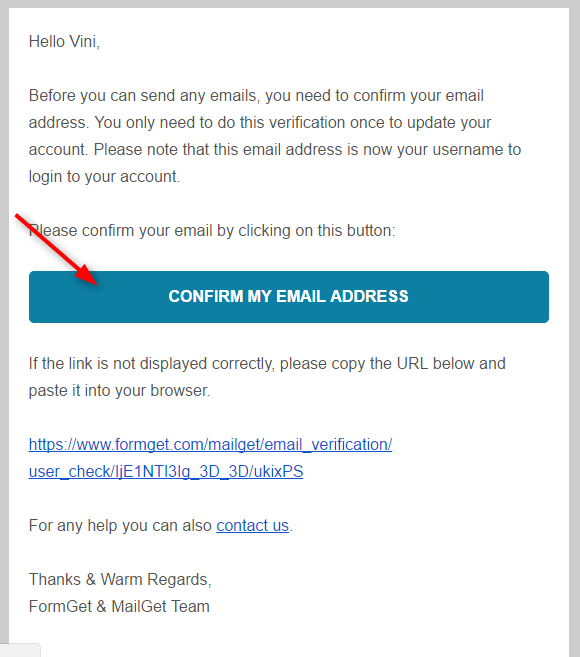
- Click on the link in the email and confirm your email address.
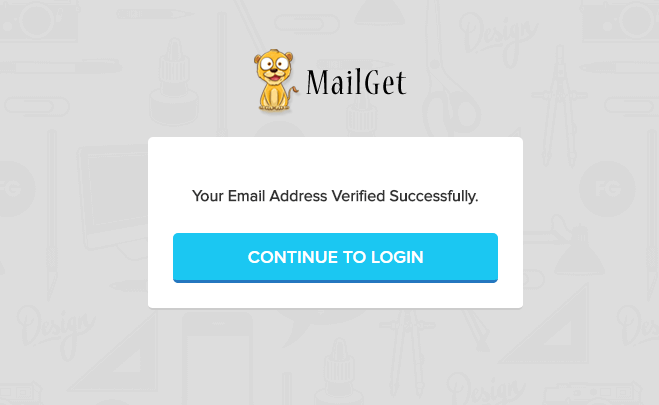
- Click on “CONTINUE TO LOGIN” to complete your account set up process.
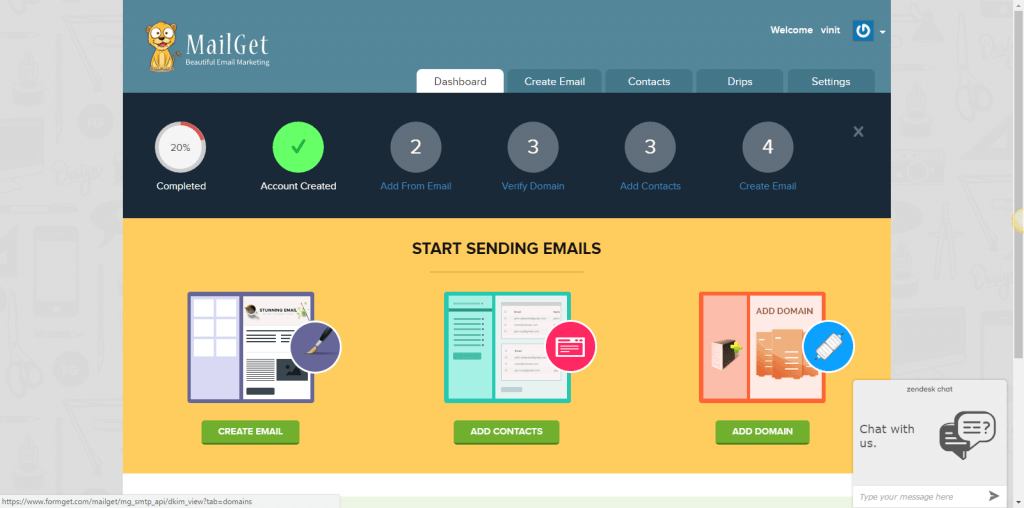
STEP 2: VERIFY SENDER’S EMAIL ADDRESS/DOMAIN
- Click on Step 2 in as shown in the screenshot below-
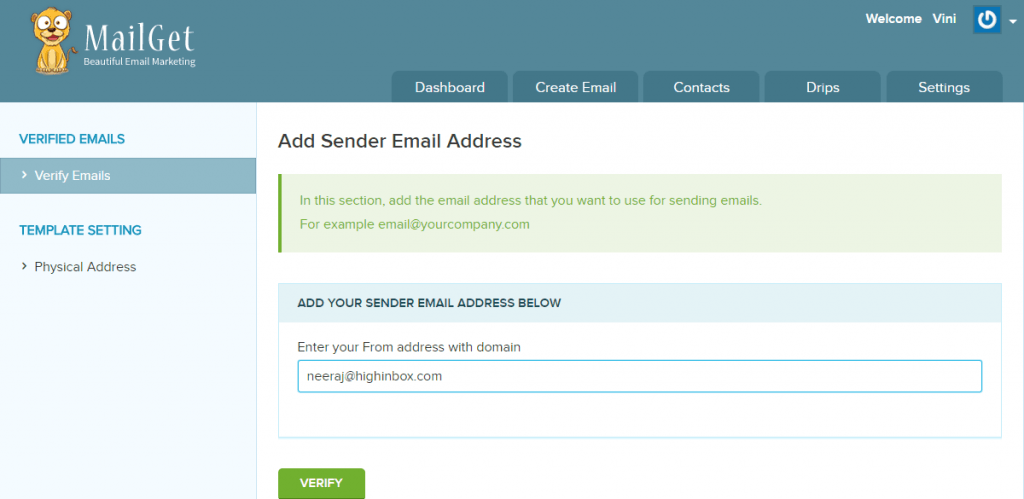
- Enter a valid Sender email address in the text box and select “Verify“.
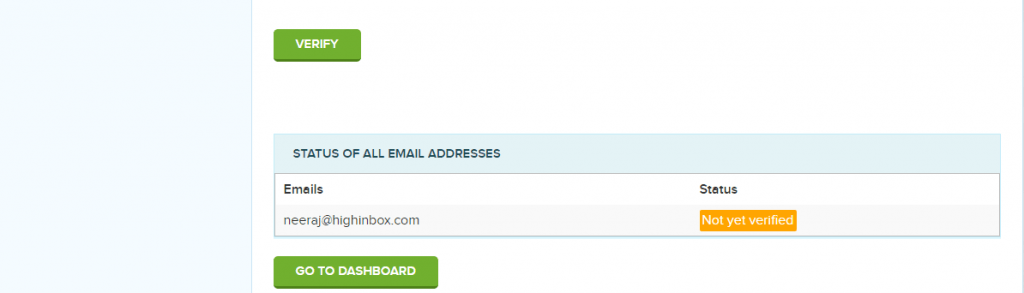
- Your status will change to “Not Yet Verified“.
- You will receive a verification email on your sender email address. Click on the verification link in the mail and verify your sender EMAIL Address /Domain.

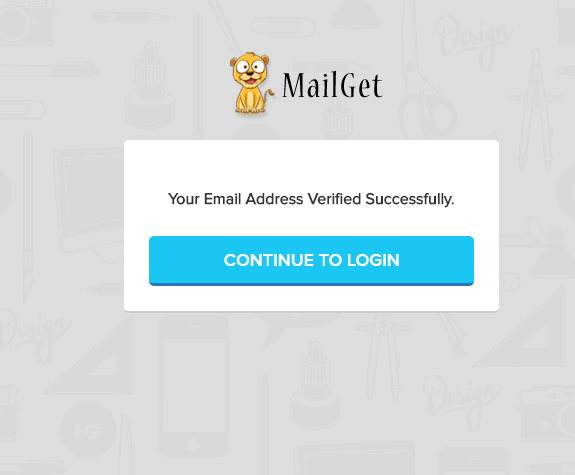
- Once, you click on the link in the email, your Sender email will be verified and you will be directed to the successful message. Click on “Continue To Login” Button.
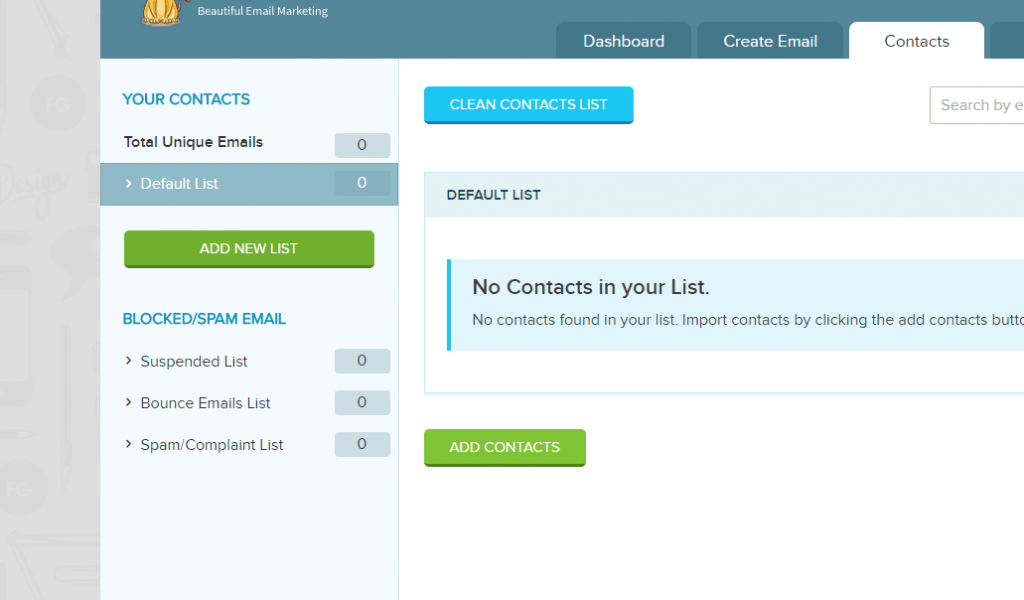
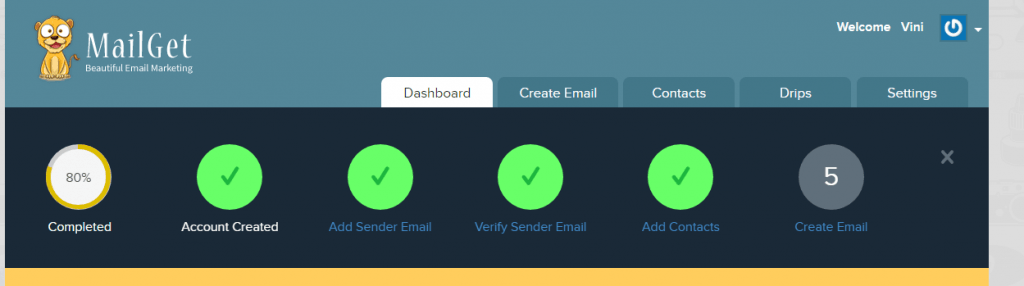
STEP 3: ADD CONTACTS
Click on the Step 4 in the screenshot shown below to Add new contacts to your account to send emails to.
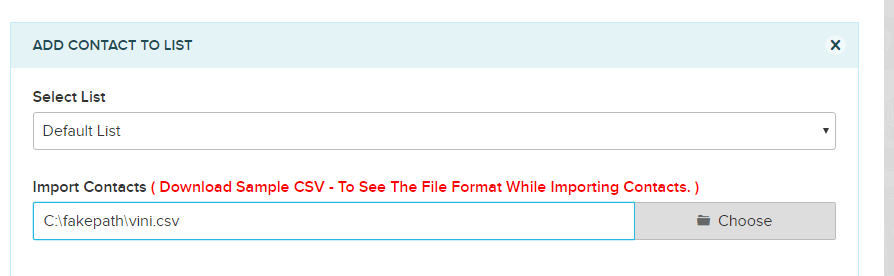
- Click on “ADD CONTACTS” to add new contacts.
- Upload your contacts as CSV file or by directly entering them in the text box provided.
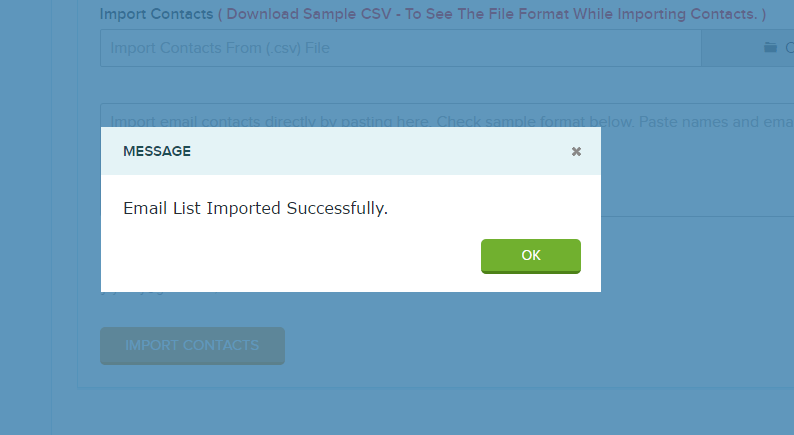
- Once the upload is successful. You will get the successful message on the screen.
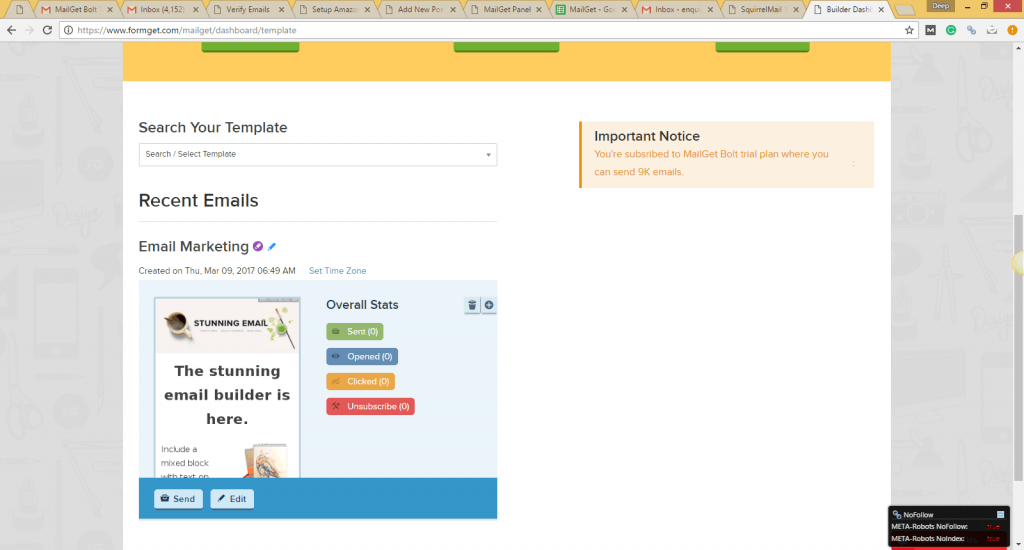
STEP 4: CREATE EMAIL
- Click on Step 5 to create your email.
- Select the type of campaign you want to send email in.
Regular Campaign – To send bulk emails once to a group of contacts.
Drip Campaign – In Drip Campaign you can schedule your emails , and send them accordingly. For example – If you send an email to any contact today and you need to send him/her a reminder 2 days after sending the 1st mail, you can use Drip Campaign and send emails at regular intervals of time.
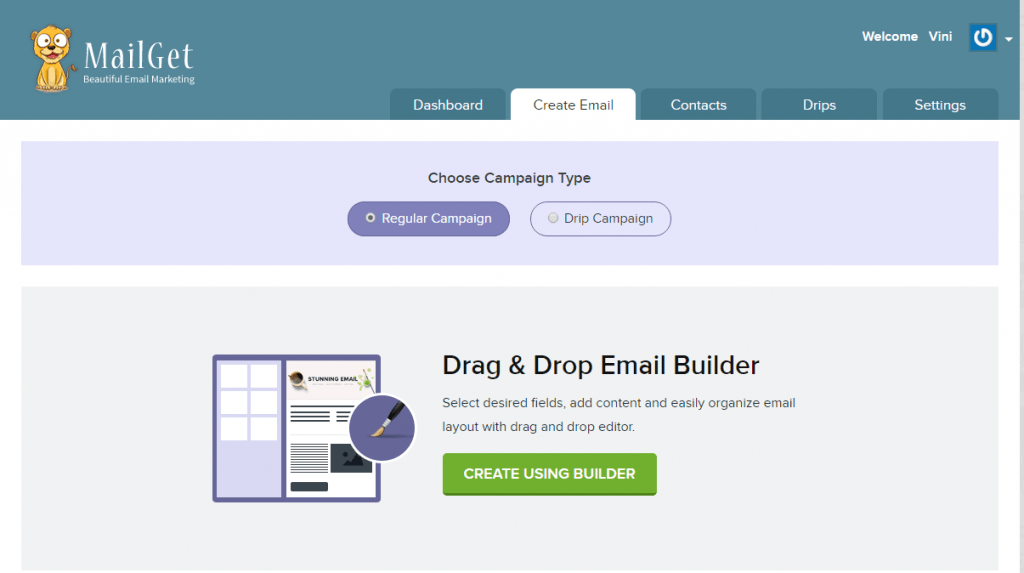
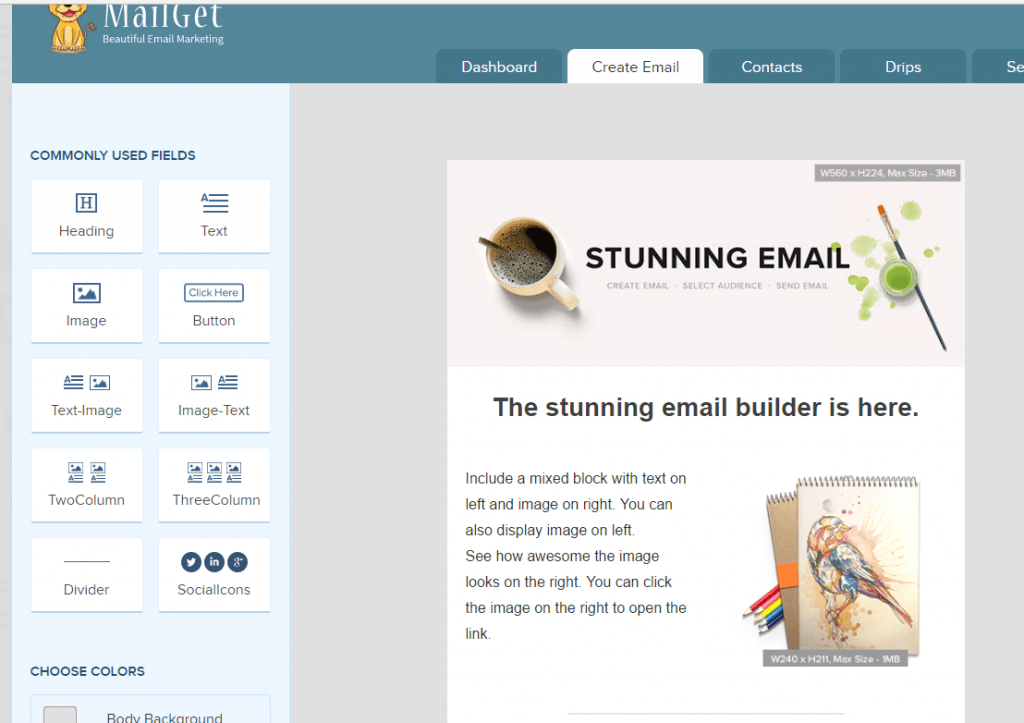
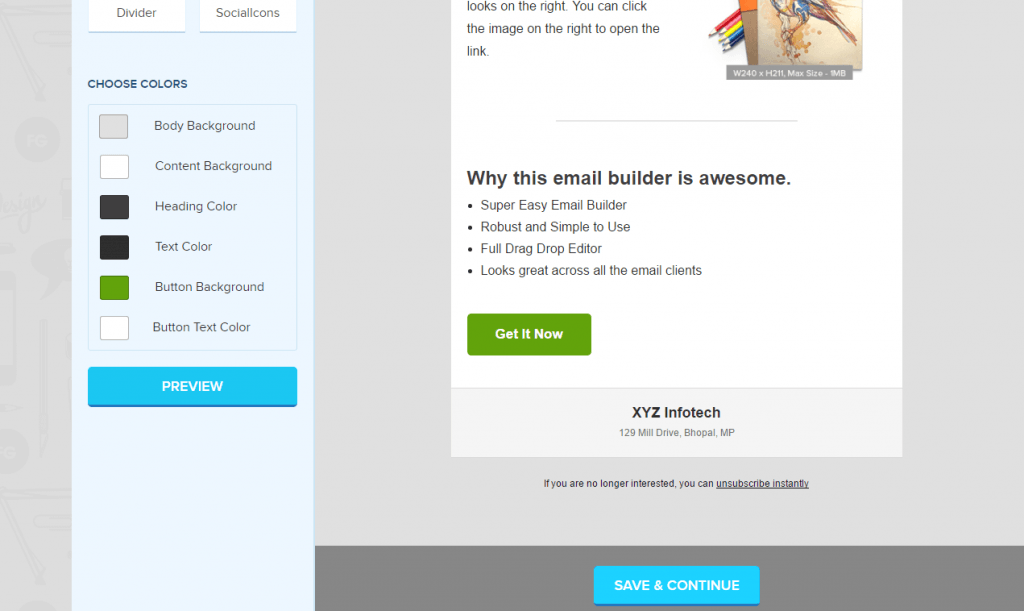
- Build a new Email.
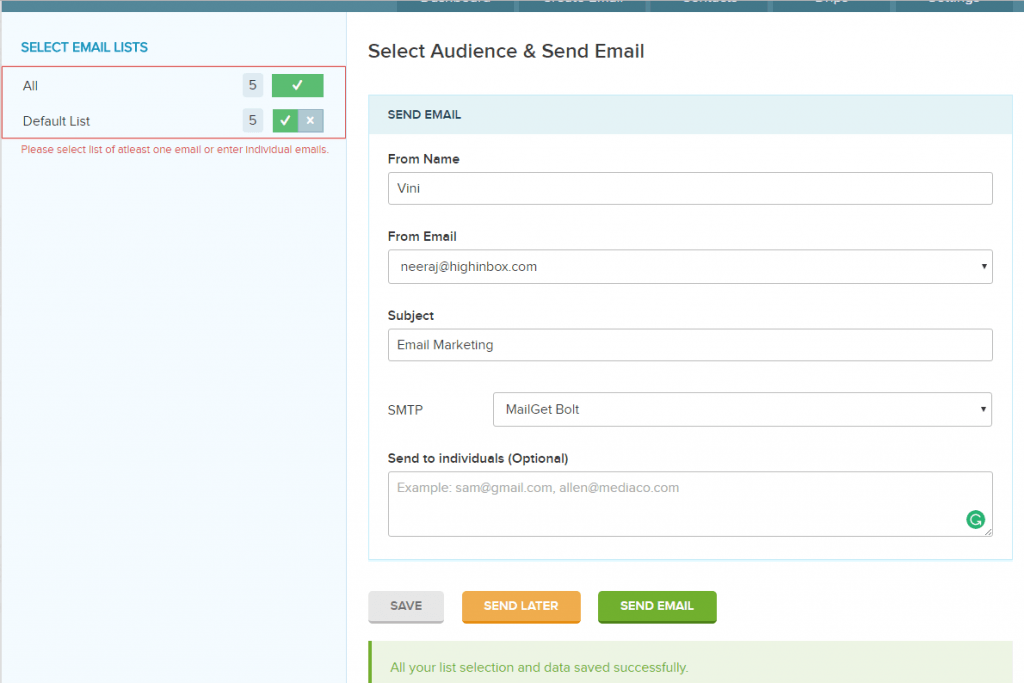
- Click on “SAVE & CONTINUE” once you are done drafting your email.
- Fill in the details and now you are ready to send your email Campaign or else you can save it to send it later.
- Once you are done with these 5 step, you are all set to send emails to all your contacts instantly.
Note: For quality reasons, your first campaign will be verified by us before it has been sent to your contact list. Once your campaign is approved, you can send emails according to the plan you subscribed to.