
Sparkpost allows users to send emails through the Sparkpost API or SMTP integration.
Sparkpost SMTP requires verified sending domain for sending emails. So, It becomes the necessity to add valid sending domain before integrating with SMTP.
How To Add Sending Domain?
Well, I am going to explain how you can add Sending Domain step-by-step. Let’s start now –
Step #1 : Login to your Sporkpost account.
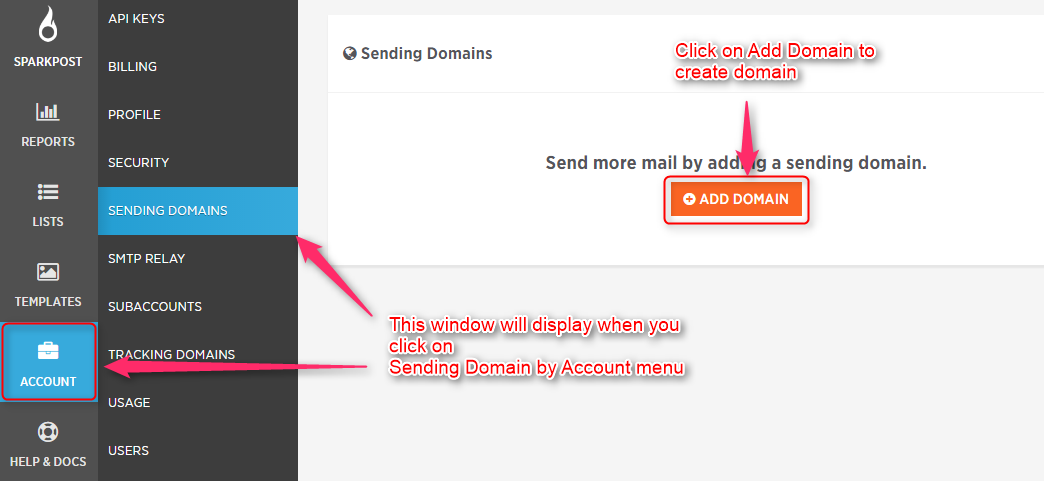
Step #2 : Go to Dashboard of Sparkpostand Click on Account.
You will see Sending Domain. Then click on add domain button to configure sending domain.
Step #3 : Now, add your valid sending domain in Sending Domain field and click on Add Domain button.

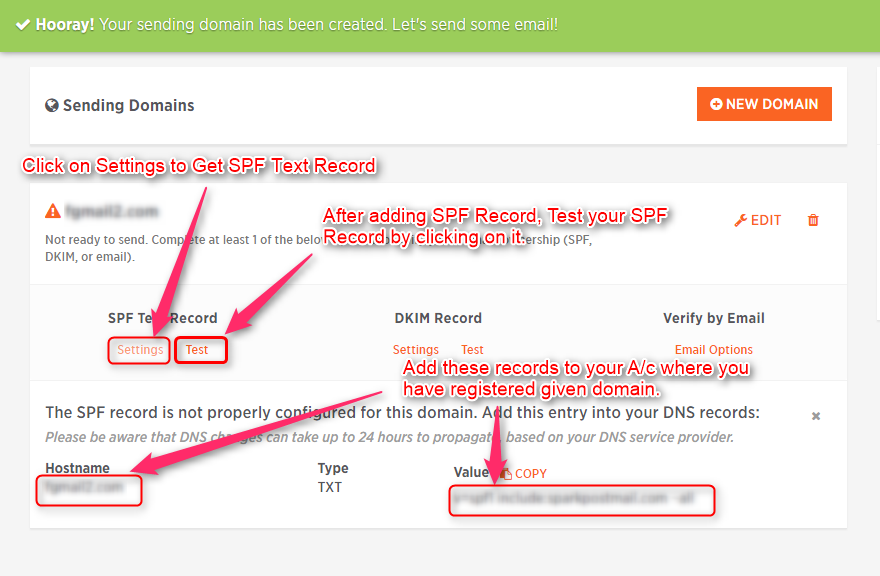
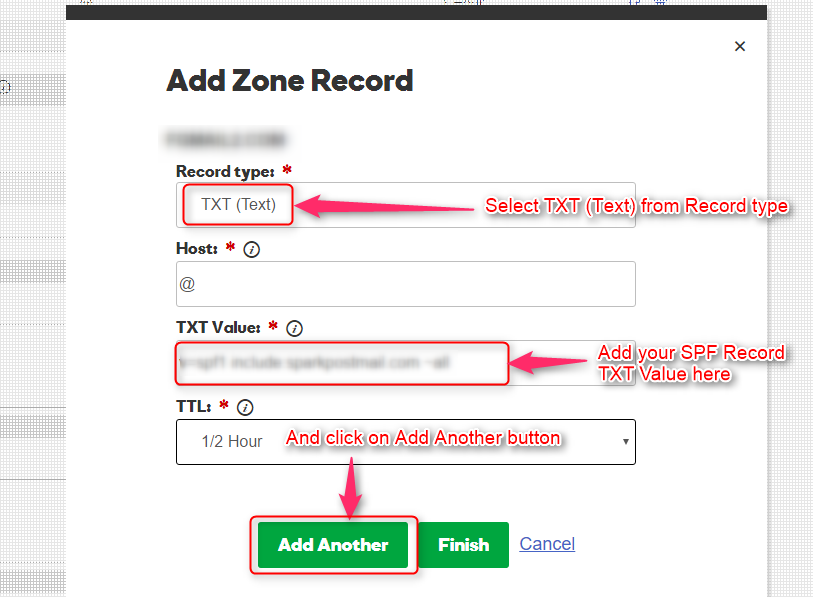
Step #4 : Get your SPF TXT and add to hosting site where you have registered your domain name.
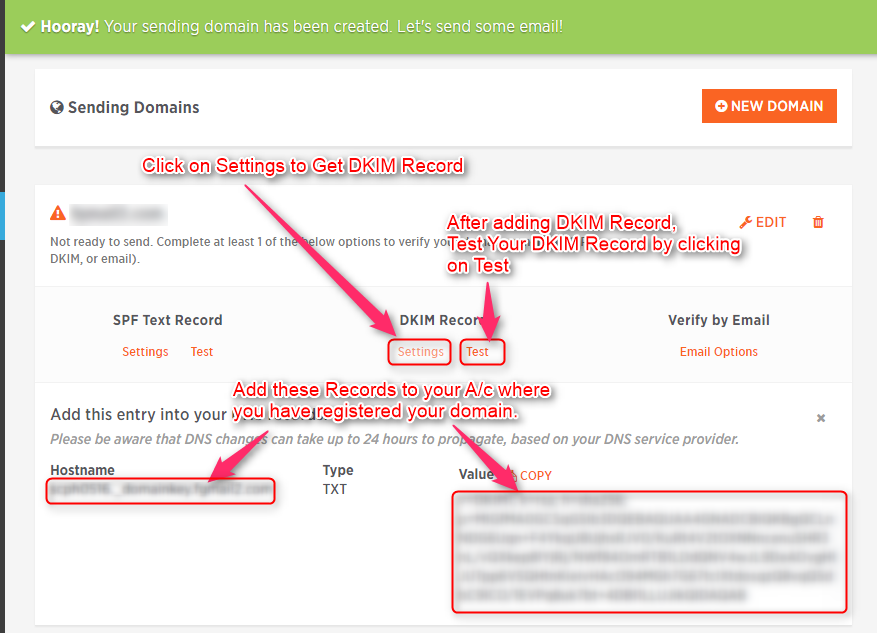
Step #5 : Get your DKIM Record and add to hosting site where you have registered your domain name.
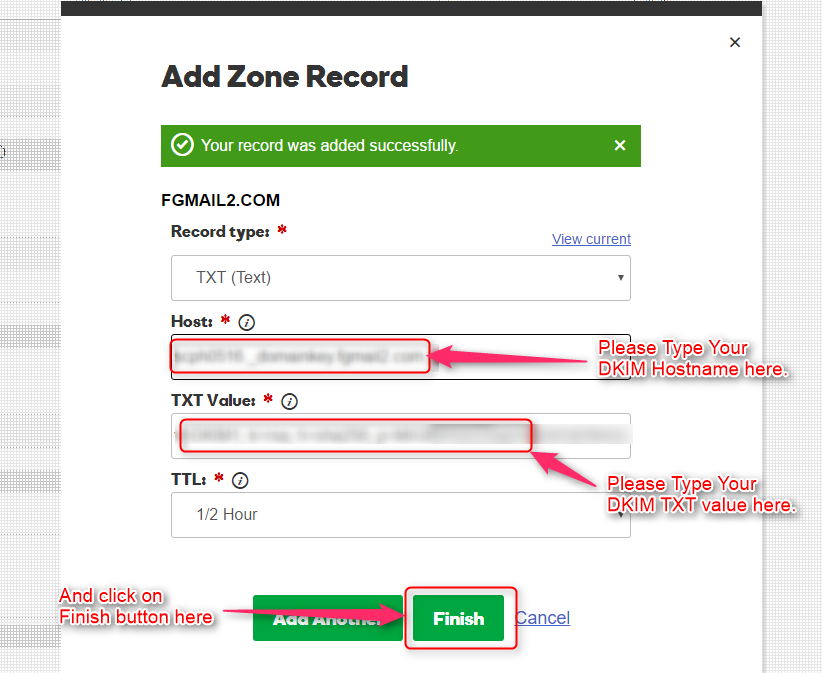
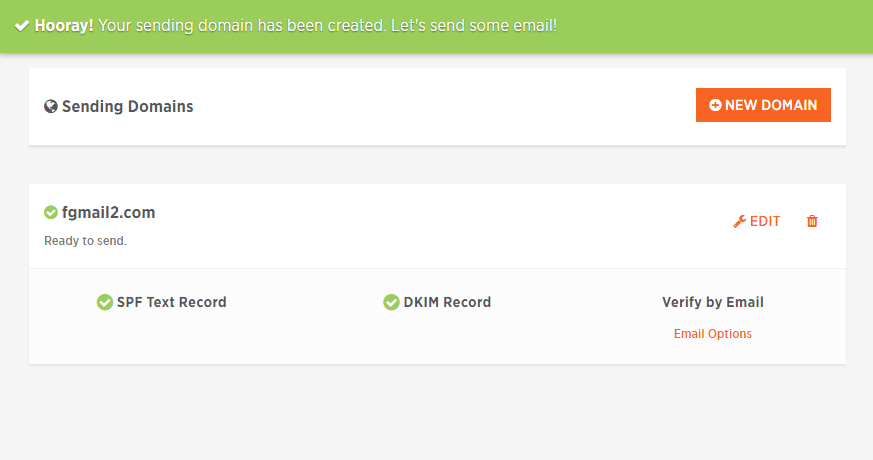
Step #6 : After Adding SPF TXT and DKIM Record and testing you will get this window.
Connect Sparkpost SMTP with MailGet
Step #1 – Go to your MailGet dashboard and click on “Settings” tab.
Step #2 – On setting page click on “Other SMTP” link in the left sidebar to open SMTP setting section.
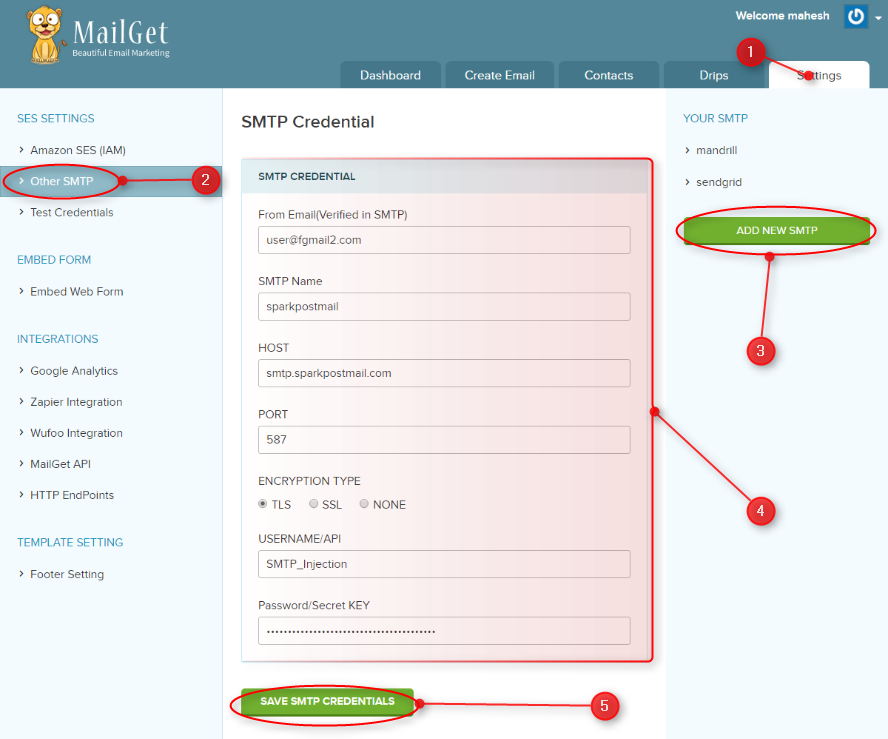
Step #3 – Now you will see a green button “ADD NEW SMTP” on the right side, click on that button to add Mandrill SMTP.
Step #4 – When you will click on “ADD NEW SMTP” button, a new form will open. You have to fill all the information in form as listed below to connect MailGet With Sparkpost.
- From Email: From Email address( which one you have verified from your domain in Sparkpost ) for your Email Campaign.
- SMTP Name: You can set any name to recognize Sparkpost SMTP.
- HOST: smtp.sparkpostmail.com
- PORT: 587
- USERNAME/API: You can get from SMTP Relay.
- PASSWORD/Secret KEY: You can get from SMTP Relay.
Step #5 – After filling form click on the green button “SAVE SMTP CREDENTIALS” to save details.
Now your Sparkpost SMTP is connected with your MailGet Account to send emails.
Setup Sparkpost Account for Handling Bounces & Spam Emails
For making the good reputation of your Sparkpost account, you should keep the percentage of your bounce and spam rates as low as possible.
Make sure that your emails list should not contain invalid email. This process requires that your Sparkpost account must be configured with your MailGet account.
Once, You add Webhook to Sparkpost. It will start sending bounce & spam reports to MailGet.
And then MailGet will filter these bounce and spam emails before emails sending from next time.
These are the steps which you need to follow: –
Step #1 : Login to your Sparkpost Account.
Step #2: Go to Dashboard of Sparkpost and Click on Account to see Webhook option.
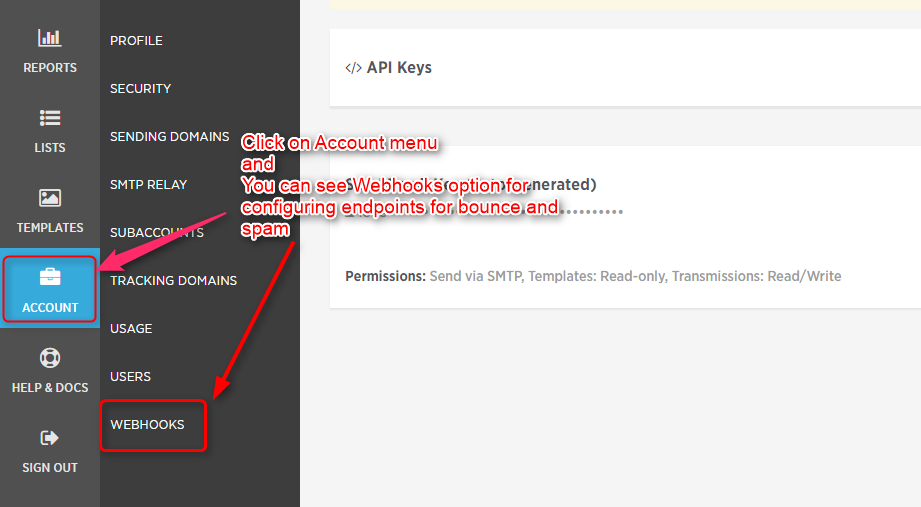
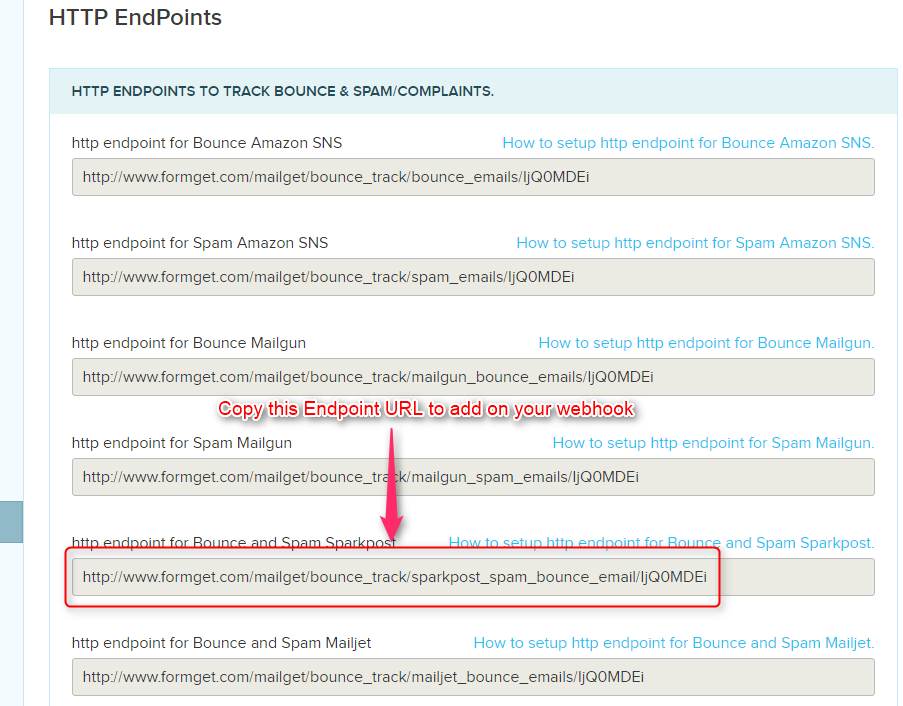
Step #3: Go to MailGet for your endpoint URL.
Step #4 : When you click on Webhook, you will see webhook panel where you have to create a new webhook.
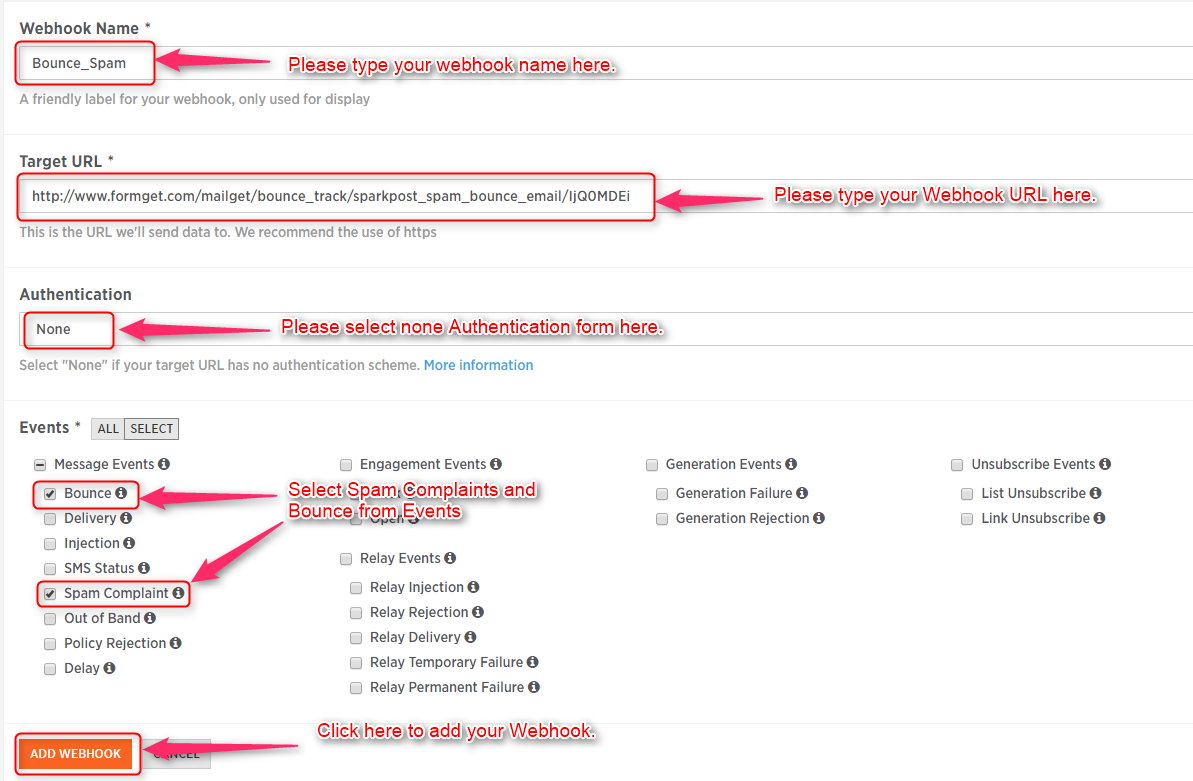
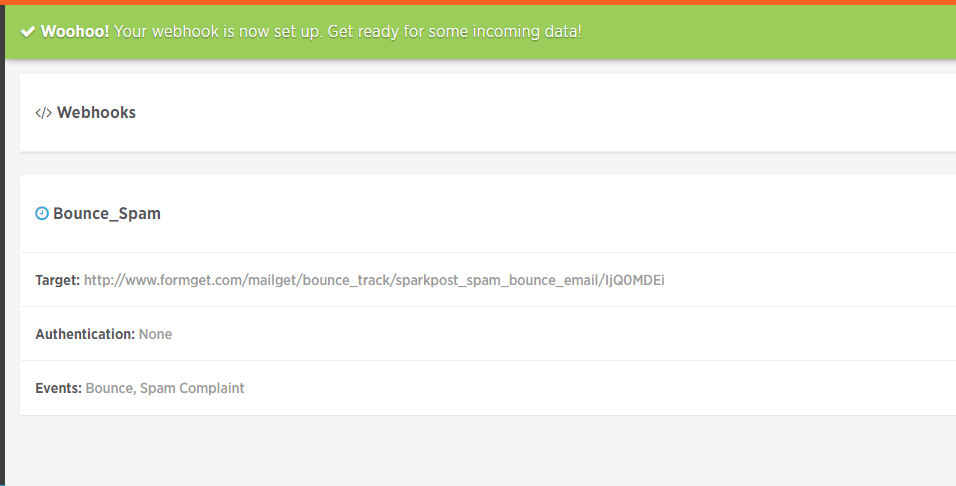
Step 5: Once You click on Add Webhook your webhook will be set for bounce and spam complaints. Once You click on Add Webhook your webhook will be set for bounce and spam complaints.
You may also refer this blog for more related information –
- SendinBlue SMTP With MailGet: Complete Setup