
Forms are an easy and simple way to quickly gather customer information like their name, email address, preferences, comments, etc. Also, it is a powerful means to actually initiate communication with visitors and possibly convert them into customers. That’s the reason why a business owner relies on forms. However, they seek resources to grow its services that are free and require less effort. The very first thought which strikes in mind is Can I use Google Forms For commercial purposes?
Well, in some ways, you can!
Undoubtedly, Google Forms is the right access for all the startup and business owners who want to boost their sales with minimum cost. Basically, it is the only free tool that lets you create online forms like feedback forms, order forms, event registration forms and much more.

Furthermore, with fewer efforts, you can easily get statistical data of responses from your clients in a spreadsheet. The platform is fully automated, you don’t have to trouble yourself for every other response.
Though it offers numerous features yet Google Forms doesn’t let you collect payment through your commercial form which is exactly why one should give Pabbly Form Builder a try. We’ll recommend you to give this robust Google Forms alternative a shot.
As a business owner, at some point of time, you would want to sell out your product or services via the form. So let’s understand the process of creating an order form in Google Forms from scratch.
Steps for creating an order form in Google Forms
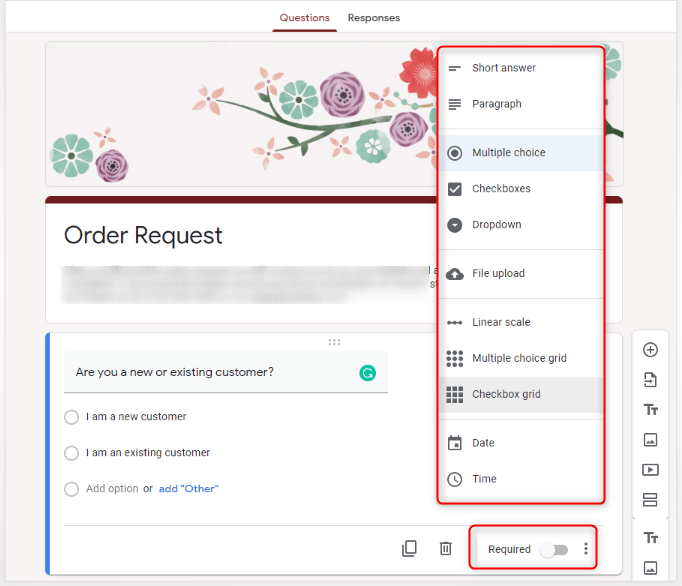
Step 1: Create Your Form
You can easily create the Google Forms by selecting the ‘Blank’ option or you can also use its pre-designed templates. After that, entitle your form using the customization options accordingly. All the changes suggested will save automatically. Also, you can make a particular field mandatory by enabling the ‘Required’ toggle.
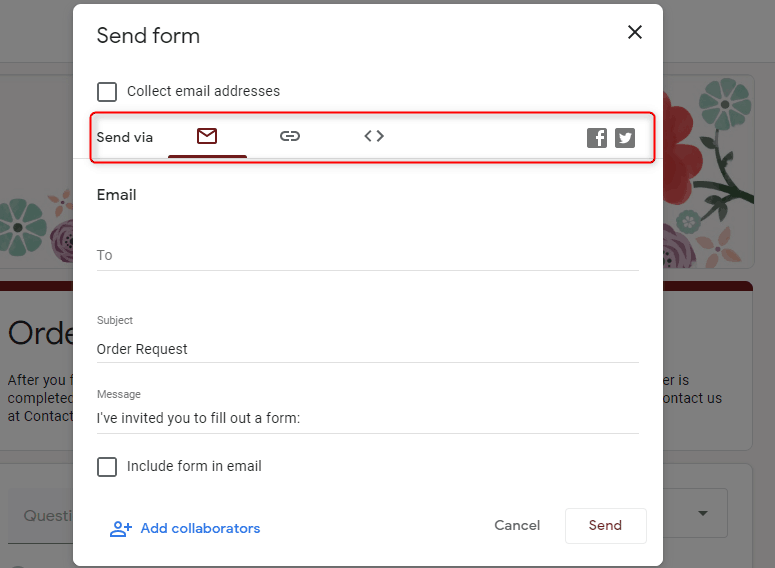
Step 2: Share Your Form
By clicking on the ‘Send’ button appearing on the top right corner, a pop-up will appear with options like you can share your form via email, URL, on your social media platform and also you can embed the code on your website. It also lets you add collaborators.
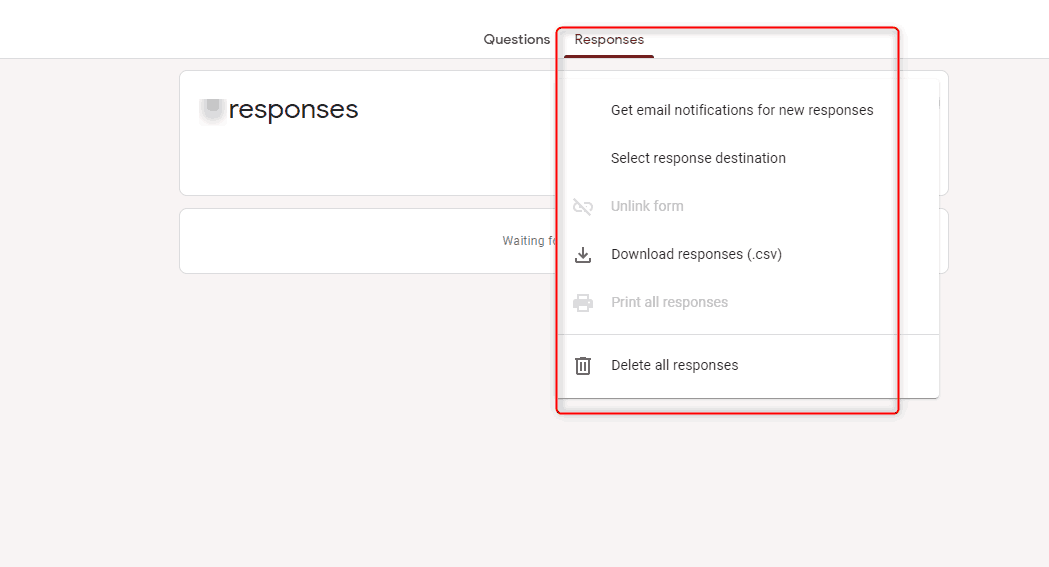
Step 3: Response Section
In the response section, you will see the results of your form. It lets you create a spreadsheet. Additionally, by clicking on three vertical dots you get an option to enable the email notification, download the spreadsheet, select the response destination and delete all responses simultaneously.
Limitations Of Google Forms in Business purpose.
As discussed earlier one of the major drawbacks of Google Forms is it doesn’t let you collect payment through your forms. There are no such options of payment gateway available in Google Forms. Using it, you can only gather customer information regarding the product.
Other than this there is no such inbuilt feature available in Google Forms to keep track of user response and activity.
Every business owner wants their platform to be hassle-free by offering less work on the customer end. If users have to switch on different options for payments then it’s quite a task.
That’s the reason why Google Forms are a huge turn off for business owners.
How one can overcome the Google Forms Limitations?
Keeping this problem in mind we came across the best suitable alternative of Google Forms which is Pabbly Form Builder. One of the cheapest and most effective online form creating tool that lets you collect payment through the form itself. It provides two payment gateways which are Paypal and Stripe.
Moreover, it lets you add more than one product in a single form.
Other than this, the software is packed with all advanced features like unlimited form submission, receive unlimited payments and much more.
You must be wondering how it works? Let’s walk you through the whole process step by step.
Steps for creating an order form in Pabbly Form Builder
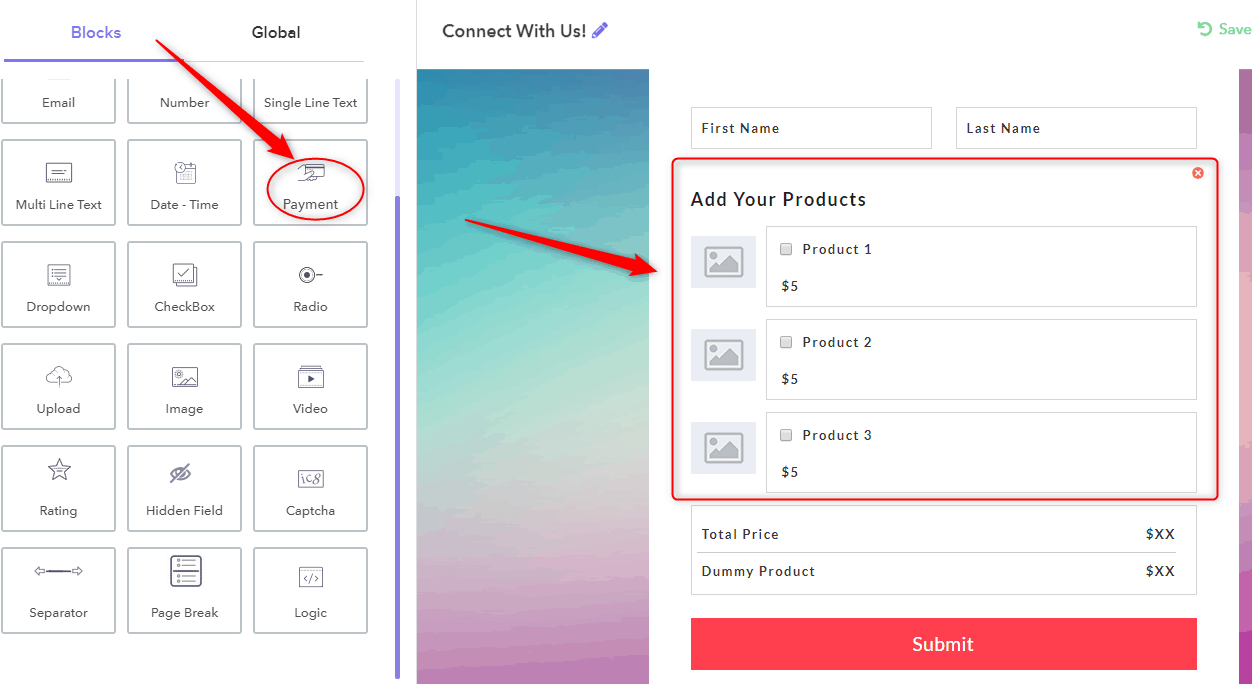
Step 1: Create Your Form
To create a form, you can either click on the option ‘Create New Form’ or select a pre-designed template. Using the ‘Block’ field you can easily customize a form by drag and drop option. Next, when you click on the ‘Payment’ option, the product field will appear in the form.
Step 2: Configure Payment
By clicking on the product, the ‘Configure Payment’ page will appear where you have to mention your product details like product name, currency, billing cycle and set up fees if any.
Additionally, by clicking on ‘Select Payment Gateway’ PayPal and Stripe will appear, you can easily integrate your payment option by providing the required details. Further, it offers ‘single and multiple product’ field, choose accordingly. Finalize everything by clicking on the button ‘Save Payment Setting’

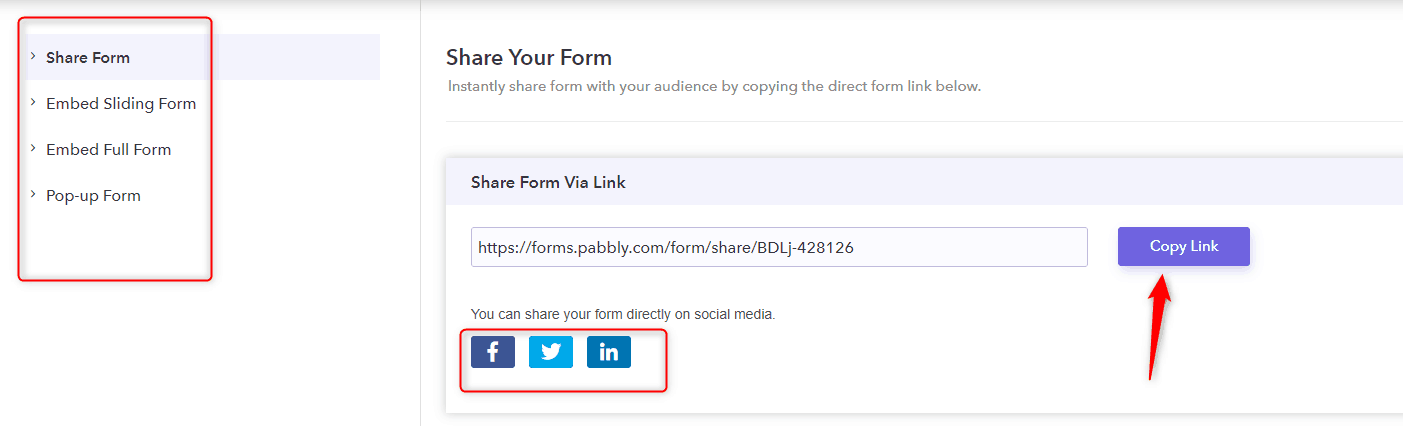
Step 3: Share Your Form
After customizing your form as per your need, you can share by clicking on the ‘Share’ button appearing on the top right corner. Further, it allows you to share your form via URL, on your social media directly and you can also embed your form on your website.
Step 4: Response Section
You can keep track of every response by clicking on the ‘Submission’ option appearing on the left side. There you will see options like form submission, analytics, and reports. Other than this it lets you export all the submission or specified month submission in CSV file format
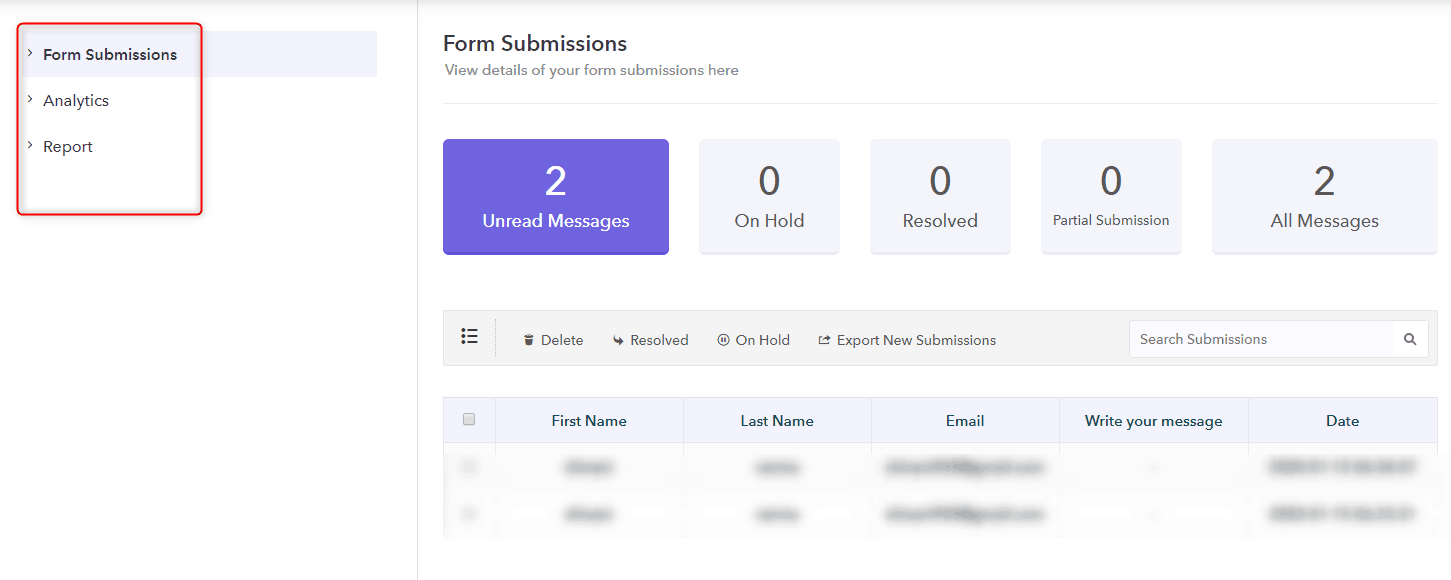
Besides this, you will see a surplus number of features in Pabbly Form Builder like for every new response you will get an email notification, autoresponder and much more in setting option. You can keep an eye on each response using the single software.
Conclusion
That’s all following the above procedure and you are good to go. All those who were wondering about Google Forms commercial use, we hope this article helped you clear your doubt about the same.
Let us know your reaction in the comment section.
For more information, give it a read: