
Are you looking for a form that allows you to collect uploaded files?
Then don’t go anywhere,
Google Forms gives users the ability to add files and media to the forms. With its file upload option, form owners will be able to collect various types of information like job applications, videos, pictures, students’ assignments, etc., from the respondent. Further, it helps them to verify the identity of the individuals on the basis of their information.
Assuredly, Google Forms simplifies the process of form creation but it restricts you to upload unlimited files. Also, it does not allow you to upload files if you are not logged into a Google account. In that case, you can switch to one of its alternative i.e. Pabbly Form Builder
It empowers you to upload unlimited files without login to Google account. Other than this, the form builder gives you a lot of reasons why people will come to your form. Read it out in the below section.
Google Forms empowers you to effortlessly configure uploaded files and set restrictions on the size & type of files you accept.
Let’s take a brief look at how you can add upload button to Google Forms
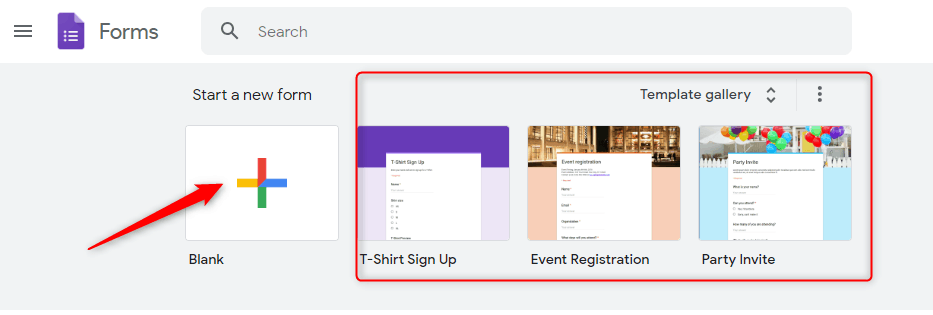
Step1: Create Your Form
At first, you need to open Google Forms for creating a new contact form. You can create a new form by selecting the ‘Blank’ or by choosing pre-designed templates.
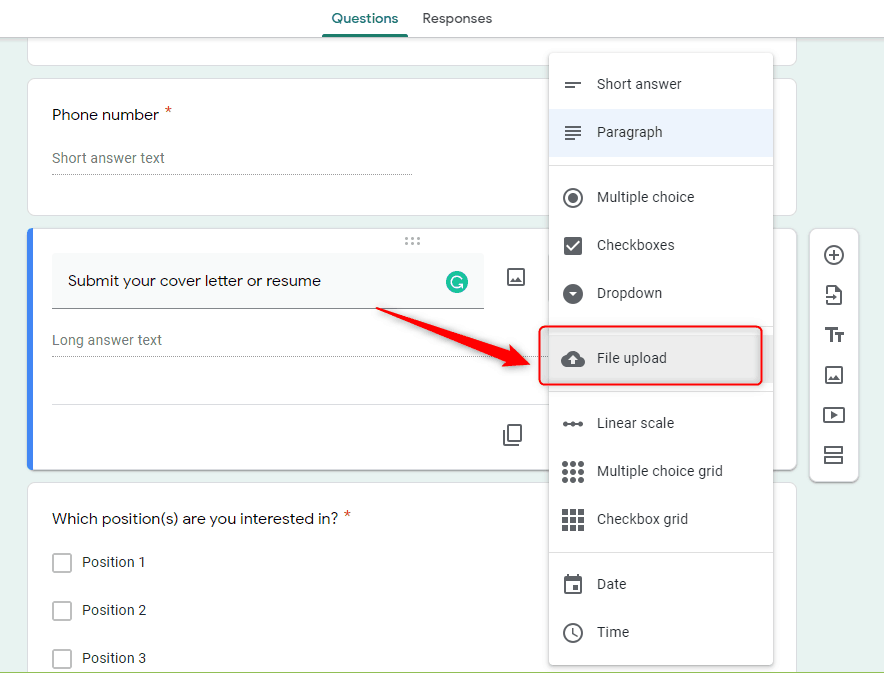
Step 2: Select Answer Type
After that, all you need to do is enter the necessary details/question according to your survey. Then, you have to select the ‘File upload’ option as an answer from the dropdown list menu.
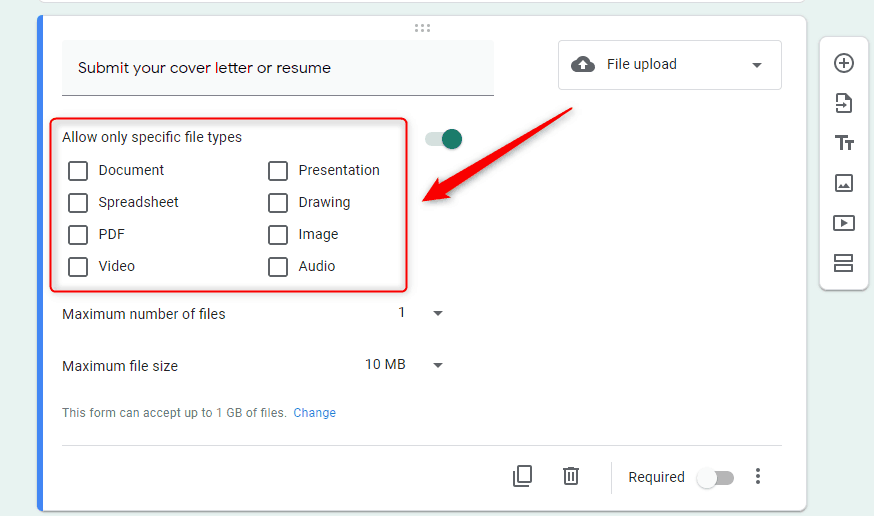
Step 3: Specify File Types
After adding the file upload field in the form you can specify the file type that you want to accept from the users such as document, presentation, spreadsheet, image, video, audio, etc.
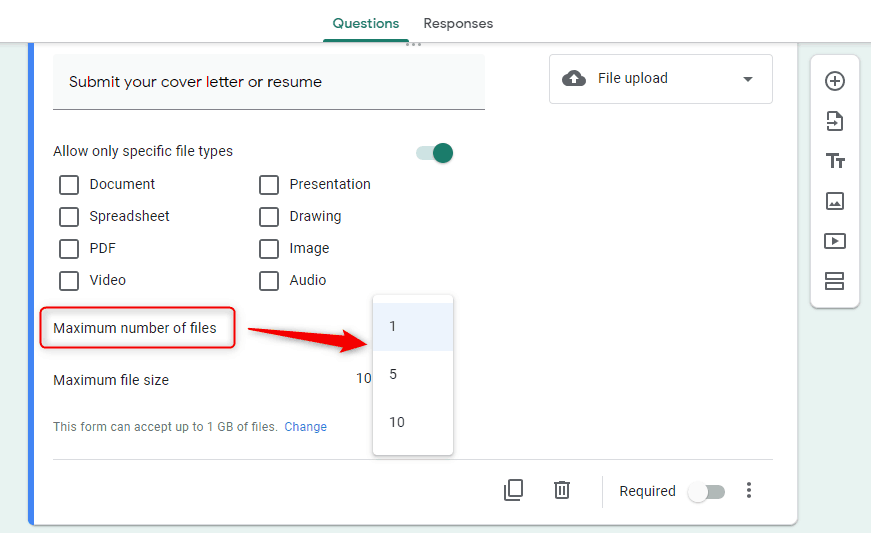
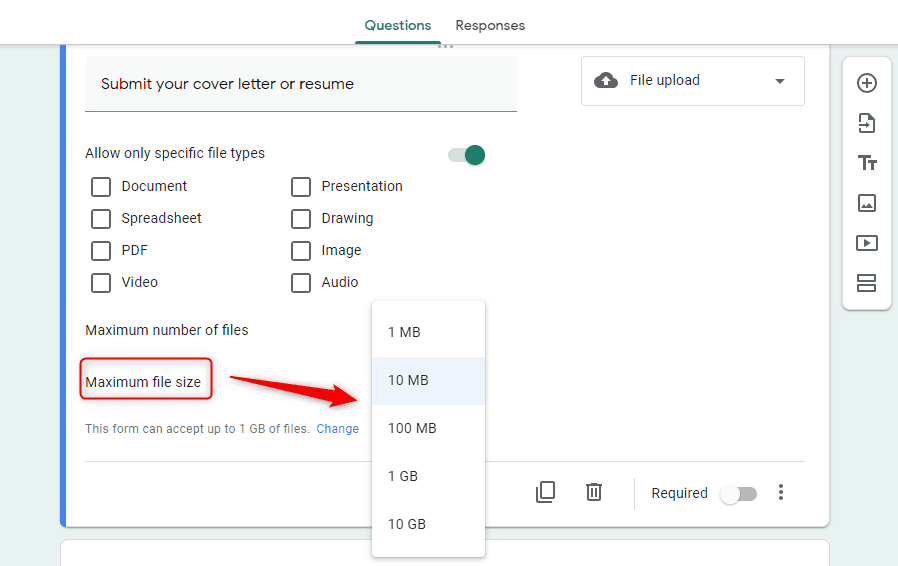
Step 4: Maximum Number of Files
Here, you get an option to set the maximum number of files – this can only be 1, 5 or 10 at the moment. You can choose any of the options and allows users to upload the file.
Step 5: Maximum File Size
Inside the file upload attachment question, you’ll find other options to specify the max file size (from 1 MB to 10 GB).
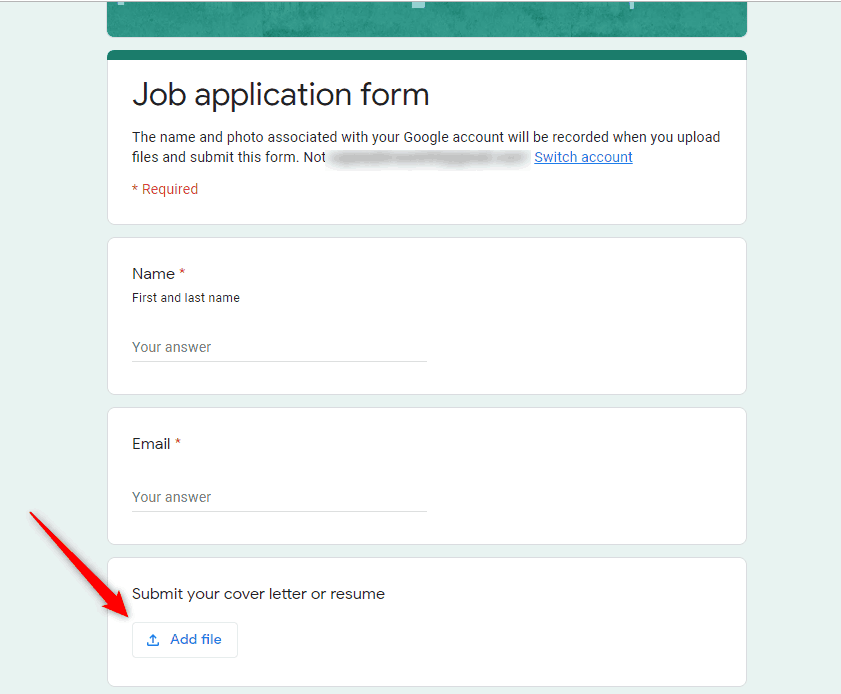
Step 5: Preview Your Form
Once the form is completed, you can view your form by clicking on the eye-shaped preview icon in the upper-right corner. Thus, your respondents will be able to upload the file to the form submission.
Why Pabbly Form Builder is the best Google Forms alternative?
Google Forms is definitely delighted you at first because it is a free tool but it has a very limited feature-set.
Whereas, Pabbly Form Builder is the only software that does not restrict you on features. With this, you can create amazing forms in a snap and handle unlimited file uploads, submissions, storage, webhooks, etc. It makes your complications of file uploading, form submission easier.
Moreover, you can completely customize the file upload form with its advanced designing options. Pabbly Form Builder offers numerous 3rd party integrations with many kinds of business tools, including Google Analytics. Therefore you can automatically add your file uploads to the storage option that you use in your daily workflow.
Let’s take a look at how to add a file upload field to your forms in few minutes via Pabbly Form Builder.
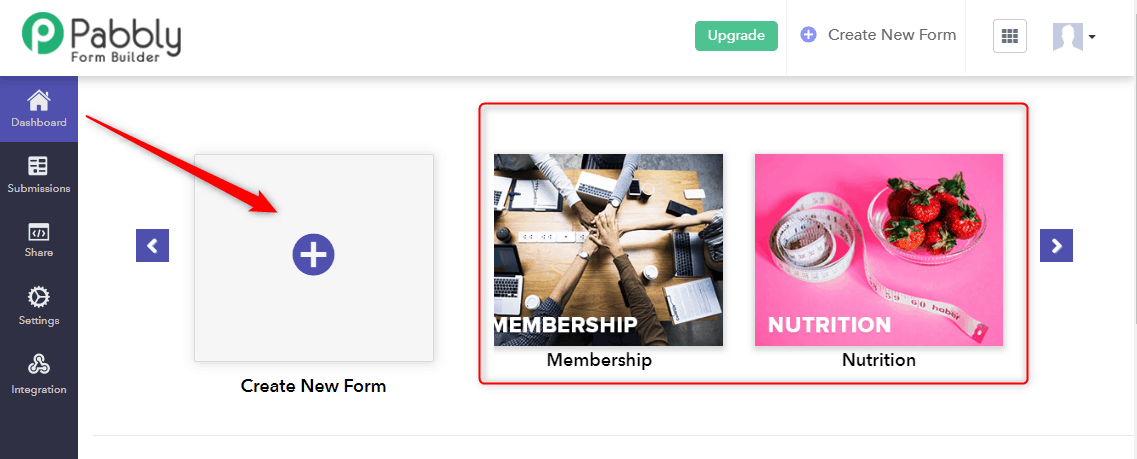
Step 1: Create Your Form
You can choose the predefined templates or create your own new form by clicking on the “Create New Form” option.
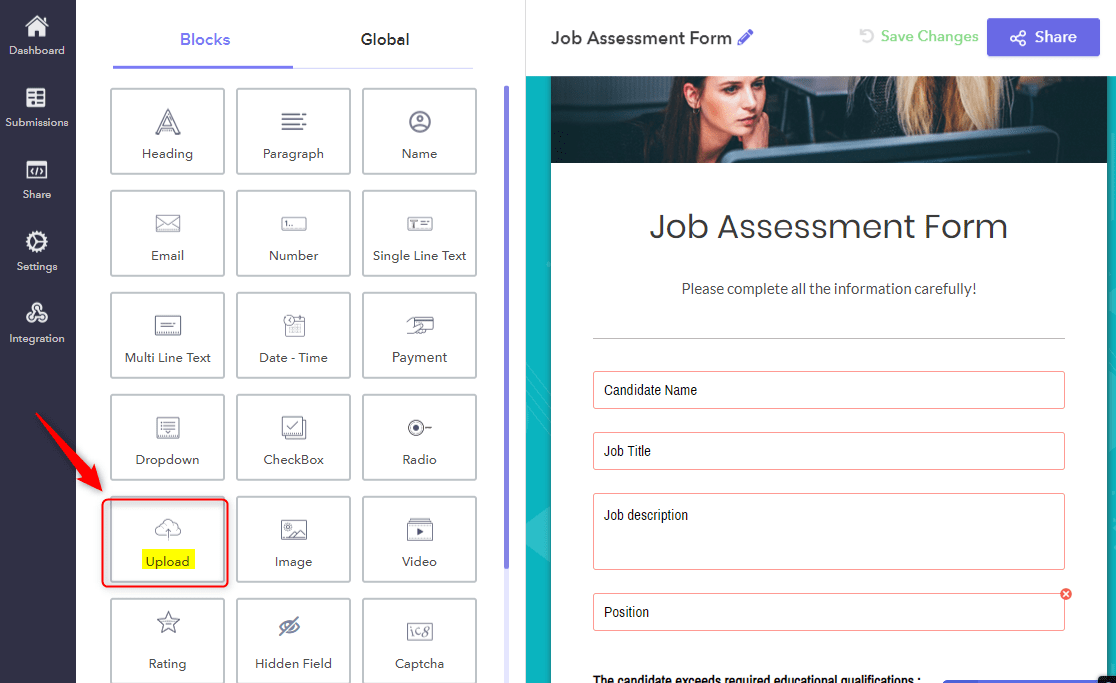
Step 2: File Upload Option
After creating the form you can add an upload field in your form by simply dragging the “upload” option.
Step 3: Customization Options
Now when you click on the upload field, multiple customization options will get appear on the screen. Using this, you can easily design the form fields, layout, header, etc.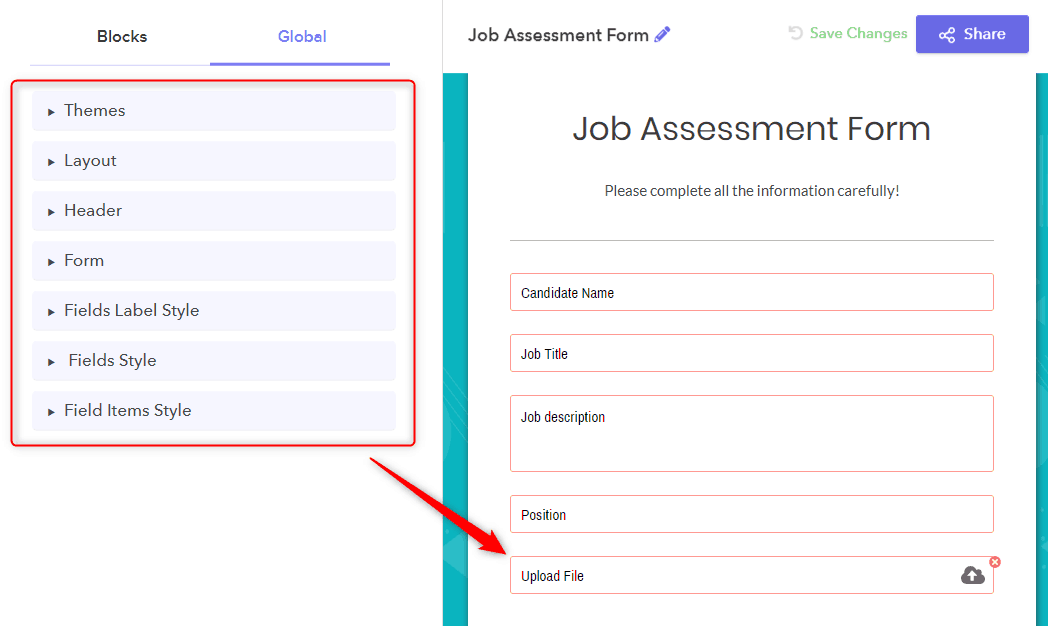
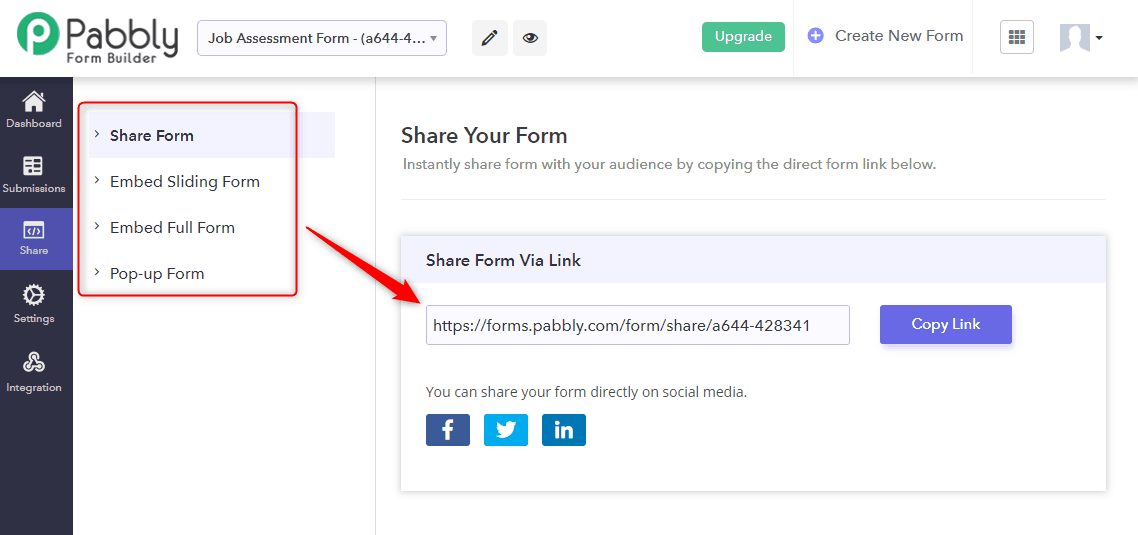
Step 4: Share The Form
After creating the form you can instantly share it with your audience by just copying the link. You can easily embed the form on your website in 3 ways like – full form, popup form or sliding form.
That’s it! Now, you can easily accept the files through forms as per your requirements.
Conclusion
Adding forms with file upload fields to your site can help you get the necessary information from customers faster. By following the above implementation you can easily streamline the processes that were once complex such as accepting job applications, guest post submissions, etc.