
Use MailGet – email service provider for Sending Emails, just connect and send with MailJet API or SMTP services.
In this blog, I am going to explain an easy way of API/SMTP configuration to send an email using Mailjet. Emailing has become a powerful medium for companies to communicate with their clients. The most difficult task for companies is that how to send a large number of email to their customers.
We have made a blog for those who have suffered from this problem and so we are going to use Mailjet API for sending emails.
This tutorial will demonstrate how to configure MailJet API to send emails.
Watch the live demo or download code from the link given below
Steps to configure MailJet API in an application: –
Step 1:- Download the latest MailJet API library .zip folder
Step 2:- Extract the downloaded .zip folder.
Step 3:- Create a lib folder in the root folder, copy & paste all the files available in the src folder of extracted zip folder.
Step 4:- Create index.php into your root folder. And now just copy php code and paste it in index.php.
Tutorial Scripts in detail
Below are the details of the code used in this tutorial with proper explanation.
index.php
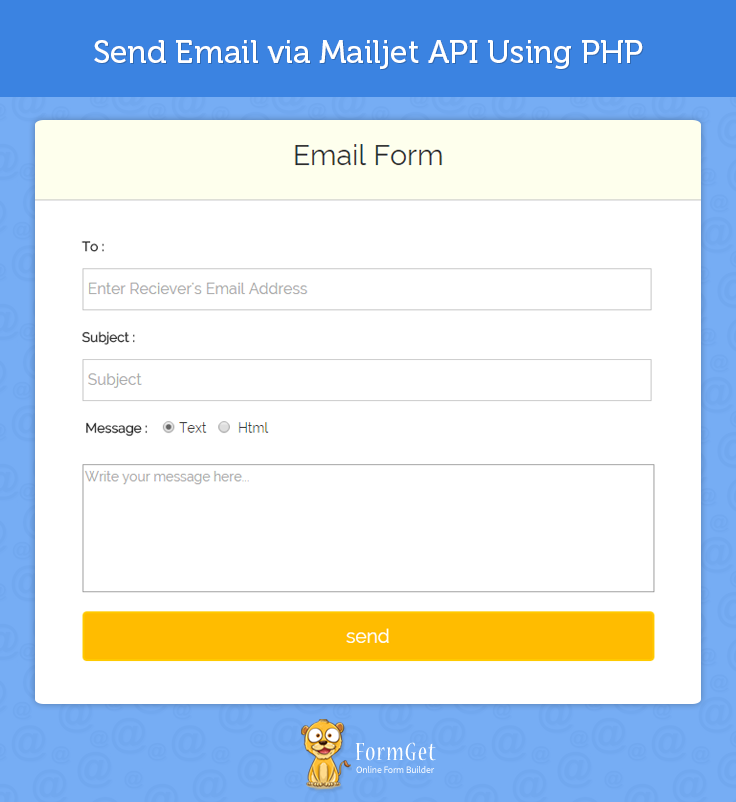
index.php provide an interface for user to fill the receiver’s information like receiver email id, subject and text which will be store in an array that will go further to Mailjet Api for processing which will send email to receiver’s email id.
<html>
<head>
<title>How To Send Email Using Mailjet API</title>
<meta name="robots" content="noindex, nofollow">
<link href="css/style.css" rel="stylesheet" type="text/css"/>
<link href="css/bootstrap.css" rel="stylesheet" type="text/css"/>
<script src="js/bootstrap.js" type="text/javascript"></script>
</head>
<body>
<div class="container">
<div class='wrap'>
<div class='row'>
<div id="main" class="col-xs-12 col-sm-6 col-md-4 ">
<h1 id='h1'>Send Email via Mailjet API Using PHP</h1>
</div>
</div>
<div class='row' >
<div id="login" class="col-xs-12 col-sm-6 col-md-4 ">
<div style='margin-top:-30px;'>
<h2>Email Form</h2>
<div style="margin: 20px 10px;">
<form action="" method="post" name='myForm' onsubmit="return validate();">
<label>To : </label>
<input type='text' name='to' placeholder="Enter Reciever's Email Address"/>
<label>Subject : </label>
<input type='text' name='subject' placeholder='Subject'/>
</br><label> </label>
<label>Message : </label><?php echo " "; ?><input type="radio" name='msg' value='txt' checked><?php echo " "; ?>Text <?php echo " "; ?><input type="radio" name='msg' value='html'><?php echo " "; ?> Html
</br><label></label>
<textarea name='text' style="height: 134px; resize: none; width: 100%;" placeholder='Write your message here...'/></textarea><br/>
<br/>
<input type='submit' name='submit' value='send' /><br/>
</form>
</div>
</div>
</div>
</div>
<div class='row'>
<div id="note" class="col-xs-12 col-sm-6 col-md-4 ">
<b>Note : </b>In demo, we have disabled the functionality of sending Emails.
</div>
</div>
</div>
</div>
<script type="text/javascript">
function validate()
{
if (document.myForm.to.value == "")
{
alert("Please enter your Email!");
document.myForm.to.focus();
return false;
}
else
{
/*validating email with strong regular expression(regex)*/
var str1 = document.myForm.to.value
/* This is the regular expression string to validate the email address
Email address example : [email protected] , [email protected] , [email protected] ,
[email protected] , [email protected]
*/
var filter = /^([w-]+(?:.[w-]+)*)@((?:[w-]+.)*w[w-]{0,66}).([com net org]{3}(?:.[a-z]{6})?)$/i
if (!filter.test(str1))
{
alert("Please enter a valid email address!")
document.myForm.to.focus();
return false;
}
if (document.myForm.subject.value == "")
{
alert("Please enter a subject!");
document.myForm.subject.focus();
return false;
}
if (document.myForm.text.value == "")
{
alert("Please enter a text!");
document.myForm.text.focus();
return false;
}
return(true);
}
}
</script>
</body>
</html>
<?php
include("src/Mailjet/php-mailjet-v3-simple.class.php");
//include('php-mailjet.class-mailjet-0.1.php');
$apiKey = 'Insert API Key';
$secretKey = 'Insert API Secret Key';
$mj = new Mailjet($apiKey, $secretKey);
if (isset($_POST['submit'])) {
function sendEmail() {
// Create a new Object
$mj = new Mailjet();
$params = array(
"method" => "POST",
"from" => "Insert sender Email Id",
"to" => "{$_POST['to']}",
"subject" => "{$_POST['subject']}",
"text" => "{$_POST['text']}"
);
$result = $mj->sendEmail($params);
if ($mj->_response_code == 200) {
//echo "success - email sent";
print '<script type="text/javascript">';
print 'alert("email successfully sent!")';
print '</script>';
} elseif ($mj->_response_code == 400) {
//echo "error - " . $mj->_response_code;
print '<script type="text/javascript">';
print 'alert("Email Successfully Sent..!")';
print '</script>';
} elseif ($mj->_response_code == 401) {
//echo "error - " . $mj->_response_code;
print '<script type="text/javascript">';
print 'alert("Unauthorized! You have specified an incorrect ApiKey or username/password couple.")';
print '</script>';
} elseif ($mj->_response_code == 404) {
//echo "error - " . $mj->_response_code;
print '<script type="text/javascript">';
print 'alert("Not Found! The method your are trying to reach don't exists.")';
print '</script>';
} elseif ($mj->_response_code == 405) {
//echo "error - " . $mj->_response_code;
print '<script type="text/javascript">';
print 'alert("Method Not Allowed! You made a POST request instead of GET, or the reverse.")';
print '</script>';
} else {
print '<script type="text/javascript">';
print 'alert(" Internal Server Error! Status returned when an unknow error occurs")';
print '</script>';
}
return $result;
}
sendEmail();
}
?>Step 5:- Create style.css into your css folder created within the root folder. Once you finished this task just copy css code and paste it into style.css.
style.css
Designing HTML elements.
@import url(http://fonts.googleapis.com/css?family=Raleway);
.wrap{
margin:0;
padding: 0;
}

#main{
width:60%;
margin:auto;
font-family:raleway;
//border:1px solid green;
margin-left: 20%;
}

span{
color:red;
}

#h1{
text-align:center;
font-size:35px !important;

}

h2{
background-color: #FEFFED;
text-align:center;
border-radius: 10px 10px 0 0;
padding:30px;
margin: 0px -40px -40px -40px ;
border-bottom: 1px solid #ccc;
}

#login{
width:60%;
//float: left;
border-radius: 10px;
font-family:raleway;
border: 2px solid #ccc;
padding: 10px 40px 25px;
margin-top: 30px;
margin-left: 20%;
}

input[type=text],input[type=textarea]{
width:99.5%;
padding: 10px;
margin-top: 8px;
border: 1px solid #ccc;
padding-left: 5px;
font-size: 16px;
font-family:raleway;

}
input[type=radio]{
vertical-align: middle;
margin: -4px 0 0 2px !important;

}
input[type=submit]{
width: 100%;
background-color:#FFBC00;
color: white;
border: 2px solid #FFCB00;
padding: 10px;
font-size:20px;
cursor:pointer;
border-radius: 5px;
margin-bottom: 15px;
}
#profile{
padding:50px;
border:1px dashed grey;
font-size:20px;
background-color:#DCE6F7;
}

#logout{
float:right;
padding:5px;
border:dashed 1px gray;
}

a{
text-decoration:none;
color: cornflowerblue;
}

i{
color: cornflowerblue;
}
#note {
word-wrap: break-word;
margin: 10px 24%;
width: 62%;
padding: 10px 50px;
font-size: 16px;
}

label {
display: inline-block;
max-width: 100%;
margin-bottom: 5px;
font-weight: bold;
margin-top: 18px;
}
#formget{
float:right;
}
Conclusions:-
This is all about, how to send emails via Mailjet API. Hope you will be benefited by this post. Please share your feedback in the space provided below. Keep reading our other blog post. 🙂
For more information check out the blog given below –
- How to Design Responsive Email Template
- Find Bounced Email Via Postmark
One Reply to “Send Email via Mailjet API Using PHP”
thanks for this tutorial.
I had a problem when submitting.
it shows wrong API..although i m using the correct api..plz help