
MailGet provides an excellent feature to connect multiple SMTP services in your single account to send emails. It connects with all SMTP services like Mandrill, SendGrid, Mailgun, Postmark, Google, Outlook, Yahoo, MailJet etc.
In documentation, we are going to connect SMTP of SendPulse with MailGet account for sending bulk emails.
Connect SendPulse SMTP –
After signing up with SendPulse SMTP follow the below-mentioned steps, in order to connect the SMTP to your MailGet account.
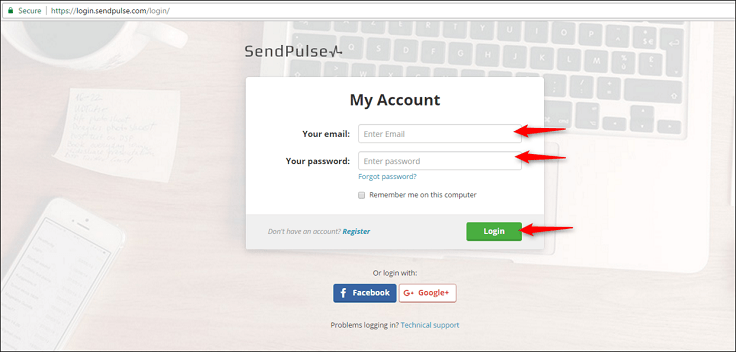
Step-1: – Click on SendPulse SMTP link and login into the account of SendPulse SMTP.
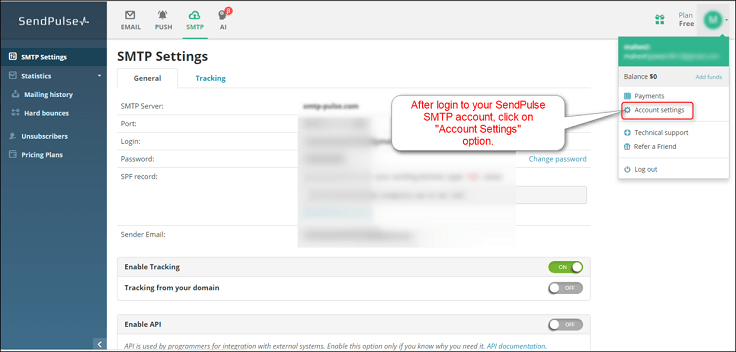
Step-2: – Once you get logged in the SendPulse SMTP account, you will then see the SendPulse SMTP’s dashboard panel and from there, just click on the “SMTP Settings” option so as to get the credentials.
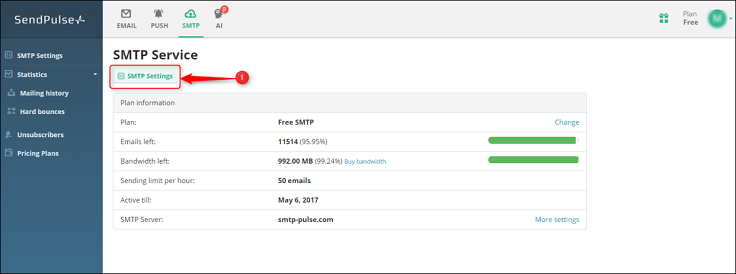
After clicking on SMTP settings, you will get a screen where the credentials will be given.
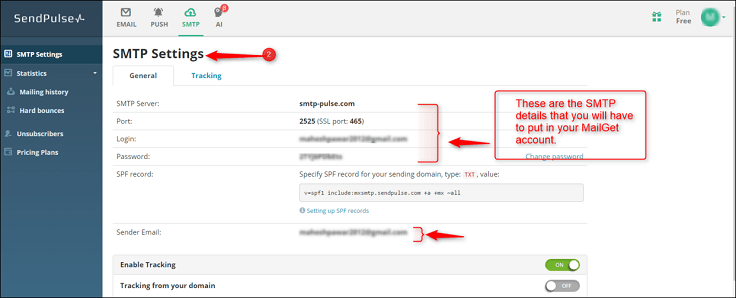
Step-3: – After getting all the credentials of SendPulse SMTP. Login to your MailGet account and go to “Other SMTP” under Settings option and fill the required details in their respective columns. Here’s are details which you will have to put-
- Select Your SMTP Provider – Any Other/ Custom SMTP
- SMTP Name – SendPulse
- HOST – smtp-pulse.com
- PORT – 465
- ENCRYPTION TYPE – Select SSL
- From Email (Verified in SMTP) – Write the email which you’ve verified in your SendPulse account
- USERNAME/API – Write here the login email which you’ve got from your SendPulse account.
- Password/Secret KEY – Write here the password which you’ve got from your SendPulse account.
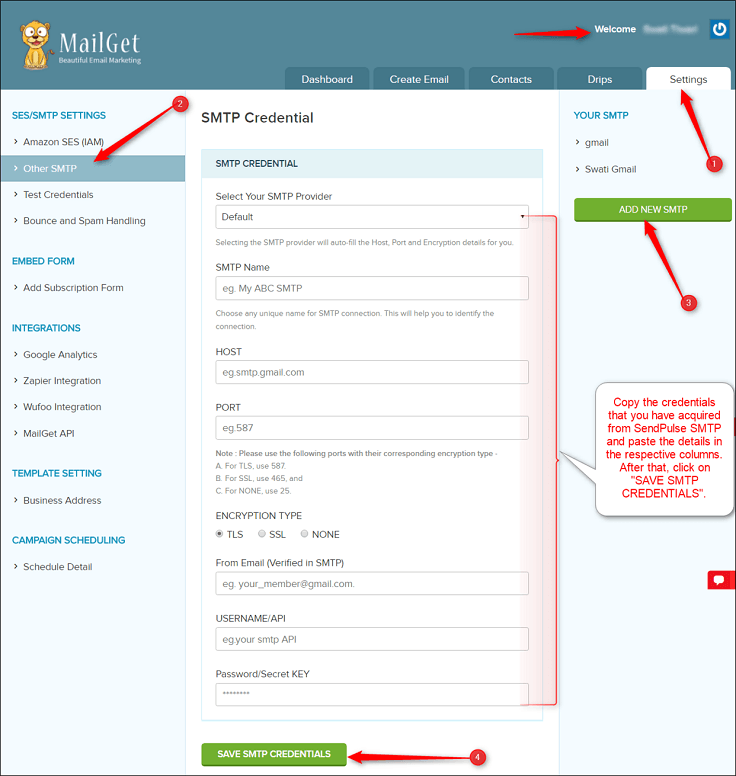
Now after putting all the required details in the respective fields, click on “Save SMTP Credentials”. Hence with this, your MailGet will be connected to the SendPulse SMTP.
For Setting Up Bounce & Spam Handling Of SendPulse Account –
To maintain your sending reputation, you have to get rid of the bounced and spam emails containing in your mailing list. For that, you need to configure MailGet with your SMTP service provider (SendPulse) so that the bounced & spam email addresses can be filtered out from your sending list.
After configuration, SendPulse will start sending the notification to MailGet about the bounced and spam email address when an email is sent to a list. These notifications will help MailGet to filter your sending list.
Thus for configuring the Bounce/Spam email list, just go through the steps given in the process below –
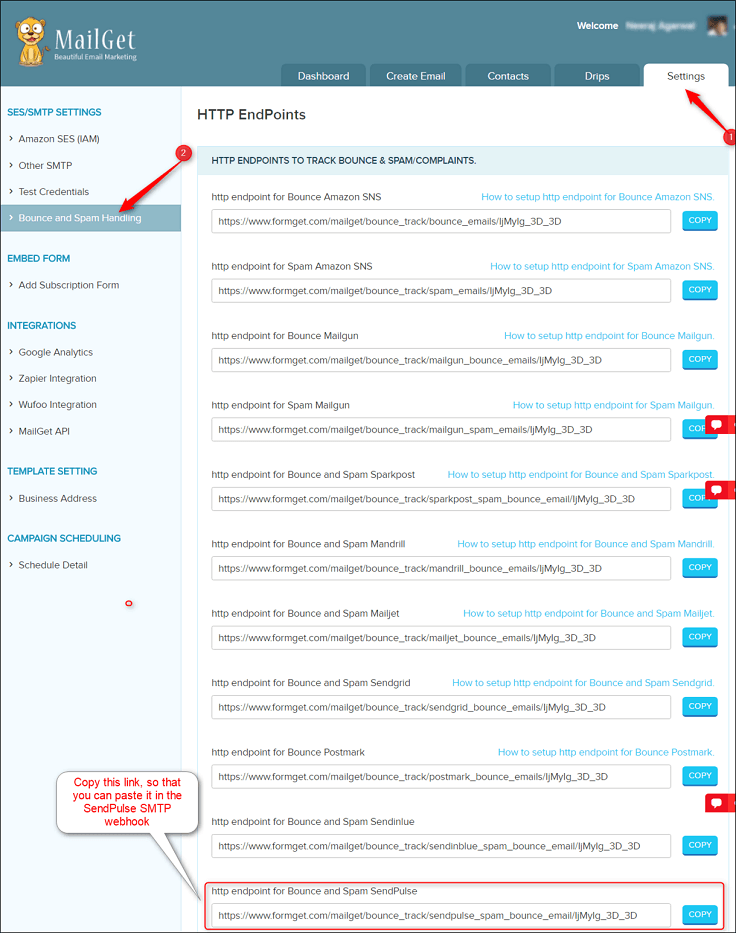
Step:1 – MailGet Account > Settings > Bounce & Spam Handling > HTTP Endpoint For Bounce and Spam SendPulse
Under the Setting section of your MailGet account, go to “Bounce And Spam Handling“ option and copy the link of HTTP Endpoints of SendPulse from the drop-down list which you will have to paste further in the webhook of SendPulse SMTP.
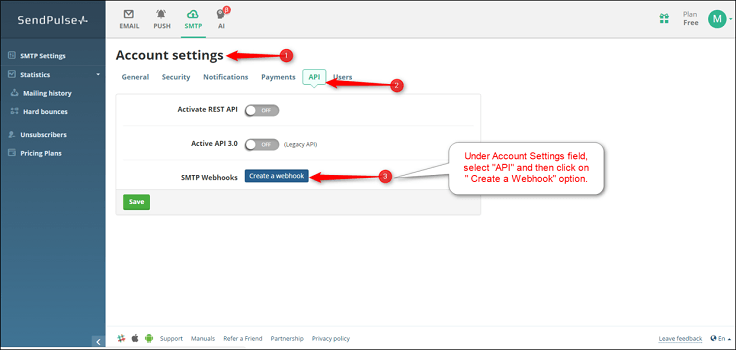
Step:2 – SendPulse SMTP Account > Account Settings > API > SMTP Webhooks > Save
Once you copy the link, go to Account Settings of SendPulse SMTP and then, click on API section.
Once you click on “Create a webhook” option then it will display a notification box where you will paste the link of HTTP endpoints of SendPulse which you have copied from your MailGet account under “Bounce & Spam Handling” and then, select the “Not delivered & Marked as spam” items from the Events for SMTP drop-down list.
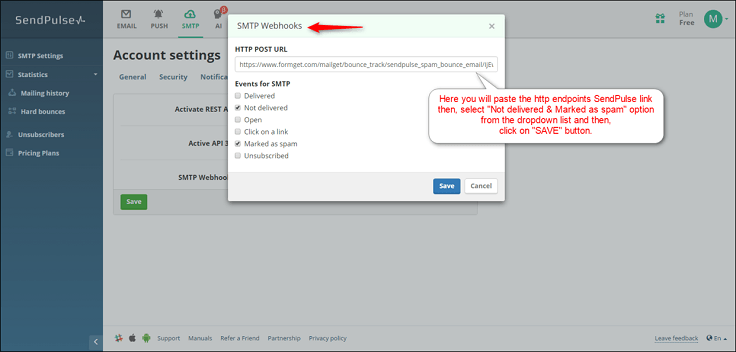
After making the required changes, just click on “SAVE” button. Thus, you have now fulfilled all the necessary steps that were needed to set up the SendPulse SMTP and configure the bounce/spam email lists. So now you are all set to send bulk emails using MailGet.
You may also like –
- Elastic Email SMTP With MailGet : Complete Setup