
SendinBlue is one among the most widely used SMTP being preferred by users for sending bulk emails. Here in MailGet, you can easily connect with SendinBlue SMTP for sending emails.
In this documentation, you will be going to learn about the steps for integrating SendinBlue SMTP with MailGet.
Let start…
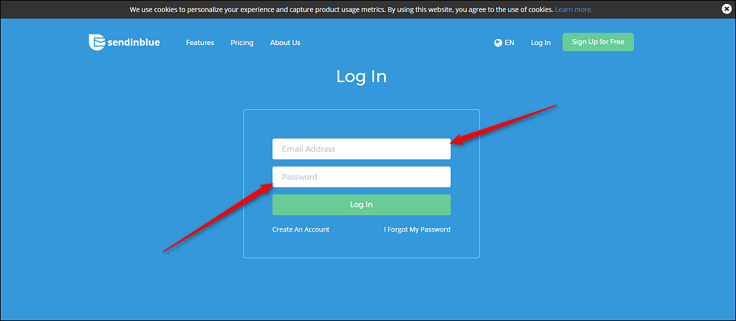
STEP 1. Login to your SendinBlue account.
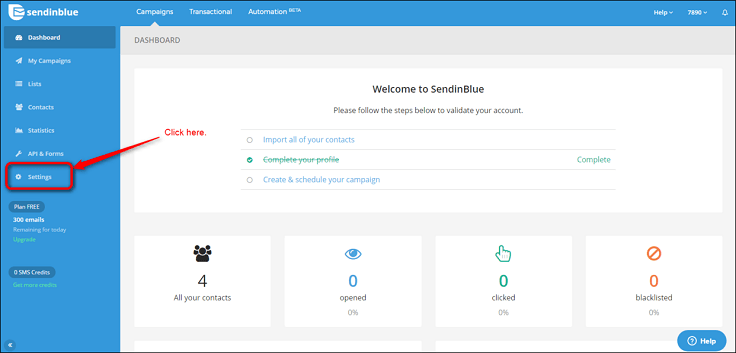
STEP 2. After login to your SendinBlue account, you will be redirected to the dashboard, which looks as shown below. Next, you will need to move to the “Settings” section.
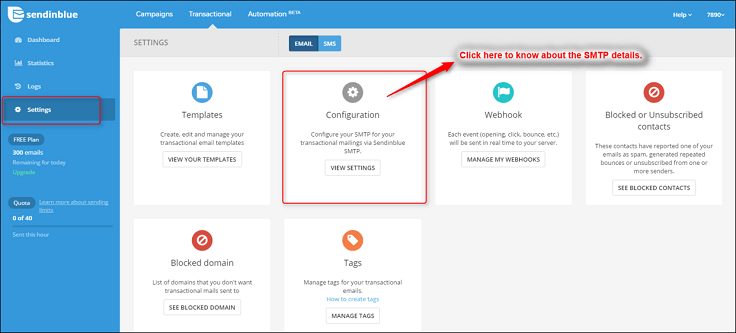
STEP 3. In settings section, you will be able to see the various option as shown below. You will need to move on to the “Configuration” section.
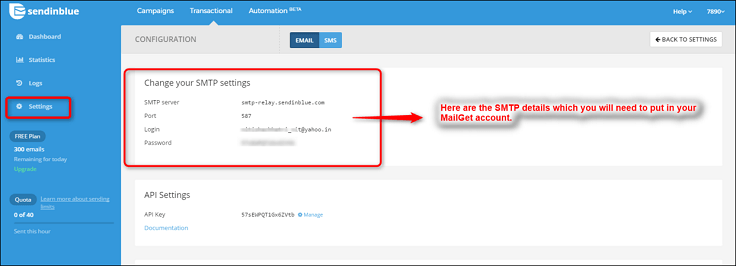
STEP 4. So in the configuration section, you will be able to get the SMTP details which you will have to put in your MailGet account.
STEP 5. Now move onto your MailGet account and put the SMTP details which you got from your SendinBlue account.
Here’s are details which you will have to put-
- Select Your SMTP Provider – Any Other/ Custom SMTP
- SMTP Name – SendinBlue
- HOST – smtp-relay.sendinblue.com
- PORT – 587
- ENCRYPTION TYPE – Select TLS
- From Email (Verified in SMTP) – Write the email which you’ve verified in your SendinBlue account
- USERNAME/API – Write here the login email which you’ve got from your SendinBlue account.
- Password/Secret KEY – Write here the password which you’ve got from your SendinBlue account.
Once you put the SMTP details, then click on “SAVE SMTP CREDENTIALS“.

Setting Up Bounce & Spam in SendinBlue Account
Once you’re done with setting up SendinBlue SMTP details in your MailGet account, next you will have to setup spam and bounce in your SendinBlue account. This setup will help you in tracking the bounce & spam users, later on, you will not send them any emails in future.
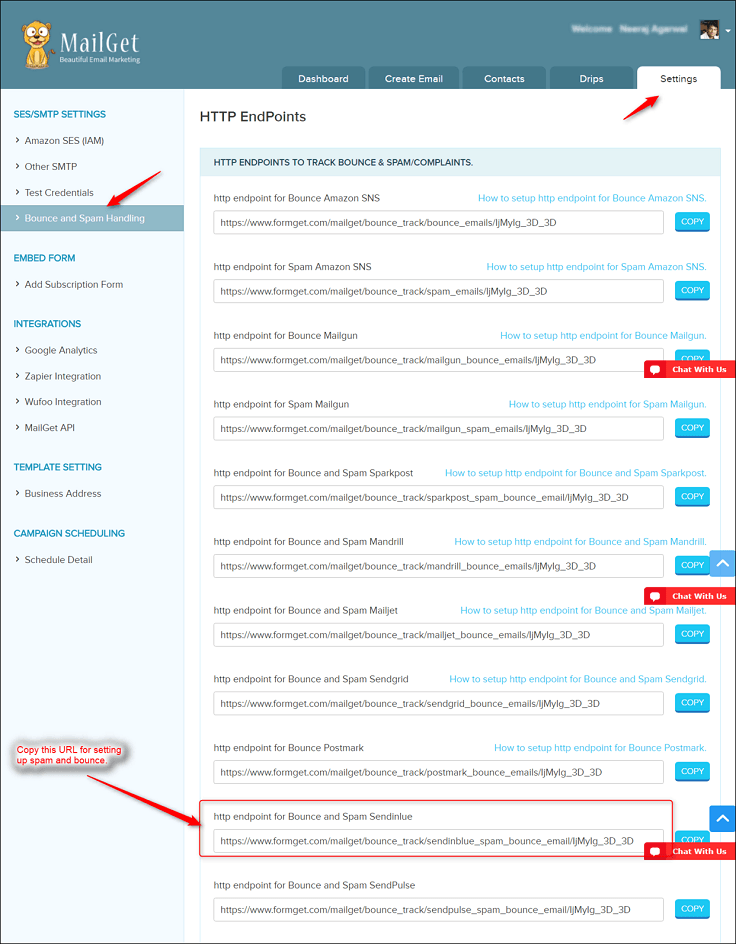
STEP 1. Move to the Bounce and Spam Handling section in your MailGet account as shown below. In that section, you can see the URL for SendinBlue. Kindly copy that URL as we need to put that URL in SendinBlue account.
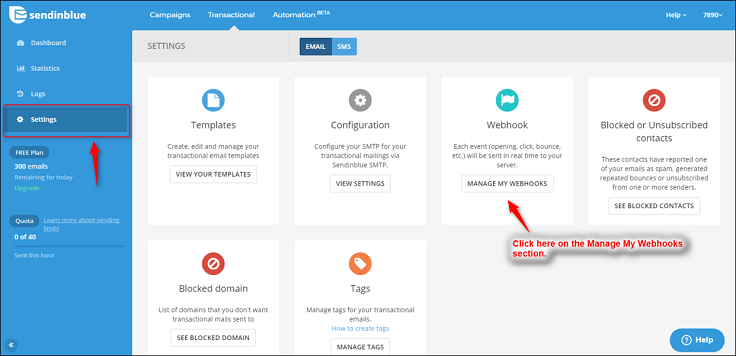
STEP 2. Login to your SendinBlue account, and then under the Settings section, you will need to click on the option named as “Webhook” as shown below –
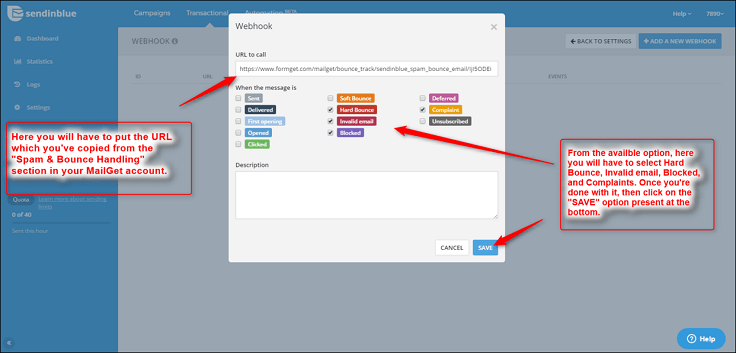
STEP 3. Once you move to the Webhook section, you will have to press on “Add A New Webhook” option and a small popup. Now paste the URL which you’ve copied from your MailGet account, select the Hard Bounce option and then click on save button.
That’s it you have to do for setting up spam and bounce in your SendinBlue account. Once you’re done with all the above step, you can then start sending emails. Still, if you wish to connect with some other SMTP, you can click to Configure Multiple SMTP.
You may also like –
- SendPulse SMTP With MailGet : Complete Setup