
MailGet provides an excellent feature to connect multiple SMTP services in your MailGet account to send emails. It connects with all SMTPs like SendPulse, SendInBlue, SendGrid, MailGun, Postmark, Google, Outlook, Yahoo, MailJet etc.
In this documentation, you are going to connect ElasticEmail SMTP with MailGet to send emails and see how to update that credentials.
Connect Elastic Email SMTP With MailGet –
To connect MailGet with ElasticEmail as your SMTP, you will need to first signup for ElasticEmail SMTP service and create an account there. Once you have created the account. Simply follow the given steps, which will guide you properly.
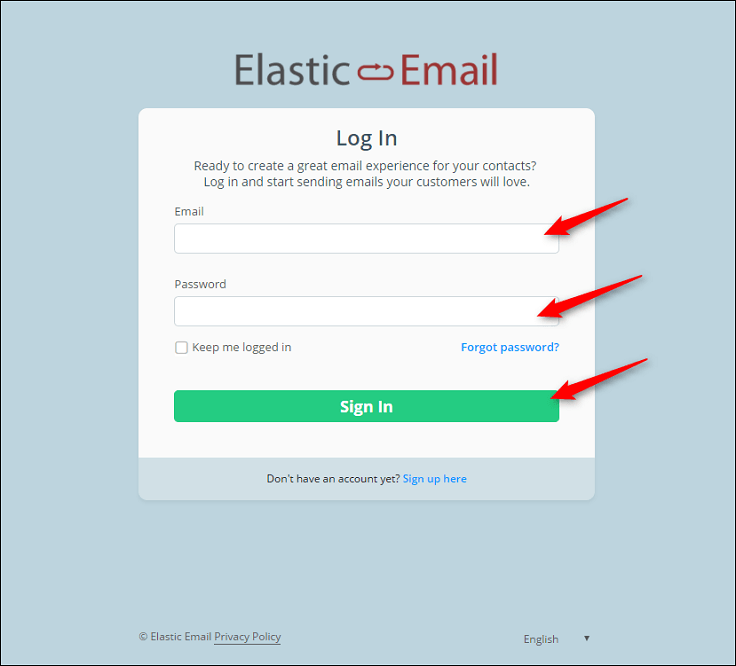
Step:1 – Login to your elastic email account to create the account.
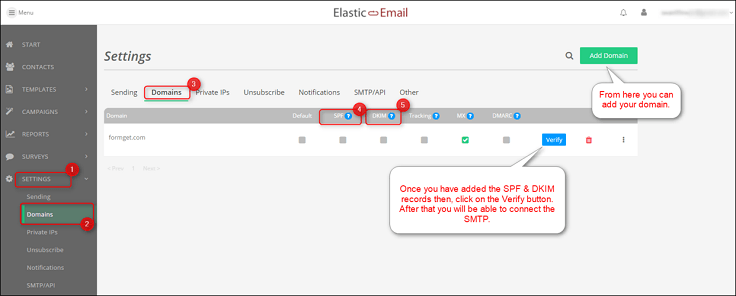
Step:2 – Once you’ve created an account in the ElasticEmail SMTP, you will have to get your domain verified. For verifying your domain, you will have to go to settings option and select domain. From the top menu, under Domain select the SPF & DKIM records where you will add the details and once you will add these records then your domain will get automatically verified. See the below image to get a clear assistance.
Step:3 – After verifying your domain, go to “Settings” and select “SMTP/API” option. You will then, get the credentials which you will put in your MailGet account for connecting Elastic Email as your SMTP.
Step:4 – After getting all the SMTP credentials of Elastic Email. Login to your MailGet account then, go to “Other SMTP” under Settings option and fill the required details in their respective columns. Here’s are details which you will have to put-
- Select Your SMTP Provider – Others
- SMTP Name – Elastic Email
- HOST – smtp.elasticemail.com
- PORT – 2525
- ENCRYPTION TYPE – None
- From Email (Verified in SMTP) – Write the email address associated with the domain which you have verified in your Elastic Email account.
- USERNAME/API – You will get the username from your Elastic Email account.
- Password/Secret KEY – You will get the password from your Elastic Email account.
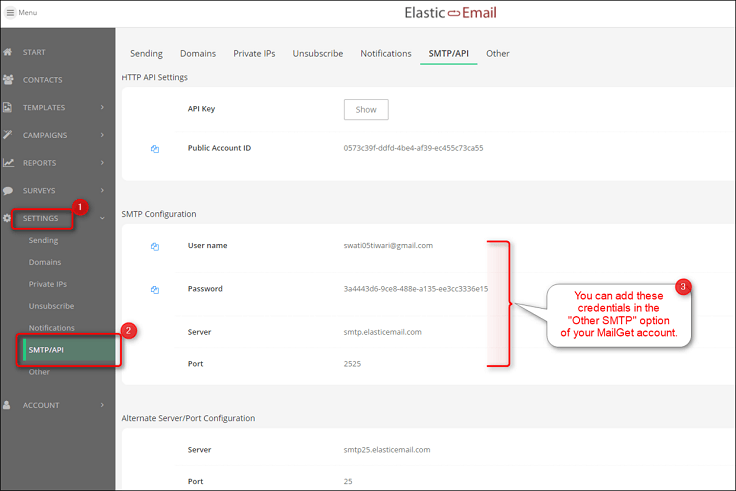
Put all the required details in the respective fields, click on “Save SMTP Credentials”. Hence with this, your MailGet will be connected to the ElasticEmail SMTP.
Setup Bounce & Spam Setting in Elastic Email Account
After setting up SMTP credentials you will have to setup spam and bounce in your Elastic Email account which will ensure that you’re able to track down the spam and bounce emails. By ensuring this, you will make sure that you won’t be sending any emails to them in afterward.
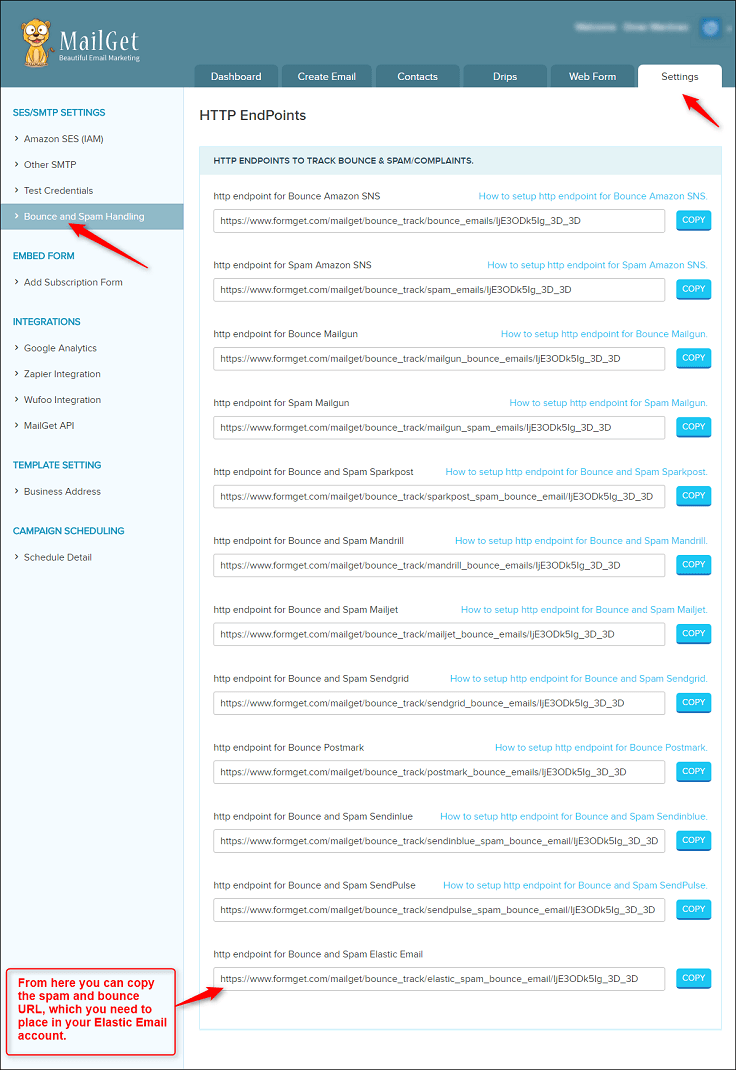
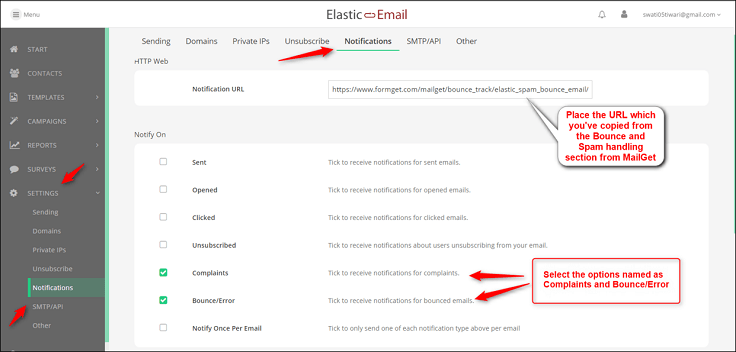
Step:1 – On your MailGet dashboard, click on the “Setting” option and then you can see “Bounce and Spam Handling” section. Under that section, you will have to copy the bounce and spam URL provided for Elastic Email.
Step:2 – Next get to back to your Elastic Email account and move to the Settings section, where you will have to click on the “Notifications” option. Now you can see a field named as “Notification URL” where you will have to place the URL copied from your MailGet account and then click on the save button, as shown below –
Once you’re done with the above procedure, you’re all setup for sending emails via Elastic Email SMTP. Meanwhile if you wish to send emails via every SMTP at the same time, then you can look up for the MailGet SMTP Routing feature.
Recommended blog –
- SMTP2Go With MailGet : Complete Setup