
That’s no wonder if your mailing list contains a large number of invalid email addresses.
So we recommend you to configure SNS with your SES account and get rid of any such invalid/expired emails containing in your mailing list.
When next time your emails will be sent, all the bounced email addresses will be filtered out from your contact list.
Just follow these few steps required for configuration after which SNS will start sending notification of every bounced email to your MailGet application then MailGet application will add these emails in your bounce list.
With the help of these notifications, MailGet will be able to filter your emails list and help you maintain a good reputation of your Amazon account.
Follow the below steps –
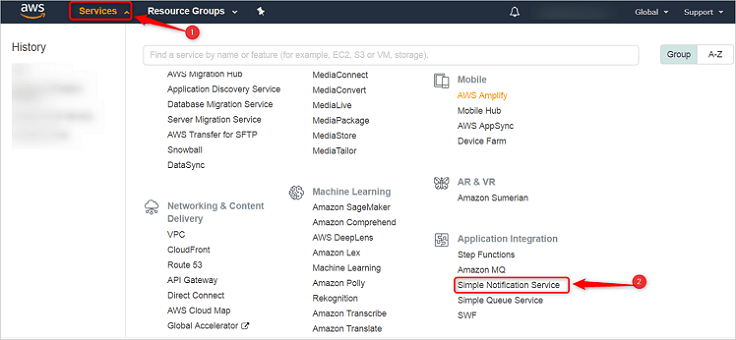
Step: 1 Go to the “Services” section and click on “SNS – Simple Notification Service” option.
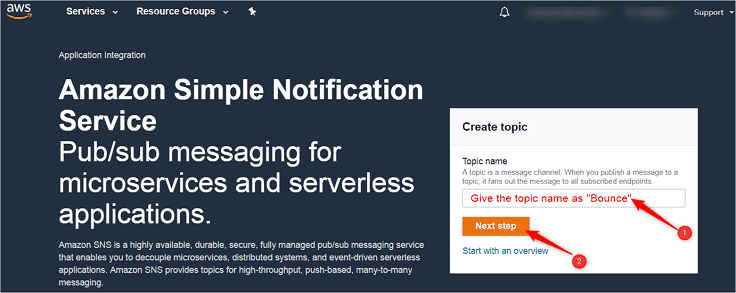
Step: 2 Add topic as “Bounce” under the Topic name option and hit “Next Step” button.
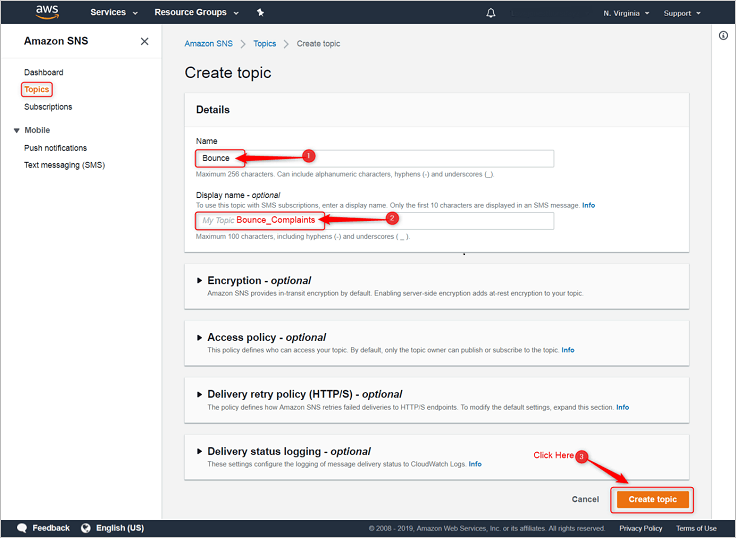
Step: 3 After clicking on a “Create Topic” a display screen will appear, where you will have to give a Topic Name as “Bounce” and Display Name as “Bounce_Complaints”. Once you have added the desired names then click “Create Topic” button.
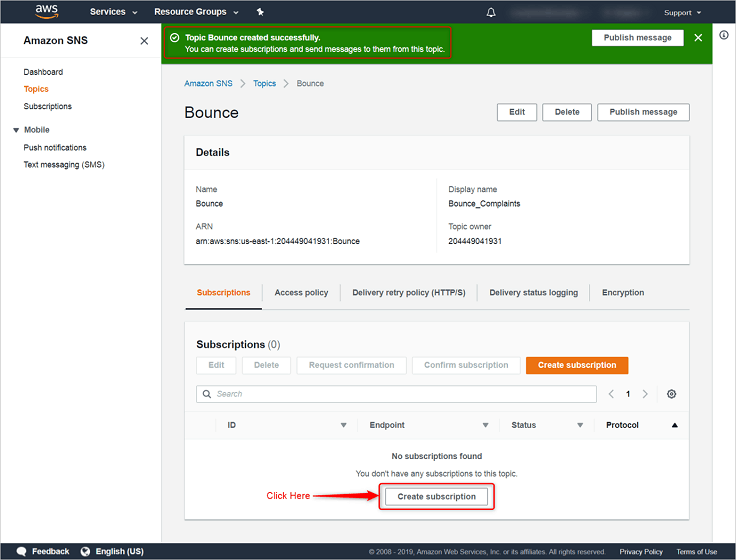
Step: 4 Next, click on “Create subscription” button.
Step: 5 In this step, you will have to add the endpoint. So, select Protocol as “HTTPS”.
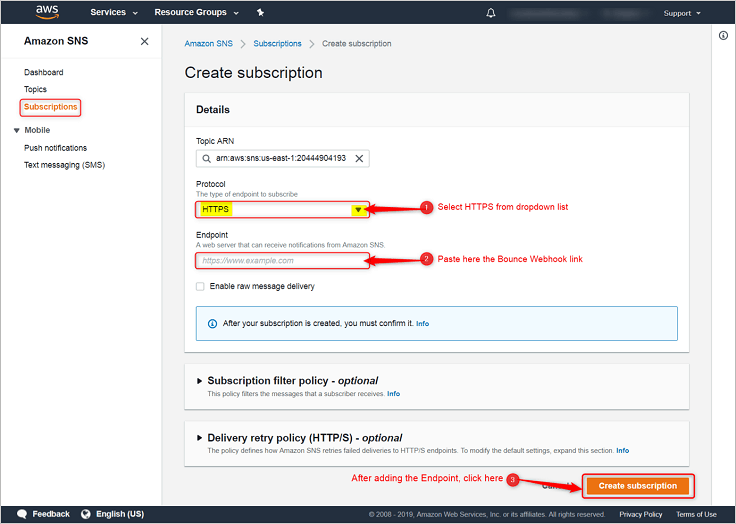
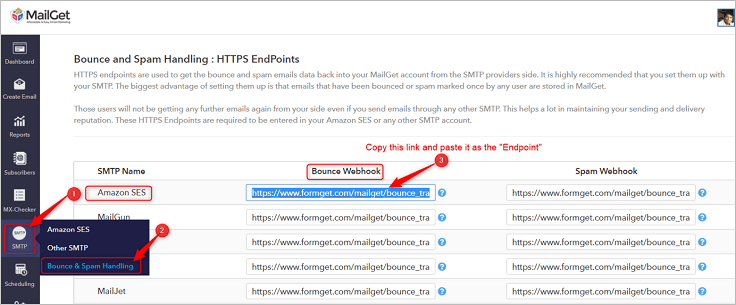
Next, just copy & paste the link for Endpoint viz., given in your MailGet account as “Bounce Webhook”, under Bounce & Spam Handlings section and then click on “Create subscription”.
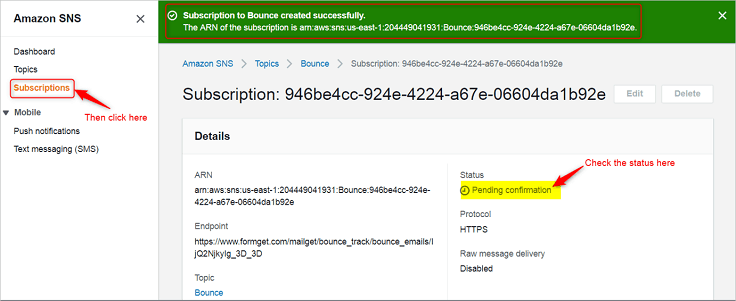
Step: 6 It will show a status of “Pending confirmation” and to confirm it, you will first have to move on to the “Subscriptions” label.
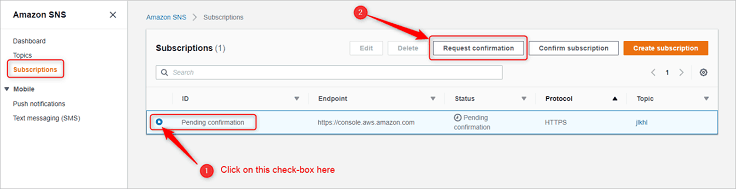
Step: 7 Select “Pending confirmation” option from the checkbox and then click on “Request confirmation” button.
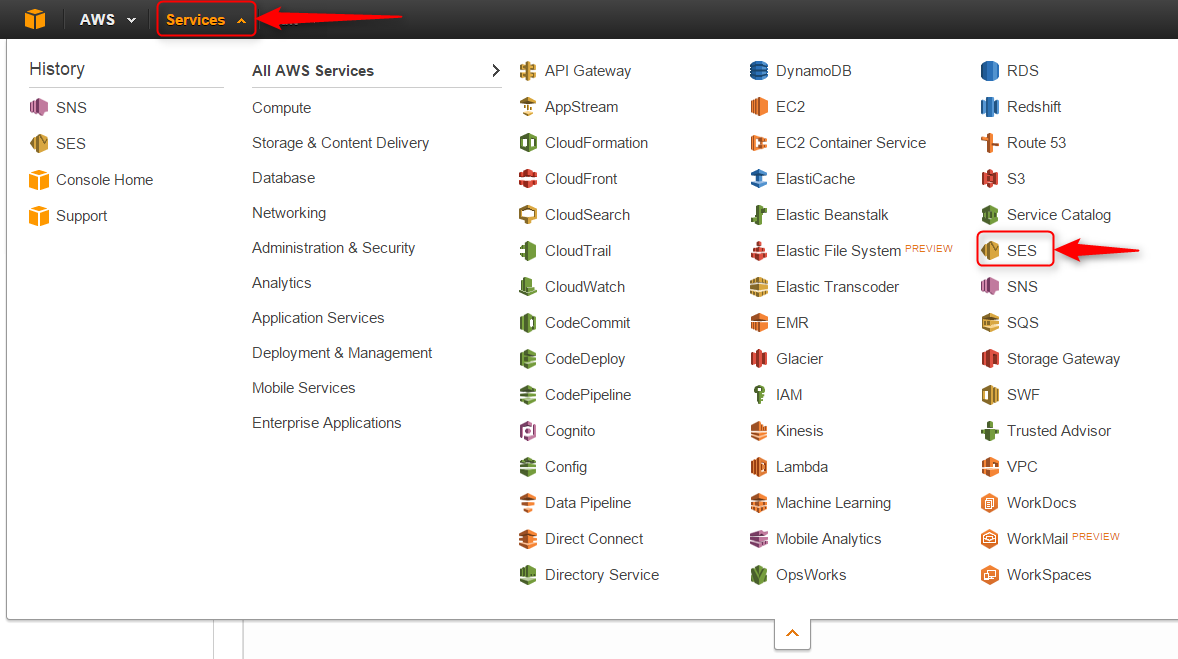
Step: 8 Now go to the “Services” section and then select “SES“.
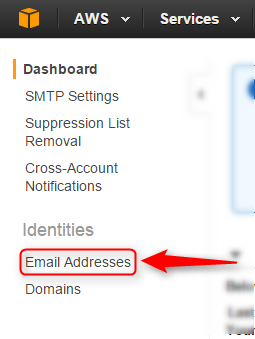
Step: 9 Click on the “Email Addresses” label.
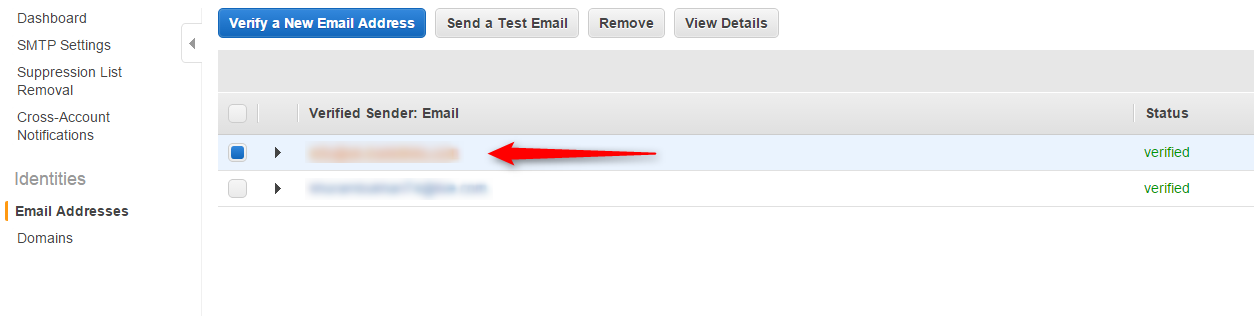
Step: 10 Now click on your verified Sender: “Email address”
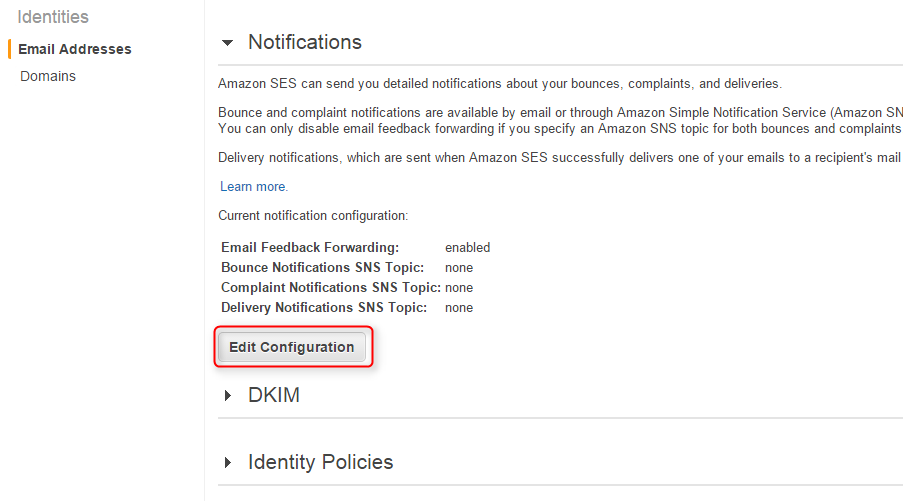
Step: 11 After that click on “Notification” Option.

Step: 12 Then click on the “Edit Configuration” Button.
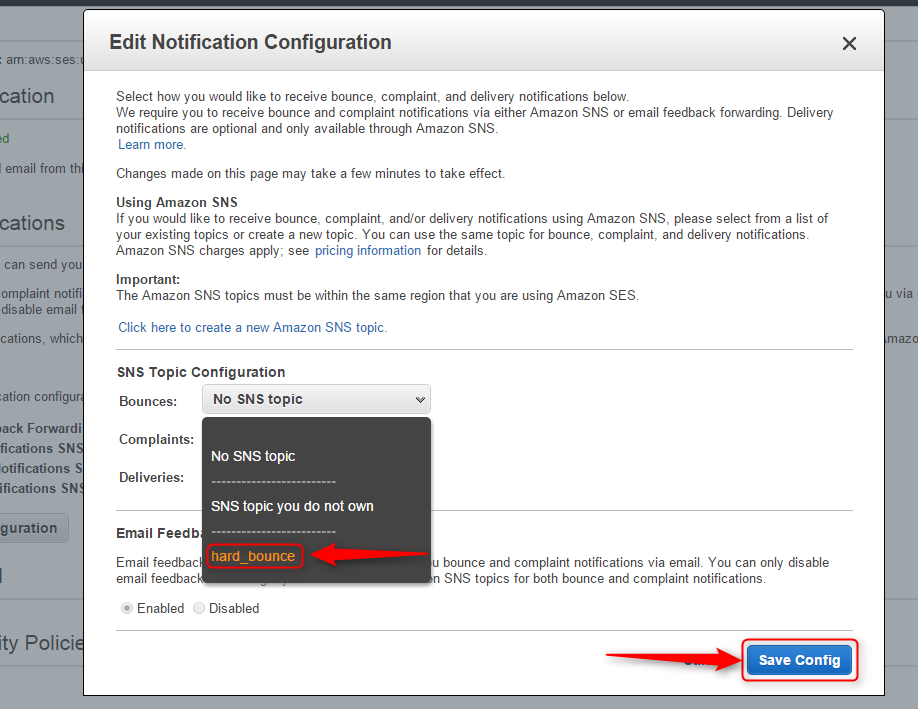
Step: 13 Finally, select the “Bounce_Complaints” available under the dropdown list of SNS Topic Configuration → Bounces. After that, click on “Save Config”.
If you still experience problems, you can reach our support team anytime, or can talk to our support member over online chat.