
If Google Forms is your first choice for creating any type of form and now you are looking for a way to capture & share your location with visitors via Google Forms, then I would like to tell you that:
Google Forms does not support the geolocation feature
It is definitely a free tool but it restricts you in features like it does’t have any inbuilt logic to identify locations. You can only add the link of the geolocation script in the description area as a part of the confirmation message.
So to overcome this you can try its alternatives.
Here, I’m highlighting one of them i.e. Pabbly Form builder that automatically detects the user’s location, IP address, etc without requiring any geolocation script. Apart from this, it has several advanced features like unlimited submission, conditional redirects, logic etc.
Try Pabbly Form Builder for Free
Forms work well for gathering a variety of data from any user. But if you want to record GPS coordinates on forms such as incident reports, order delivery forms, etc. then mistakes can happen while entering information that creates more work for you!
For example, while filling out shipping and billing address forms you filled the right address but it could not be located or confirmed for one reason or another.
Thus, you need to add the geolocation field to your forms. Adding this field to forms makes it easy to track where forms are filled out. The geolocation field can automatically get and store the current location of users.
For this, you would need to specifically ask the user in a question within the form for their country, postcode or zip, etc. Or else, you can handle the code/program in the script editor. This is a hectic task if you are not a pro at handling code and programs.
Google Forms does not identify visitor locations without scripting links. So, it will be mandatory for the respondent to click on the link before proceeding. Because it takes the location only when the user clicks on that link.
Let’s See How To Get The Geolocation Of A Place In Google Forms:
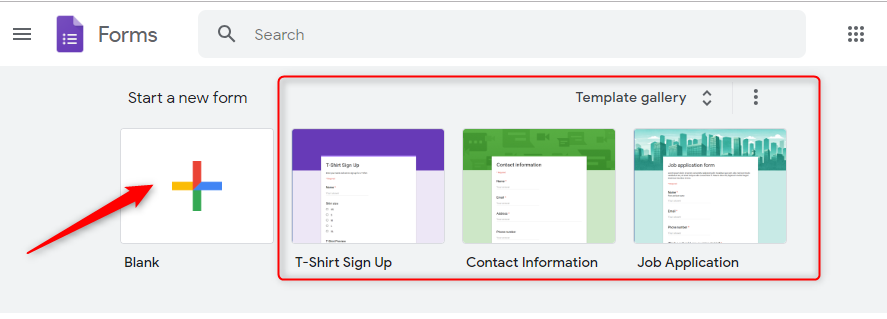
Step 1: Choose Your Template
First, you can simply choose the form design from its amazing pre-built templates or create your own by selecting the “Blank” option.
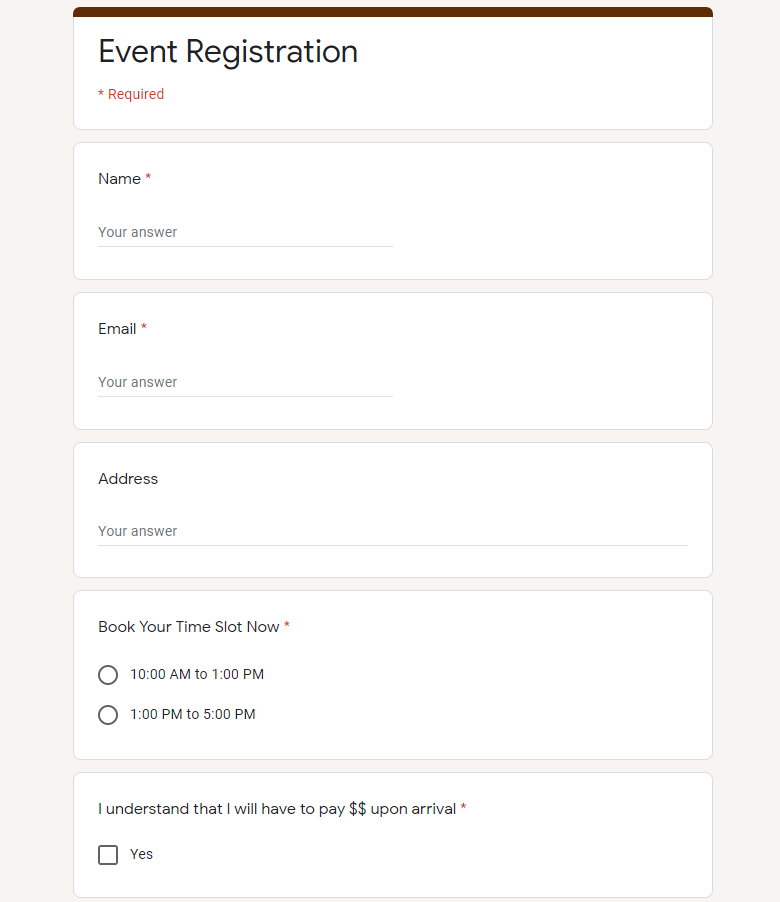
Step 2: Create Your Form
Next, create your form according to your requirements with the address field to capture a user’s location.

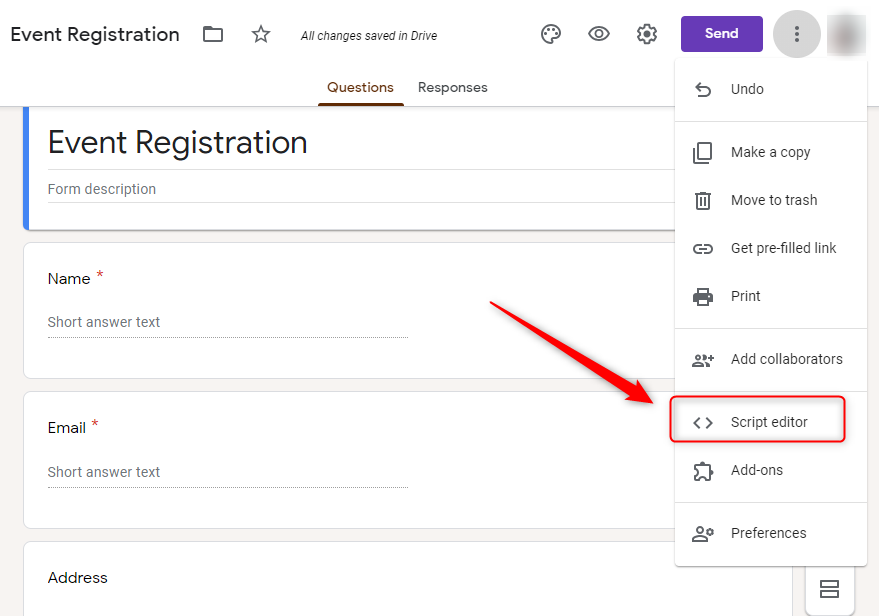
Step 3: Go To The Script Editor
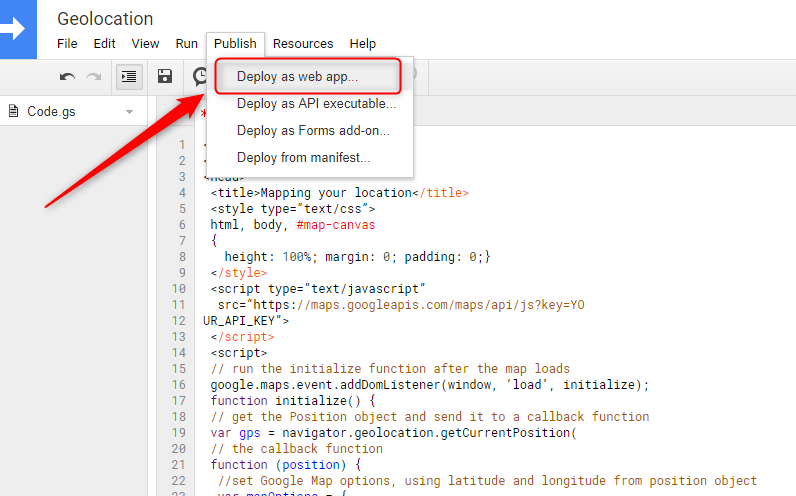
Now, click on the “More” option that is available in the top right corner, here you will find the “Script Editor” option in the drop-down menu.
Step 4: Add Your Geolocation Script
A clean slate opens in the new tab where you can enter your geolocation script to gather users’ address (street name, city, state, zip code, country). After adding the script you can publish it as “Deploy as web app” that will create a link.
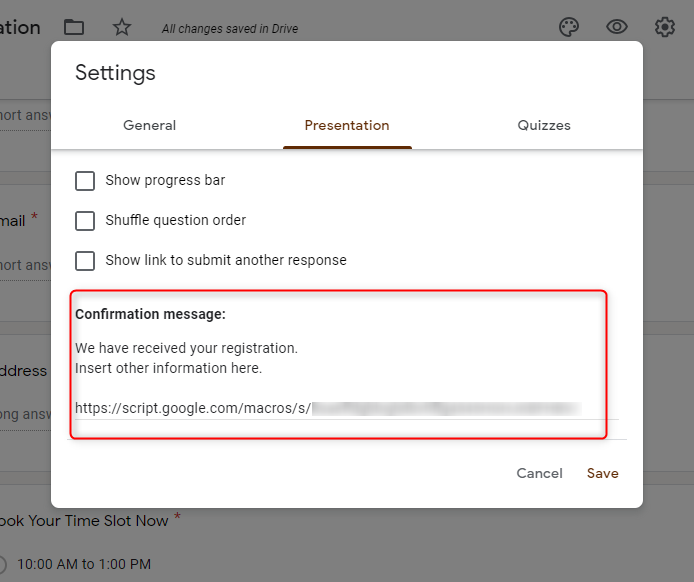
Step 5: Paste A Link To The Confirmation Message
Now go to the settings of your form and paste the geolocation script link in under the confirmation message tab/section.
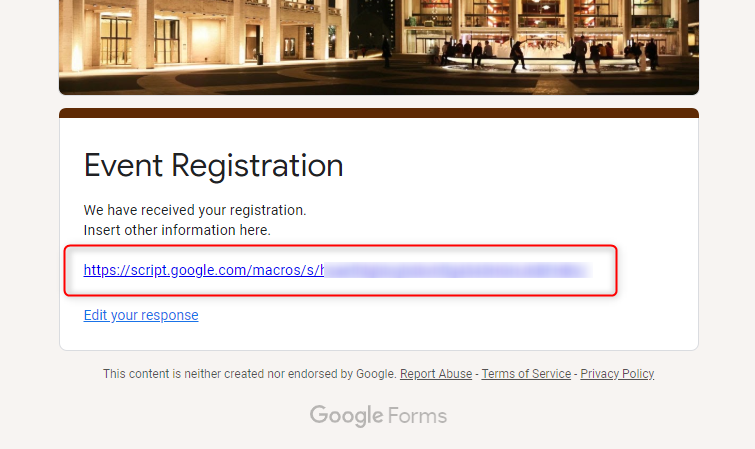
Step 6: Geolocation Script Link
After submitting the form, when users click on the scripted link, it will detect the respondent’s location.
Limitations of Google Forms
Google Forms has some limitations that you may not realize until you actually use it. We have seen one of its drawbacks in the above section i.e. it does not detect geolocation of place automatically. Therefore, you need to take the location from Google Maps using the link sharing option and paste it within your form description.
Besides that, it has some other limitations such as:
- It will not allow you to collect online payments directly from it.
- You cannot customize its rigid template to a great extent.
- Google Forms is not optimized for tablets or mobile devices.
- It doesn’t support complex branching & logical jumps.
- You can get email notifications only on one email address.
These are some pitfalls of using Google Forms, which may cause you to look for other form builders available online.
One of its best alternatives is Pabbly Form Builder, which does not restrict you on features. With this, you can easily share your current location with the respondent so that they can easily reach you using the map
Embed Google Maps Into Your Form via Pabbly Form Builder
Pabbly Form Builder is the best alternative of Google Forms because this software incorporates all those features which you refused to use in Google Forms. With this, you can easily embed the map in your form and share your location with the respondent without any coding knowledge.
Further, it automatically captures the user’s location, country, state, IP, browser details without adding any scripting code.
The following guide will teach you how to add a Google Maps to your form for getting the location of a place.
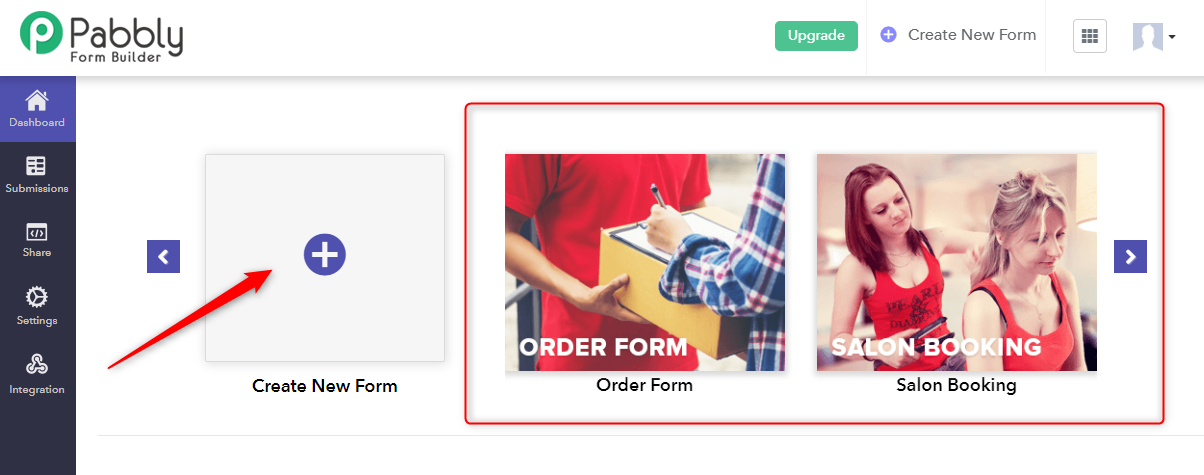
Step 1: Create Your Form
Firstly, you need to sign up for a free account & create a form by clicking on the “Create New Form” icon. Also, you can use its 250+ pre-built templates and customize it according to your requirements.
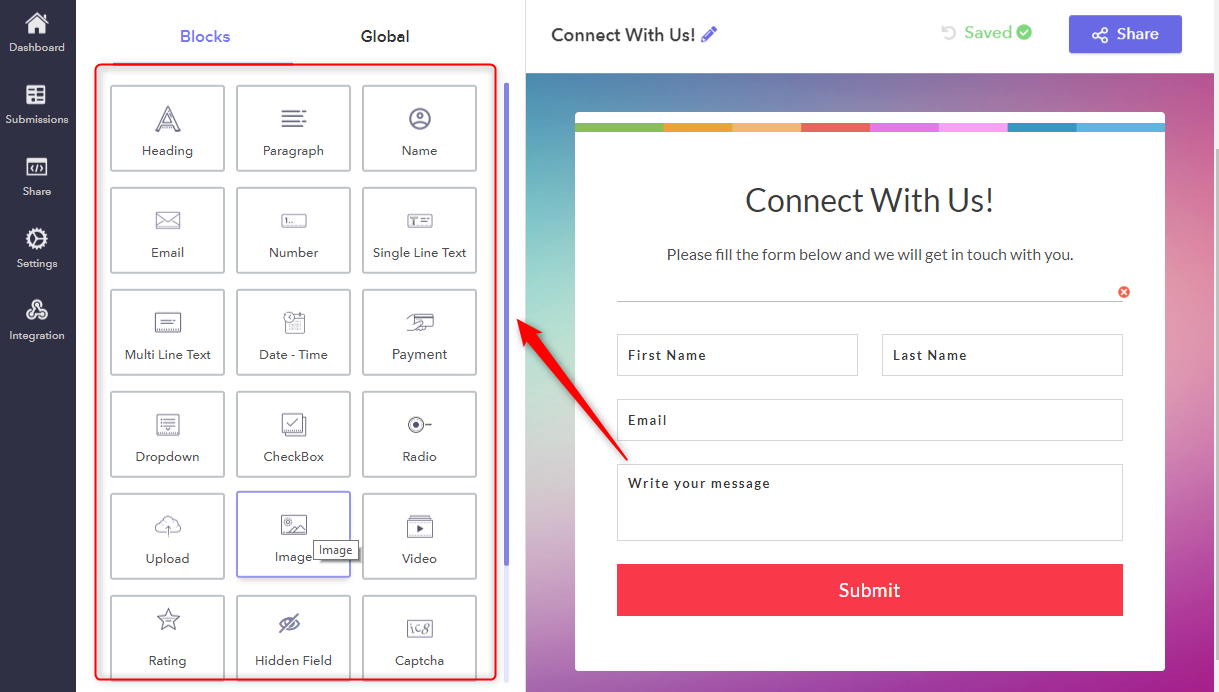
Step 2: Add Custom Fields
After this, add as many fields as you want in the form using its advanced options such as payment, captcha, hidden field, logic, rating, etc.
Step 3:Customize The Form
In addition, using this one can customize/edit your form individually or globally according to your needs. When you click on the “Global” option, many customization options will appear on the screen such as themes, layout, headers, etc.

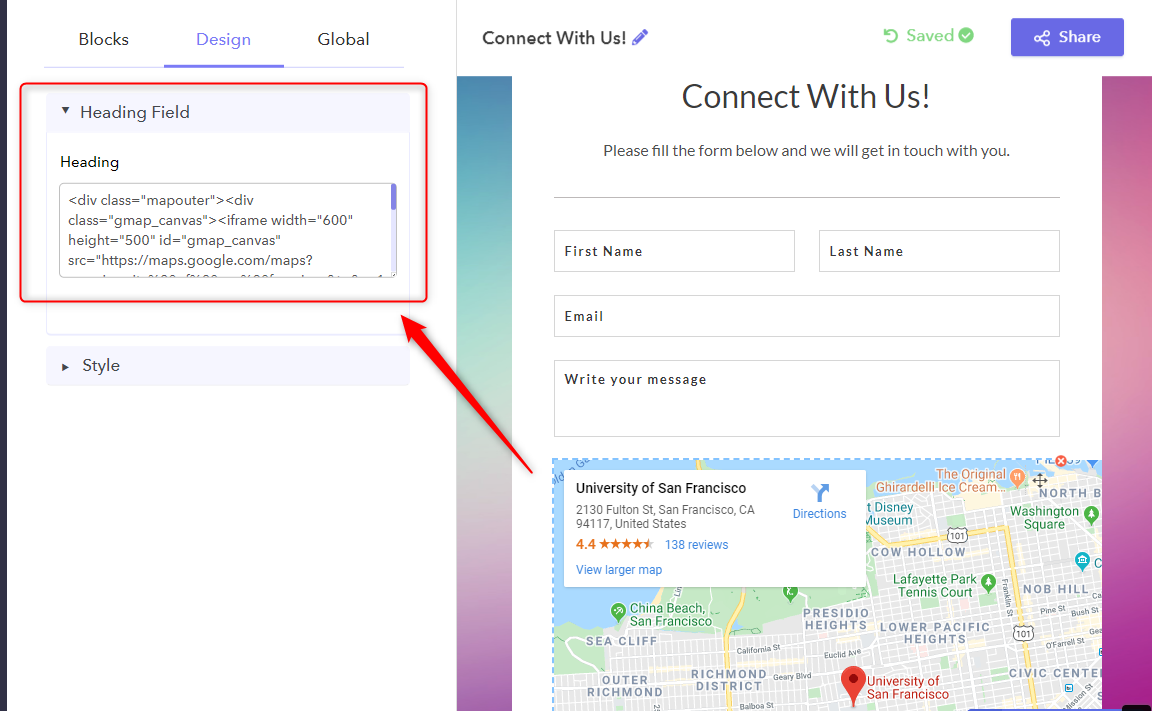
Step 4: Embed The Map On Your Form
Now as you click on the “Heading” blocks the design options are open on your screen, here you can paste Google Maps code in “Heading Field” to embed the map in your form.
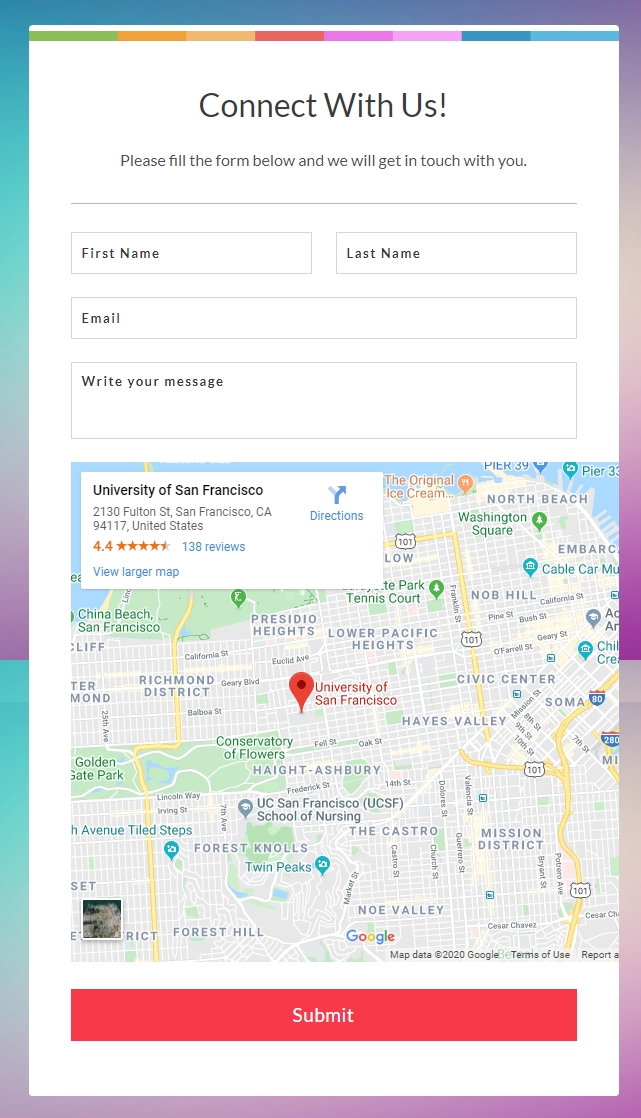
Step 5: Preview Your Form
To check the preview of your form with a map you can simply click on the eye icon.
Step 6: View Users Information
Now, go to the “Submission” option and then click on the user’s response details. A popup will appear on your screen where you can easily find all the details of your users.
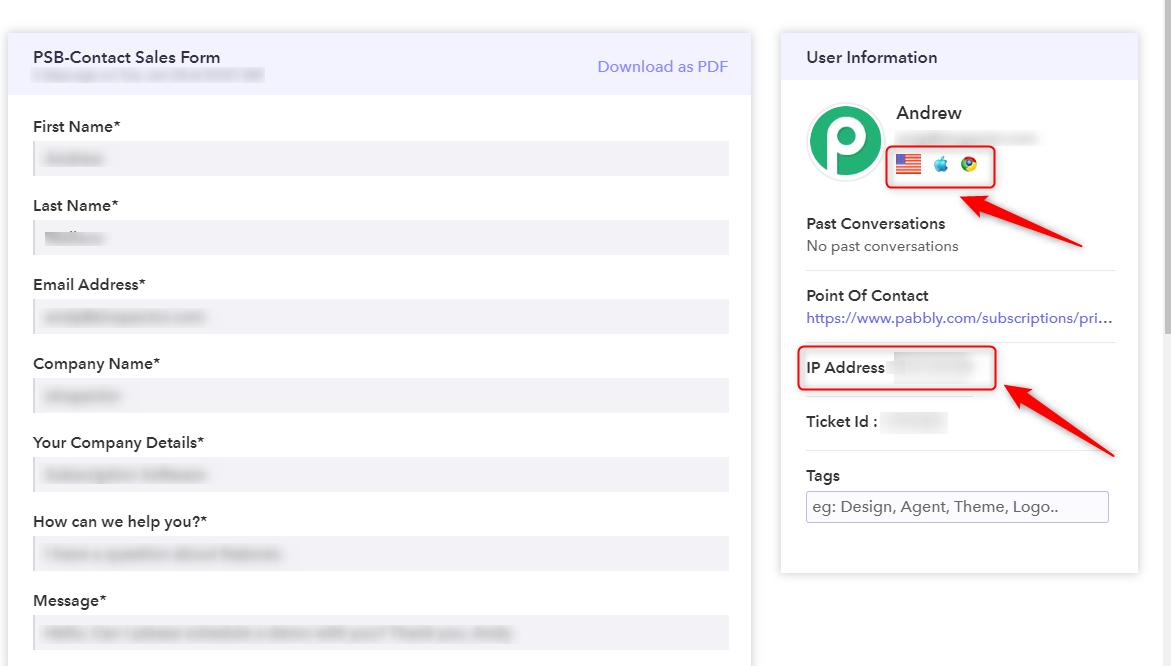
Now, you can view your user’s responses, IP address, country, browser details, etc in the admin panel.
Final Thoughts
Now, you can easily share your location with another person by embedding a map in your contact form. This will save you time and bring more business to your store. You’ll not only save your time but also get more leads through your contact form without having to embed the code every time.
We hope this article has helped you to add geolocation to a form!