
Hello! As you might already know that a person can receive blog feeds on email or on a website. But you need not surprise when I say that you can also create a Google Chrome Browser extension for this. So your user can see all latest feeds just by a click on an icon, that’ll display RSS feeds from the server.
Chrome is now one of the most popular web browsers and you can’t ignore its utilization in increasing your users.Creating a chrome extension of your service has become a necessity and it is also not too much tough. So let’s begin creating your first extension to display RSS feeds.
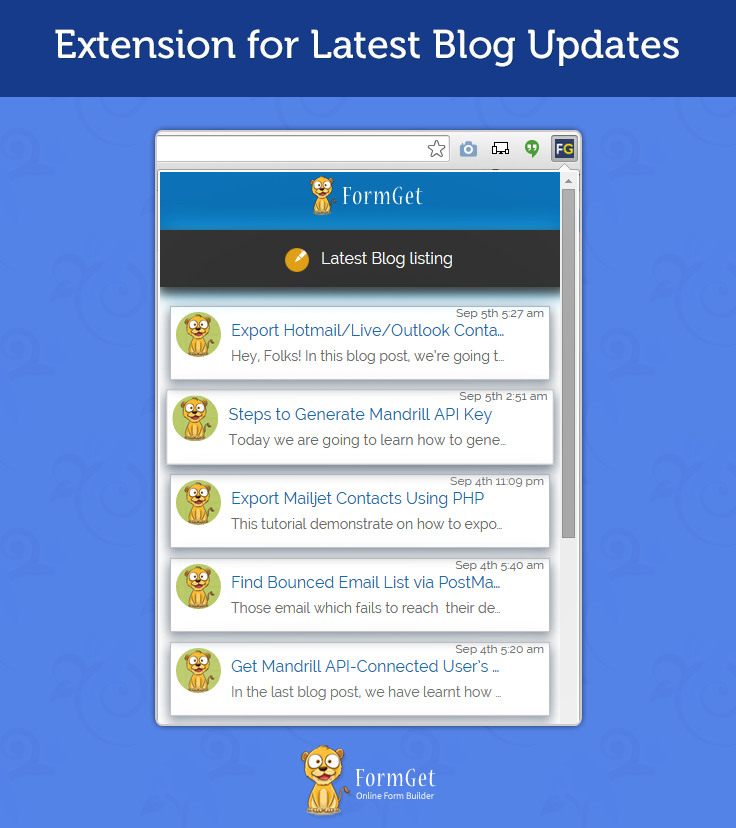
Watch the live demo or download code from the link given below
What is an extension
Google provides various APIs to create a program which runs inside the browser and extends the browser’s functionality.That is why such programs are called extensions.
There are many limitations while creating an extension since google is much strict towards the data security.So you must consider these following limitations in your mind before you proceed to code for an extension-
1.] The popup to display should be purely HTML and JavaScript and jQuery is the only thing to manage all content.
2.] To create dynamic content, prefer to use external Javascript in any page of the extension.
3.] Chrome blocks all links which don’t have a “target” property set to “_blank”.
4.] If you are linking some files from google servers it is better to download them into your extension. If it is still necessary then prefer “HTTPS” over “HTTP”.
How to create extension
The first file you need to create in order to create an extension is a JSON formatted “manifest” file, and it is compulsory that you name the file as “manifest.json”.The file manifest contains all metadata about your extension.Here you provide a name of your extension, some description about it, also the version, permission to the resources from your extension would require accessing data. You can choose either browser action or page action depending on your extensions requirements. Here I’ve chosen browser action and provided the details of my extension’s icon, popup page, and its default title.
manifest.json
{
"manifest_version": 2,
"name": "Formget Latest Blogs",
"description": "This extension displays the latest blog updates from FormGet.",
"version": "1.0",
"browser_action":
{
"default_icon": "formget_favicons.png",
"default_popup": "popup-page.html",
"default_title":"Formget Updates"
},
"permissions": [ tabs],
"content_security_policy": "script-src 'self' https://www.google.com;object-src 'self'"
}
Then create a HTML file with name “popup-page.html”. This file will be rendered inside the popup of your extension. Since we’ll be displaying feed at runtime, so there is an empty division<div> with id given”feed”, into which dynamically data will be populated.
popup-page.html
<!DOCTYPE html PUBLIC "-//W3C//DTD XHTML 1.0 Transitional//EN" "http://www.w3.org/TR/xhtml1/DTD/xhtml1-transitional.dtd">
<html xmlns="http://www.w3.org/1999/xhtml">
<head>
<title>Formget Latest Blogs</title>
<script type="text/javascript" src="jquery.min.js"></script>
<script type="text/javascript" src="jquery.parss.js"></script>
<script type="text/javascript" src="myjs.js"></script>
<link rel="stylesheet" href="mycss.css" type="text/css" media="all">
</head>
<body id="main-body">
<div id="box">
<div id="logo"><a href="https://www.formget.com" target="_blank"><img src="img/formget-logo.png" alt="Formget logo"></a></div>
<div id="blog-head">
<div id="blog_head_con">
<a href="https://www.formget.com/blog" target="_blank">
<img src="img/blog.png" alt="formbuilder">
<span class="logo-inner">Latest Blog listing</span>
</a>
</div>
</div>
<!--Below div used to place RSSfeed data fetched from server-->
<div id="feed"></div>
</div>
</body>
</html>
Now create the “heart” of our extension, a Javascript file. Every dynamic content on our popup page is delivered through javascript. Since chrome allows only external javascript, we need to create a file with name “myjs.js”. Here “jquery.parss.js” library is used, to fetch RSS feeds from your server. It directly puts the <title>, <date>, <description> etc. in <li> tags.
myjs.js
$(document).ready(function(){
$("#feed").PaRSS(
"https://www.formget.com/feed/", // (feed_url,item_count,date_format,show_descriptions)
10,
"M jS g:i a",
true
);
window.addEventListener('click',function(e){ // To open injected hyperlinks in new tabs, chrome block them otherwise.
if(e.target.href!==undefined){
chrome.tabs.create({url:e.target.href})
}
});
});
mycss.css
#main-body{
margin:0;
}
#box{
width:400px;
font-family:raleway,Arial, Helvetica, sans-serif;
}
#feed{
list-style:none;
background-color:#FFFFFF;
margin-top:134px;
}
li:before{
content:'';
display:inline-block;
height: 45px;
width: 45px;
background-image:url(img/author.png);
border-radius:30px;
background-size:contain;
background-repeat:no-repeat; }
li{
border:1px solid #CBCBCB;
padding:5px;
box-shadow: 0px 5px 17px 1px #99A3AD, 0px 0px 40px #EEEEEE;
margin-top: 20px;
margin: 10px;
}
li:hover{
transform: scale(1.02);
}
#logo{
margin-top:-10px;
background-color:#0c79c3;
padding: 14px;
z-index:99999;
position: fixed;
top: 0;
left: 0;
width: 400px;
}
#blog-head{
padding:5px 0 5px 5px;
background-color:#3C3C3C;
box-shadow: 0px 5px 17px 1px #505050, 0px 0px 40px #1ABBFF;
z-index:99999;
position: fixed;
top:58px;
left: 0;
width: 400px;
}
.logo-inner{
color:#fff;
font-size: 16px;
vertical-align: bottom;
display: inline-block;
margin-left: 5px;
padding: 14px;
}
.parss-date, .parss-image {
display: block;
float: right;
margin-top: -6px;
color: #888888;
}
.parss-title a {
font-size: 16px;
margin-top: 9px;
margin-left: 10px;
position: absolute;
color: #0C79C3;
text-decoration: none;
text-overflow: ellipsis;
display: inline-block;
width: 275px;
white-space: nowrap;
overflow: hidden;
vertical-align: top;
}
.parss-title a:hover{
color:#003399;
}
.parss-description{
font-size: 17px;
font-size: 14px;
color: #8A8A8A;
-webkit-margin-after: 0.5em;
-webkit-margin-start: 0px;
-webkit-margin-end: 0px;
text-overflow: ellipsis;
display: inline-block;
width: 275px;
white-space: nowrap;
overflow: hidden;
vertical-align: top;
margin-left: 55px;
margin-top: -12px;
}
.parss-description:after{
content:'...';
}
div#blog-head img {
margin: 0 -10px 7px 0;
}
div#logo img {
margin: 0 34%;
}
div#blog_head_con {
margin: 0 0 0 30%;
}
Load the extension locally
Now you have all required files ready so you need your extension to start working in a chrome. You can load your extension in following steps:
- Directly type “chrome://extensions” in the address bar. Alternatively you can click on menu icon
 then click “more tools->extensions”.
 - Now check the “Developer Mode” checkbox on the top of the page.
- Click on “Load Unpacked Extensions” button and give the path of your extension folder residing in your local system.
Your extension’s icon will start displaying in the extension bar of the browser. Click on it and see what we’ve done so far!
Conclusion
This was the easiest kind of extension you will build. But you can work more on it to increase the functionality. I hope that the post was helpful for you to create a simple RSS feed extension successfully. I tried to keep things simple and clear. Keep visiting our website, Thank you !!
For more information go thorugh following blogs –
- Javascript Login Form
- Form Submit Without Page Refreshing– jQuery/PHP
- How To Create Pop-up Contact Form Using JavaScript
2 Replies to “Chrome Extension Tutorial to Display RSS Blog Feeds”
how to set unread count of feed in extension.
Useful info. Lucky me I found your web site by accident, and I am surprised why this
accident did not came about earlier! I bookmarked it.