
In this blog post we have covered one of the topic of ajax i.e. to upload images using Ajax and php without page refresh.
Short Description :
In this process the image is selected first and previewed before storing it in to any location . Then using jQuery Ajax, it is send to php script on submit button event.
PHP script stores the image in a defined location and returns the message of the success and failure of the process.
Here we have applied some validations on the selected file, to check it whether it is an image file (jpg, jpeg or png ) or any other file type.
Upload File size allowed is 100 Kb.
Following steps are pointed under this process :
1. Include jQuery library.
2. HTML page with upload field.
3. jQuery Ajax code.
3. PHP script to store image.
Ajax Code :
$.ajax({
url: "ajax_php_file.php", // Url to which the request is send
type: "POST",             // Type of request to be send, called as method
data: new FormData(this), // Data sent to server, a set of key/value pairs (i.e. form fields and values)
contentType: false,       // The content type used when sending data to the server.
cache: false,             // To unable request pages to be cached
processData:false,        // To send DOMDocument or non processed data file it is set to false
success: function(data)   // A function to be called if request succeeds
{
$('#loading').hide();
$("#message").html(data);
}
});
PHP code used to store the image :
$sourcePath = $_FILES['file']['tmp_name'];       // Storing source path of the file in a variable
$targetPath = "upload/".$_FILES['file']['name']; // Target path where file is to be stored
move_uploaded_file($sourcePath,$targetPath) ;    // Moving Uploaded file
Below is our complete code with the live demo and download option
HTML page containing file upload field.
HTML file : ajax_upload_image_main.php
<html>
<head>
<title>Ajax Image Upload Using PHP and jQuery</title>
<link rel="stylesheet" href="style.css" />
<link href='http://fonts.googleapis.com/css?family=Roboto+Condensed|Open+Sans+Condensed:300' rel='stylesheet' type='text/css'>
<script src="http://ajax.googleapis.com/ajax/libs/jquery/1.11.1/jquery.min.js"></script>
<script src="script.js"></script>
</head>
<body>
<div class="main">
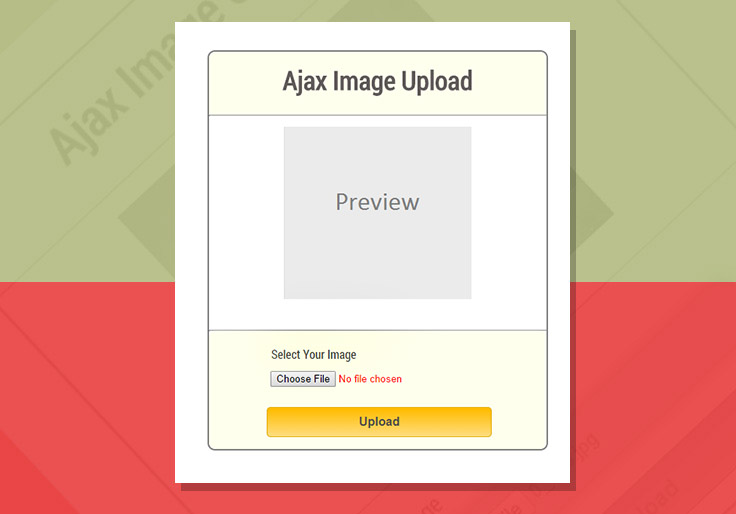
<h1>Ajax Image Upload</h1><br/>
<hr>
<form id="uploadimage" action="" method="post" enctype="multipart/form-data">
<div id="image_preview"><img id="previewing" src="noimage.png" /></div>
<hr id="line">
<div id="selectImage">
<label>Select Your Image</label><br/>
<input type="file" name="file" id="file" required />
<input type="submit" value="Upload" class="submit" />
</div>
</form>
</div>
<h4 id='loading' >loading..</h4>
<div id="message"></div>
</body>
</html>
Complete jQuery Code : script.js
$(document).ready(function (e) {
$("#uploadimage").on('submit',(function(e) {
e.preventDefault();
$("#message").empty();
$('#loading').show();
$.ajax({
url: "ajax_php_file.php", // Url to which the request is send
type: "POST",             // Type of request to be send, called as method
data: new FormData(this), // Data sent to server, a set of key/value pairs (i.e. form fields and values)
contentType: false,       // The content type used when sending data to the server.
cache: false,             // To unable request pages to be cached
processData:false,        // To send DOMDocument or non processed data file it is set to false
success: function(data)   // A function to be called if request succeeds
{
$('#loading').hide();
$("#message").html(data);
}
});
}));

// Function to preview image after validation
$(function() {
$("#file").change(function() {
$("#message").empty(); // To remove the previous error message
var file = this.files[0];
var imagefile = file.type;
var match= ["image/jpeg","image/png","image/jpg"];
if(!((imagefile==match[0]) || (imagefile==match[1]) || (imagefile==match[2])))
{
$('#previewing').attr('src','noimage.png');
$("#message").html("<p id='error'>Please Select A valid Image File</p>"+"<h4>Note</h4>"+"<span id='error_message'>Only jpeg, jpg and png Images type allowed</span>");
return false;
}
else
{
var reader = new FileReader();
reader.onload = imageIsLoaded;
reader.readAsDataURL(this.files[0]);
}
});
});
function imageIsLoaded(e) {
$("#file").css("color","green");
$('#image_preview').css("display", "block");
$('#previewing').attr('src', e.target.result);
$('#previewing').attr('width', '250px');
$('#previewing').attr('height', '230px');
};
});
PHP Script : ajax_php_file.php
<?php
if(isset($_FILES["file"]["type"]))
{
$validextensions = array("jpeg", "jpg", "png");
$temporary = explode(".", $_FILES["file"]["name"]);
$file_extension = end($temporary);
if ((($_FILES["file"]["type"] == "image/png") || ($_FILES["file"]["type"] == "image/jpg") || ($_FILES["file"]["type"] == "image/jpeg")
) && ($_FILES["file"]["size"] < 100000)//Approx. 100kb files can be uploaded.
&& in_array($file_extension, $validextensions)) {
if ($_FILES["file"]["error"] > 0)
{
echo "Return Code: " . $_FILES["file"]["error"] . "<br/><br/>";
}
else
{
if (file_exists("upload/" . $_FILES["file"]["name"])) {
echo $_FILES["file"]["name"] . " <span id='invalid'><b>already exists.</b></span> ";
}
else
{
$sourcePath = $_FILES['file']['tmp_name']; // Storing source path of the file in a variable
$targetPath = "upload/".$_FILES['file']['name']; // Target path where file is to be stored
move_uploaded_file($sourcePath,$targetPath) ; // Moving Uploaded file
echo "<span id='success'>Image Uploaded Successfully...!!</span><br/>";
echo "<br/><b>File Name:</b> " . $_FILES["file"]["name"] . "<br>";
echo "<b>Type:</b> " . $_FILES["file"]["type"] . "<br>";
echo "<b>Size:</b> " . ($_FILES["file"]["size"] / 1024) . " kB<br>";
echo "<b>Temp file:</b> " . $_FILES["file"]["tmp_name"] . "<br>";
}
}
}
else
{
echo "<span id='invalid'>***Invalid file Size or Type***<span>";
}
}
?>
CSS code : style.css
body {
font-family: 'Roboto Condensed', sans-serif;
}
h1
{
text-align: center;
background-color: #FEFFED;
height: 70px;
color: rgb(95, 89, 89);
margin: 0 0 -29px 0;
padding-top: 14px;
border-radius: 10px 10px 0 0;
font-size: 35px;
}
.main {
position: absolute;
top: 50px;
left: 20%;
width: 450px;
height:530px;
border: 2px solid gray;
border-radius: 10px;
}
.main label{
color: rgba(0, 0, 0, 0.71);
margin-left: 60px;
}
#image_preview{
position: absolute;
font-size: 30px;
top: 100px;
left: 100px;
width: 250px;
height: 230px;
text-align: center;
line-height: 180px;
font-weight: bold;
color: #C0C0C0;
background-color: #FFFFFF;
overflow: auto;
}
#selectImage{
padding: 19px 21px 14px 15px;
position: absolute;
bottom: 0px;
width: 414px;
background-color: #FEFFED;
border-radius: 10px;
}
.submit{
font-size: 16px;
background: linear-gradient(#ffbc00 5%, #ffdd7f 100%);
border: 1px solid #e5a900;
color: #4E4D4B;
font-weight: bold;
cursor: pointer;
width: 300px;
border-radius: 5px;
padding: 10px 0;
outline: none;
margin-top: 20px;
margin-left: 15%;
}
.submit:hover{
background: linear-gradient(#ffdd7f 5%, #ffbc00 100%);
}
#file {
color: red;
padding: 5px;
border: 5px solid #8BF1B0;
background-color: #8BF1B0;
margin-top: 10px;
border-radius: 5px;
box-shadow: 0 0 15px #626F7E;
margin-left: 15%;
width: 72%;
}
#message{
position:absolute;
top:120px;
left:815px;
}
#success
{
color:green;
}
#invalid
{
color:red;
}
#line
{
margin-top: 274px;
}
#error
{
color:red;
}
#error_message
{
color:blue;
}
#loading
{
display:none;
position:absolute;
top:50px;
left:850px;
font-size:25px;
}
Conclusion :
In this blog post we have covered a basic topic of ajax of uploading image using php with applied validations in it. Hope this might have worked for you to understand the ajax property. Keep reading our other blog posts for more coding tricks.
41 Replies to “Ajax Image Upload using PHP and jQuery”
good
Hi,
It seems to be great solution for other browsers but demo is not working on IE8. Will happy if you provide any solution to resolve this cause. Once again its a good solution 🙂
That’s really helpful! Thanks a lot!
Thanks for this tutorial i.it is a very useful to me
Really wonder for what you provide this code. It solve my headache problem
great post and interesting feedback from others. Thanks for sharing, how to rotate the image since it is uploaded right words.
thanks
explain php coding for $targetpath and $sourcepath .where they are storing and where it is placed
Excuse me, can I know how to add other variable as data to be post with file data?
thanks so much for the code, hope you can help me with this too..
I think the file-data is seperated from the post-data. The file-data is in $_FILES, the post-data in $_POST. You can handle both data with different functions.
Thank you! This is a great help! God bless
hi there, is it possible to have the form auto submit when an image is selected? ive tried putting the ajax code in the onchange for the file field but its not working, also can u run this without the form? ie just standalone js?
Good tutorial! Really helped me out. Can you please tell me how to make the selected image [preview and upload name] go back to normal after the image is uploaded? Eagerly waiting for your reply. Thank You.
Its good.very useful code
Great tutorial and very useful. PERFECT 🙂 solve my problem
Thanks it helped me a lot, awesome tutorial, Please upload one more tutorial regarding uploade images using ajax and progress bar
THANKS
Thanks. Was really helpful.
Hi,
The image is uploading for only one time ,, for the 2nd or more times is not working ..please check
Thanks
mahesh
THANK YOU VERY MUCH! THIS IS A GREAT AND ERROR FREE 100% WORKING EXAMPLE!
how i can make random upload file name ?
i have a idea for php code :
function genRandomString()
{
$length = 5;
$characters = “0123456789ABCDEFGHIJKLMNOPQRSTUVWZYZ”;
$real_string_length = strlen($characters) ;
$string=”id”;
for ($p = 0; $p < $length; $p++)
{
$string .= $characters[mt_rand(0, $real_string_length-1)];
}
return strtolower($string);
}
Very nice explanation on AJAX, thank you very much. Very helpful for me!!
but how to use this code ?
when file uploaded ajax save file name input box as file type i can not read value of genRandomString()
please help me.
jquery save value input box as file to hidden input box you can see my code upload in :
http://bechat.in/signup/
and all code is :
index.php {
sstart();
?>
Sign_Title; ?>
<form method="post" action="”>
Sign up
<input name="rname" placeholder="Sign_firstname; ?>” type=”text”>
<input name="rfamily" placeholder="Sign_lastname; ?>” type=”text”>
<input name="remail" placeholder="Sign_Email; ?>” type=”mail”>
<input name="rusername" placeholder="Sign_UserName; ?>” type=”text”>
<input name="rpassword" placeholder="Sign_Password; ?>” type=”password”>
<input name="repeatpassword" placeholder="Sign_PasswordConfig; ?>” type=”password”>
<input type="submit" value="Sign_Login; ?>”>
Browse
Login
select(“`username`”,”`user`”,”`username`=’$rusername'”);
if(mysql_num_rows($result)>=1)
{
$bool=true;
}
if(!pregmach($rusername))
{
$bool=true;
}
if(!pregmach($rpassword))
{
$bool=true;
}
if(!checkemail($remail))
{
$bool=true;
}
if($bool==true)
{
echo “Erorr register ..”;
}else{
if(empty($imageurl) || $imageurl ==”avatar.png”){
$sql->insert(“`user`”,”‘$rusername’,’$rpassword’,’system’,’$rname’,’$rfamily’,’$remail’,’avatar.png'”,”`username`, `password`,`list`,`name`,`family`,`email`,`avatar`”,””);
header(“location:../index.php”);
}else{
$sql->insert(“`user`”,”‘$rusername’,’$rpassword’,’system’,’$rname’,’$rfamily’,’$remail’,’$imageurl'”,”`username`, `password`,`list`,`name`,`family`,`email`,`avatar`”,””);
header(“location:../index.php”);
}
}
}
?>
//End index.php}
upload.php {
500000) {
echo ‘{“status”:”error”}’;
}else{
if(move_uploaded_file($_FILES[‘upl’][‘tmp_name’], ‘../image/profile/’.$_FILES[‘upl’][‘name’])){
echo ‘{“status”:”success”}’;
exit;
}
}
}else{
echo ‘{“status”:”error”}’;
}
}
echo ‘{“status”:”error”}’;
exit;
//}
js.js (java script file ){
$(function(){
var ul = $(‘#upload ul’);
$(‘#drop a’).click(function(){
// Simulate a click on the file input button
// to show the file browser dialog
$(this).parent().find(‘input’).click();
});
// Initialize the jQuery File Upload plugin
$(‘#upload’).fileupload({
// This element will accept file drag/drop uploading
dropZone: $(‘#drop’),
// This function is called when a file is added to the queue;
// either via the browse button, or via drag/drop:
add: function (e, data) {
var tpl = $(”);
// Append the file name and file size
$(“#signup-avatar img”).attr(“src”,”../image/profile/”+data.files[0].name);
$(“#imageurl”).val(data.files[0].name);
tpl.find(‘p’).text(data.files[0].name)
.append(‘‘ + formatFileSize(data.files[0].size) + ‘‘);
// Add the HTML to the UL element
data.context = tpl.appendTo(ul);
// Initialize the knob plugin
tpl.find(‘input’).knob();
// Listen for clicks on the cancel icon
tpl.find(‘span’).click(function(){
if(tpl.hasClass(‘working’)){
jqXHR.abort();
}
tpl.fadeOut(function(){
tpl.remove();
});
});
// Automatically upload the file once it is added to the queue
var jqXHR = data.submit();
},
progress: function(e, data){
// Calculate the completion percentage of the upload
var progress = parseInt(data.loaded / data.total * 100, 10);
// Update the hidden input field and trigger a change
// so that the jQuery knob plugin knows to update the dial
data.context.find(‘input’).val(progress).change();
if(progress == 100){
data.context.removeClass(‘working’);
}
},
fail:function(e, data){
// Something has gone wrong!
data.context.addClass(‘error’);
}
});
// Prevent the default action when a file is dropped on the window
$(document).on(‘drop dragover’, function (e) {
e.preventDefault();
});
// Helper function that formats the file sizes
function formatFileSize(bytes) {
if (typeof bytes !== ‘number’) {
return ”;
}
if (bytes >= 1000000000) {
return (bytes / 1000000000).toFixed(2) + ‘ GB’;
}
if (bytes >= 1000000) {
return (bytes / 1000000).toFixed(2) + ‘ MB’;
}
return (bytes / 1000).toFixed(2) + ‘ KB’;
}
});
//end js.js
i can not return result when generated by php function.
So good, thanks!
very useful and good
Good and nice tutorial, many tutorial on other site not clear and not obvious like on this site.
Mine is not working. am I going to change the noimage.png? Thanks
I am getting the following error
Notice: Undefined index: file_1 in C:\wamp\www\site1\test.php on line 2
That is very great tuto! thanks a lot for the code :p
Excellent script! Thank you so much — it’s working great both on my dev box and my production server.
I purchased this package and had to fix many things for a LAMP setup, and integrate into existing code.
I consider myself above amateur (40+ years in IT, 15 years in web development), yet I cannot figure out when I choose an image to upload, I get “C:\fakepath” as a response in the file name field. Where does that come from and how can I suppress it so that only the file name shows?
fakepath is chrome browser default property. Use this same code in other browser and the text “fakepath” automatically change.
Thank You Man … Awesomeeeeeeeeeeeee :] 😀 😀
Many thanx, I had always been keeping my file uploads on a separate page, now I can integrate them with my forms.
Maybe this will help somebody else:
To autosubmit the form when the user selects the image add this after ‘reader.readAsDataURL(this.files[0]);’ : ‘$(“#uploadimage”).submit();’ without the quotes.
To solve the problem when you submit the form using image “A.jpg” then you try to submit the form again using the same photo add this to the ajax success function: ” $(“#file”).replaceWith(”); ” and replace “$(“#file”).change” with ” $(document).on(‘change’, ‘#file’, function(){ ” .
Hope this will help somebody else.
Yes
very helpful thank you WingmanImd .
Sir
good script, working
but ‘move_uploaded_file’ not working.
file not moves to folders
Always make sure the folder you are trying to copy a file to, already exists. 😉
look so nice thanks
hello sir
i have a question if I have upload image and signature image on single upload button before upload need to click on check box one check box for image and one for signature after click on either sig or image then image save database and display in box signature box in signature image box in box
Sir can you guide us how can we do
Thanks
Hello ! ! !
I need a second upload for 2 Pictures. Can you help me ?
When i duplicate the function and add an new preview fiel it’s doesent work. The Preview of both Buttons displays in second preview div
Greets
Malcom