
By default, Google Forms allow you to collect unlimited responses to your surveys. But what if, you want to limit your Google Forms responses?
The good news here is, you can limit Google Forms responses to a certain extent.
But, the very first question arises here is “why to limit responses?”
The obvious answer is by doing so, you can prevent spamming on your form. Besides that, halts on responses make the survey accurate and on point.
While Google Forms does allow you to limit responses to one per user, it doesn’t offer any feature to restrict an entire number of responses on a form.
Keeping the same in mind, we would like to suggest one of its best alternative i.e. Pabbly Form Builder which allows you to limit the total number of responses on a form. Along with that, you can also put an activation and expiration date on each of your forms.
So, if you want to know how to restrict responses on your Google Forms, then this help guide is for you.
Here Is How You Can Limit Responses On Google Forms To One Per User
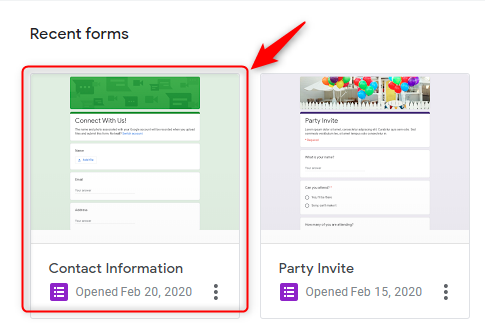
Step 1: Open Your Form
In order to limit Google Forms responses, open the form in which you want to apply limitations.
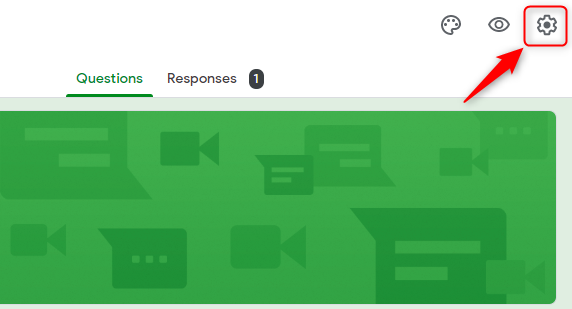
Step 2: Open Form Settings
Further, to access settings of the form, click on the “gear” icon on the top right part of the screen.
Step 3: Switch On “Limit To 1 Response”
Lastly, click on the checkbox that says “Limit to 1 response” and hit “Save” thereafter.
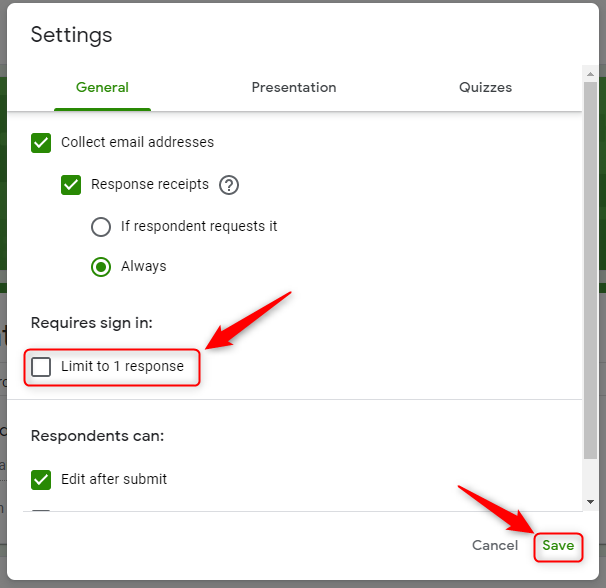
Now, your form will receive only one response from each user.
Does Restricting Responses Using Google Forms Help?
There are certain things that you should always keep in mind about the “Limit to 1 response” setting of Google Forms.
- It limits responses to one per user. Further, you can’t restrict the total number of responses to your survey.
- There is no such feature available to set activation and expiration date on the form.
- Moreover, you have to manually enable the limit to the response feature.
Are There Other Form Makers Available With Better ‘Limit response’ Settings?
There are plenty of alternatives to Google Forms available online. One such powerful alternative is the Pabbly Form Builder that doesn’t restrict you on features like unlimited uploads, unlimited storage and so on.
Moreover, it offers certain features on limiting responses that are listed below:
- Pabbly Form Builder allows you to collect unlimited responses from your users.
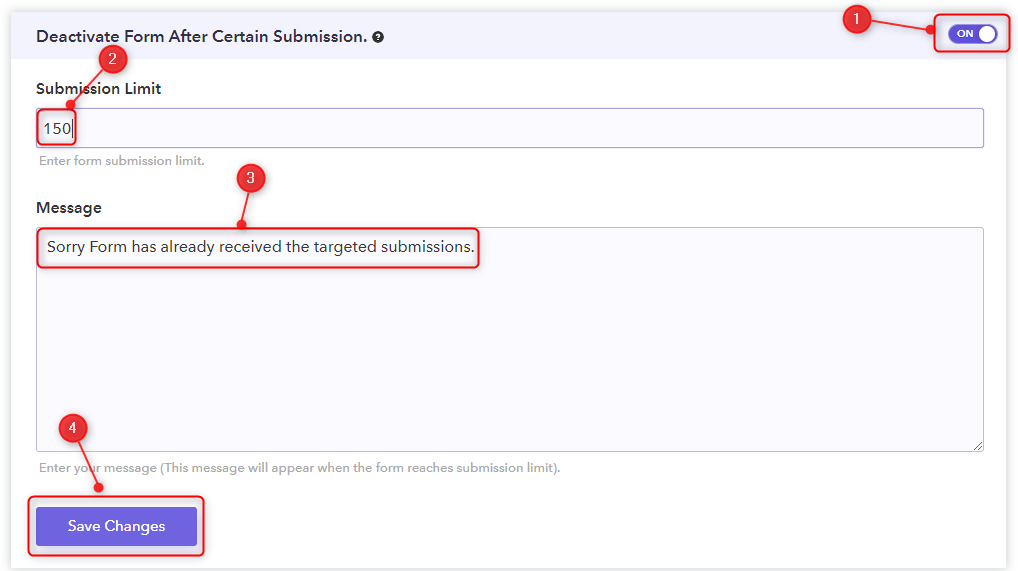
- It allows you to limit the total number of responses on each of your forms. If you enable this feature, the form will automatically expire as soon as the entered number of responses has been reached.
- Alternatively, you can also assign activation/expiration date and time for your forms.
- Moreover, all these actions conducted automatically by the application.
These features for limiting responses can be highly useful and efficient. You will not have to manually launch or close down any of your forms if the above-mentioned features are utilized.
Here Is How You Can Configure The Different ‘Limit responses’ Settings In Pabbly Form Builder
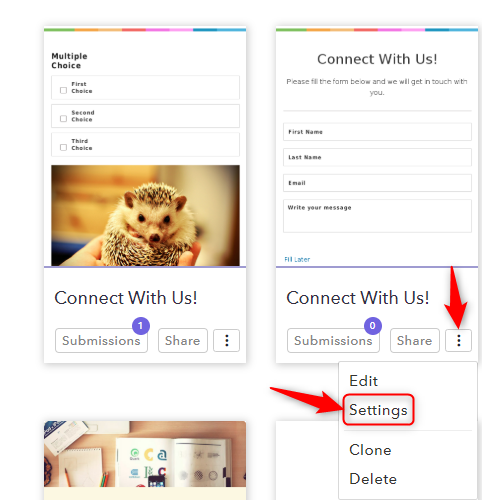
Step 1: Open Form Settings
In the Pabbly Form Builder dashboard, click on the three vertical dots icon on your form to open a drop-down menu. Thereafter, select “Settings” from the menu to open form configurations.
Step 2: Open Form Scheduling Tab
From the column on the left part of the screen, click on “Form Scheduling” to view all ‘Limit response’ options in Pabbly Form Builder.
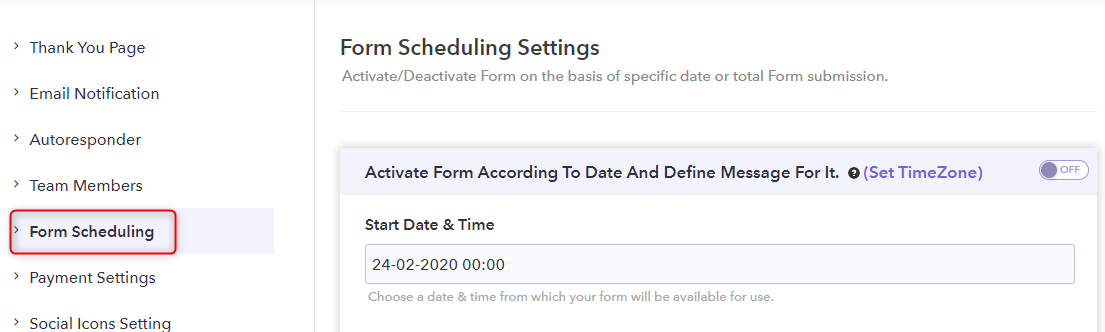
Step 3: Set Activation Date And Time On Form
The first dialogue box can be activated to enter the start date and time for your form. The form will be made active on the date and time you put into this box.
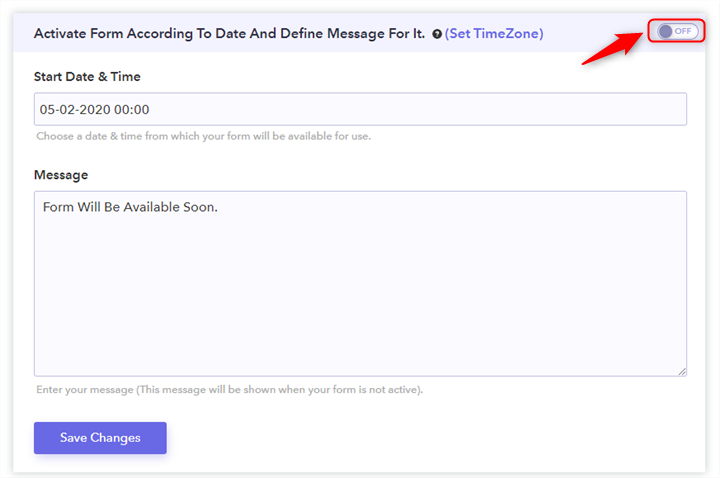
Step 3 a) Enable The Option
Enable the feature by clicking on the toggle at the top right corner of the box.
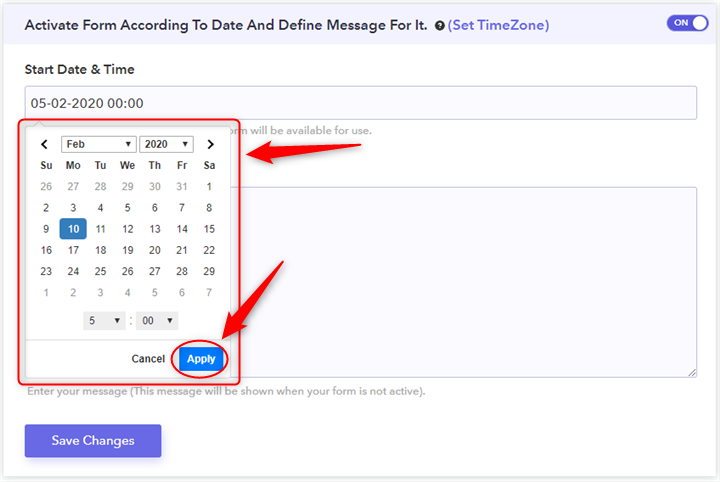
Step 3 b) Set Date and Time
After switching it on, select the date and time in the first field from the down-down menu and click “Apply”.
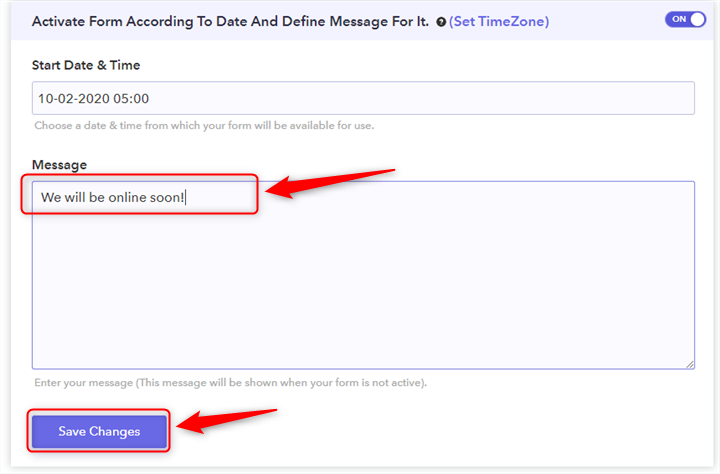
Step 3 c) Add Custom Message
After that, add a custom message that you want to be displayed, when the form is not active and then hit “Save Changes”.
This would enable the “Activation Date and Time” feature for your form.
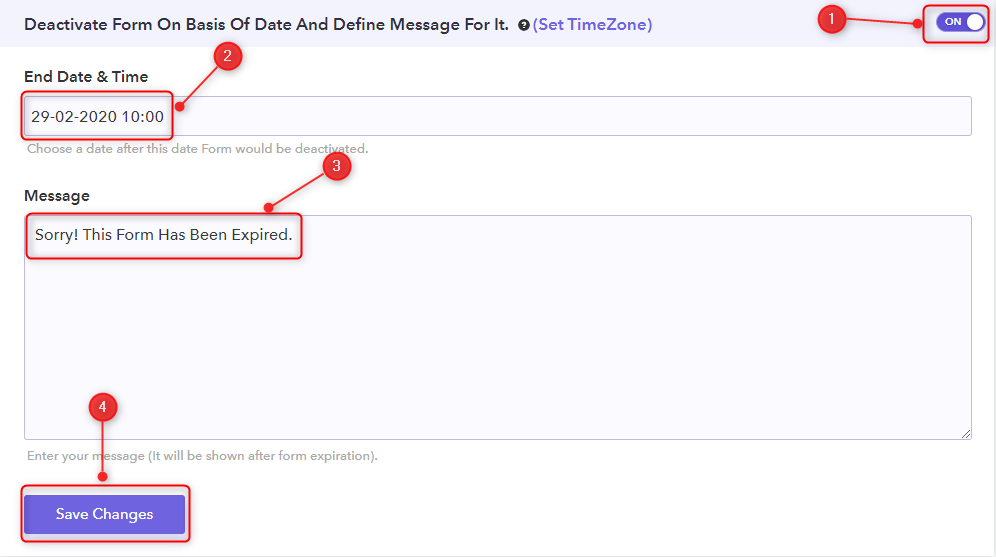
Step 4: Set Deactivation Date And Time On Form
Similarly, by enabling the “Deactivation Date and Time” feature you can set the end date and time of form. Further, you can also set the submission limit and custom message too.
In this way, Pabbly Form Builder will handle your forms on your command.
To Sum Up…
Hopefully, this article has helped you learn how to put a limit on the number of responses on your Google Forms. Putting a restriction on submissions can be useful in a variety of ways. While form makers available online have distinct features that allow you to limit responses in different manners, you should choose the one that suits your requirements.
You May Also Like To Read: