
Google Forms is a simple to use form builder tool that lets you create beautiful survey forms. It is not only preferred by individuals but also by organizations for conducting surveys.
The thing which makes this software a real delight is, it allows you to receive unlimited responses on surveys from the audience. Moreover, its “free of cost” tag is cherry on top.
Although the form creator provides the mentioned feature, but it has some restrictions which we are going to discuss further.
No doubt, Google Forms let you collect unlimited responses on your survey but it does not provide any option to keep track of the responses which is a huge disappointment for business with greater needs.
Keeping this in mind, we came across the best effective alternative of Google Forms which is Pabbly Form Builder. It lets you view the analytics and report of the submission in the software itself.
Besides, you can easily manage responses at your fingertips. The software is trouble-free and can be accessed by anyone.
Here, in this particular help guide, we will see how one can manage their responses in Google Forms.
1. How To View Google Forms Responses:
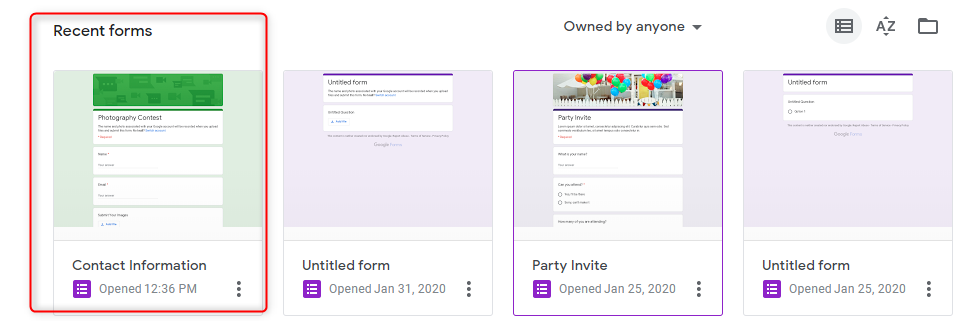
Step 1: Open A Form
To see the responses, open the particular form. Don’t forget to log in to your Google account before that.
Step 2: Responses Section
Further, click on the “Responses” on the top of the page to view the user responses on your form.

Step 3: Accepting Responses Option
If you want to conclude the survey and don’t want to receive further responses, then disable the “Accepting responses” button.

2. How To Download Responses In CSV Format:
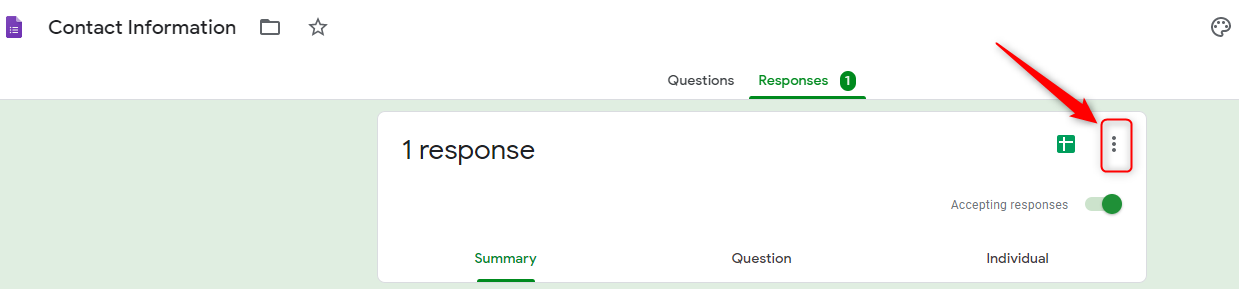
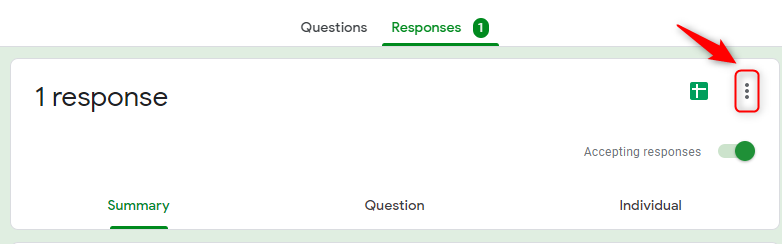
Step 1: Responses Section
In the responses tab, click on the three vertical dots icon to view the drop-down menu.
Step 2: Download Responses
To download the received responses of your form. Select the “Download responses(.csv)” option.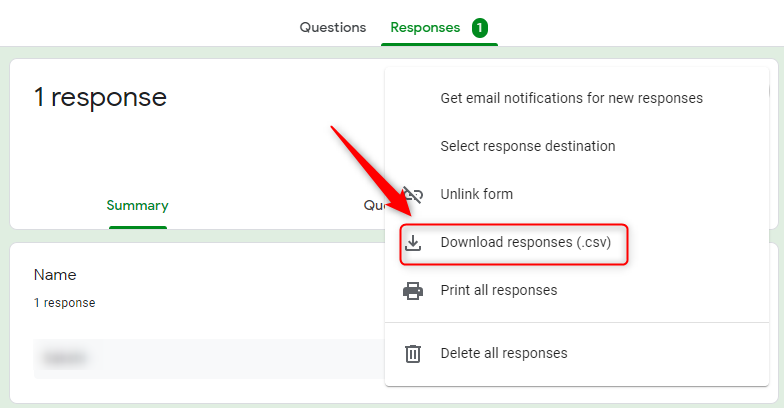
After clicking on that button, a zip file would automatically be downloaded on your system. Thereafter, you would be able to access the responses offline.
3. How To Use Google Sheets Integration:
Step 1: Google Sheet Icon
In the Responses tab, click on the Google Sheets icon beside the three vertical dots.
![]()
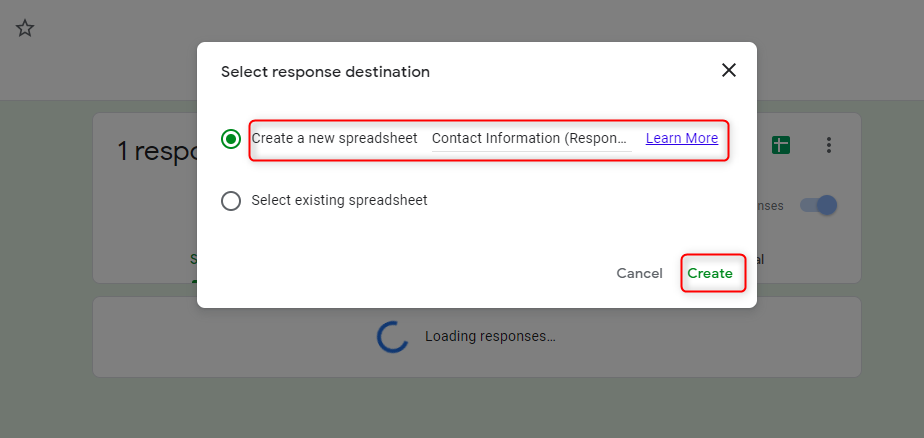
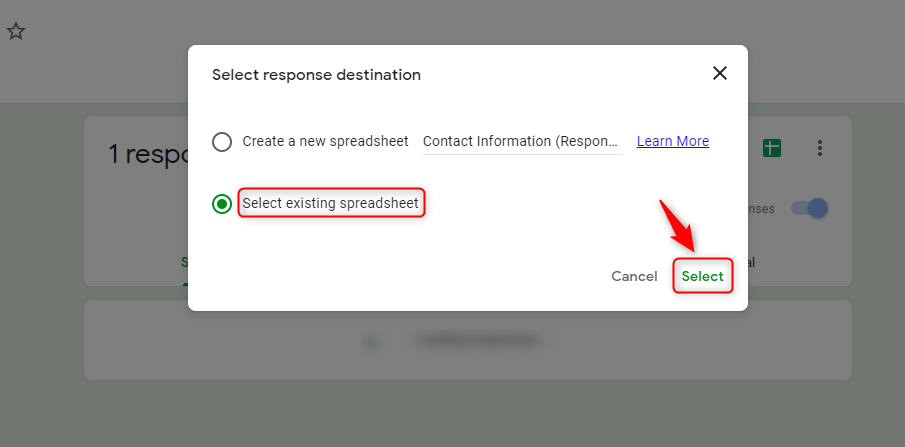
Step 2: Select Response Destination
You will have two options, which are either create a new spreadsheet or link the responses to an existing spreadsheet.
Check the radio button of the option you wish to choose and then click “Create” or “Select”.
Step 3: Choose Spreadsheet
If you choose to create a new spreadsheet, a new tab will open with Google Sheets displaying your responses.
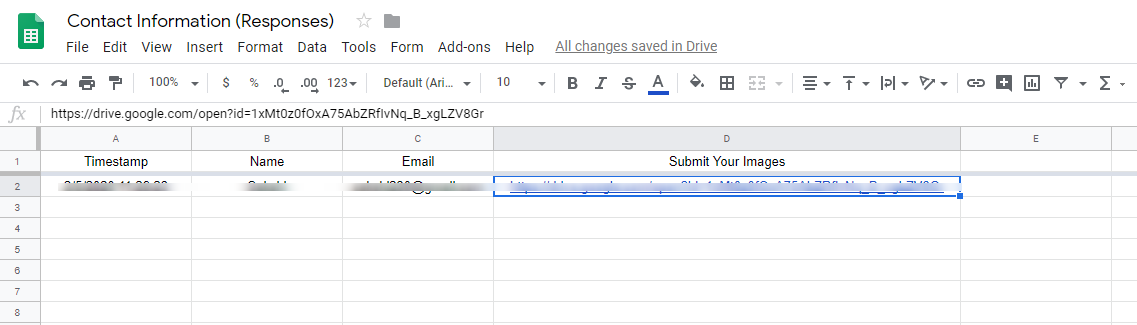
On the other hand, the second option will ask you to select the existing spreadsheet you wish to link your responses with. 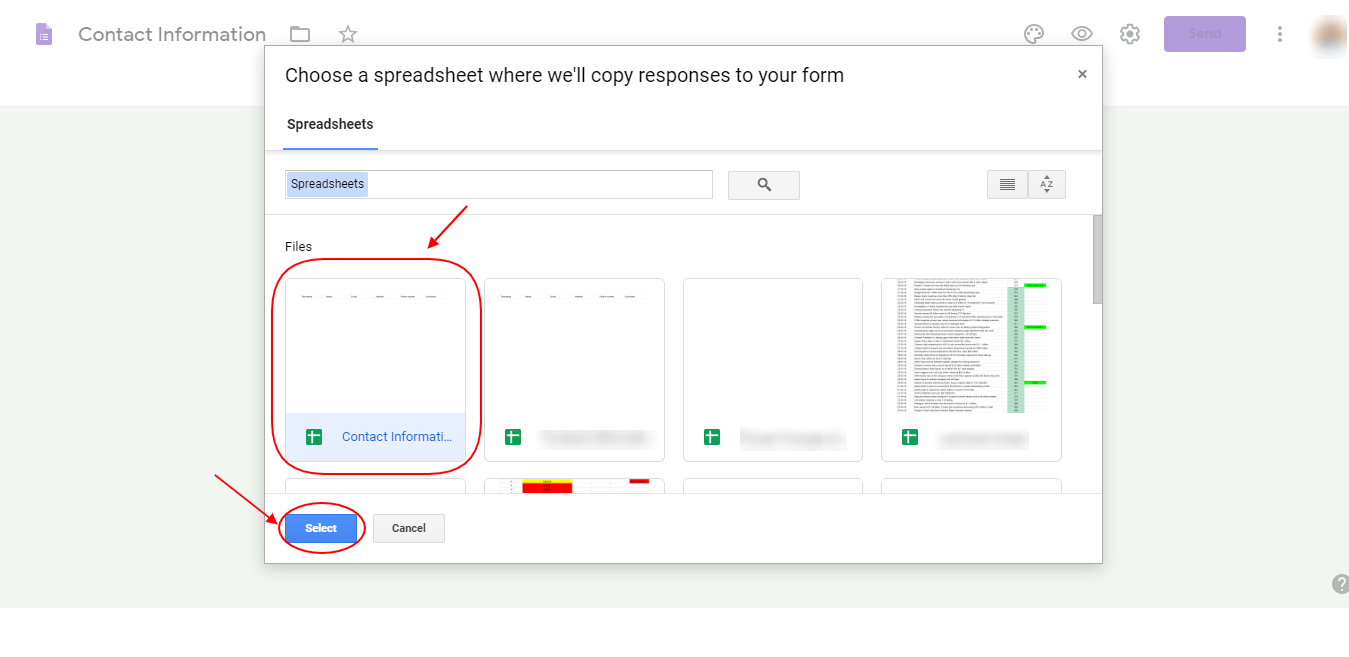
Subsequently, a new tab will open with the Google Sheets, that you just selected, displaying your responses.
4. How To Enable Email Notifications Of Responses:
Step 1: Response Section
Click on the three vertical dots icon in the Responses tab.
Step 2: Select Option
Further, from the drop-down menu, select “Get email notifications for new responses”.
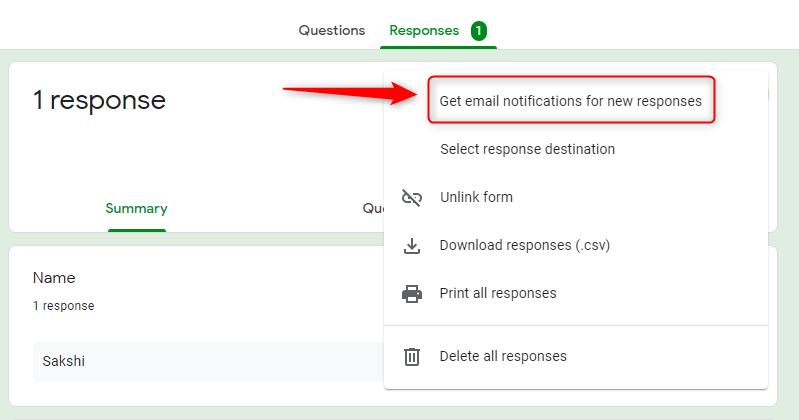
Thereafter, email notifications would be enabled on your Google account. Further, you will receive notifications in your Gmail inbox.
Restrictions of Google Forms in managing responses?
Google Forms has some limitations that you may not realize until you actually use it. Collecting responses is one thing but keeping track of your respondent form activity via Analytics is something Google Forms doesn’t offer. Further, you get to view the data in spreadsheets software but you can’t download specified month responses separately.
Besides that, this survey maker has only one integration – Google Sheets. As you have seen, this is used to export responses. Another thing you might have noticed is that the tool allows you to get email notifications only on one email address – that too, a Gmail account.
These are some pitfalls of using Google Forms, which may cause you to look for other survey makers available online.
Is there any suitable alternative to Google Forms available in the market?
Yes! One of the alternatives is Pabbly Form Builder, which has excellent response management features. It not only covers all the Google Forms limitations, but also offers additional features such as real-time reports and analytics tool in the software itself.
Moreover, it provides email notifications of responses on multiple email addresses. It also offers a convenient way of exporting responses as you can download specific month responses or whole responses submitted using the software itself.
Let’s understand how one can manage responses using Pabbly Form Builder.
1. How To View Responses:
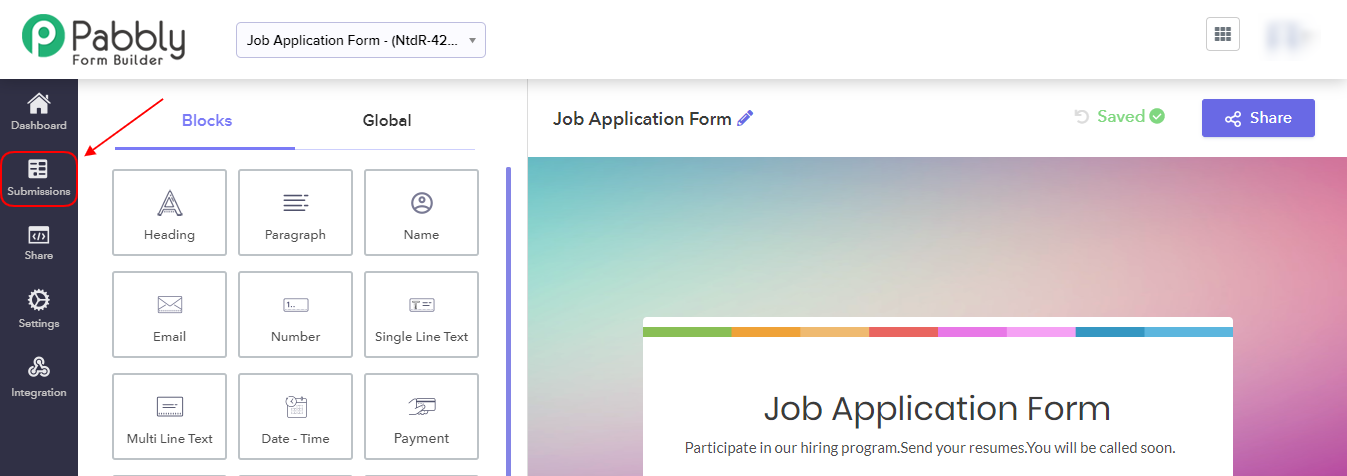
Step 1: Submission Section
After you create your survey using Pabbly Form Builder, open the “Submissions” tab which you will see on the extreme left column.
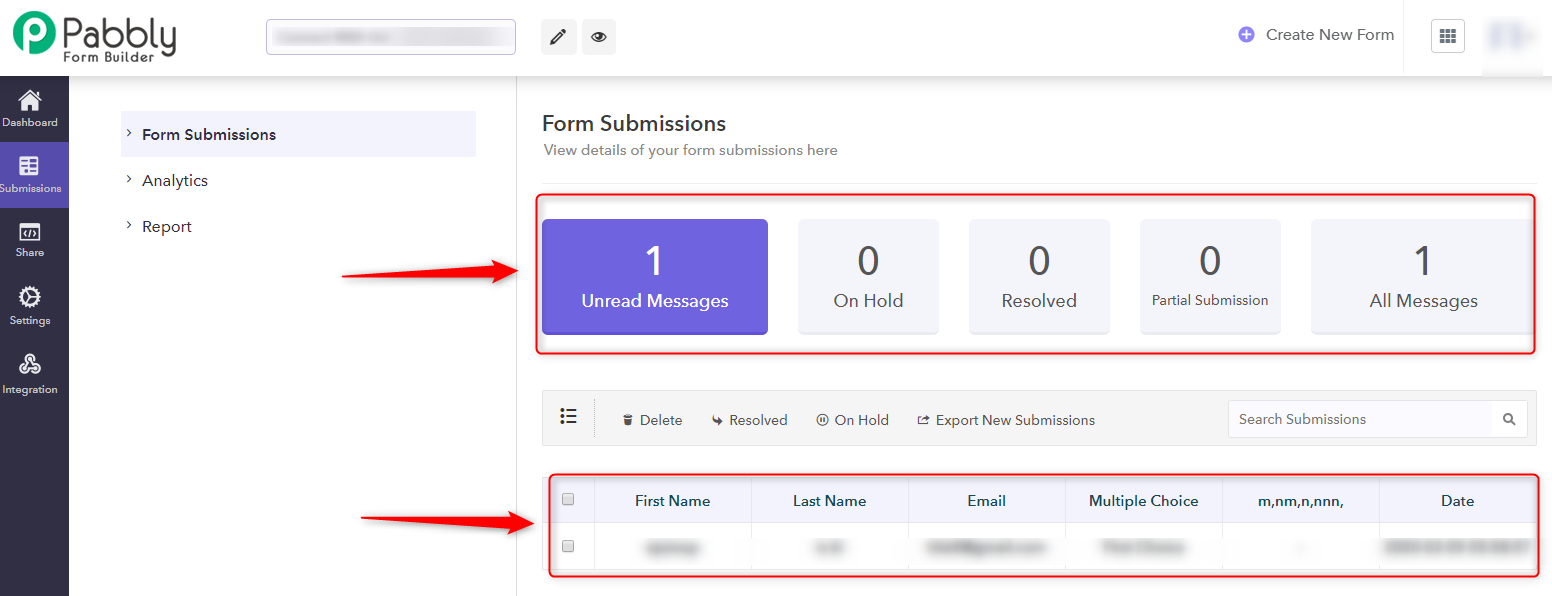
Step 2: Form Submission Section
The following page will give you 5 options: ‘Unread Messages’, ‘On Hold’, ‘Resolved’, ‘Partial Submissions’ and ‘All Messages’. Choose accordingly to view responses in the respective categories below.
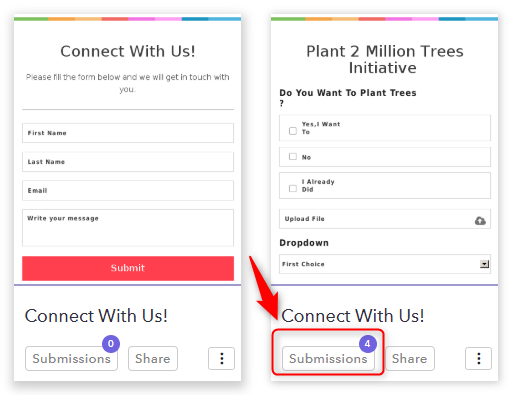
Alternatively, by selecting the “Submissions” button appearing on your form in the dashboard. The button also shows the number of new responses received on the survey.
2. How To Download Responses:
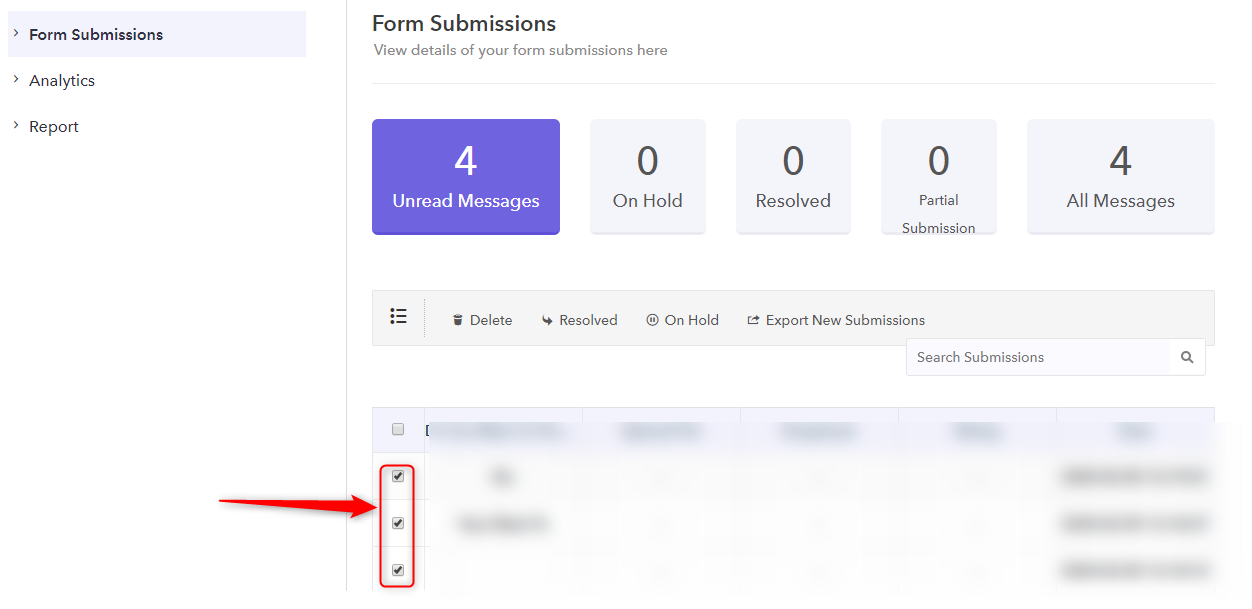
Step 1: Select Responses
You first need to select specific responses you want to download. Pabbly Form Builder allows you to download specific responses as well. Check the boxes of the responses you wish to download.
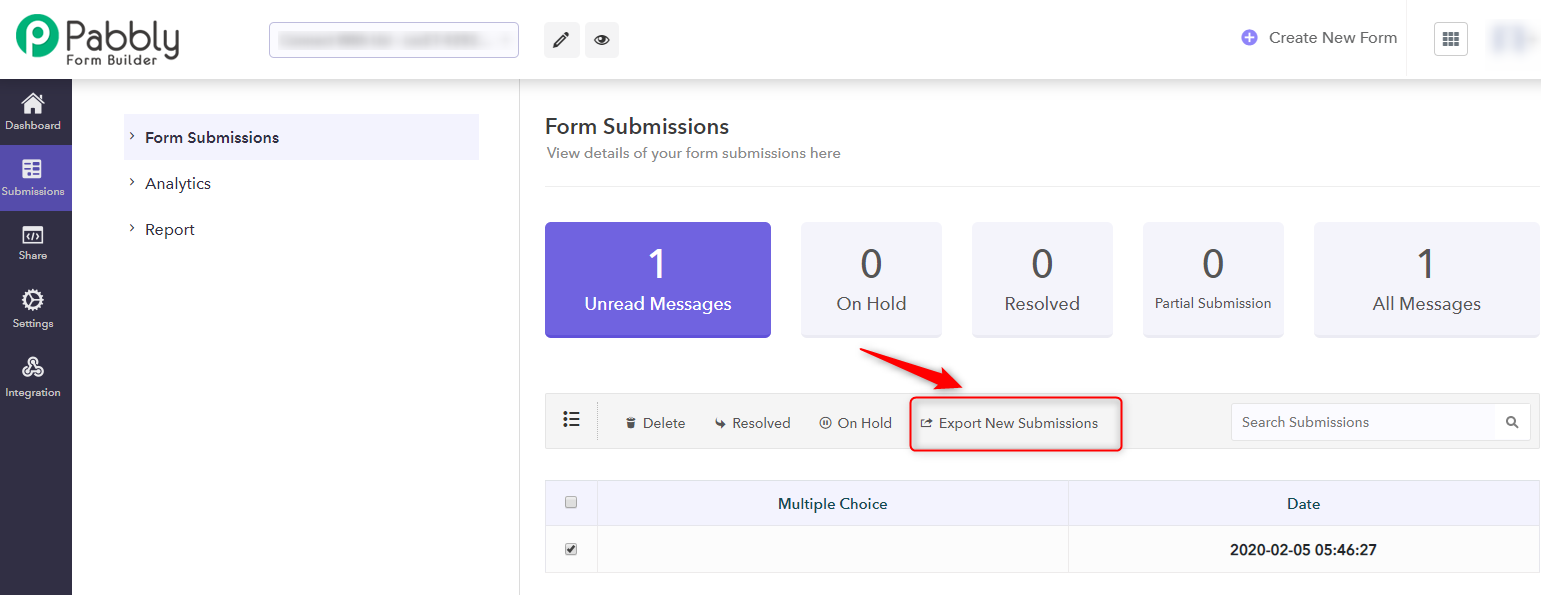
Step 2: Download Responses
Click on the “Export Submissions” button to download the selected responses. The file that would be downloaded on your system will only include the selected responses.
3. How To Enable Email Notifications For Responses:
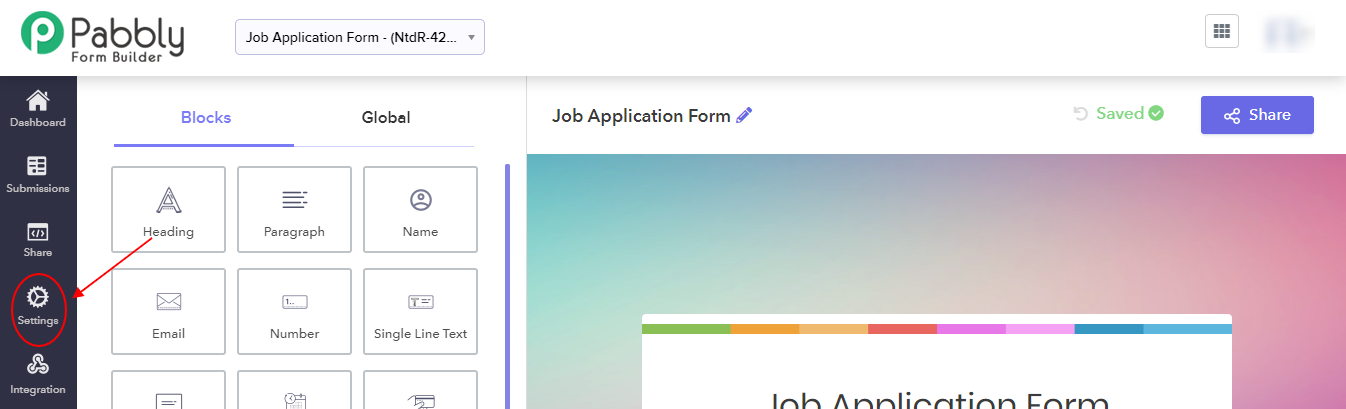
Step 1: Setting Option
Open “Settings” from the dashboard, the button of which you can find on the extreme left column.
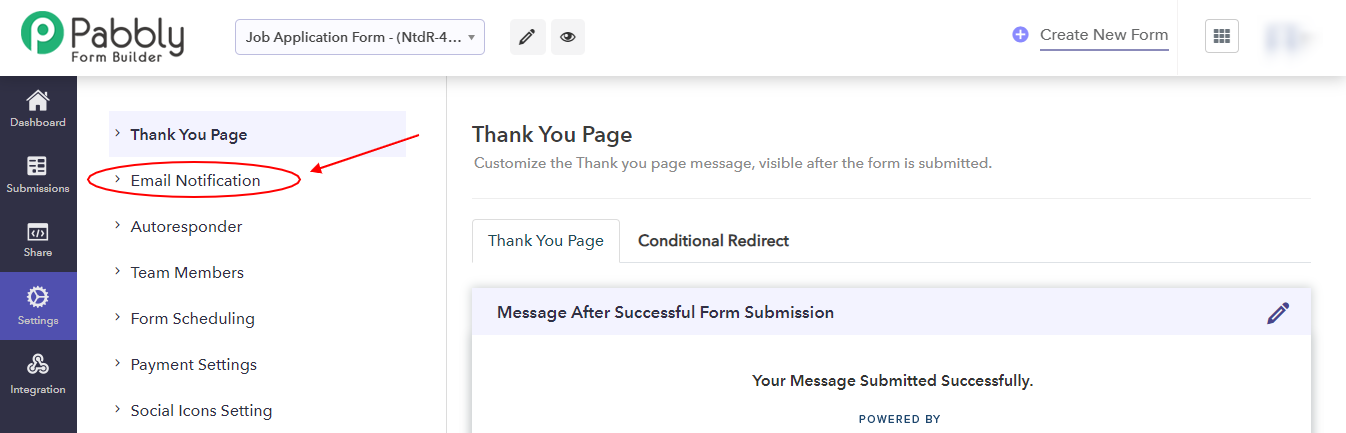
Step 2: Email Notification Section
Click on the “Email Notifications” button on the following page from the list of settings available.
Step 3: Add Multiple Email Addresses
Use the “Add” button to enter the email address you wish to receive notifications on.
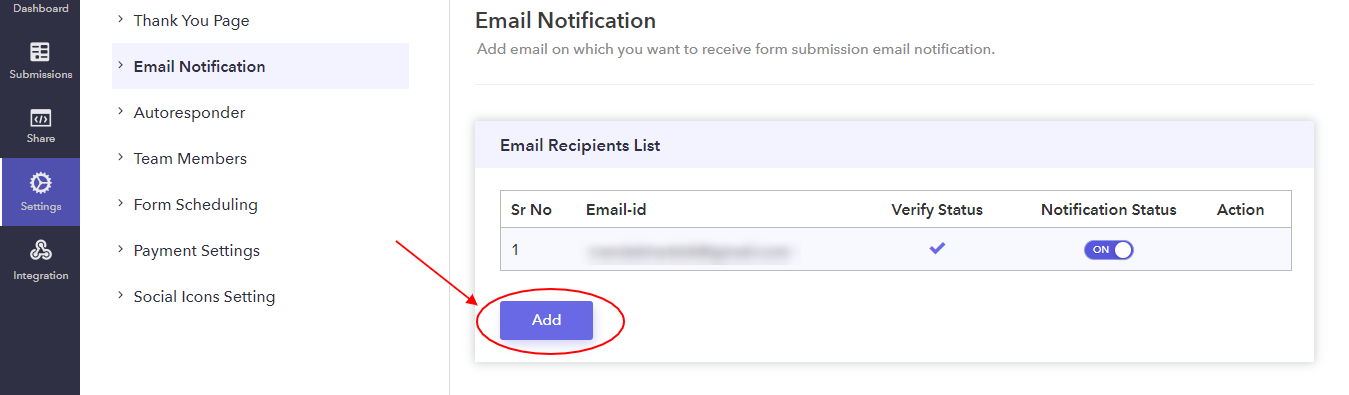
Moreover, you can add multiple emails in a single survey form using Pabbly Form Builder.
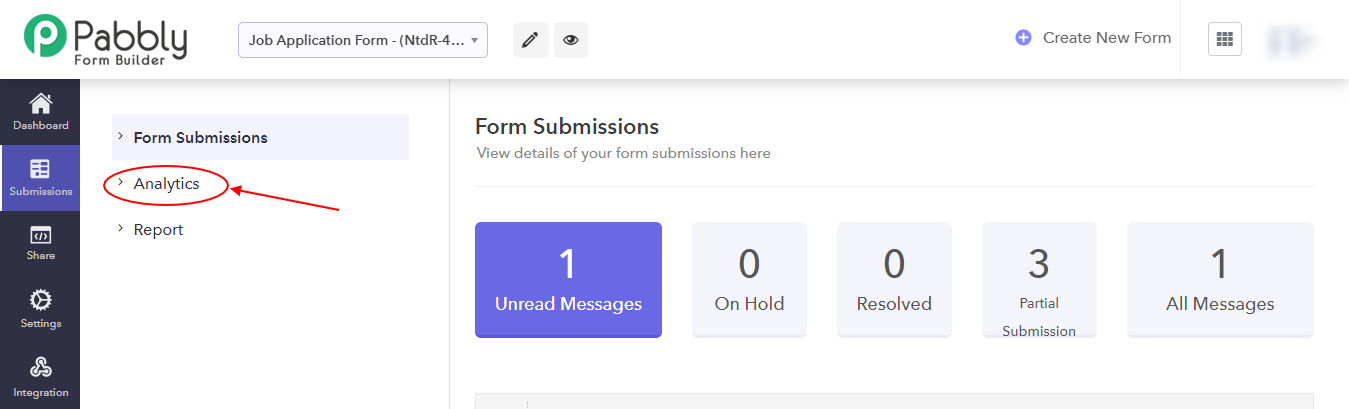
4. How To View Analytics:
Step 1: Analytics Option
In the Submissions tab, click on “Analytics”.
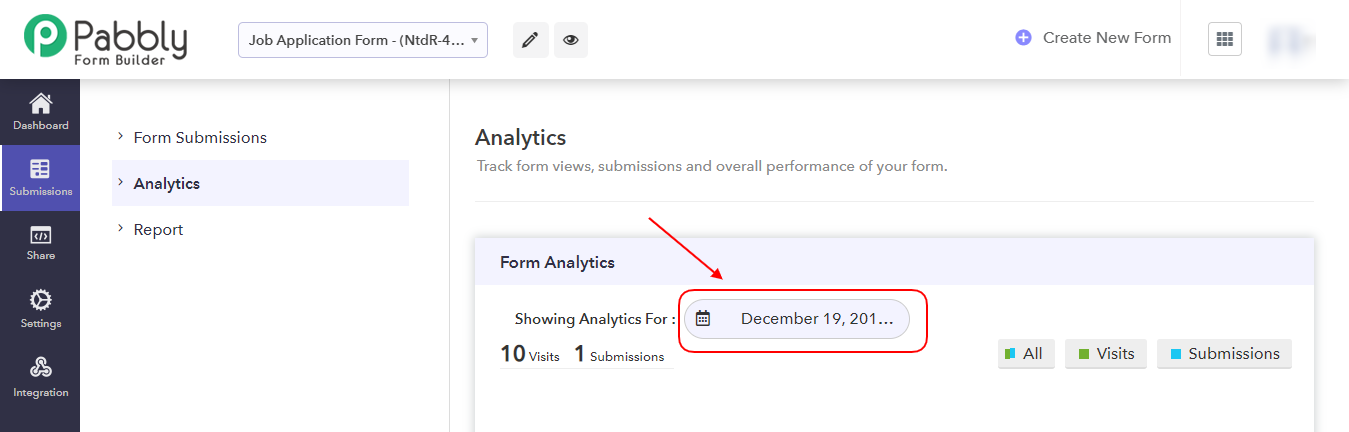
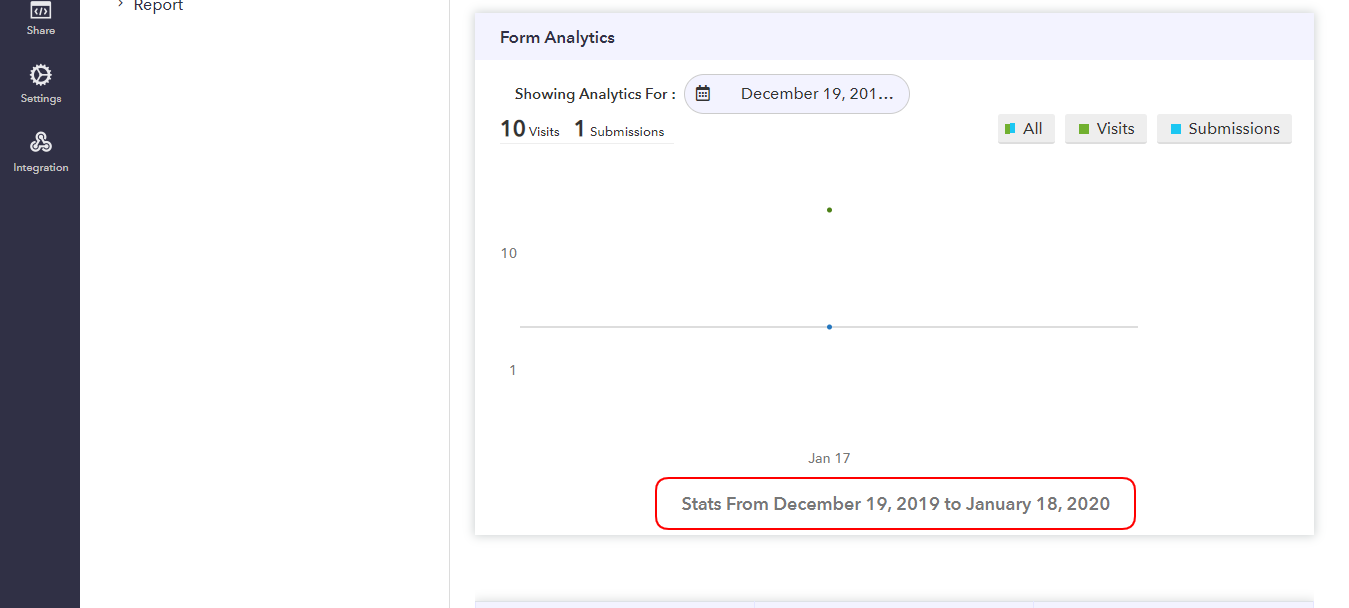
Step 2: Showing Analytics Option
Now, choose the period you need to view the analytics of. Use the drop-down menu beside “Showing Analytics For:” to set the period.
Step 3: Apply Option
You can select ranges like the last 7 days, this month and the last 6 months. Alternatively, you can also create your custom range.
After selecting the time period, click on “Apply”.
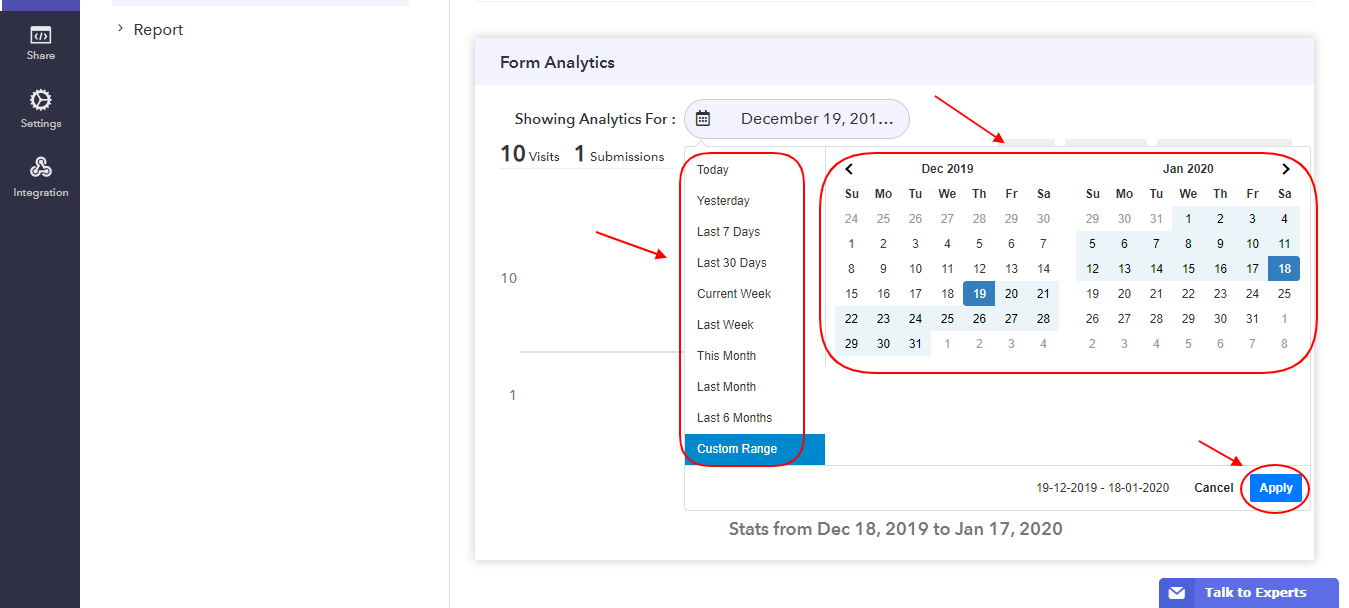
The page will then display the analytics for the selected period. These include form visits and submissions.
Here you have it, follow these steps and you can see and operate every needed thing related to your form.
Conclusion
Surveys are becoming increasingly common. Usually, Google Forms is the first online tool that comes into our mind when we wish to create surveys. This is partly because most of us have Google accounts. Nonetheless, it lacks in some areas, including response management which has been discussed above.
If you do not find the drawbacks as limiting, Google Forms should be your top choice as it is free of cost too.
You May Also Like To Read: