
MailGet grants an efficacious functionality of connecting multiple SMTPs like SendInBlue, SendGrid, SendPulse, Amazon SES, SparkPost, MailGun, MailJet, ElasticEmail and much more, so that one can send bulk emails with different SMTP directly from the single MailGet account.here in the below documentation we are going brief you how to connect ”
Here in the below documentation, we are going to brief you how to connect ” SMTP2GO” to your MailGet account.
So, kindly go through the following clearly defined steps for connecting SMTP2GO with your MailGet account.
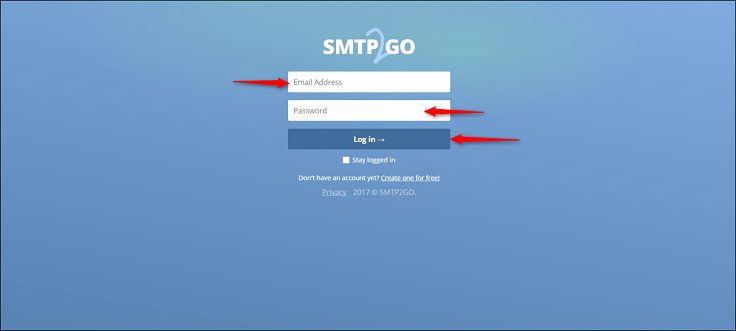
Step:1 – Create and log in to the SMTP2GO account.
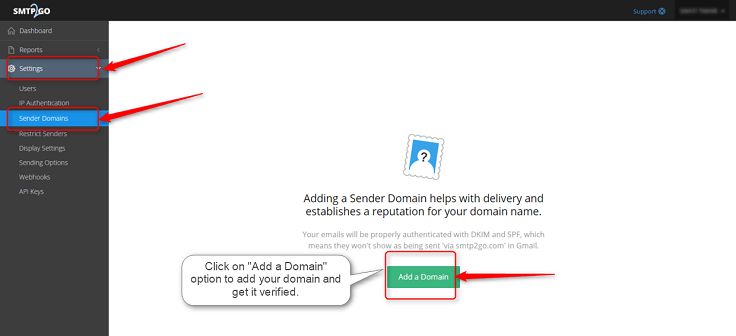
Step:2 – After login to your SMTP2Go account, click on “Settings” option and go to “Senders Domain”. In this section, you will need to add your domain and verify it.
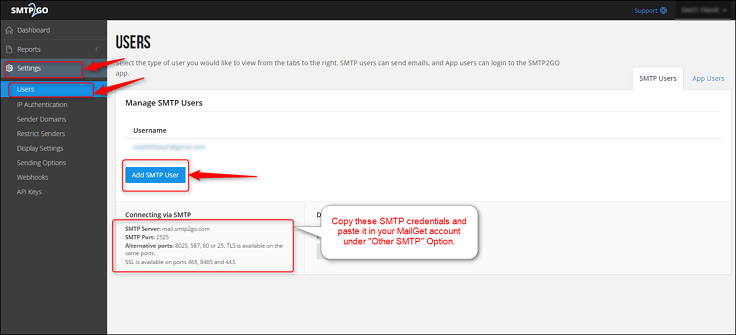
Step: 3 – Once your domain is verified in SMTP2GO, you will need to move to a section named as “Users” under Setting option. Next up is to create the username and accordingly the password will be provided to you, which you will have to put in your MailGet account.
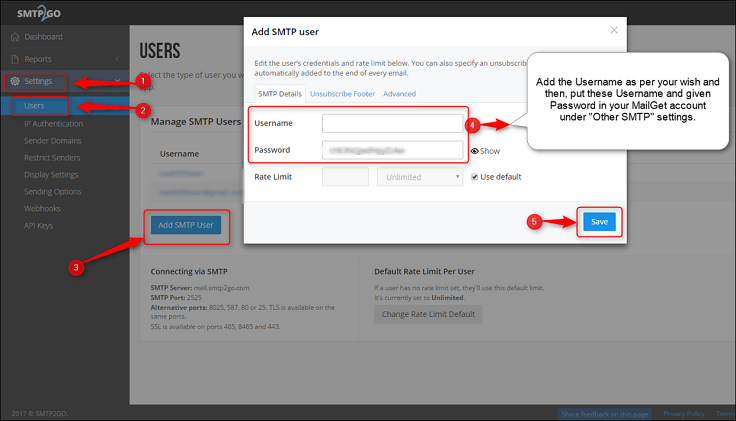
Along with the Username & Password, you will also have to copy the required SMTP credentials which you are going to be place in your MailGet account.
Step:4 – Now, login to your MailGet account. Click on the “Settings” and then move onto “Other SMTP” section. There you can add those SMTP credentials which you have acquired from SMTP2GO. Further, you can take help of the below SMTP details also –
- Select Your SMTP Provider – Any Other/ Custom SMTP
- SMTP Name – SMTP2GO
- HOST – mail.smtp2go.com
- PORT – 2525
- ENCRYPTION TYPE – Select None
- From Email (Verified in SMTP) – Write the email which you’ve verified in your SMTP2GO account.
- USERNAME/API – Write here the username that you have created in your SMTP2GO account.
- Password/Secret KEY – Write here the password which you’ve got from your SMTP2GO account.
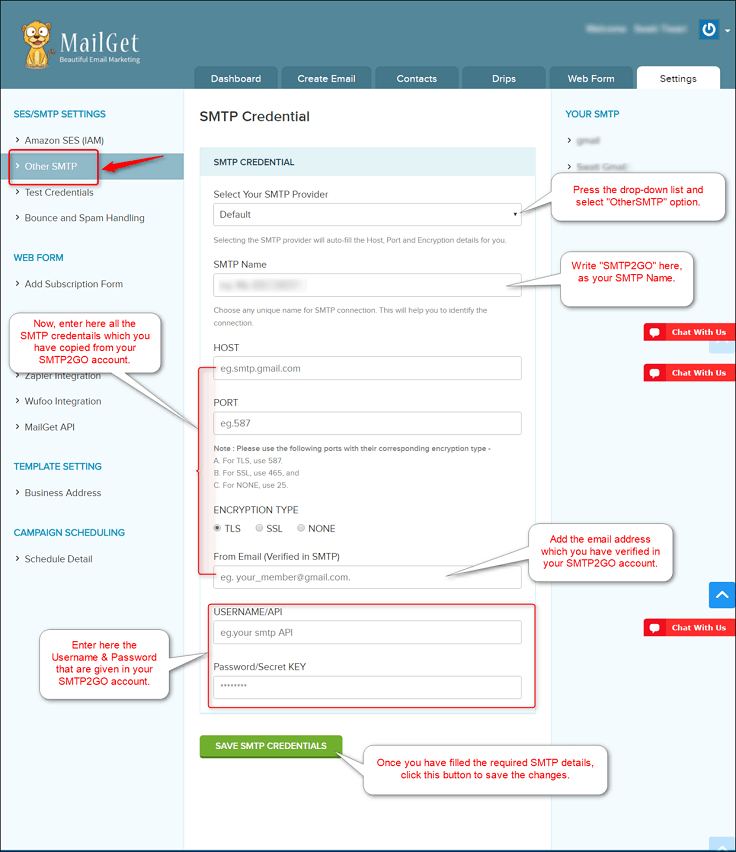
Once you have added the required details under the correct fields, simply click on the “Save SMTP Credentials” and you are done with the SMTP setup of SMTP2GO with your MailGet account.
Setting Up Bounce & Spam In SMTP2GO Account
Now, you will have to configure your bounce/spam in your SMTP2GO account, which is done in order to make sure that you can track your bounce email addresses and users who have marked your email as spam. In short, it is done to record your bounce & spam emails so that you can control it for better results. So kindly follow the below two steps process –
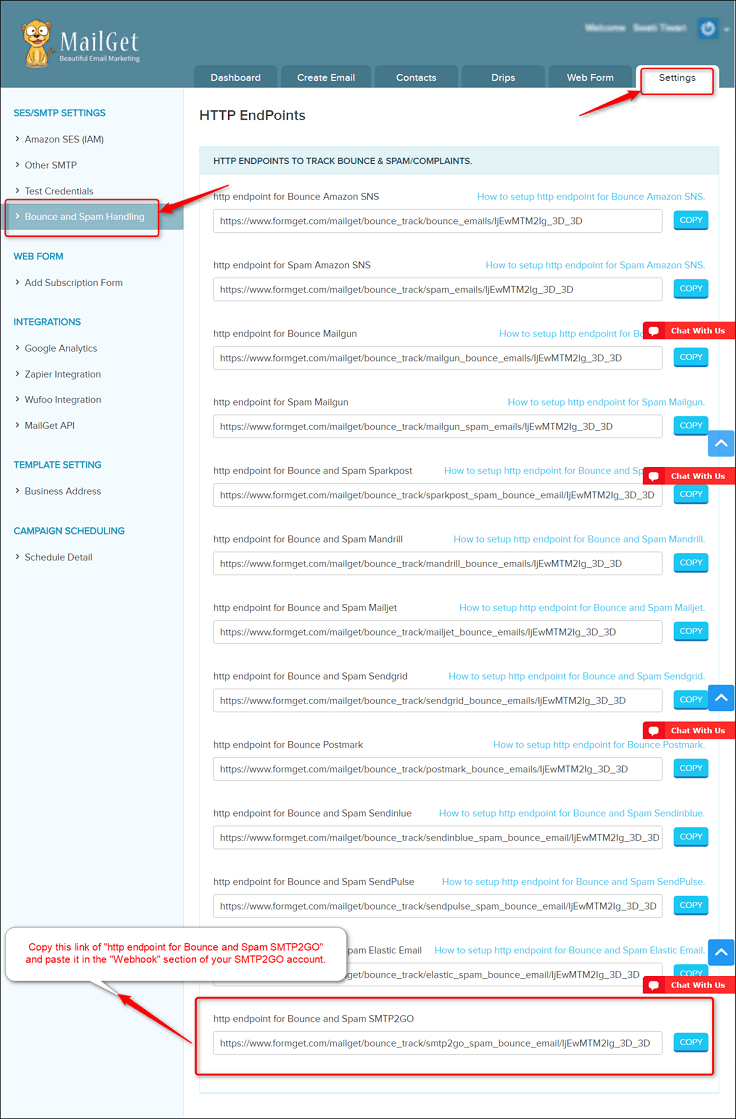
Step: 1 – MailGet Account > Settings > Bounce & Spam Handlings
Go to “Settings” option in yout MailGet account and select the “Bounce & Spam Handlings”. Once you click it, then you will get the drop down list where all the webhook – HTTP Endpoints link are given, from where you will have to copy the link of HTTP Endpoint for Bounce and Spam SMTP2GO.
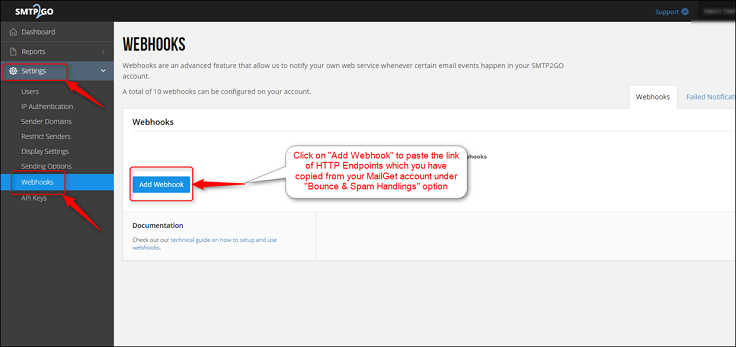
Step: 2 – Once you copy the link of HTTP endpoint for Bounce and Spam SMTP2GO, login to your SMTP2GO account and go to Webhook option under the Settings and click on “Add Webhook” button.
SMTP2GO Account > Settings > Webhook > Add Webhook
Step: 3 – As soon as you will click on the “Add WebHook” button, a pop-up will be displayed where you will put the link of HTTP Endpoint for Bounce and Spam SMTP2GO which you have copied from your MailGet account. Then, select the Spam/Bounce option from the “Event” and click on the “Save” button. For reference, kindly see the below image –
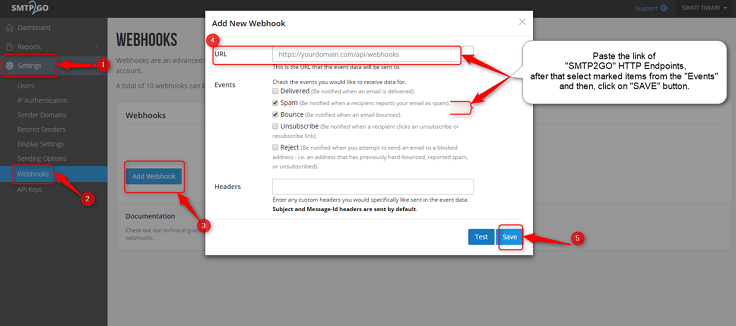
As soon as you save the settings, your webhooks will get saved and your bounce/spam will then be configured. Hence you will be completed with settings procedure of spam/bounce handlings of SMTP2GO. Now you can start sending the emails from your MailGet account. In case, if you need to connect with some other SMTP then, click to Configure Multiple SMTP.
Get more related information here –
- Sparkpost SMTP with MailGet : Complete Setup