
Once you wind up the process of form creation in Google Forms, the next necessary step is to share it with a large audience. Hence, you might be roaming from here to there, in search of how you can embed Google Forms on a website page. Right?
It is very easy to embed Google Forms either on your WordPress website or in emails. So, in this article, we broke down the entire process of form embedding in a few simple steps.
Google Forms is an excellent free form builder that allows you to embed the form on your website. But, it can’t set up things like the position of form on the webpage, customization of header & footer and submission button of the form etc. Further, it only offers a default dull form embedding option i.e. Full form.
But, if you use another form builder like the Pabbly Form Builder, then you can have different types of form embedding options like full, pop-up, and sliding form. Moreover, it also offers several customization options for form embedding.
So, in this article, I have not only mentioned the steps of form embedding in Google Forms but also provided you with an alternative that allows you to do the same.
Let’s begin…
Steps To Embed Google Forms On A WordPress Website Page:
Step 1: Create A Form
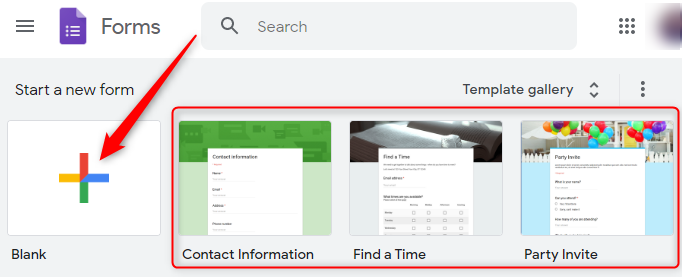
Before we get started, you’ll need to create a form.
So, after login to Google Forms, go to the dashboard & click the “Blank” button. In case, if you don’t want to start everything from scratch then, you can also edit the existing templates to ease your task.
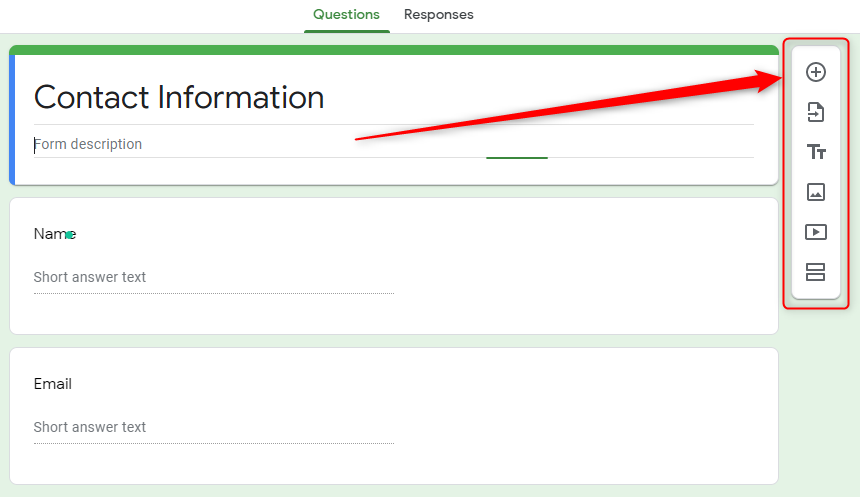
Step 2: Add Questions In Your From
Next, is the round of adding questions into the form depending on your requirements. For this, go to the “Question” tab & click the “Plus” icon to add a new question.
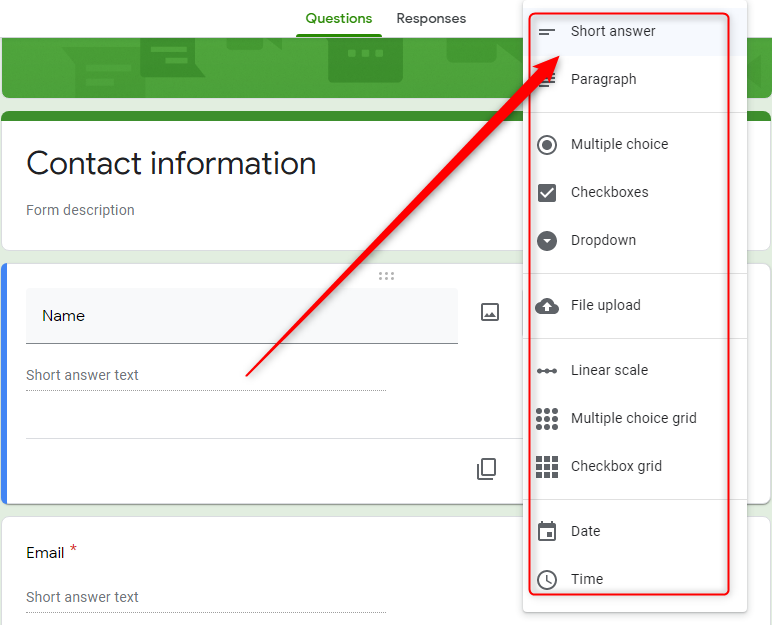
Step 3: Choose The Type Of Answer Field
Subsequently, you can choose different types of answer fields for the questions you made. For this, you have several options like short answers, file upload, multiple-choice and paragraphs, etc.
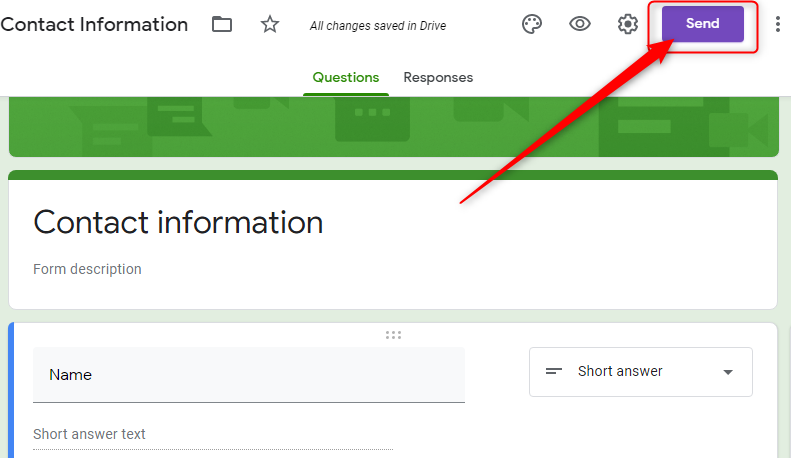
Step 4: Go To “Send” Option
Once you are done with editing the form, next you need to click on the “Send” button available at the top of the dashboard.
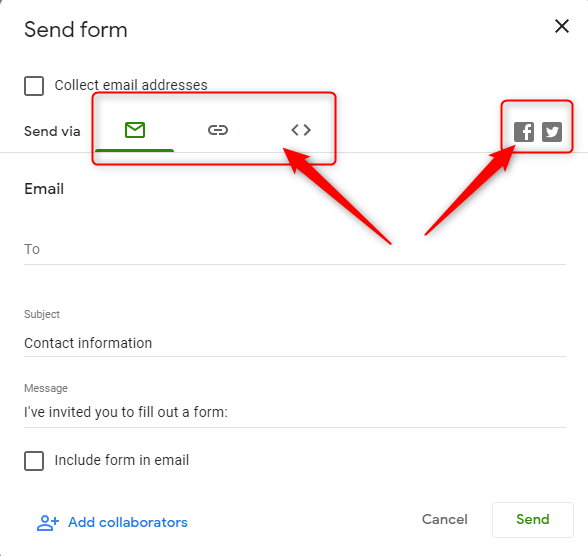
Step 5: Choose The Form Sharing Option
Now, once you open the “Send” tab, there, you will find various options of form embedding like email, HTML script, social media sharing, etc. At this point, what you need to do is select the “HTML script” option.
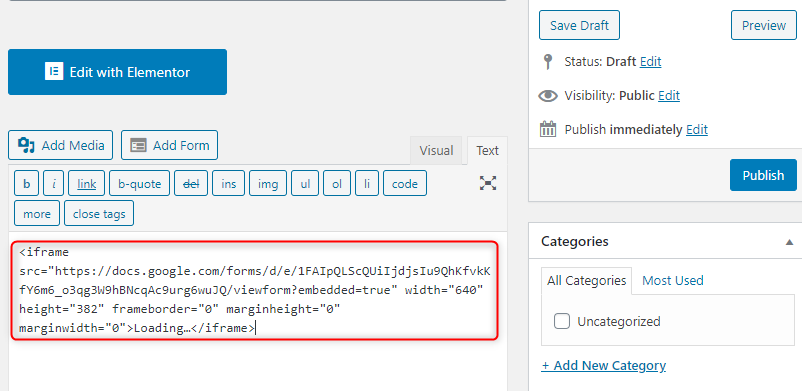
Step 6: Copy The iFrame Shortcode
Now, at this point, you can set up the dimensions of your form to specify how much portions you want to cover with it on the web page. Afterward, just copy the generated iFrame code from here.

Step 7: Paste The Code In Your Site’s Post
Then, all you need to do is paste the code in your WordPress website’s page/post.
Step 8: Save & Preview
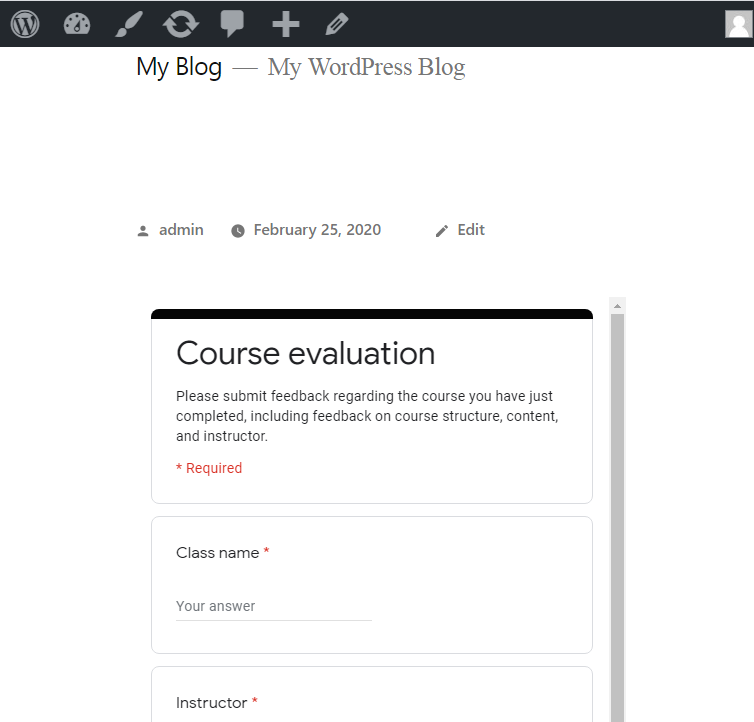
Eventually, you have successfully completed all the necessary steps for embedding the form on your website. Now, you can save all the changes you made on your website & preview it. Below, I mentioned how any form will look on your website page:
That’s it! you have successfully embedded your Google Forms on the website.
Why Google Forms Is Not The Best Tool For Embedding The Form On A Website Page:
Now, in the above mentioned image, you have seen that the form is covering too much space for your webpage. From this, you might realize that it’s not the efficient method of form embedding in every case. Let’s see why I called it a non-efficient method:
- Google Forms has a default type of form embedding option. It does not allow you to add the form on the website in different ways like sliding or pop-up form.
- Further, it does not allow you to add header & footer in the embedded form.
- It offers fewer options for social media sharing like with only Facebook & Twitter.
- Subsequently, it comes with very few customization options for form like you can’t change the color, style, header, footer & text of the form.
- Another major flaw is, it does not come with the integration of Google Analytics. Due to which you can’t track the details like how many respondents viewed & filled out your form.
- Further, you can not edit the text of the submission button in the form.
How To Overcome These Limitations Of Google Forms?
Here, I would like to suggest you try some other affordable form builder like Pabbly Form Builder for such needs. This tool not only offers multiple form embedding options but also comes with features like unlimited submission, file uploads, storage, and many more. Let’s see why I am recommending you to give a try to the Pabbly Form Builder:
- In contrast to Google Forms, it supports more options for form embedding like full, pop-up, and sliding form.
- Apart from this, it also offers more social media sharing options than Google Forms like Facebook, Twitter, LinkedIn, etc.
- This tool comes with the advanced customization option for the form you want to embed like its position, typography, color, header, footer & button option, etc.
- Besides this, it also comes with the direct integration of Google Analytics for tracking results. Additionally, it has its own built-in Analytics & Reporting feature for the same.
Embed Your Form Using Pabbly Form Builder:
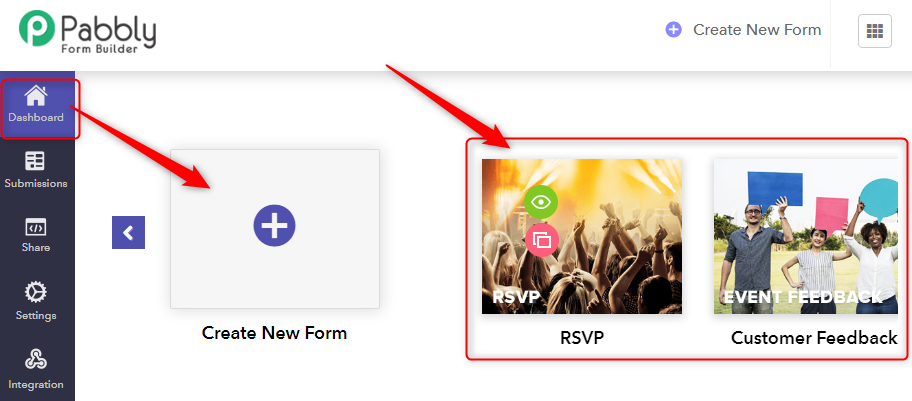
Step 1: Create A New Form
In the beginning, just go to the dashboard of it & select the “Create New Form” option for starting things from scratch. Besides this, you can also “Clone” any of its pre-built templates.
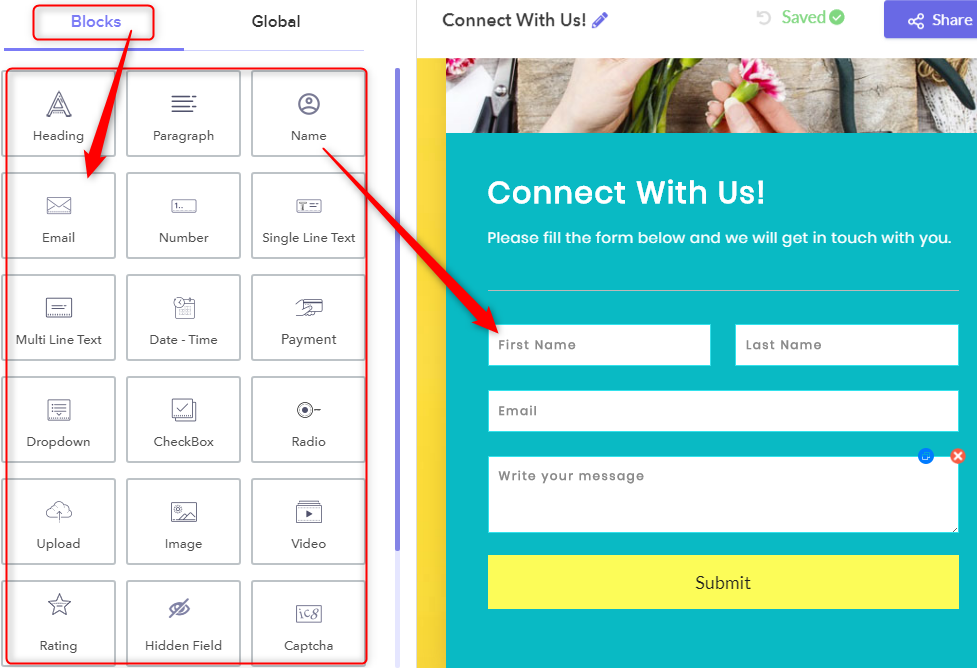
Step 2: Add Form Fields
The next step is about form customization, for this, go to the “Blocks” section of the dashboard. Now, select any desired field items from it & customized it as the way you want.
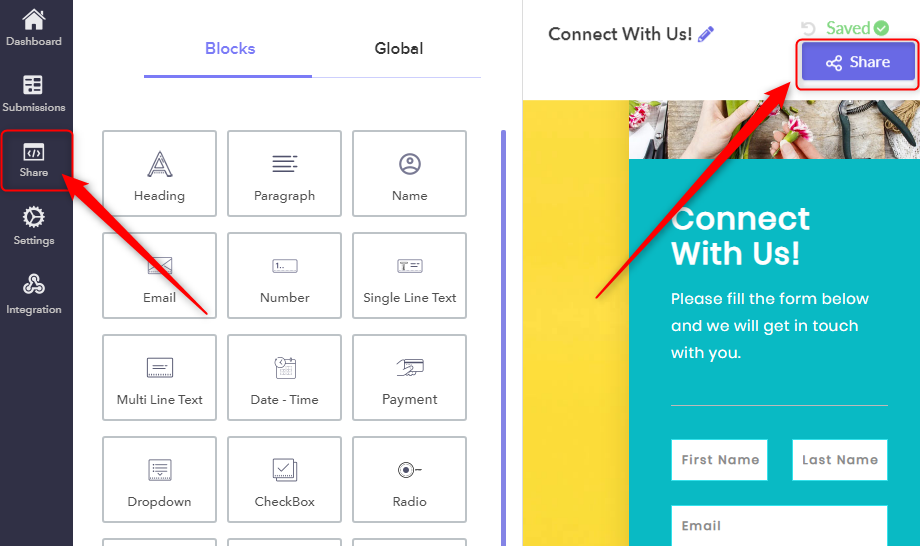
Step 3: Share The Form
Once you complete the process of form customization, next you have to share the form by clicking the “Share” button.
Step 4: Select The Form Embedding Type
Once you entered in the “Share” tab, you will find that you have 3 options of form embedding in:
- Sliding Form
- Full-Form
- Pop-up Form
Now, you can choose anyone out of these options for form embedding depending on the requirements of your website.

But, here in this help guide, I am explaining the steps of embedding form using all the 3 options one by one:
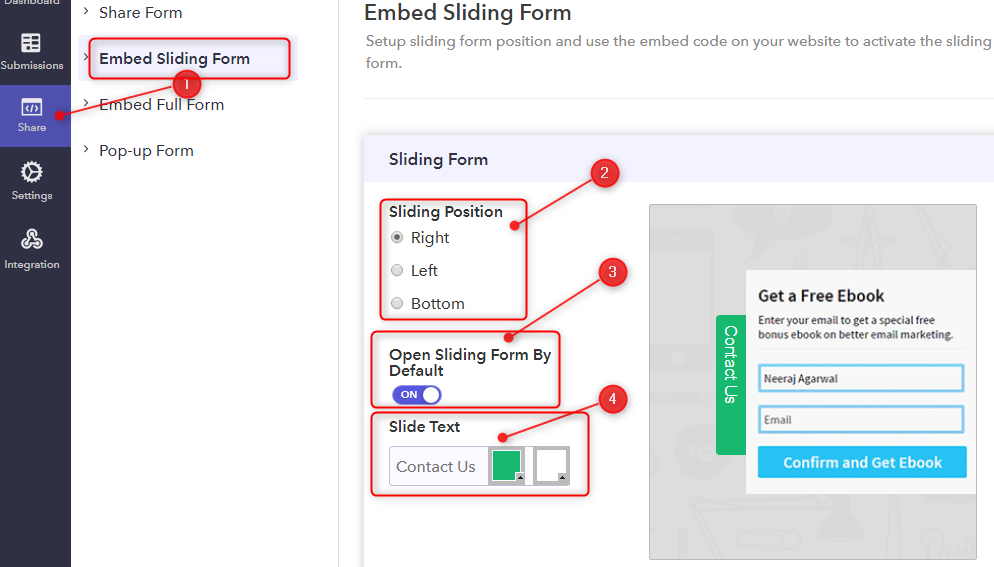
Step 4a: In Case Of Embedding A Sliding Form On Webpage
- Select the “Embed Sliding Form” option.
- Fix the position where you want your sliding form to display. Here, you have 3 options for this i.e. Right, Left, and Bottom.
- Subsequently, toggle the button if you want your form to slide on your website. If you make it “Off” then the form will be not visible to users till they click on “Sliding Text”.
- Further, customize the color of text and background of the “Slide Text”.
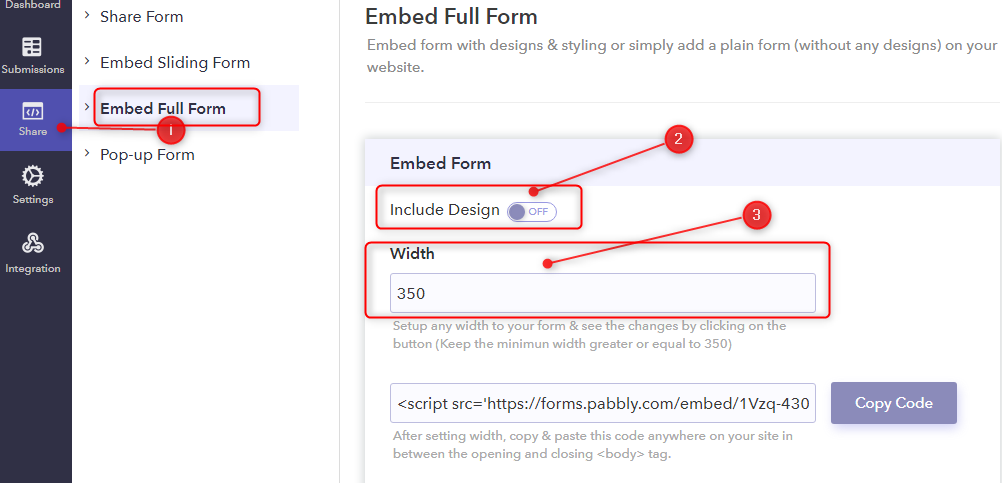
Step 4b: In Case Of Embedding A Full Form On Webpage
- Go to the “Embed Full Form” option.
- Toggle the button if you want to include the design & styling of your form or simply add a plain form on your WordPress website.
- Next, if you want then set the “Width” of form.
Step 4c: In Case Of Embedding A Pop-up Form On Webpage
- Go to the “Embed Pop up Form” option.
- Set up the header color of the “Pop-up Header Text” & its background.
- Further, customize the text of the “Pop-up Button” using which user’s will submit the form.

Step 5: Copy The Shortcode
After selecting & setting up the form embedding type, next you have to copy the Shortcode visible at the bottom of the page. In Pabbly Form Builder, you will find the following types of shortcodes for embedding form on the webpage:
- WordPress Shortcode
- HTML Code
You can use any type of code depending on the website type.
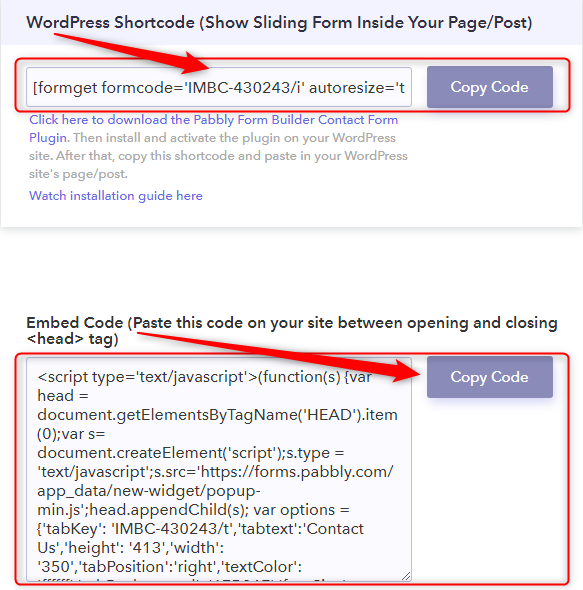
Step 6: Paste The Code In The Post Of Your Webpage
Lastly, simply paste this code in the page/post of your website page and click the “Save Draft” button. Now, you can see the changes just by previewing it & “Publish” the changes.

That’s it! This is how you can embed the form on a WordPress website page using the Pabbly Form Builder.
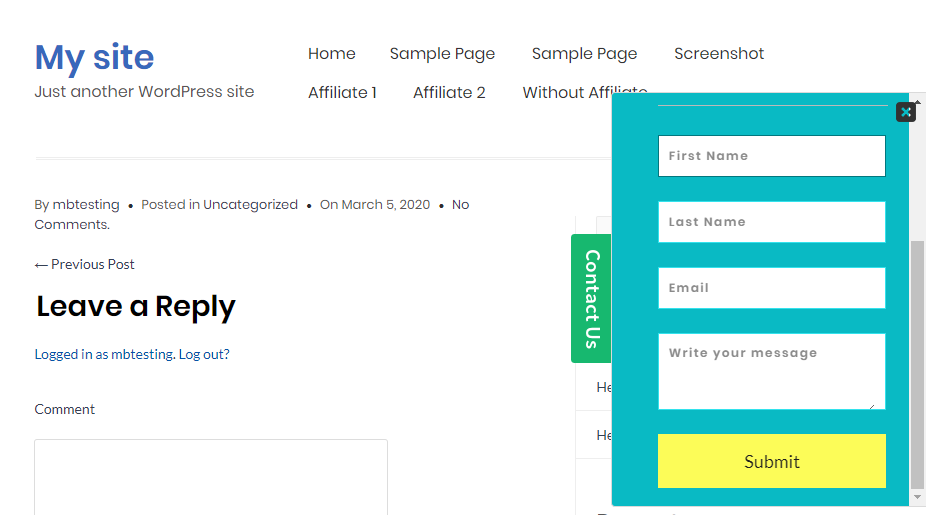
Step 7: Preview Your Form
As mentioned, with Pabbly Form Builder, you can embed three types of forms on your website. But due to the constraint of both space and time. I will be previewing only the “sliding-type form”
Conclusion
To embed Google Forms on a website is easy if you have gone through the recommended steps. But, due to the deficiencies of embedding features of Google Forms, you will lose potential customers in the long run. That is why I pitched its best alternative i.e. Pabbly Form Builder with its array of embedding options and unparalleled customization features. Come Have a look.