
Looking for a way to change the sender name in Google Forms?
Basically, people replying to your email is a positive engagement, whereas sending from a “no-reply” address creates a negative impression. That is the reason, why people mostly prefer to customize the sender’s name in their forms. It not only allows you and your clients to connect but, it also helps your recipients to identify you and your organization.
However, it is a known fact that Google Forms provides you limitless access to create and send forms for free. But, the option of changing the sender’s name is not available in its software yet. Therefore, an alternative is required in order to overcome the drawbacks of this tool.
So, Is It Possible To Get Any Alternative Better Than Google Forms?
Yes, there are better alternatives available other than Google Forms to change the sender’s name. Hence, I would like to suggest the best alternative for Google Forms is Pabbly Form Builder. The software doesn’t restrict you on features by offering unlimited submissions, storage, payments and much more.
Further, it not only enables you to send emails to your recipients through your own email address, but you can also choose from multiple SMTP servers which it provides.
Reasons Why You Should Choose Pabbly Form Builder:
Let me tell you some of its features that why you should consider Pabbly Form Builder as a Google Forms alternative.
- With the help of this software, you can not only change the sender’s name but can also change the email address from which you can get a reply from your subscribers.
- It also enables you to add a logo in the email address in order to brand your company or organization.
- This software also provides you different SMTP servers like Gmail, Hotmail, MailGun and many more to connect from.
- You can even customize your email with several options provided in the customization box. For example, you could change the font, color, style and many more.
- Along with customizing the emails, they also provide an option to modify the content of the email as per your requirement.
- This tool also provides you a “Reply-To” feature, through which you can enter your email in which you want to get replies from the subscribers.
- It comes with a built-in form analytic feature, through which you can track form views, submissions and overall performance of your form in the software itself.
- It also allows you to collect payment through your website.
Here Are The Steps To Change The Sender Name Through Pabbly Form Builder:
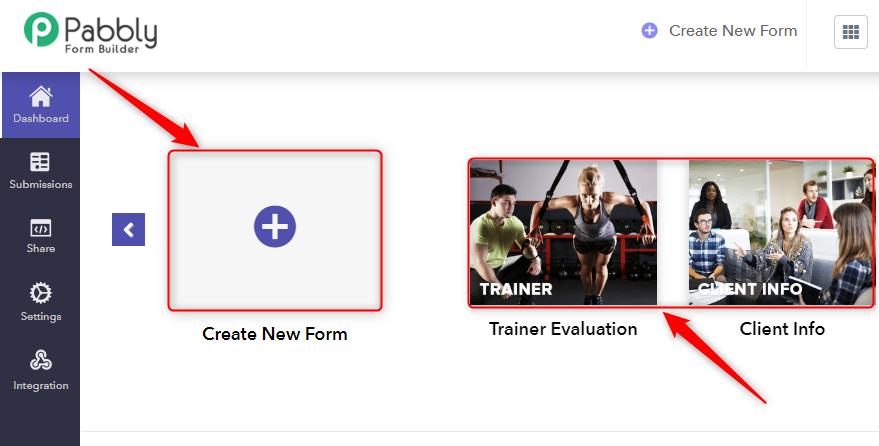
Step 1: Create Form
Firstly, sign in to Pabbly Form Builder. Then, after completing your signup, you will be directed to its dashboard. Where you can create forms through its “Create New Form” feature or else you can choose from the given form templates.
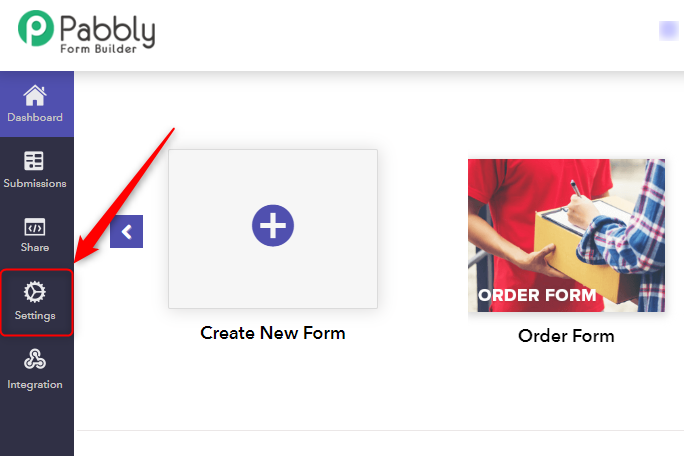
Step 2: Select Settings
After creating the form, your next step is to move towards settings, which you can find on the left side panel.
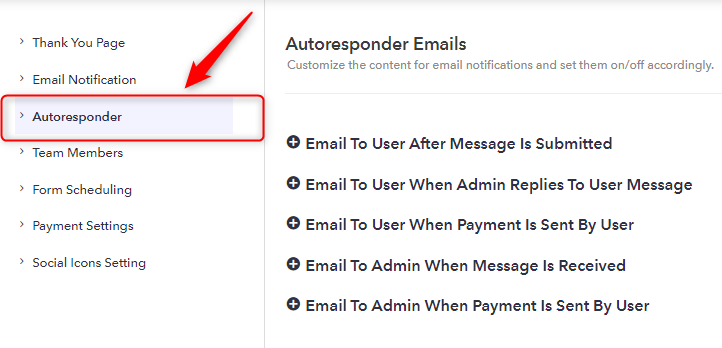
Step 3: Select Autoresponder
After clicking on “Settings” you will find several options on the settings page. From which you need to select the option “Autoresponder”. With the help of this setting, you can easily change the sender’s name in your form.
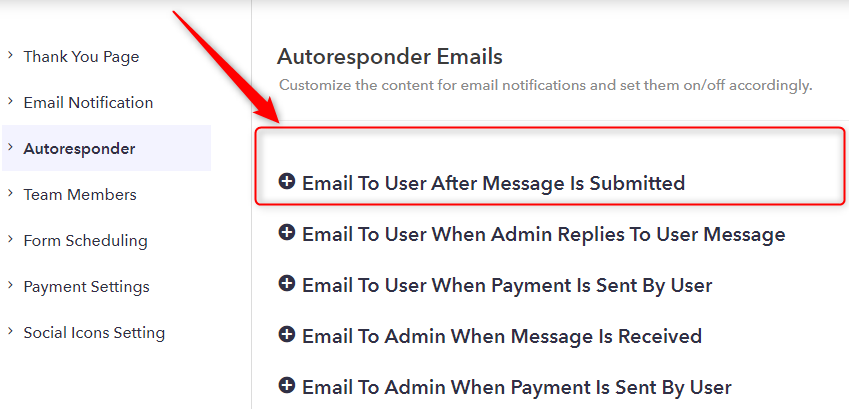
Step 4: Choose From “Autoresponder Emails”
You will find several options when you move to the “Autoresponder”. It provides different autoresponder emails to choose from. Here, let me give you an example by selecting the first option which says ” Email To User After Message Is Submitted”.
Step 5: Change The Sender Name
Once you click on the first option of the autoresponder, there you will find several options. You can change the sender’s name through the “From Name” option. All you need to do is type your name or company name in the given box.
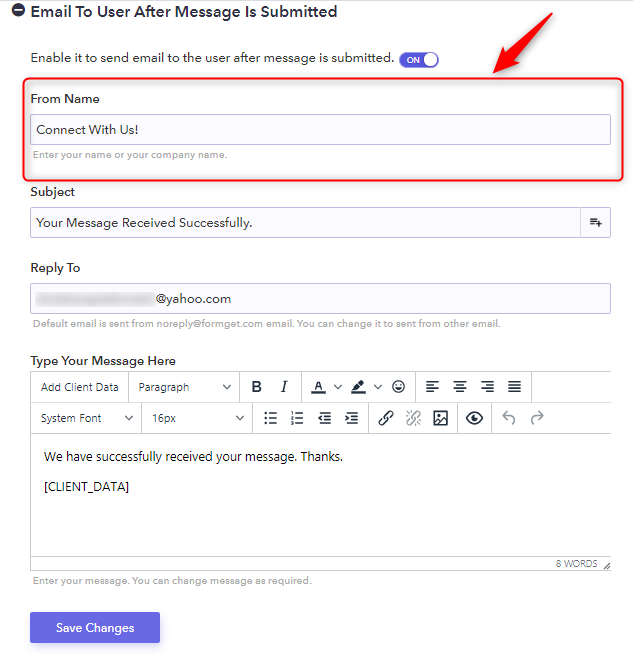
Step 6: Tap On “Save Changes”
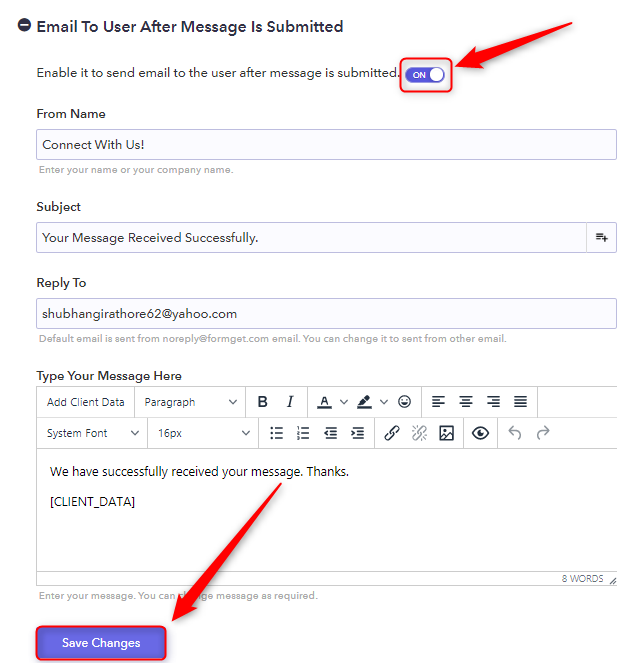
After changing the sender’s name, fill all the details you want to provide to your receiver. You can also enable the autoresponder switch by turning it “On” if you want to send the email automatically after someone fills your form.
After that, you need to change the subject, add your email address and type your message with all the modifications you want to do. Then, hit the button “Save Changes” after completing all the customizations.
Just by following the above simple steps, you can customize the sender’s name of your form. Similarly, you can also customize the other email options provided in the autoresponder feature.
Here Are The Steps To Change The Email Address By Default Through Pabbly Form Builder:
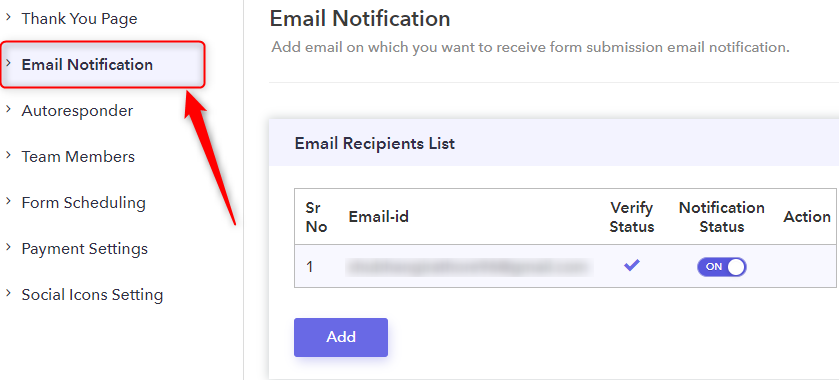
Step 1: Click On Email Notification
After opening the settings, you need to select the option of the email notification that will redirect you to its settings.
Step 2: Tick The Checkbox Of The SMTP Server
Once you will get directed to the email notification page, you need to scroll down the page. Where you will see two checkboxes, from which you need to click on the checkbox with the SMTP server option. After you tick the checkbox, it will lead you to SMTP settings.
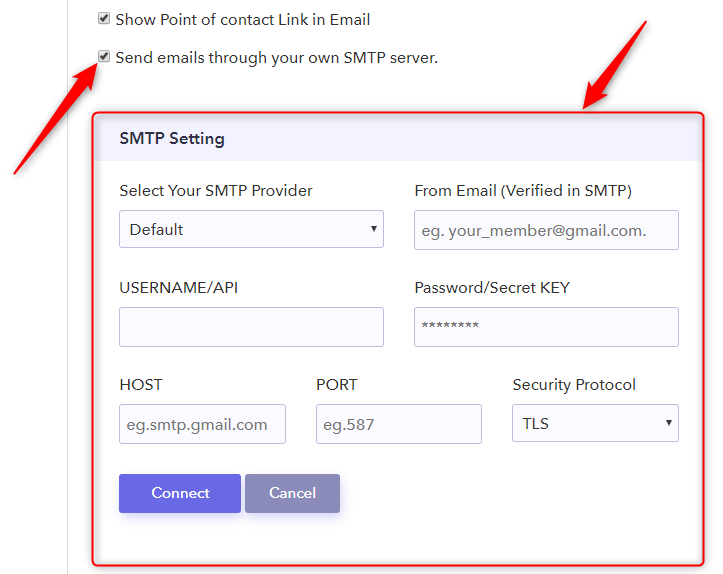
Step 3: Select Your SMTP Server
Pabbly Form Builder allows you to connect with several SMTP providers such as SendGrid, Mailjet, Sparkpost and many more. You can select your SMTP server from the servers provided in the drop-down section.
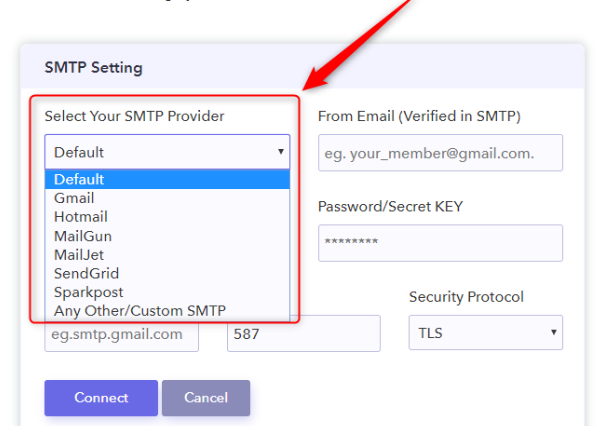
Step 4: Click On The Button “Connect”
Once you select the SMTP provider through which you want to connect. Fill the email address verified by your SMTP provider. Then, enter the username/API through which you want to send the emails.
Enter your password, host, port and select the security protocol. After you finish filling the details, click on the “Connect” button.
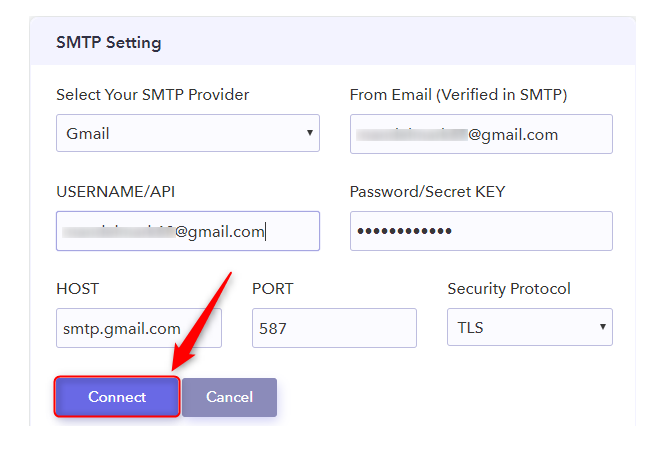
After hitting the “Connect” button, your SMTP server will get connected. Now, whenever someone will fill your form, he/she will get the confirmation email with your customized sender name as well as email in it. That’s how you can change the sender’s name in your respective forms with the help of Pabbly Form Builder.
Wrapping Up:
I hope this post was helpful in answering your query about Google Forms, as it has elaborated on how to change the sender’s name in your forms.
Even though this feature is not available in their Google Forms software, you can easily customize it with the help of the Pabbly Form Builder. By following the above-mentioned steps, one can easily personalize the sender’s name along with the email.
So, give Pabbly Form Builder a try as you can also get a free trial to use its features, I am sure you won’t get any disappointment once you switched to Pabbly Form Builder.