
Many times form respondents want to view the submitted Google Forms. This is a necessity if users want to make sure whether they answered all fields correctly or not.
So, keeping the same in mind, it offers the feature where users get a copy of the submitted response via email notification.
Google Forms doesn’t let its users view the uploaded file which is one of the biggest drawbacks. As, it is an essential feature for respondents to verify whether they have uploaded the correct document/files or not.
Hence, we recommend you to try its alternative which is Pabbly Form Builder that lets you view uploaded file and you can also download it in PDF format. Further, you can easily get along with your respondendent using its advance response receipt features.
In this particular article, I am going to teach how one can view submitted responses in Google Forms.
So, let’s get started…..
Steps To View Submitted Response In Google Forms
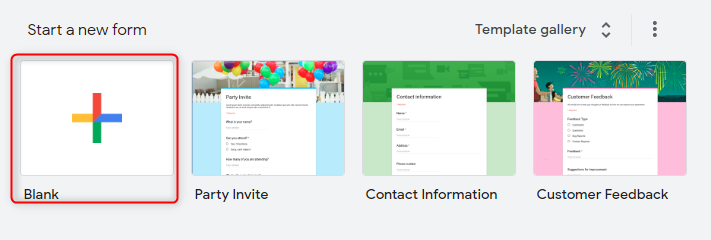
Step 1: Build A Form
To create a form, click on the “Blank” button. Further, you can use its pre-designed templates too.
Step 2: Add The Fields
Next, to add fields click on the “Plus” icon. Further, you can add different form elements such as file upload section, images, videos, etc. according to your form needs.
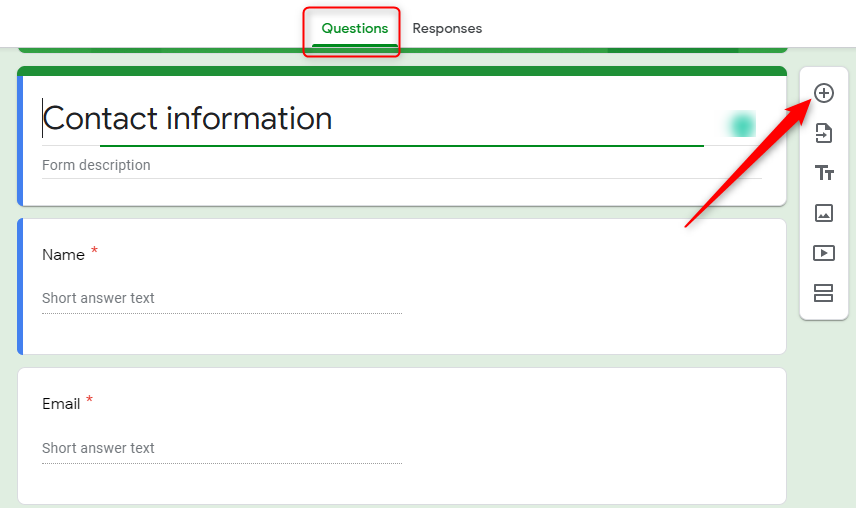
Note: Your form must include an email field so, that user can put their email (where they will receive the replica of their submission).
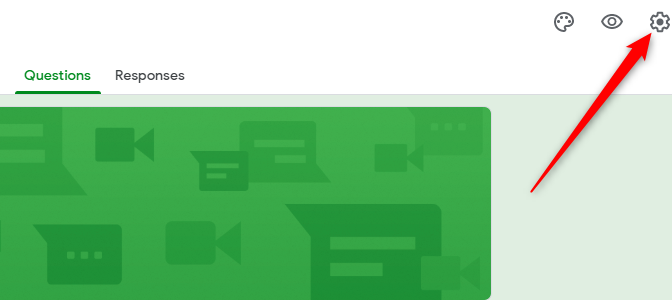
Step 3: Go To Gear Icon
Now, click on the “Gear” icon at the top right corner.
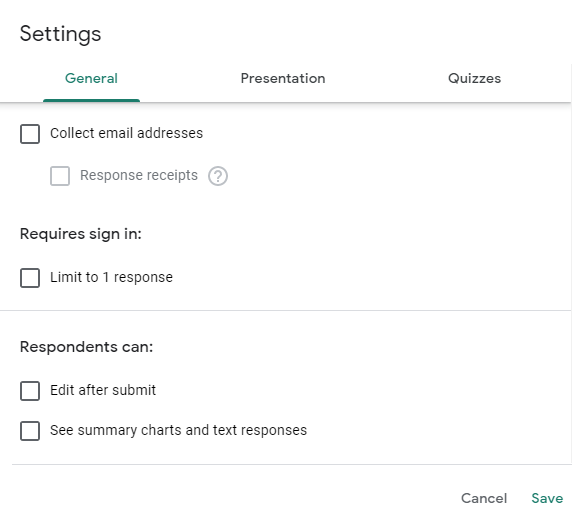
Step 4: Settings Option
Further, it will open a pop-up window where you will find options like collect email addresses, response receipts, require sign in and a lot more.
Step 5: Enable The Response Receipts Box
Next, click on the box “Collect Email Addresses”, it will enable the setting for “Response Receipts”. Simply, check the box beside “Response Receipts” which will offer two choices i.e “If the respondent requests it” and “Always”. Select the option accordingly and hit the “Save” button.

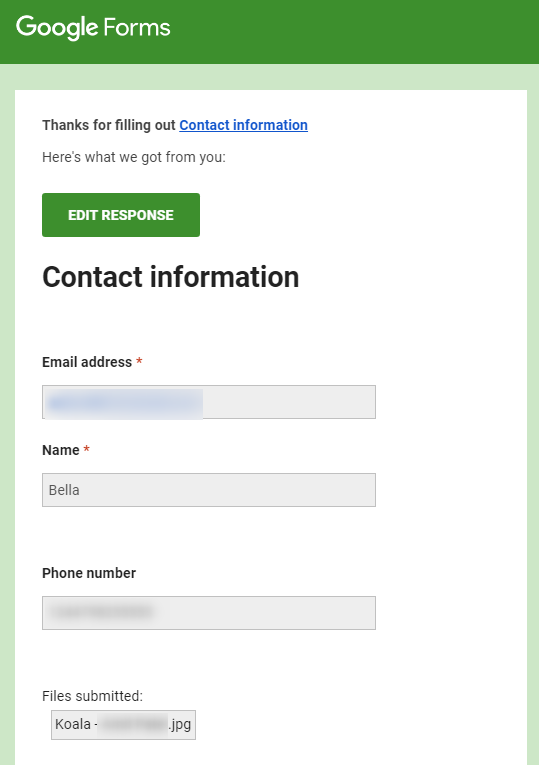
Step 6: Copy Of Submitted Response
Finally, the form submitter will get an email like this, when they submit the form.
Limitation Of Google Forms
No doubt, Google Forms are free to use, but it fails users with vast needs. Some of its limitations are mentioned below:
- It does not provide the option to customize and personalize the email notification. As a result, you have to cooperate with its default email template.
- You can not send specific notification such as payment received/sent to the user.
- Further, it doesn’t let you include your brand logo on the response receipt.
- Advance features like tracking details of form activity are absent in Google Forms.
To Overcome These Limitations Try Its Best Alternative
As discussed above the powerful tool named Pabbly Form Builder which doesn’t restrict you on features by offering unlimited submission, storage and much more.
- It provides a wide range of options to customize the respondent receipt according to your needs.
- The software comes with Autoresponder feature which will ease work at your end.
- Pabbly Form Builder allows you to add your brand identity/logo in the respondent receipt.
- Using it, you can track details such as browser name, country, sessions, type of traffic, IP address of the form respondent.
- Further, it offers flexibility to download responses in PDF format.
Now, let’s see how you can simply enable the settings to send a replica of submitted forms to your respondents.
Steps To Enable Autoresponder in Pabbly Form Builder
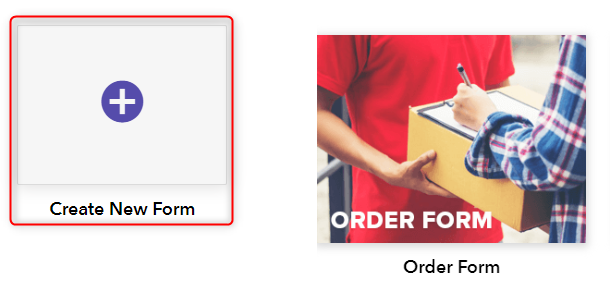
Step 1: Create A New Form
To start, click on the “Create New Form” option and you can use pre-designed templates too.
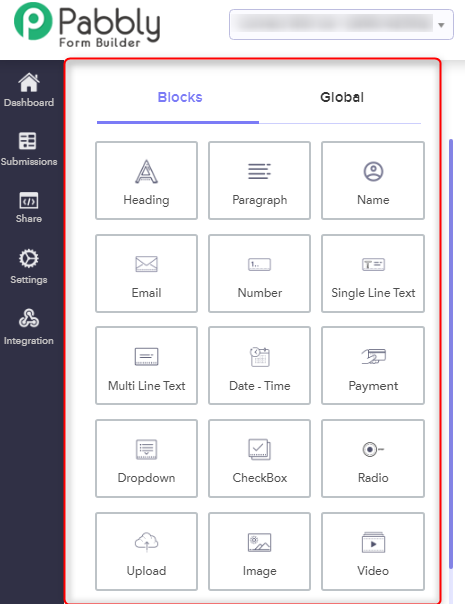
Step 2: Add Fields To Form
In the “Blocks” section, it offers various elements for building a form. You just need to drag & drop those fields which you want to include in your form.
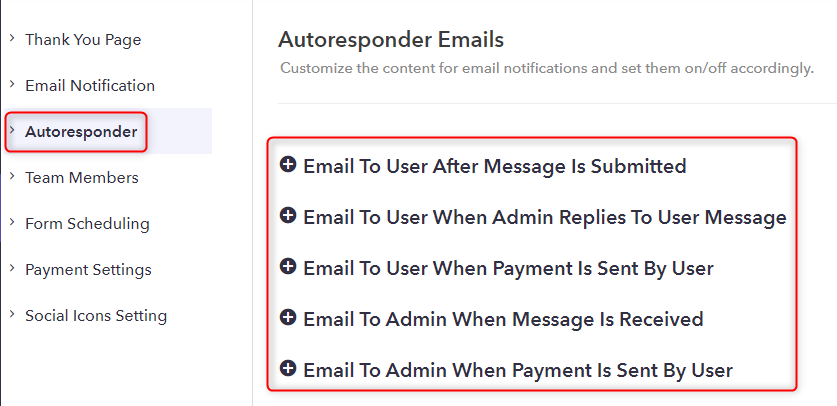
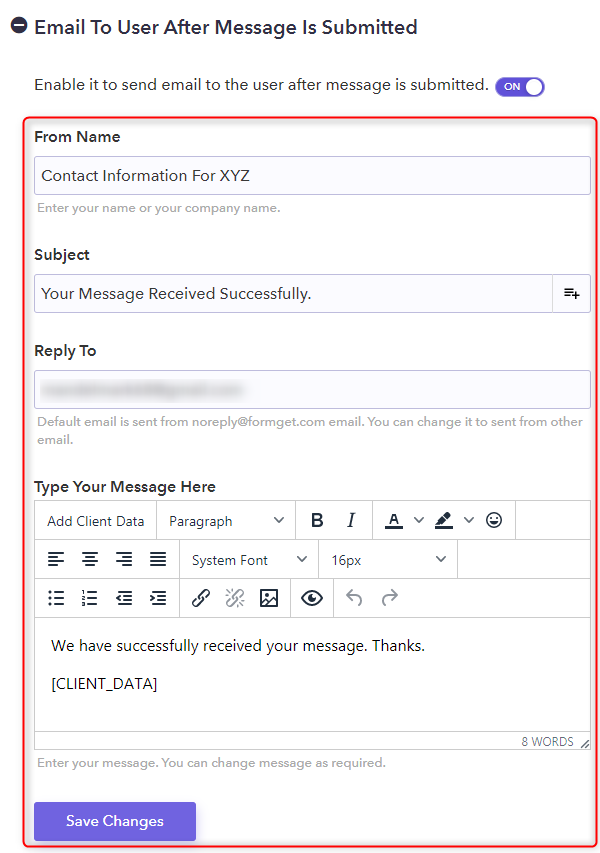
Step 3: Settings For Autoresponder
After creating the form, go to the “Setting” option, here you will find a feature “Autoresponder” along with other different options. Just select that button and it will offer a bunch of choices for email notification.
Step 4: Customize Your Email Notification
Next, here you find a variety of options such as system font, size and much more to customize the message content. Further, enable/disable it using the switch.
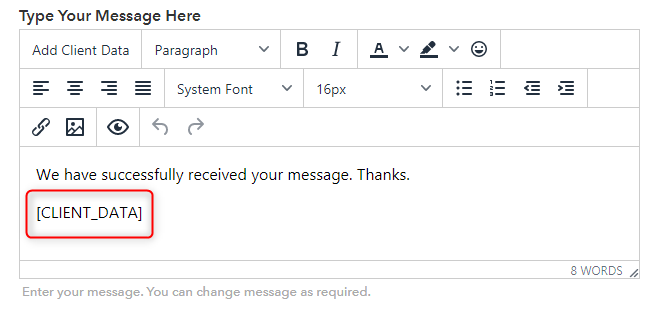
Note: Here, you’ll see the shortcode [CLIENT DATA] which sends the replica of the response to users into their mail account.
That’s how one can easily set up an autoresponder for sending a copy of submitted responses to the users.
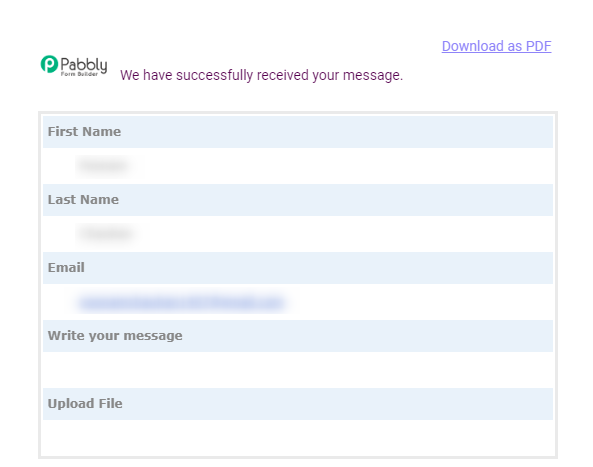
Step 5: Copy Of Submitted Response
This is how your form respondent will get an email notification that contains a copy of the submitted response.
Conclusion:
We hope that this guide has helped you in configuring the setting for viewing the submitted response.
With the help of advanced features like autoresponders, users will get the exact copy of sent entries in their respective email account. This way they will rectify their mistakes if they have made any, during form submission.
Besides this, getting a positive response like “Your Message Received Successfully” from form creator always helps in maintaining a healthy relationship.
You May Also Like To Read: