
You are probably already aware of Google Forms, aren’t you? They are a great way to simplify the process of making customer feedback surveys, order forms, event registration forms, RSVP forms, job applications and much more. Moreover, you can also use them to gather contact information and easily extract the data into a spreadsheet. For your convenience, it offers a ton of templates for the different categories of forms as well.
One of the most common uses of Google Forms is to design event registration, shopping checkout or similar pages which involve receiving payment from the customer’s side. While there are many payment checkout pages that businesses build using Google Forms, but they are not the best for collecting payments. Why it is so?
First of all, Google Forms are not Payment Card Industry (PCI) compliant. This means that they do not meet the technical and operational standards set for protecting credit card data provided by cardholders. Therefore, getting your customers to enter their payment details into Google Forms may not be the best idea.
Secondly, the forms simply do not have a way to collect payment from the visitor; you will have to redirect your customer to a third party website, which defeats the purpose of using Google Forms to create the payment checkout page in the first place. Nonetheless, if you are wondering how you can do that, let’s discuss that first.
Redirecting user to a third-party website from Google Forms for payment collection
When creating Google Forms, you can insert a confirmation text which is shown to the visitor after he or she submits the form. You are allowed to create a custom confirmation text which you can easily use to insert a link of the third-party payment website. This would redirect the users to the webpage where they can complete their payment.
While this may sound simple and effective, it leaves you with another task that you will need to complete on your end. After the customer makes the payment, you will have to manually check and record the payment received. This may not be possible without asking for a payment reference number from each customer.
You must have realized by now how hectic receiving payments can become if you stick to Google Forms. Is there a way out?
Pabbly Form Builder
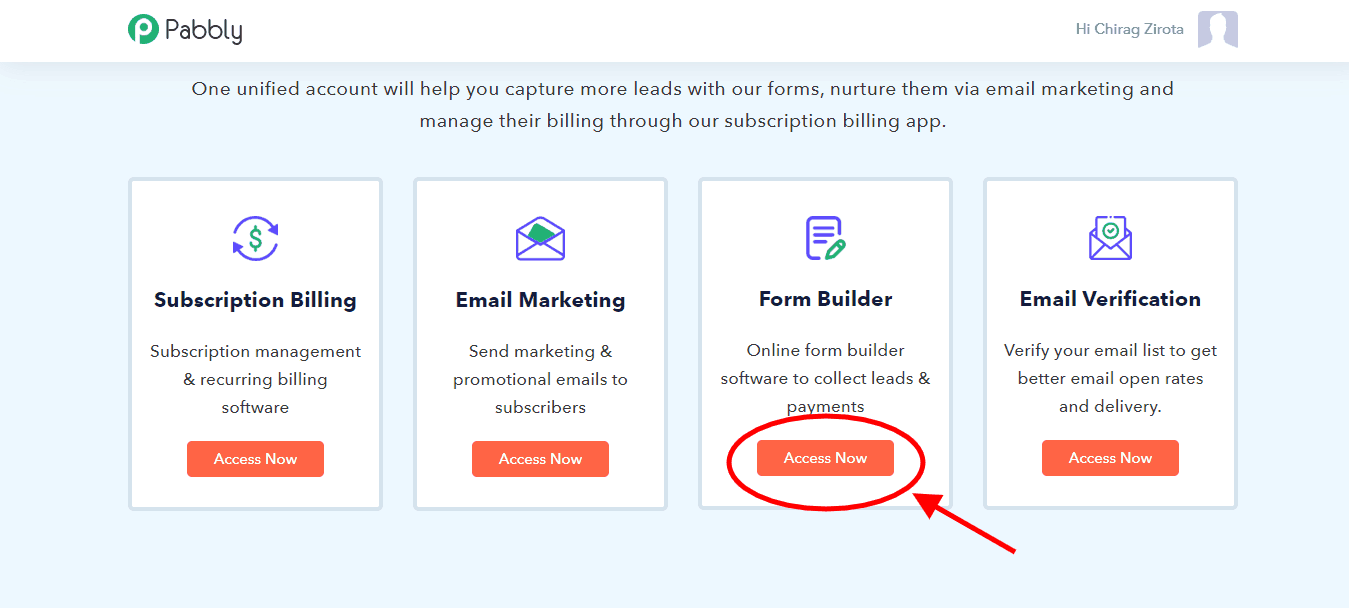
Pabbly Form Builder is an online application on which you can design any kind of business forms, including payment forms. Here is how you can use Pabbly Form Builder to build your payment forms with ease:
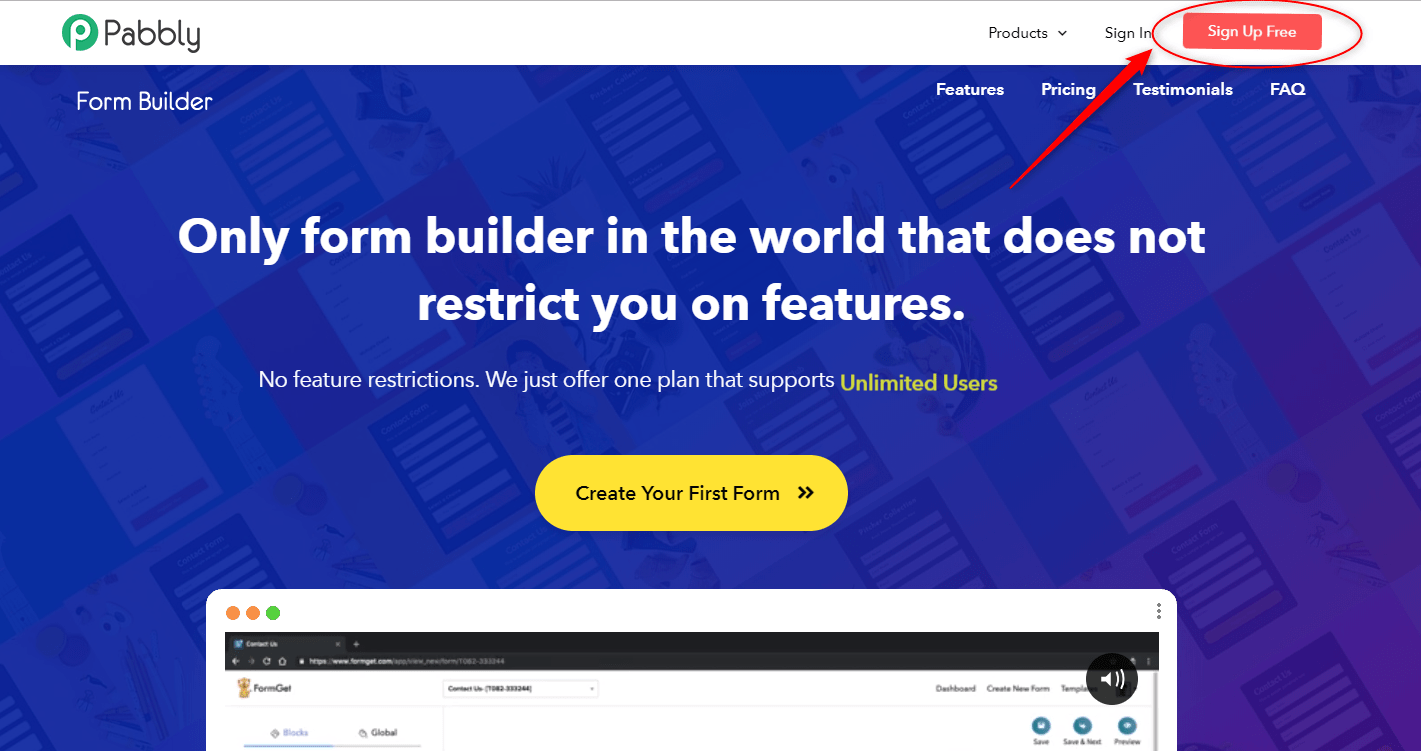
First, click on the “Sign Up Free” button on the top right corner of the Pabbly homepage and complete the signup process and open the form builder tool.
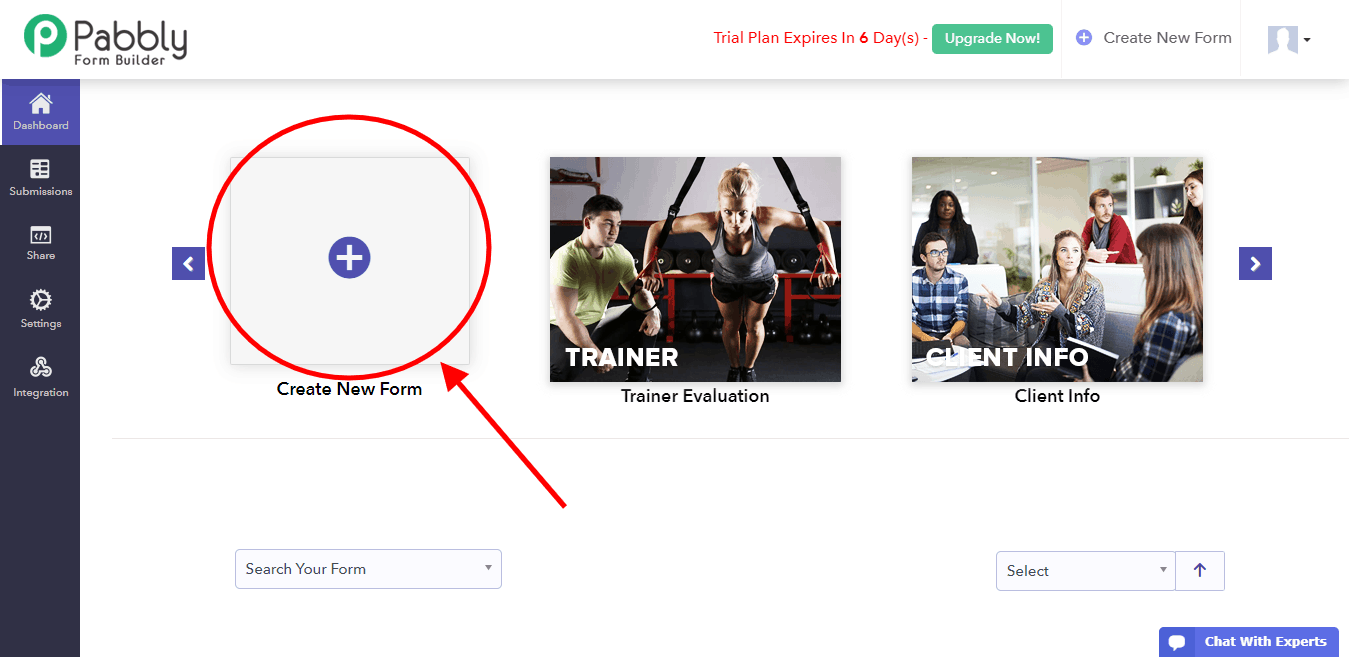
In order to start the form designing process, click the “Create New Form” button.
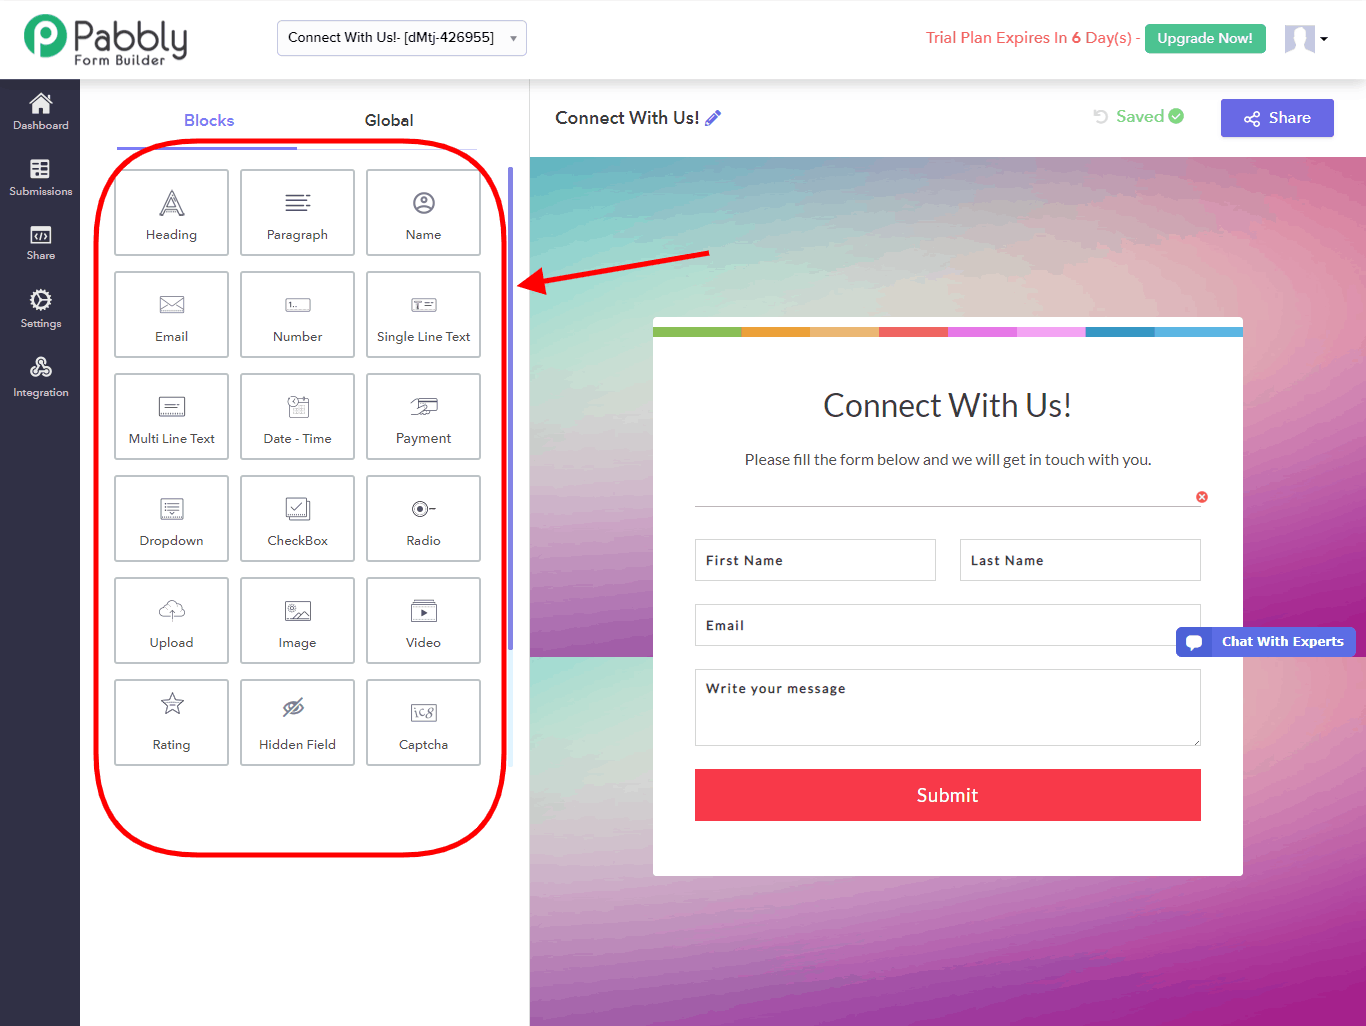
A default “Connect With Us” form will be displayed on the screen, which you can edit as per your requirements. The Pabbly Form Builder provides you with a plethora of designing tools which you can use to customize your form. You can insert headings, dropdown, video, image, captcha, radio, etc from the “Blocks” tab on the left.
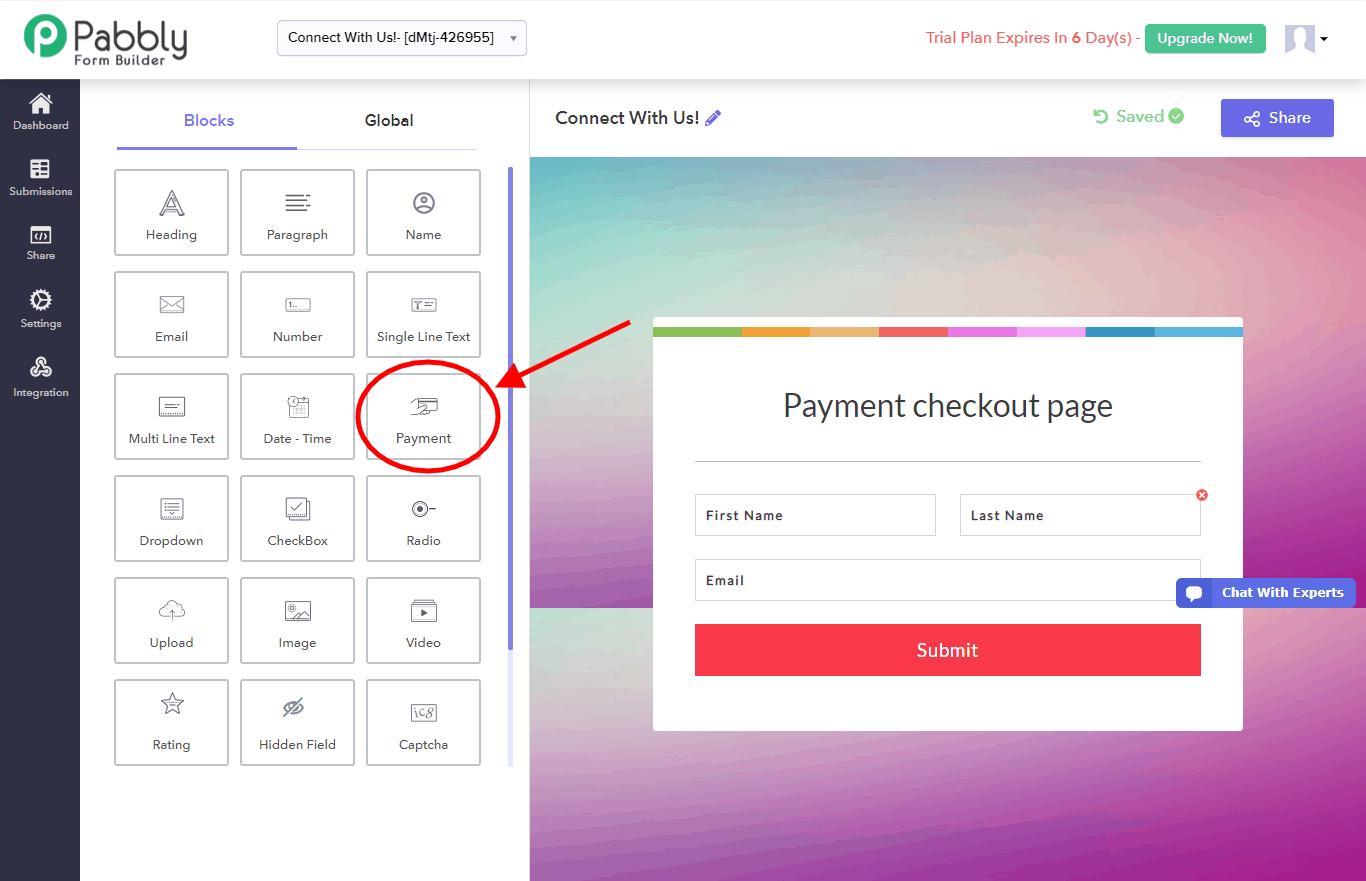
After you are done designing your form, it is time to add your products, which can be commodities, tickets, etc for which you wish to receive payment from your customers. For a payment checkout form, you will need to insert a payment box by clicking on the “Payment” block.
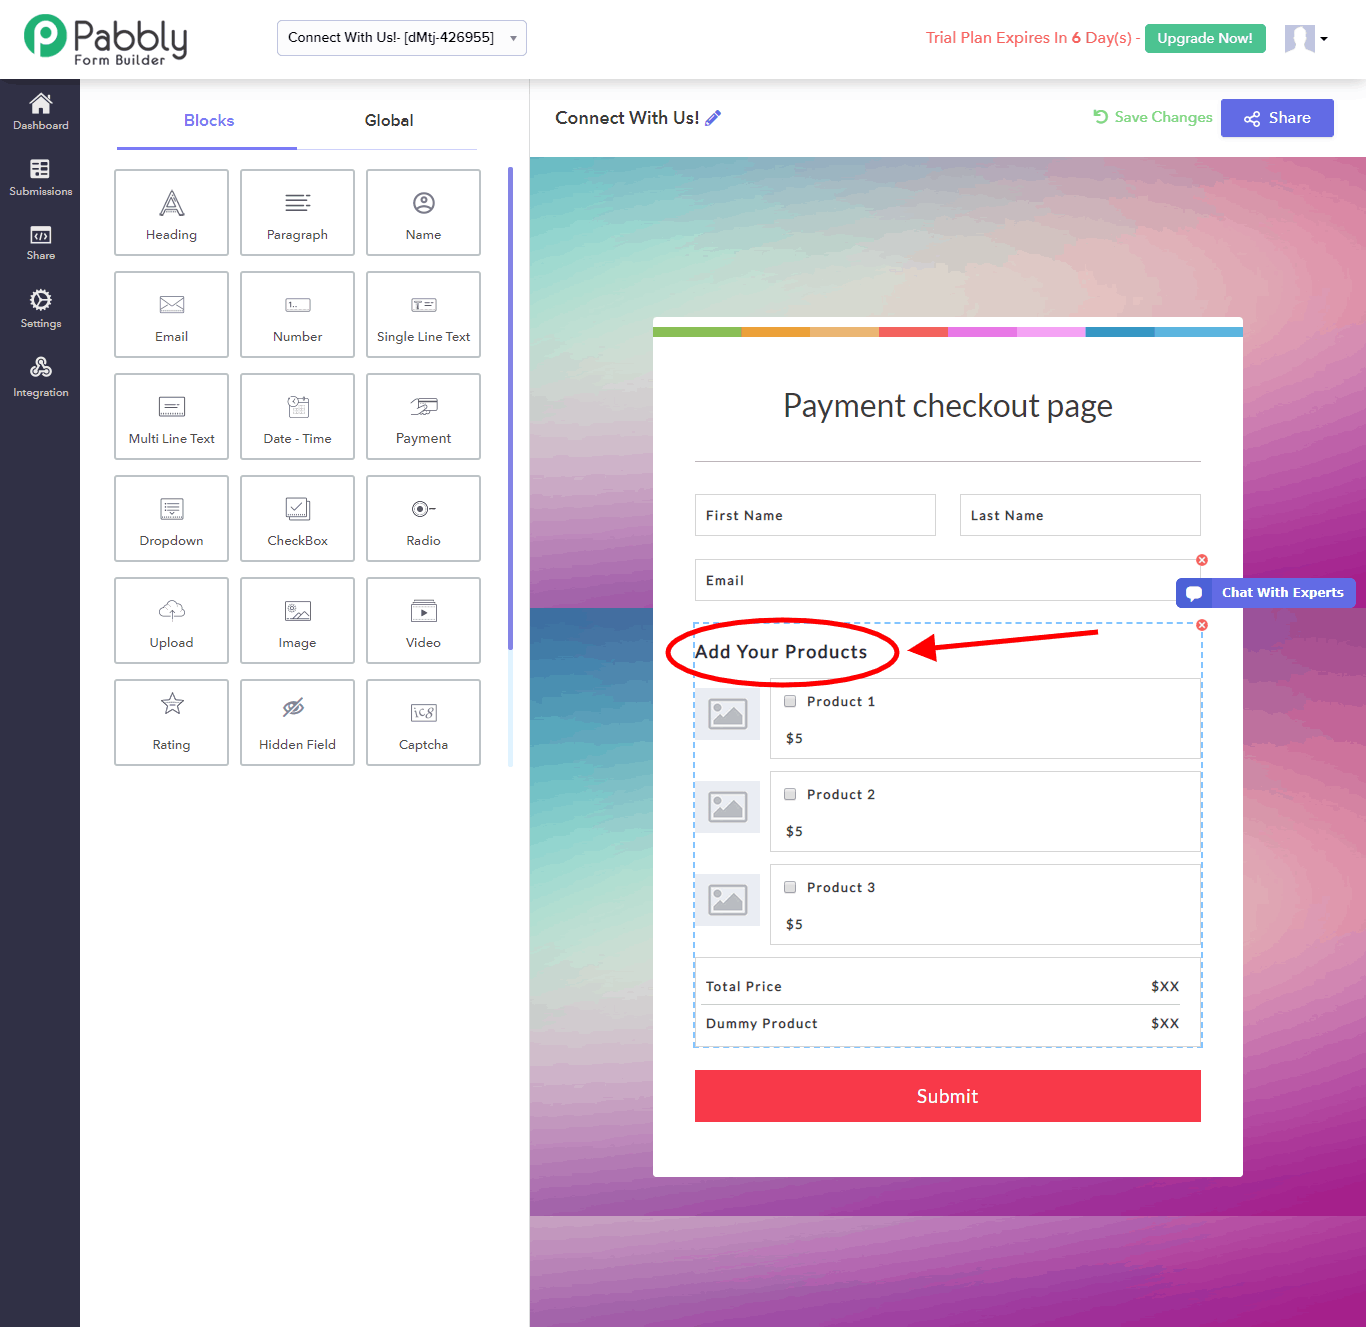
The application would automatically drop a default product list which would display product names, prices of each product and the total price of the purchase.
In order to add your products, click on the payment box that has just been inserted on your form.
This would open a “Configure Payment” dialogue box in which you need to fill in information about payment, products, and prices. Since this would be a long box, let’s go through it bit by bit.
You can change the field label through this dialogue box as well, which is currently “Add Your Products” by default. After that, you need to select the mode of payment from the “Select Merchant” drop-down menu.
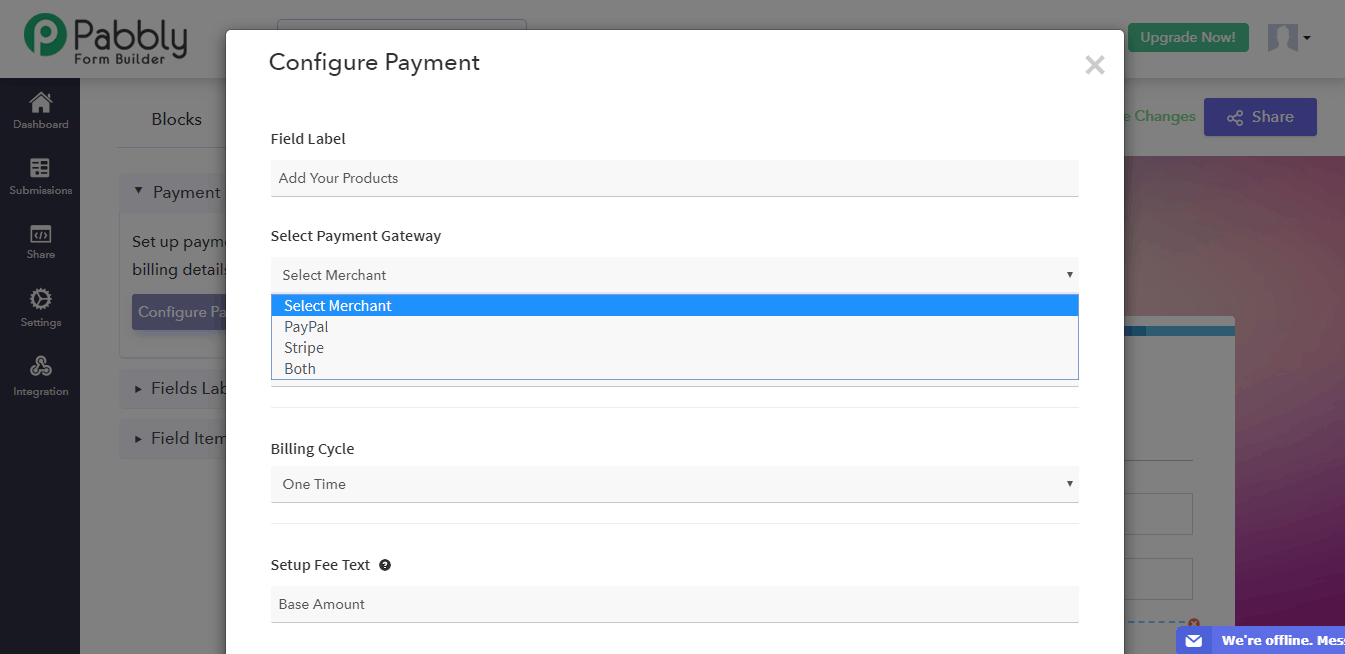
Pabbly Form Builder provides you with two options: PayPal and Stripe. In this form, we will select “Both” so you can understand the processes for both the merchants.
To receive payments, you will need to integrate your PayPal and Stripe accounts to the form. In order to learn how to do just that, visit the PayPal integration guide here and Stripe integration guide here.
PayPal integration will generate a “Secret Key” and “Client ID”, which you need to enter in the “Configure Payment” dialogue box. For Stripe, simply click on the “Connect With Stripe” button as shown below.
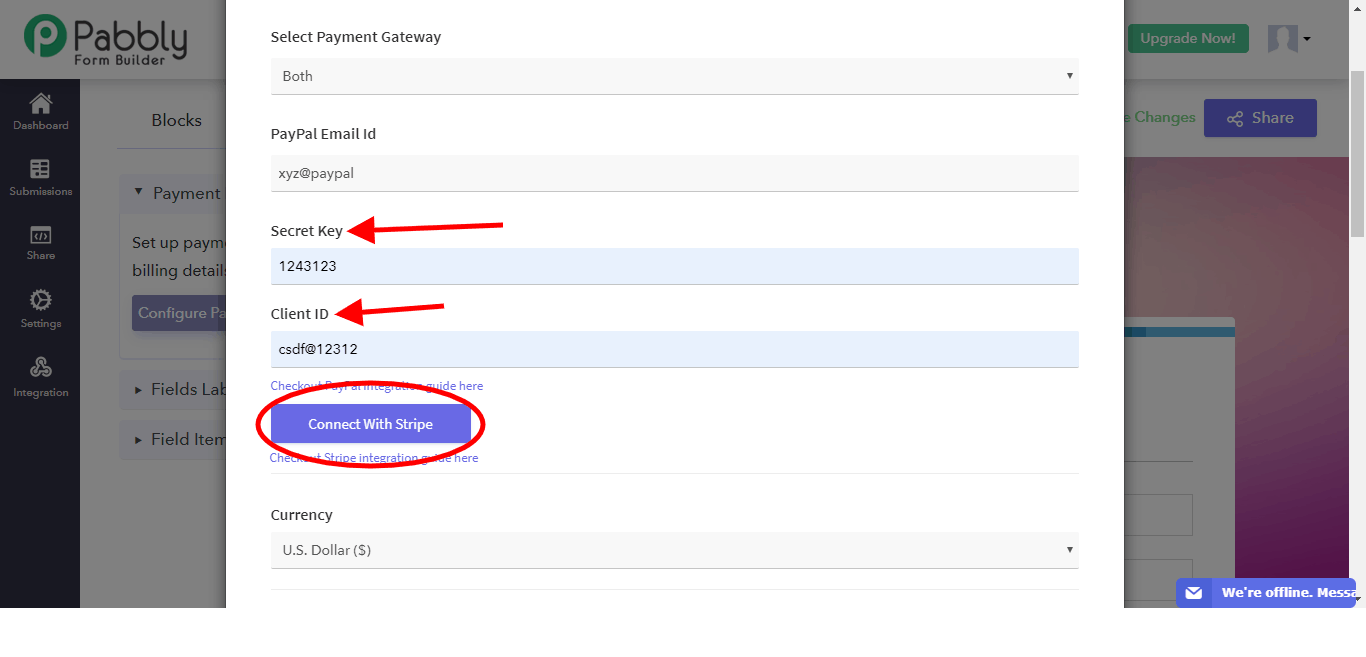
After the payment gateway integrations are done, select the currency in which you wish to receive the payments and the billing cycle from the “Currency” and “Billing Cycle” drop-down menus respectively.
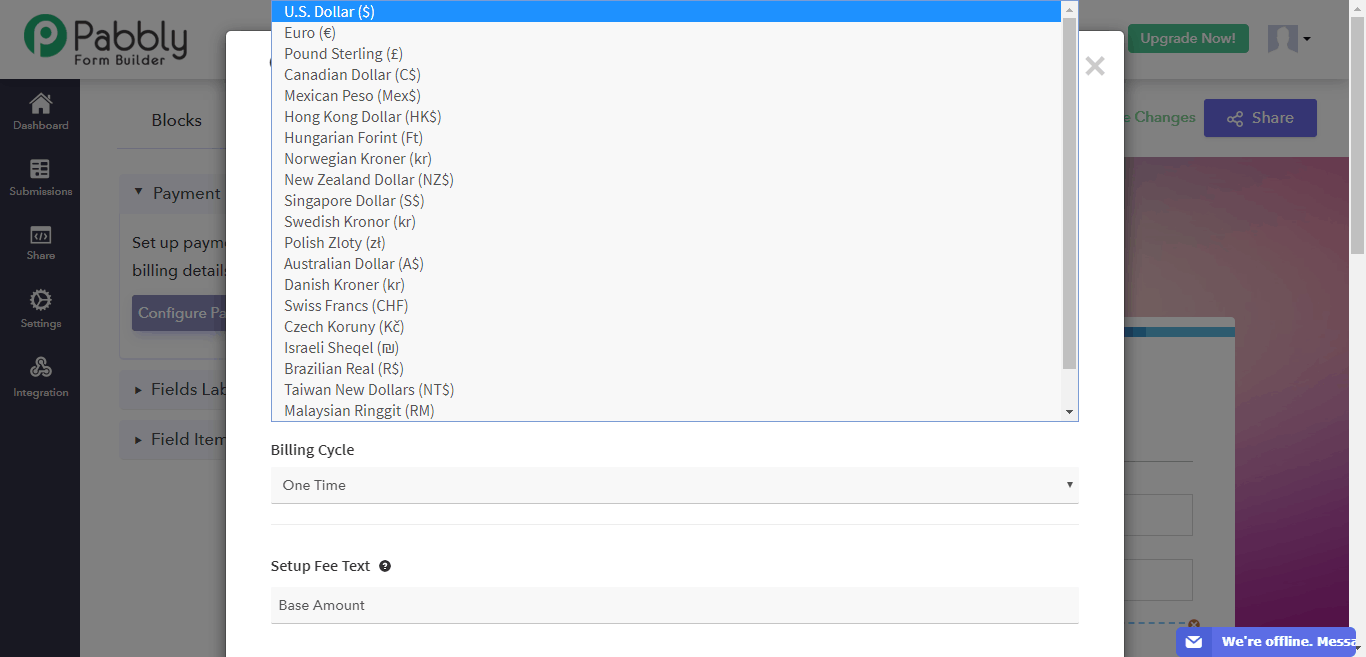
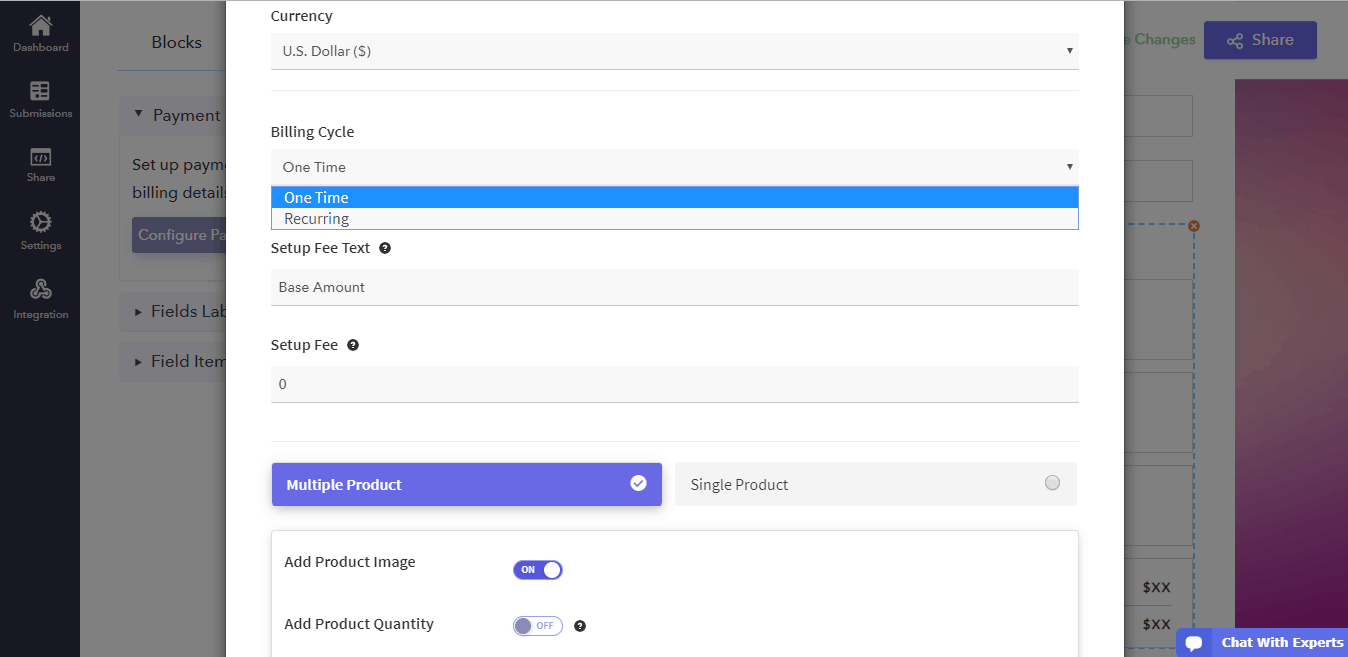
Use the “Setup Fee” to add any base amount for purchases.
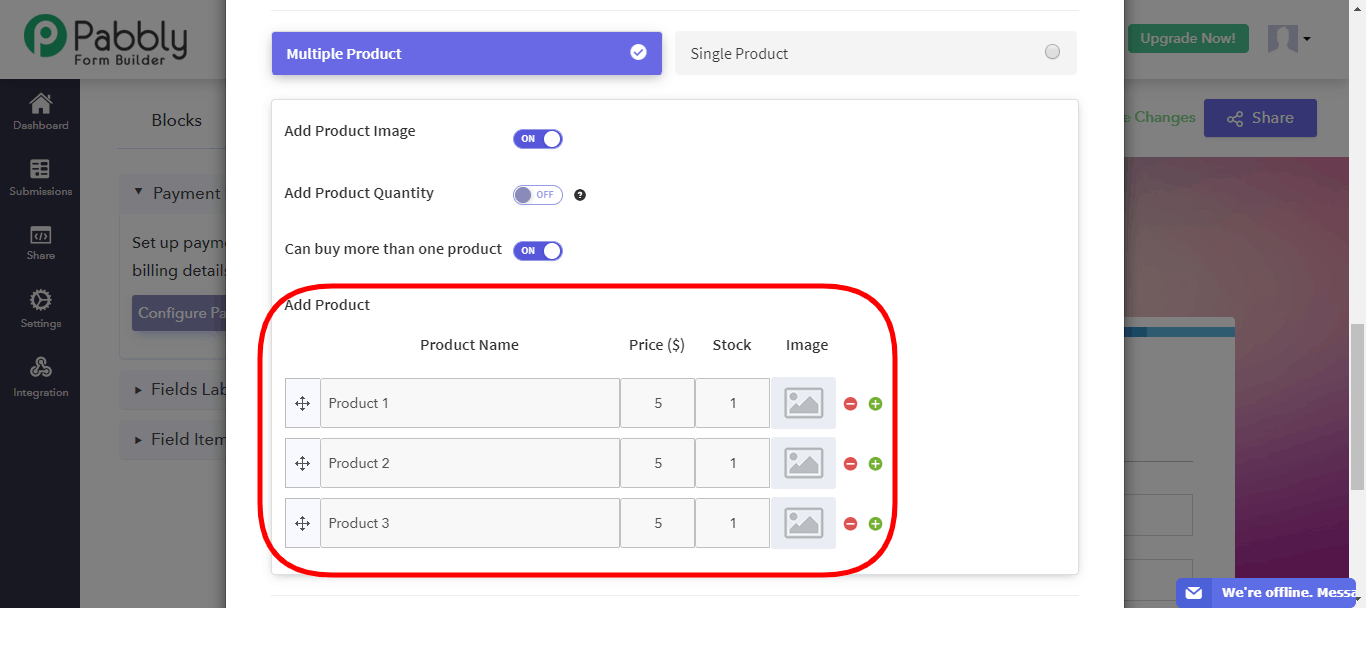
Now that you have completely filled in your payment details, it is time to add your products. In this example, we are assuming you have multiple products.
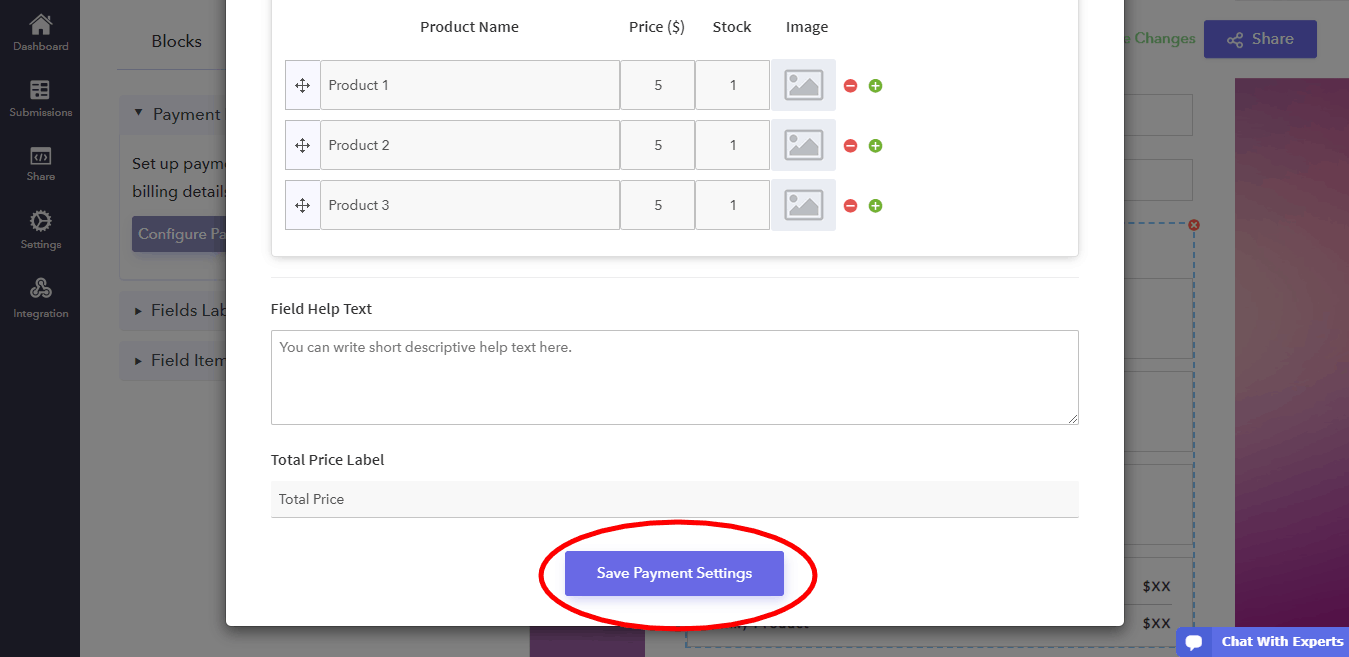
In the “Multiple Products” tab, enter in your product name, price, stock and image in the respective boxes.
After this is done, your payment form is complete. Remember that you can change the label names in their respective boxes and even add help text for your visitors in the dialogue box.
To complete the payment setup, click on the “Save Payment Settings” box at the bottom.
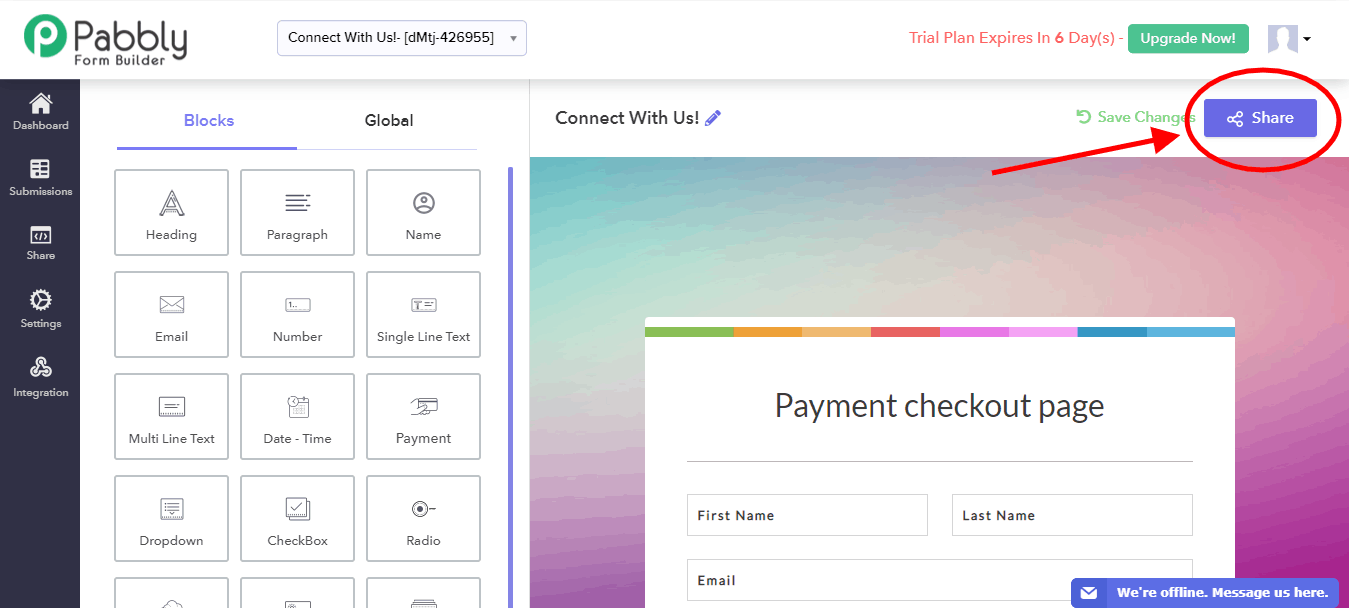
Congratulations! You have successfully finished designing your payment form!
In order to share it with your users, click on the “Share” button on the top right corner of the webpage.
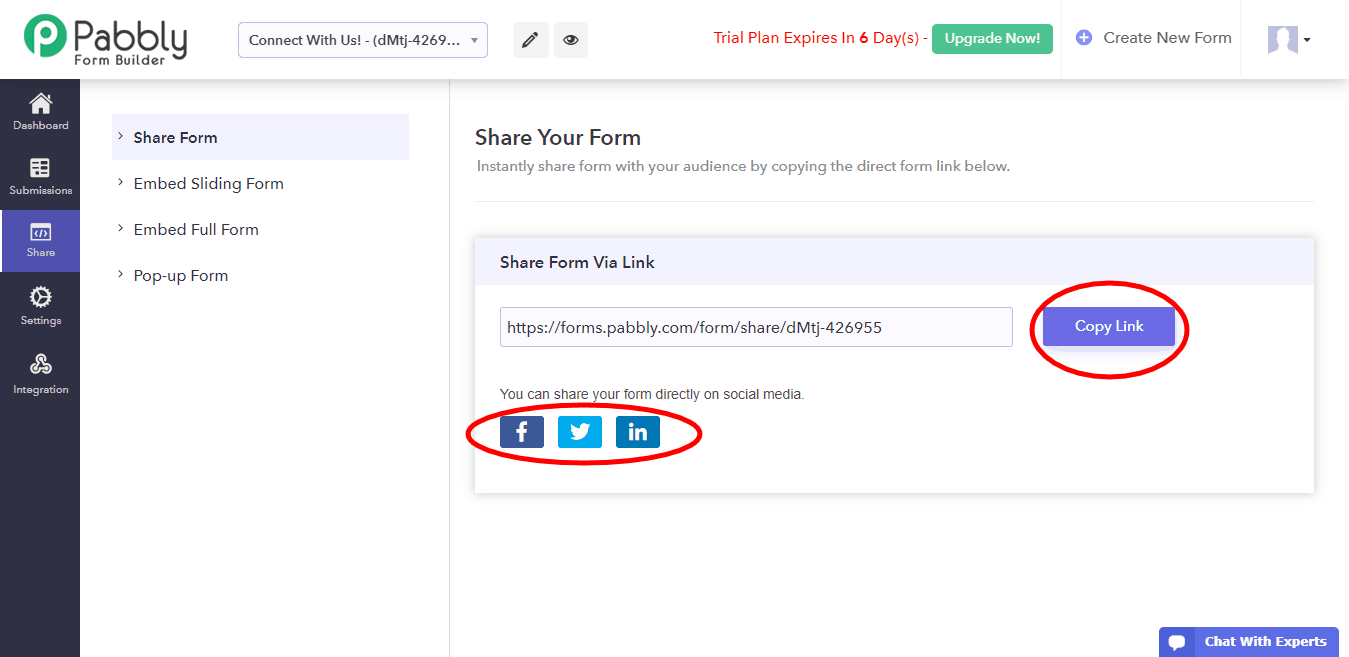
You can either use a link or Facebook, Twitter and LinkedIn to share your form with your customers.
Final Words
That’s it! Everything on your end is done and you can sit back and receive payments directly through your forms.
Pabbly Form Builder is a useful tool to give your customers a convenient user-interface to fill in the form and, as shown in this guide, make payments. In addition to that, it eliminates the trouble of keeping track of payments of each customer manually.
Do check this amazing online application to make your online operations – like collecting contact information, payment processing, billing, etc. – more efficient.
You May Also Like: