
We all know payments are the first concern in every business and it is the most critical part too. Right!
Also, whenever there is money involved, everyone demands maximum security.
If you have been using Google Forms for a long time & trusted it too much then you are finding some provision to receive payments in it.
So, let me tell you that Google Forms don’t allow you to do so.
Yes, you heard it right!
With Google Forms, you can definitely add a payment button in your forms but it will not allow you to collect online payments directly from it. There are many reasons behind this which are described below in this article.
Do you know Google Forms are not PCI compliant?
Yes, it does not support any security standards that ensure the acceptance or transmission of credit card information, maintains a secure environment for payment collection. Hence, it would be a very unsafe way for your users to submit their payment details in Google Forms.
Don’t worry! You can try some other alternative like Pabbly Form Builder.
Certainly, it provides a fully secure platform for collecting payments right from your forms.
Let us discuss everything one by one,
As you know, mostly Google Forms are used to create any kind of checkout form. But for this, you have to include a link to PayPal, Stripe, or some other third-party payment services into the form. This will help you to redirect your user from Google Forms to the 3rd-party website for payment. However, this reduces the purpose of using Google Forms. Anyway, if you are wondering how you can do that, let’s discuss that first.
Settings For Redirecting The Respondents Towards Third-Party Payment Gateways:
Google Forms allows you to create a custom confirmation text which you can easily use to insert a link of the third-party payment website. This would redirect the users to the webpage where they can complete their payment.
Let’s see what are the steps you have to follow for this,
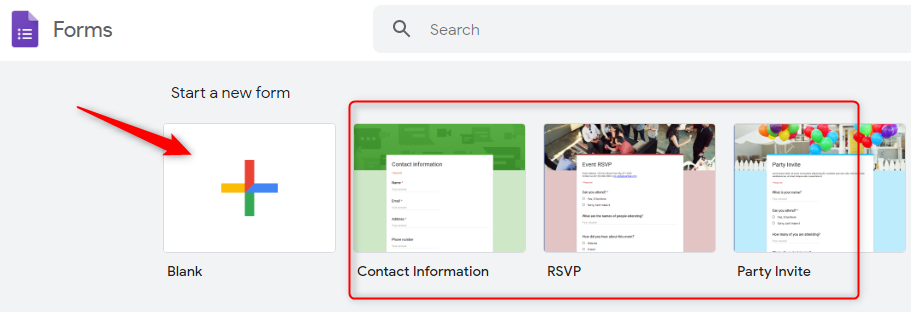
Step 1: Create A Form
First, you have to create a form for collecting payments. For this, you can either create a new form from scratch or you can choose one from its amazing pre-built templates. In Google Forms Dashboard, hit the “Blank” button for creating a new form.
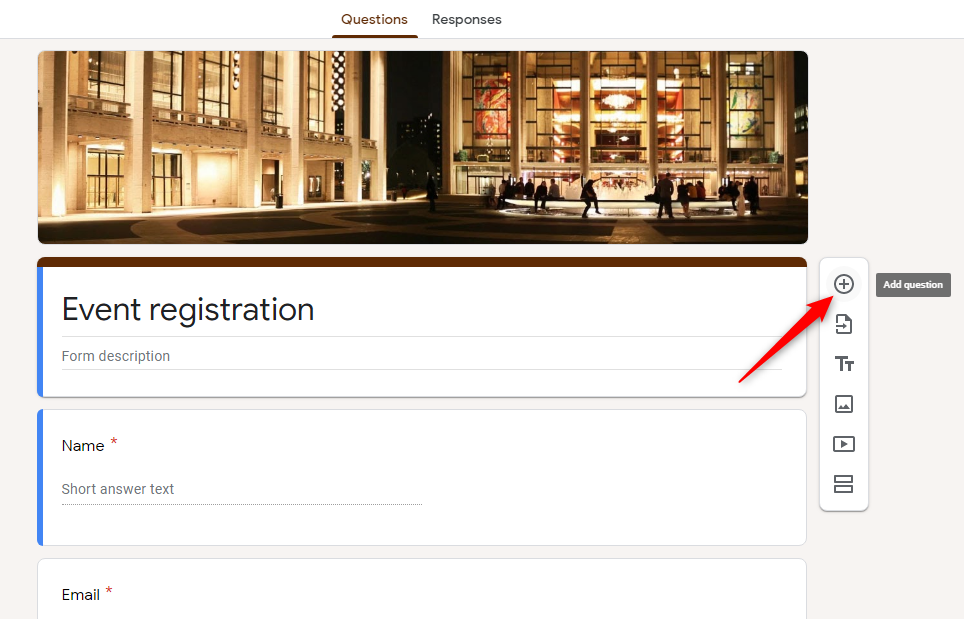
Step 2: Add Customized Questions/Media Into The Form
With Google Forms, you can add customized questions into your forms very easily. For this, you just need to hit the “Plus” icon. Further, you can add options like file upload section, images, videos, etc into your forms from here.
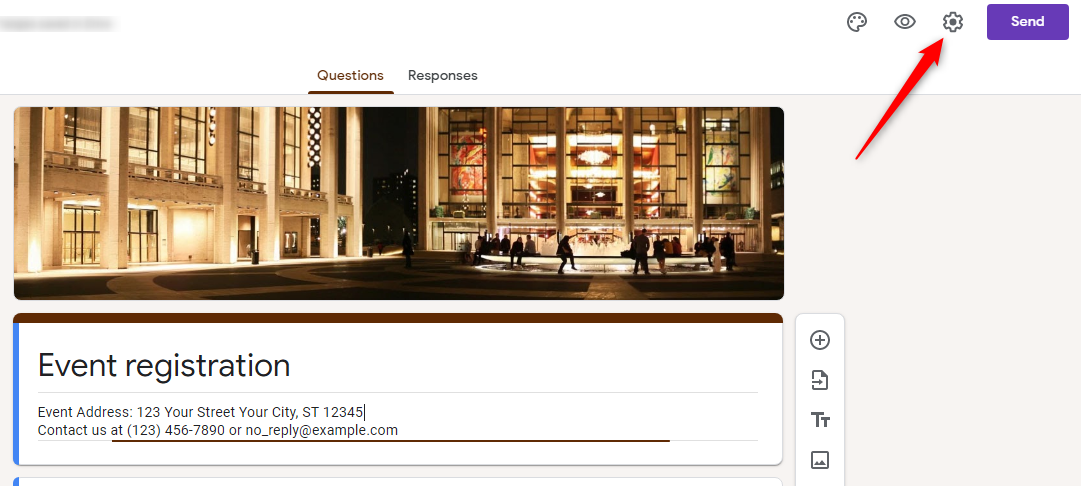
Step 3: Hit The Setting Button
Once you complete the procedure of form creation, then go to the “Setting” button which is available at the top right section of the dashboard for customizing the confirmation message.
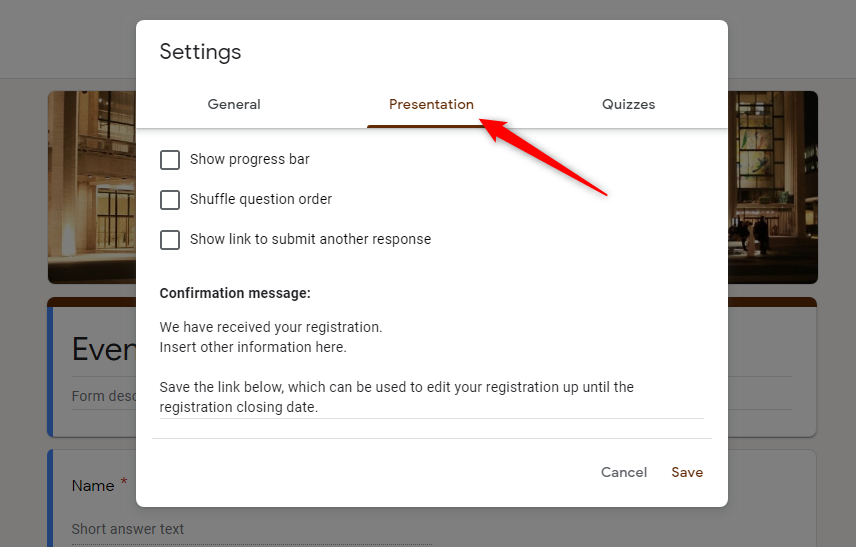
Step 4: Go To The “Presentation” Section
When you hit the “Setting” button, a pop-up window will appear. Here, you will find the “Presentation” section.
Step 5: Setup The Confirmation Message
Here, you can add a customized message and the link of third-party payment gateway like PayPal, Stripe, etc, for collecting the payments.
Save the personal confirmation message after editing it. There you go to collect payments very easily directly from your forms.

That’s it! Yes, this is how you can enable the payment collection functionality into the Google Forms.
While this may sound simple and effective, it leaves you with another task that you will need to complete on your end. Let’s see what are they,
Shortcoming Of Google Forms:
As stated earlier, Google Forms allows you to set a custom confirmation text where you can add a link that will request users to make payment. But, this link will be shown once someone submits your form. So, there can be chances that few customers may skip that & don’t jump out from that page. This can become a serious problem for you as the purpose of adding that link failed.
Secondly, you will have to manually check and record the status of payments that you have received by the checkouts made by customers. This may not be achievable without asking for a payment reference number from each customer. But, it looks quite unprofessional & insecure too.
Now, you must have realized how hectic receiving payments can become if you stick to Google Forms.
Hence, for professional purposes, you should use some other comprehensive alternative of Google Forms that can provide you a fully secure platform for managing funds.
The Best Alternative To Google Forms For Managing Payments:
I recommend you try Pabbly Form Builder for managing payments & checkouts. Why?
Pabbly Form Builder is the ultimate form builder that not only allows you to create unlimited beautiful forms but also helps you to collect & manage payments very easily. It is veritably the best software for creating SaaS-based payment collection forms.
Further, it provides you with efficient features like more than 260 pre-built templates to choose from, custom branding, file uploads & much more.
Plus, it allows you to collect the payment via connecting you to different payment gateways like PayPal & Stripe. Last but not least, Pabbly Form Builder helps you to collect recurring as well as one-time payment from customers. Interesting Isn’t it?
Yes, you can do all these using this form builder that too at a very reasonable cost.
How You Can Collect Payment With Pabbly Form Builder?
Now, you have agreed with me that the Pabbly Form Builder is the best choice for all the payment collection needs. You surely want to know what procedure you have to follow for enabling options for payment collection.
Let’s discuss it now:
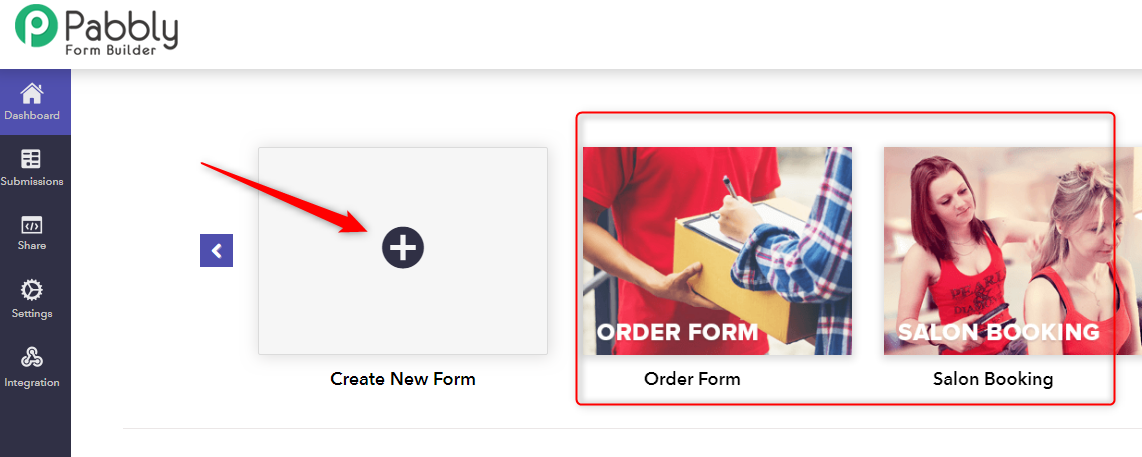
Step 1: Create A Payment Collection Form
The first thing all you have to do is to open the dashboard of Pabbly Form Builder. After that, hit the “Create New Form” icon for creating a new form from scratch. If you don’t want to do this, then you can also use one from the set of its pre-built templates & customize that according to your requirements.
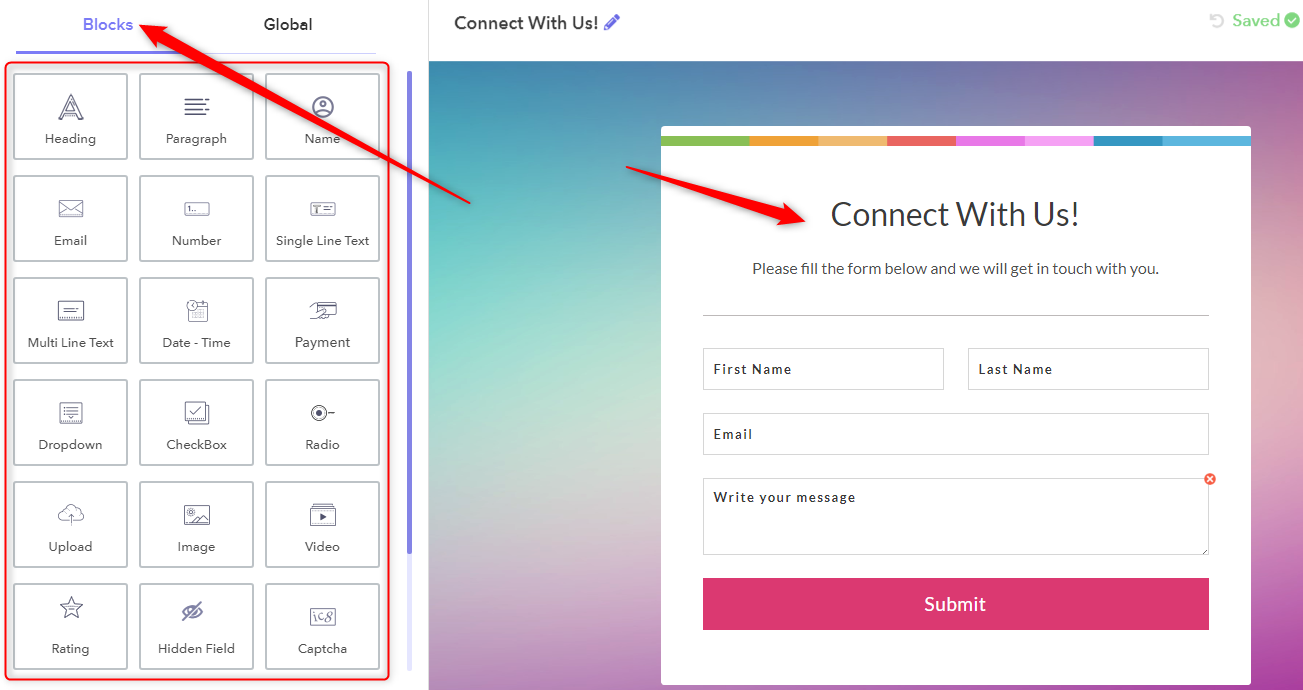
Step 2: Customize The Form As You Want
After this, you will find that a default “Connect With Us” form will appear on the screen, that you can edit as per your requirements. For this, Pabbly Form Builder provides you a lot of form elements & designing options in its “Block” tab. From here, you can add multiple fields like heading, images, captch, upload, rating, payment, etc.
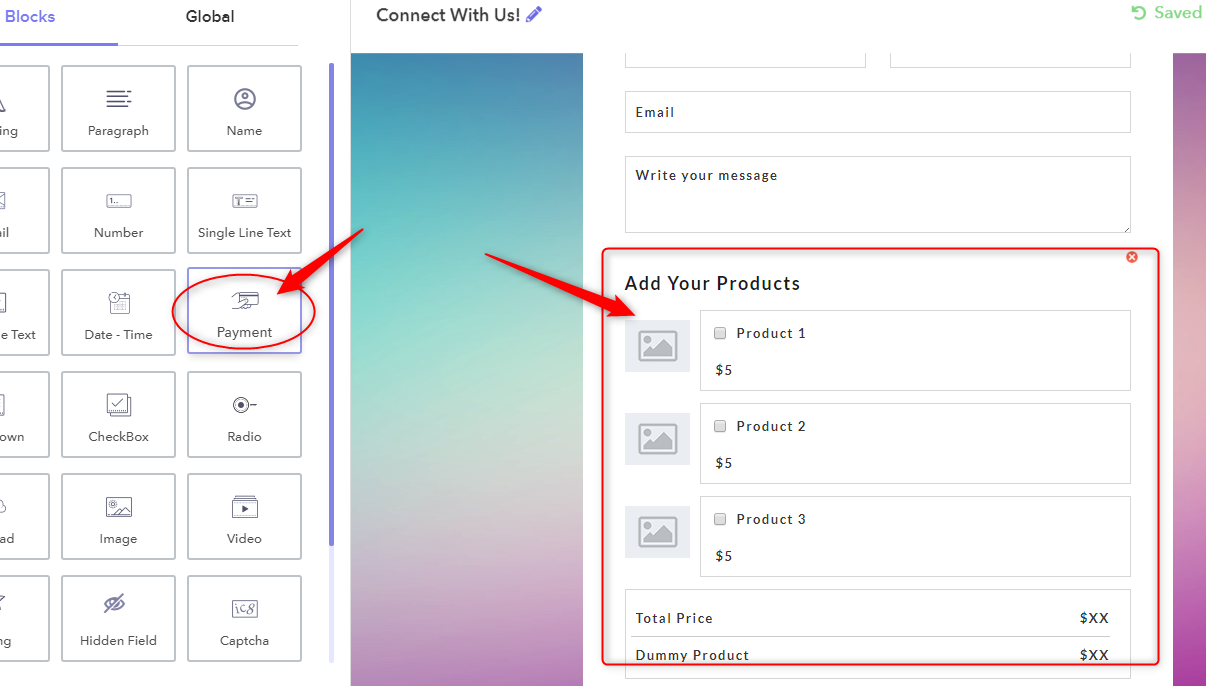
Steps 3: Add Payment Field
Now, once you add all the required elements into your form. Next, you can add the payment field into your form,
For this, just drag the “Payment” field from the block and place it at the desired area of your form. The application would automatically show a default product list, details and the total price of the purchase.
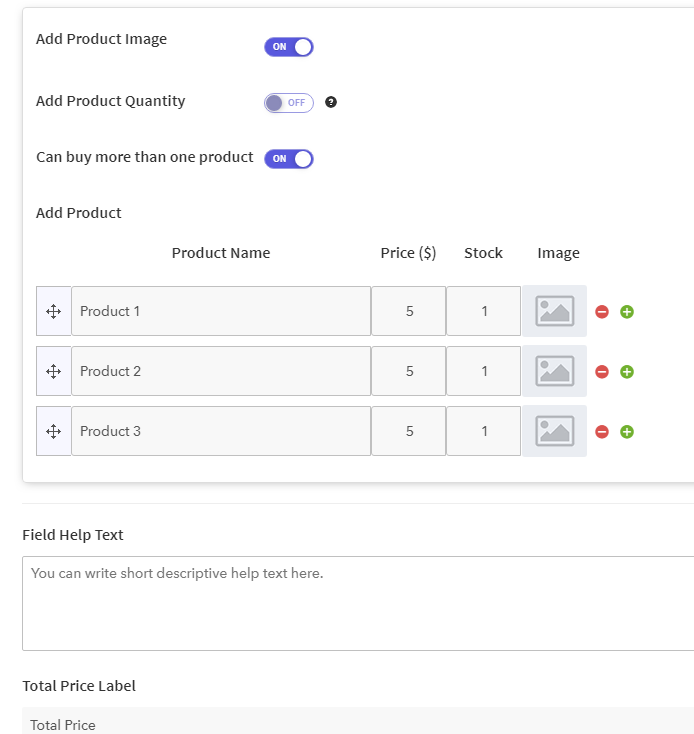
Step 4: Setup Product Details
Subsequently, you need to edit the details of your products like its name, image, price, total stock, etc, just by clicking on it. These products can be anything like commodities, tickets, etc for which you wish to receive payment from your customers.
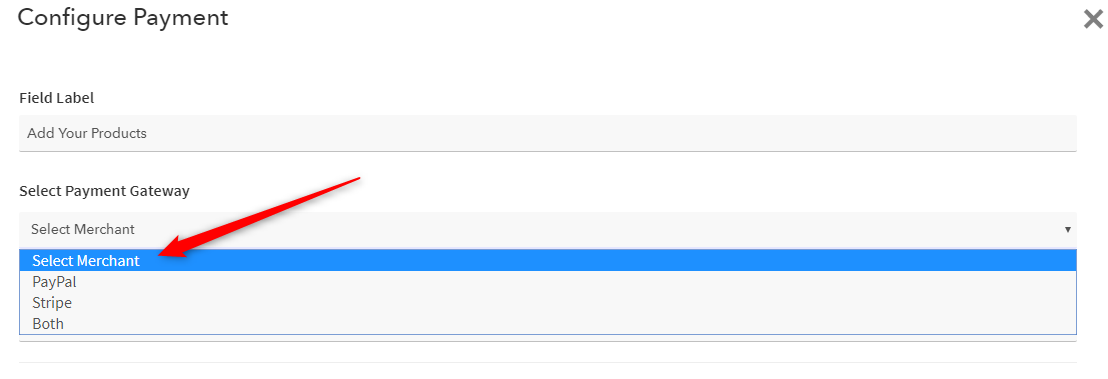
Step 5: Select Payment Gateway
After this, you have to select a payment gateway from which you want to receive payments from your customers. Here, you will find options like PayPal, Stripe or both.
To this, you will need to integrate your PayPal and Stripe accounts into the form. In order to learn how you can do this, visit the PayPal integration guide and Stripe integration guide.
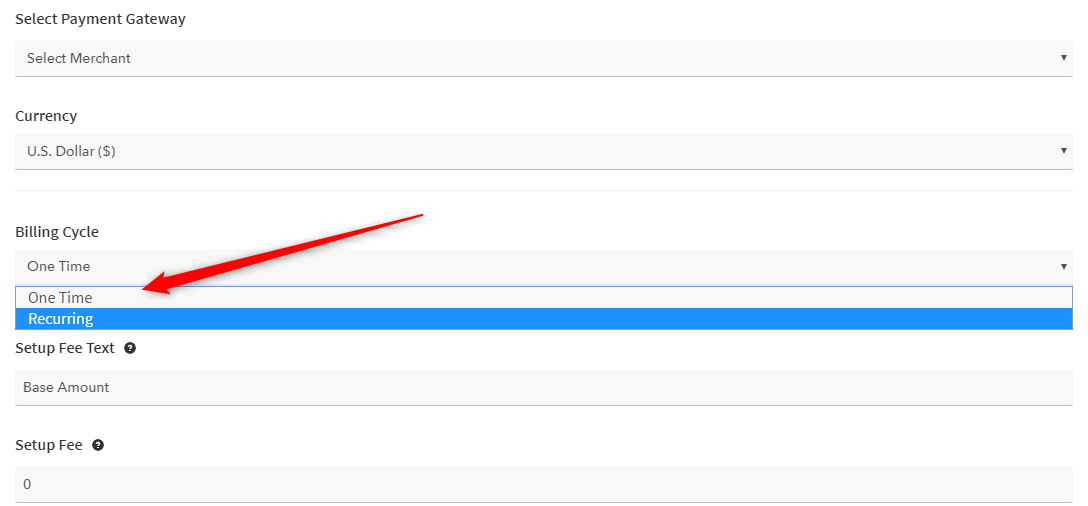
Step 6: Setup Billing Cycle
Once you add payment gateways, you have to specify the type of billing cycle you want to follow. That means Pabbly Form Builder allows you to receive both recurring & one time payments.
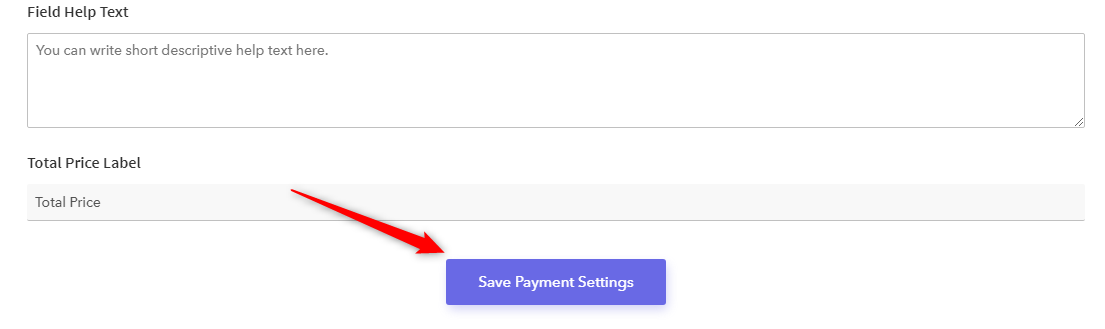
Step 7: Save The Payment Setting
Now, your payment form is ready. Hence, to complete the payment setup, click on the “Save Payment Settings” button at the bottom.
Step 8: Save, Share, Enjoy!
Hurray! You have successfully designed & configure your payment form!
Momentarily, you just need to save the form and share it wherever you want. Now, you don’t need to worry about the payment collection requirements. Everything will be managed automatically by Pabbly Form Builder.
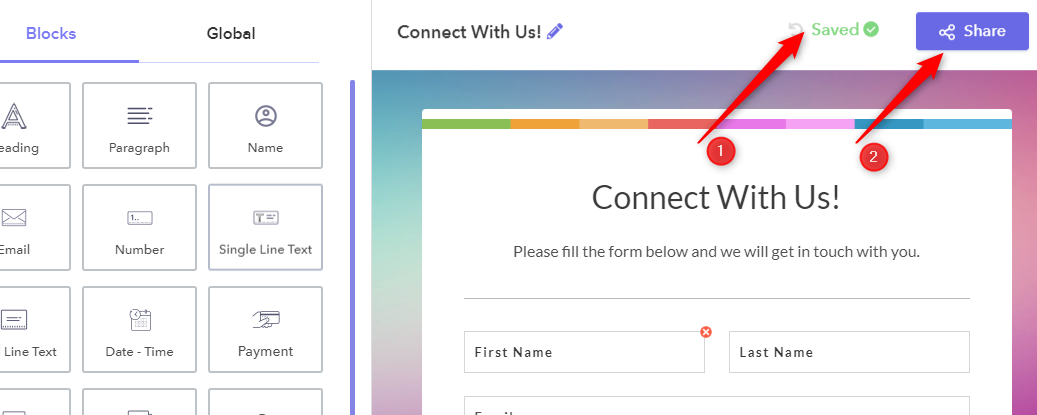
That’s it! Everything on your end is done. Now, you can sit back and receive payments directly through your forms.
Wrapping Up:
Now, taking everything into account, I am expecting that the above-mentioned information helped you to understand how one can enable options for payment collection direct from Google Forms.
Though Google Forms does not support such options. Then also, here, I shared a few other ways that can help you in collecting payments.
So, don’t waste any more time and start collecting payments and generate revenue for your business through forms without any hassle.