
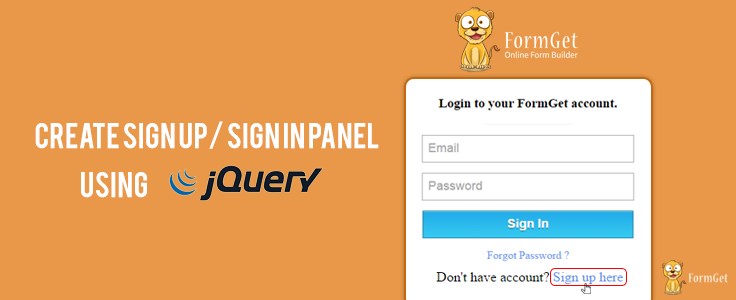
This tutorial focused on creating a registration form that can be hide and display on a click. This hide and show functionality will be maintained using jQuery.

Here with the help of HTML login and registration form example shown below you will learn how to perform it.
So, suppose you have a sign up form and login form on your website, you can display them very effectively. When you click on a “Login form” hyperlink, login form will display.

And, simultaneously, when you click on a sign up form hyperlink, “Sign up” form will appear.

It’s a complete Login/Signup pannel.
Here is the jQuery/HTML codes to Show/Hide form (Sign in & Sign up).
HTML File: showhideform.html
- It includes div “first” for the Login form.
- Div “second” for the Signup form.
<!DOCTYPE html>
<html>
<head>
<title>Show & Hide Form - Demo Preview</title>
<meta content="noindex, nofollow" name="robots">
<link href="css/showhide.css" rel="stylesheet">
<script src="http://ajax.googleapis.com/ajax/libs/jquery/1.7.1/jquery.min.js"></script>
<script src="js/showhide.js"></script>
</head>
<body>
<img id="logo" src="images/logo.png">
<div id="main">
<!-- Create Div First For Login Form -->
<div id="first">
<form action="" method="post">
<h3>Login to your FormGet account.</h3>
<img id="divider" src="images/divider.png">
<input id="loginemail" placeholder="Email" type="text">
<input id="loginpassword" placeholder="Password" type="password">
<input id="login" type="button" value="Sign In">
<p id="one"><a href="#">Forgot Password ?</a></p>
<p id="two">Don't have account? <a class="signup" href="#" id="signup">Sign up here</a></p>
</form>
</div>
<!-- Create Div Second For Signup Form-->
<div id="second">
<form action="" id="form" method="post" name="form">
<h3>Create a Free Account</h3>
<img id="divider" src="images/divider.png">
<input id="name" placeholder="Full Name" type="text">
<input id="registeremail" placeholder="Email" type="text">
<input id="registerpassword" placeholder="Password" type="password">
<input id="contact" placeholder="Contact Number" type="text">
<input id="register" type="button" value="Create your FormGet account">
<p id="two">Already have an account? <a class="signin" href="#" id="signin">Sign in</a></p>
</form>
</div>
</div>
</body>
</html>
jQuery File: showhide.js
- Contains jQuery function to display sign-up form, hide login form when clicking on a hyperlink.
- jQuery function to display login form, hide sign-up form when clicking on a hyperlink.
$(document).ready(function() {
// On Click SignIn Button Checks For Valid E-mail And All Field Should Be Filled
$("#login").click(function() {
var email = new RegExp(/^[+a-zA-Z0-9._-]+@[a-zA-Z0-9.-]+.[a-zA-Z]{2,4}$/i);
if ($("#loginemail").val() == '' || $("#loginpassword").val() == '') {
alert("Please fill all fields...!!!!!!");
} else if (!($("#loginemail").val()).match(email)) {
alert("Please enter valid Email...!!!!!!");
} else {
alert("You have successfully Logged in...!!!!!!");
$("form")[0].reset();
}
});
$("#register").click(function() {
var email = new RegExp(/^[+a-zA-Z0-9._-]+@[a-zA-Z0-9.-]+.[a-zA-Z]{2,4}$/i);
if ($("#name").val() == '' || $("#registeremail").val() == '' || $("#registerpassword").val() == '' || $("#contact").val() == '') {
alert("Please fill all fields...!!!!!!");
} else if (!($("#registeremail").val()).match(email)) {
alert("Please enter valid Email...!!!!!!");
} else {
alert("You have successfully Sign Up, Now you can login...!!!!!!");
$("#form")[0].reset();
$("#second").slideUp("slow", function() {
$("#first").slideDown("slow");
});
}
});
// On Click SignUp It Will Hide Login Form and Display Registration Form
$("#signup").click(function() {
$("#first").slideUp("slow", function() {
$("#second").slideDown("slow");
});
});
// On Click SignIn It Will Hide Registration Form and Display Login Form
$("#signin").click(function() {
$("#second").slideUp("slow", function() {
$("#first").slideDown("slow");
});
});
});
CSS File: showhide.css
- Styling sign-in, sign-up panel.
body{
background-color:#eeeff3;
text-align:center
}
#main{
position:relative;
margin-top:15px
}
img#logo{
margin-top:50px
}
#first{
width:308px;
margin-top:0;
padding:28px 25px;
background-color:#fff;
border:1px solid #000;
border-radius:5;
position:absolute;
left:50%;
margin-left:-180px;
top:0
}
#second{
width:308px;
margin-top:0;
padding:28px 25px;
background-color:#fff;
display:none;
border:1px solid #000;
border-radius:5;
position:absolute;
left:50%;
margin-left:-180px;
top:0
}
h3{
margin-top:0
}
input[type=text],[type=password]{
padding:7px;
width:100%;
height:40px;
margin-top:15px;
font-size:18px
}
input[type=button]{
background:linear-gradient(to bottom,#22abe9 5%,#36caf0 100%);
box-shadow:inset 0 1px 0 0 #7bdcf4;
border:1px solid #0F799E;
color:#fff;
width:306px;
height:40px;
margin-top:15px;
font-size:18px;
font-weight:700;
cursor:pointer;
text-shadow:0 1px 0 #13506D
}
input[type=button]:hover{
background:linear-gradient(to bottom,#36caf0 5%,#22abe9 100%)
}
a{
text-decoration:none;
color:#6495ed
}
p#two{
margin-bottom:0
}
Conclusion:
So, if you want to create a complete sign-in, sign-up panel for any of your project, the above codes jQuery/HTML codes will provide you a great help.
Collect more related information through these blogs –
- Dynamically Change Form Action Based on Selection Using jQuery
Create Multiple Form Fields Based On Selection Using jQuery

You want multiple registration of users at a time. Here is the solution!
Use event based forms. Display multiple forms by selecting the number of forms from Select Option Tag.

Select the number of forms from the select option. And those number of forms will be available on the screen Dynamically.
Say, if you select “One”, one form will display.
Similarly for two guests, select “Two” . Two forms will display at a time.
Form1 for Guest1
Form2 for Guest2.
Likewise, you can show multiple form at a time and allow multiple registration of your guests.
Here is the code to create Multiple Forms Using select option using jQuery.
HTML File – mulipleform.html
<!DOCTYPE html>
<html>
<head>
<title>Show Multiple Form Using Drop down Option - Demo Preview</title>
<meta content="noindex, nofollow" name="robots">
<!-- Importing Font Family From Google Fonts -->
<link href='http://fonts.googleapis.com/css?family=Droid+Serif' rel='stylesheet' type='text/css'>
<link href="multipleform.css" rel="stylesheet">
<script src="http://ajax.googleapis.com/ajax/libs/jquery/1.11.0/jquery.min.js"></script>
<script src="js/multipleform.js"></script>
</head>
<body>
<div class="container">
<h2>Dynamically Created Form Fields Based On Selection</h2>
<div id="selected_form_code">
<select id="select_btn">
<option value="0">--Select No Of Form to Display for Registration--</option>
<option value="1">One</option>
<option value="2">Two</option>
<option value="3">Three</option>
<option value="4">Four</option>
<option value="5">Five</option>
</select>
</div>
<div id="form1">
<form action="#" id="form_submit" method="post" name="form_submit">
<!-- Dynamic Registration Form Fields Creates Here -->
</form>
</div>
</div>
</body>
</html>
jQuery File – multipleform.js
$(document).ready(function() {
$('select#select_btn').change(function() {
var sel_value = $('option:selected').val();
if (sel_value == 0) {
$("#form_submit").empty(); // Resetting Form
$("#form1").css({
'display': 'none'
});
} else {
$("#form_submit").empty(); //Resetting Form
// Below Function Creates Input Fields Dynamically
create(sel_value);
// Appending Submit Button To Form
$("#form_submit").append($("<input/>", {
type: 'submit',
value: 'Register'
}))
}
});
function create(sel_value) {
for (var i = 1; i <= sel_value; i++) {
$("div#form1").slideDown('slow');
$("div#form1").append($("#form_submit").append($("<div/>", {
id: 'head'
}).append($("<h3/>").text("Registration Form" + i)), $("<input/>", {
type: 'text',
placeholder: 'Name' + i,
name: 'name_' + i
}), $("<br/>"), $("<input/>", {
type: 'text',
placeholder: 'Email' + i,
name: 'email_' + i
}), $("<br/>"), $("<textarea/>", {
placeholder: 'Message' + i,
type: 'text',
name: 'msg_' + i
}), $("<br/>"), $("<hr/>"), $("<br/>")))
}
}
});
Css File -multipleform.css
div#form1{
width:380px;
display:none;
height:auto;
border:1px solid gray;
padding:20px;
background-color:#FDE2E2;
border-radius:5px;
margin-left:40px;
box-shadow:0 0 8px gray
}
#select_btn{
width:425px;
height:30px;
margin-left:40px;
font-family:'Droid Serif',serif
}
h3{
text-align:center;
font-family:'Droid Serif',serif
}
h2{
margin-top:80px;
width:500px;
text-align:center;
text-shadow:0 0 1px gray;
font-family:'Droid Serif',serif
}
input[type=text]{
padding:5px;
width:100%;
height:40px;
border:1px solid #49b637;
margin:10px 0;
box-shadow:0 0 5px #5a5a6f;
border-radius:3px;
font-family:'Droid Serif',serif
}
input[type=submit]{
background-color:#781149;
color:#fff;
border-radius:5px;
padding:10px;
width:100%;
height:40px;
border:2px solid #fff;
font-size:16px;
font-family:'Droid Serif',serif
}
input[type=submit]:hover{
background-color:orange;
cursor:pointer
}
textarea{
padding:5px;
width:100%;
height:80px;
border:1px solid #49b637;
margin:10px 0;
box-shadow:0 0 5px #5a5a6f;
border-radius:3px;
font-family:'Droid Serif',serif
}
.container{
margin:20px auto;
width:960px;
position:relative
}
Conclusion:
If you want registration from multiple users, displaying multiple form by event trigger will be very helpful for you. The process is fast and easy.
You will select the number and those number of forms will be displayed. That means multiple users can register themselves at a time.
If you know any other method for multiple registrations, you can share with us in the link given below.
Get more related information through following blogs –
- Prevent Form Submission Using jQuery
- Regular Expression to Validate an Email Address
Create Dynamic Form Fields Using jQuery
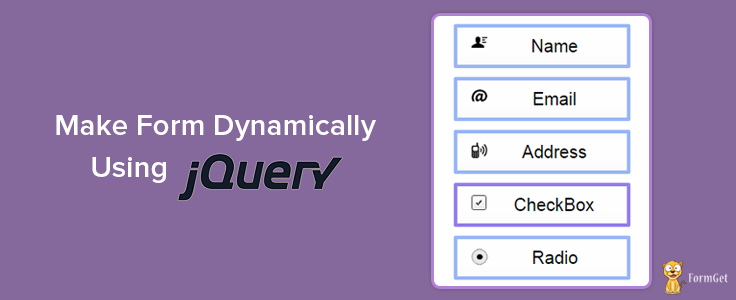
Dynamic forms are instant crafted form. It’s very simple and quick to create form dynamically with dynamic form builder. One will click on the required form fields and form will be constructed with just few clicks. You can add new fields like input fields, Radio button, checkbox, email fields and can also remove them.
Below is our complete code with download and live demo option

Last time, we have shown you how to create dynamic form using JavaScript. Here, you will learn the same using Jquery.
HTML File – dynamicallyformcreation.html
<!DOCTYPE html>
<html>
<head>
<title>Create Dynamic Form Using jQuery </title>
<script src="http://ajax.googleapis.com/ajax/libs/jquery/1.11.0/jquery.min.js"></script>
<script src="http://code.jquery.com/ui/1.10.4/jquery-ui.js"></script>
<link href="css/style.css" rel="stylesheet">
<script src="js/script.js" type="text/javascript"></script>
</head>
<body>
<div class="maindiv">
<div id="header"></div>
<div class="menu">
<button id="namebutton"><img src="images/name-img.png">Name</button>
<button id="emailbutton"><img src="images/email.png">Email</button>
<button id="addressbutton"><img src="images/contact-img.png">Address</button>
<button id="checkboxbutton"><img src="images/check-img.png">CheckBox</button>
<button id="radioaddbutton"><img src="images/radio-img.png">Radio</button>
<button id="reset">Reset</button>
</div>
<div class="InputsWrapper1">
<div id="yourhead">
<div id="your">
<h2 id="yourtitle">Your Form Title<img src="images/edit-form.png"></h2>
<h4 id="justclickid">Just Click on Fields on left to start building your form. It's fast, easy & fun.</h4>
</div>
</div>
<div id="InputsWrapper"></div>
</div>
</div>
</body>
</html>
jQuery File – script.js
$(document).ready(function() {
/*------------------------------------------------
To Edit Your Form Heading
-------------------------------------------------*/
$("#yourtitle").click(function() {
$("#your").hide();
var createhead = $(document.createElement('div'));
createhead.attr("id", "your1");
createhead.html('<label id="titleid">' + '<b>Title : </b>' + '</label>' + '<br/>' + '<input id="inputhead" "type=text placeholder="Type Your Choicehead"/>' +
'<button id="doneid">Done</button>');
$("#yourhead").append(createhead);
var get1 = $("#yourtitle").text();
$("#inputhead").val(get1);
$("#doneid").click(function() {
var get = $("#inputhead").val();
if (get == 0) {
alert("Cannot Leave Field Blank");
} else {
$("#yourtitle").html('<h1>' + get + '</h1>');
$("#yourtitle").css({
"text-align": "center",
"font-size": "25px",
"color": "white",
"cursor": "pointer"
});
$("#your1").remove();
$("#your").show();
$("#your").css({
"background-color": "#F4D4FA",
"width": "530px"
});
$("#justclickid").hide();
}
});
});
/*-------------------------------------------------------------------*/
var MaxInputs = 100; //Maximum Input Boxes Allowed
/*-------------------------------------------------------------------
To Keep Track of Fields And Divs Added
-------------------------------------------------------------------*/
var nameFieldCount = 0;
var emailFieldCount = 0;
var addressFieldCount = 0;
var checkboxFieldCount = 0;
var radiobuttonFieldCount = 0;
var checkboxdivCount = 0;
var checkbox_sub_para_Count = 0;
var radiobuttondivCount = 0;
var radio_sub_para_Count = 0;
var InputsWrapper = $("#InputsWrapper"); // Input Box Wrapper ID
var x = InputsWrapper.length; // Initial Field Count
/*--------------------------------------------------------------
To Get Fields Button ID
----------------------------------------------------------------*/
var namefield = $("#namebutton");
var emailfield = $("#emailbutton");
var addressfield = $("#addressbutton");
var checkbox = $("#checkboxbutton");
var radiobutton = $("#radioaddbutton");
$(InputsWrapper).sortable(); // To Make Added Fields Sortable
/*---------------------------------------------------------------
To Add Name Field
----------------------------------------------------------------*/
$(namefield).click(function() {
if (x <= MaxInputs) {
nameFieldCount++;
$(InputsWrapper).append('<div>' + '<div class="name" id="InputsWrapper_0' + nameFieldCount + '">' + '<label>Name:' + nameFieldCount + '</label>' +
'<input type="text" name="mytext[]" id="field_' + nameFieldCount + '" placeholder="Name ' + nameFieldCount + '"/>' + '<button class="removeclass0">x</button>' +
'<button class="addclass0">+</button>' + '<br>' + '</div>' + '</div>');
x++;
}
return false;
});
$("body").on("click", ".removeclass0", function() {
$(this).parent('div').remove(); // To Remove Name Field
x--;
return false;
});
$("body").on("click", ".addclass0", function() {
nameFieldCount++; // To Add More Name Fields
$(this).parent('div').parent('div').append('<div class="name">' + '<label>Name:' + nameFieldCount + '</label>' + '<input type="text" name="mytext[]" id="field_' +
nameFieldCount + '" placeholder="Name ' + nameFieldCount + '"/>' + '<button class="removeclass0">x</button>' + '<button class="addclass0">+</button>' + '<br>' +
'</div>');
x++;
return false;
});
/*------------------------------------------------
To Add Email Field
-------------------------------------------------*/
$(emailfield).click(function() {
if (x <= MaxInputs) {
emailFieldCount++;
$(InputsWrapper).append('<div>' + '<div class="email" id="InputsWrapper_1' + emailFieldCount + '">' + '<label>Email:' + emailFieldCount + '</label>' +
'<input type="text" name="myemail[]" id="field_' + emailFieldCount + '" placeholder="Email' + emailFieldCount + '"/>' + '<button class="removeclass1">x</button>' +
'<button class="addclass1">+</button>' + '<br>' + '</div>' + '</div>');
x++;
}
return false;
});
$("body").on("click", ".removeclass1", function() {
$(this).parent('div').remove(); // To Remove Email Field
x--;
return false;
});
$("body").on("click", ".addclass1", function() {
emailFieldCount++; // To Add More Email Field
$(this).parent('div').parent('div').append('<div class="email">' + '<label>Email:' + emailFieldCount + '</label>' + '<input type="text" name="myemail[]" id="field_' +
emailFieldCount + '" placeholder="Email' + emailFieldCount + '"/>' + '<button class="removeclass1">x</button>' + '<button class="addclass1">+</button>' + '<br>' +
'</div>');
x++;
return false;
});
/*------------------------------------------------
To Add Address Field
-------------------------------------------------*/
$(addressfield).click(function() {
if (x <= MaxInputs) {
addressFieldCount++;
$(InputsWrapper).append('<div>' + '<div class="address" id="InputsWrapper_2' + addressFieldCount + '">' + '<label>Address:' + addressFieldCount + '</label>' + '<p>' +
'<textarea type="text" name="myaddress[]" id="field_' + addressFieldCount + '" placeholder="Address' + addressFieldCount + '" />' +
'<button class="removeclass2">x</button>' + '<button class="addclass2">+</button>' + '</p>' + '<br>' + '</div>' + '</div>');
x++;
}
return false;
});
$("body").on("click", ".removeclass2", function() {
$(this).parent('p').parent('div').remove(); // To Remove Address Field
x--;
return false;
});
$("body").on("click", ".addclass2", function() {
addressFieldCount++; // To Add More Address Field
$(this).parent('p').parent('div').parent('div').append('<div class="address">' + '<label>Address:' + addressFieldCount + '</label>' + '<p>' +
'<textarea type="text" name="myaddress[]" id="field_' + addressFieldCount + '" placeholder="Address' + addressFieldCount + '"/>' +
'<button class="removeclass2">x</button>' + '<button class="addclass2">+</button>' + '<br>' + '</p>' + '</div>');
x++;
return false;
});
/*------------------------------------------------
To Add Check-Box
-------------------------------------------------*/
$(checkbox).click(function() {
if (x <= MaxInputs) {
checkboxFieldCount++;
checkboxdivCount++;
checkbox_sub_para_Count++;
$(InputsWrapper).append('<div class="checkbox" id="InputsWrapper_3_' + checkboxdivCount + '">' + '<p class="checkbox_child" id="para' + checkbox_sub_para_Count + '">' +
'<label>CheckBox:' + checkboxFieldCount + '</label>' + '<input type="checkbox" name="mycheckbox[]" id="field_' + checkboxFieldCount + '" value="CheckBox' +
checkboxFieldCount+++'"/>' + '<button class="removeclass3">x</button>' + '<button class="addclass3">+</button>' + '</p>' + '<p class="checkbox_child" id="para' +
checkbox_sub_para_Count + '" >' + '<label>CheckBox:' + checkboxFieldCount + '</label>' + '<input type="checkbox" name="mycheckbox[]" id="field_' +
checkboxFieldCount + '" value="CheckBox' + checkboxFieldCount+++'"/>' + '<button class="removeclass3">x</button>' + '<button class="addclass3">+</button>' + '</p>' +
'<p class="checkbox_child" id="para' + checkbox_sub_para_Count + '" >' + '<label>CheckBox:' + checkboxFieldCount + '</label>' +
'<input type="checkbox" name="mycheckbox[]" id="field_' + checkboxFieldCount + '" value="CheckBox' + checkboxFieldCount + '"/>' +
'<button class="removeclass3">x</button>' + '<button class="addclass3">+</button>' + '</p>' + '</div>');
x++;
}
return false;
});
$("body").on("click", ".removeclass3", function() {
$(this).parent('p').remove(); // To Remove Check-Box
x--;
return false;
});
$("body").on("click", ".addclass3", function() {
checkboxFieldCount++; // To Add More Check-Box
$(this).parent('p').parent('div').append('<p class="checkbox_child" id="para' + checkbox_sub_para_Count + '">' + '<label>CheckBox:' + checkboxFieldCount + '</label>' +
'<input type="checkbox" name="mycheckbox[]" id="field_' + checkboxFieldCount + '" value="CheckBox' + checkboxFieldCount + '"/>' +
'<button class="removeclass3">x</button>' + '<button class="addclass3">+</button>' + '</p>');
x++;
return false;
});
/*------------------------------------------------
To Add Radio-Button
-------------------------------------------------*/
$(radiobutton).click(function() {
if (x <= MaxInputs) {
radiobuttonFieldCount++;
radiobuttondivCount++;
radio_sub_para_Count++;
$(InputsWrapper).append('<div class="radiobutton" id="InputsWrapper_4_' + radiobuttondivCount + '">' + '<p class="radiobutton_child" id="para' + radio_sub_para_Count +
'">' + '<label>Radio:' + radiobuttonFieldCount + '</label>' + '<input type="radio" name="myradio[]" id="field_' + radiobuttonFieldCount + '" placeholder="Radio_' +
radiobuttonFieldCount+++'"/>' + '<button class="removeclass4">x</button>' + '<button class="addclass4">+</button>' + '</p>' +
'<p class="radiobutton_child" id="para' + radio_sub_para_Count + '">' + '<label>Radio:' + radiobuttonFieldCount + '</label>' +
'<input type="radio" name="myradio[]" id="field_' + radiobuttonFieldCount + '" placeholder="Radio_' + radiobuttonFieldCount+++'"/>' +
'<button class="removeclass4">x</button>' + '<button class="addclass4">+</button>' + '</p>' + '<p class="radiobutton_child" id="para' + radio_sub_para_Count +
'">' + '<label>Radio:' + radiobuttonFieldCount + '</label>' + '<input type="radio" name="myradio[]" id="field_' + radiobuttonFieldCount + '" placeholder="Radio_' +
radiobuttonFieldCount + '"/>' + '<button class="removeclass4">x</button>' + '<button class="addclass4">+</button>' + '</p>' + '</div>');
x++;
}
return false;
});
$("body").on("click", ".removeclass4", function() {
$(this).parent('p').remove(); // To Remove Radio-Button
x--;
return false;
});
$("body").on("click", ".addclass4", function() {
radiobuttonFieldCount++; // To Add More Radio-Button
$(this).parent('p').parent('div').append('<p class="radiobutton_child" id="para' + radio_sub_para_Count + '">' + '<label>Radio:' + radiobuttonFieldCount + '</label>' +
'<input type="radio" name="myradio[]" id="field_' + radiobuttonFieldCount + '" placeholder="Radio_' + radiobuttonFieldCount + '"/>' +
'<button class="removeclass4">x</button>' + '<button class="addclass4">+</button>' + '</p>');
x++;
return false;
});
$("#reset").on("click", function() {
$("#InputsWrapper").empty(); // To Reset All Elements
});
});
Css File – style.css
#header{
background-color:#40B1ED;
height:60px
}
.maindiv{
border:1px solid #000;
background:#FAFAFA;
width:960px;
height:1000px;
position:absolute;
top:20px;
left:350px;
overflow:auto
}
.menu{
background-color:#fff;
width:220px;
height:350px;
padding:15px;
border:1px solid #000;
border-radius:4px;
position:absolute;
top:70px;
left:10px;
box-shadow:0 0 5px #000
}
.menu img{
float:left;
padding-left:10px
}
#your{
padding:10px;
width:400px;
height:120px;
position:absolute;
top:10px;
left:50px;
border:1px dashed #fff
}
#your:hover{
background-color:#FBF0FC;
border:1px dashed #000;
cursor:pointer
}
#InputsWrapper{
position:absolute;
top:150px;
left:40px
}
#your1{
padding:10px;
width:500px;
height:120px;
position:absolute;
top:10px;
left:50px;
border:1px dashed #000
}
#titleid{
font-size:20px
}
#inputhead{
font-size:30px;
border-radius:2px;
box-shadow:0 0 5px #40B1ED;
border:1px solid #40B1ED;
width:450px
}
#doneid{
position:absolute;
bottom:5px;
right:5px;
color:#fff;
background-color:#40B1ED;
border-radius:2px;
border:2px solid #40B1ED
}
#namebutton{
border:4px solid #9AB7F5;
width:200px;
height:50px;
background:#E4E7F0 url(../images/tab-bg.png) repeat-x;
margin-bottom:10px;
font-size:20px;
border-radius:2px
}
#namebutton:hover{
border:4px solid #9680ED;
border-radius:2px;
cursor:pointer
}
#emailbutton{
border:4px solid #9AB7F5;
width:200px;
height:50px;
background:#efefef url(../images/tab-bg.png) repeat-x;
margin-bottom:10px;
font-size:20px;
border-radius:2px
}
#emailbutton:hover{
border:4px solid #9680ED;
border-radius:2px;
cursor:pointer
}
#addressbutton{
border:4px solid #9AB7F5;
width:200px;
height:50px;
background:#efefef url(../images/tab-bg.png) repeat-x;
margin-bottom:10px;
font-size:20px;
border-radius:2px
}
#addressbutton:hover{
border:4px solid #9680ED;
border-radius:2px;
cursor:pointer
}
#checkboxbutton{
border:4px solid #9AB7F5;
width:200px;
height:50px;
background:#efefef url(../images/tab-bg.png) repeat-x;
margin-bottom:10px;
font-size:20px;
border-radius:2px
}
#checkboxbutton:hover{
border:4px solid #9680ED;
border-radius:2px;
cursor:pointer
}
#radioaddbutton{
border:4px solid #9AB7F5;
width:200px;
height:50px;
background:#efefef url(../images/tab-bg.png) repeat-x;
margin-bottom:10px;
font-size:20px;
border-radius:2px
}
#radioaddbutton:hover{
border:4px solid #9680ED;
border-radius:2px;
cursor:pointer
}
#reset{
border:4px solid #9AB7F5;
width:200px;
height:50px;
margin-bottom:10px;
font-size:20px;
border-radius:2px
}
.InputsWrapper1{
background-color:#fff;
width:650px;
height:900px;
border:1px solid #000;
position:absolute;
top:70px;
right:10px;
border-radius:4px;
overflow:auto;
box-shadow:0 0 5px #000
}
div.name{
background:#E1F3FC;
margin-bottom:10px;
margin-top:15px;
margin-left:10px;
width:300px;
height:35px;
border-radius:5px;
border:1px solid blue;
padding:5px;
cursor:move
}
.name input,.email input{
padding:5px
}
div.email{
background:#E1F3FC;
margin-bottom:10px;
margin-top:15px;
margin-left:10px;
width:300px;
height:35px;
border-radius:5px;
border:1px solid blue;
padding:5px;
cursor:move
}
div.address{
position:relative;
background:#E1F3FC;
margin-bottom:10px;
margin-top:15px;
margin-left:10px;
width:320px;
height:50px;
border-radius:5px;
border:1px solid blue;
padding:5px;
cursor:move
}
.address textarea{
padding-left:5px
}
div.address label{
position:absolute
}
div.address p{
position:absolute;
right:10px;
top:-10px
}
.checkbox_child{
background:#E1F3FC;
margin-bottom:10px;
margin-top:20px;
margin-left:10px;
width:170px;
height:25px;
border-radius:5px;
border:1px solid blue;
padding:5px;
cursor:move
}
.radiobutton_child{
background:#E1F3FC;
margin-bottom:10px;
margin-top:20px;
margin-left:10px;
width:140px;
height:25px;
border-radius:5px;
border:1px solid blue;
padding:5px;
cursor:move
}
Conclusion:
I hope, this tutorial would be helpful for you. And, you could able to create dynamic form using jQuery codes in simple manner.
You may aslo like –
- Disable Autocomplete in Form Fields With jQuery
- Create Form Using jQuery
Implementing jQuery Text Editor in Textarea

You might have seen text editor in review form of WordPress.org. It is having a rich text editor in their review comment form.
Another example is, Blogger post text editor, working on it’s text editor is also fun. They help to create rich content where, you can easily bold the text or make it italics, adjust the font size. You can format your text in one click.
In this tutorial, we are going to share a file that creates Text Editor using jQuery/JavaScript/HTML.
Below is our complete code with download and live demo option

Here is a code for simple text editor named “HtmlBox” built on jQuery library. It’s created by Remiya solutions.
You can directly use the codes to create Text Editor in any of your project. It includes 9 files. 8 Javascript files and one main Html file. These files are mentioned below:
textarea_editor.html: The main HTML file that includes links to all JavaScript/jQuery files.
htmlbox.content.js: Add WYSIWYG text editing events into the Text editor.
htmlbox.full.js – Appending toolbar. Styling it’s height, width. Insert Toolbar images. Append buttons. (e.g. Bold, Italics)
htmlbox.syntax.js – Contains HTML codes for Textarea and JavaScript codes to call various text form functions.
jquery-1.2.3.min.js – It’s a pre-define jQuery library.
xhtml.js – HTML to XHTML parser.
htmlbox.colors.js – Contains colors that will used in text color changer.
htmlbox.min.js – Defines each function of toolbar that are used in text formatting.
htmlbox.styles.js – Give proper design to the HtmlBox.
htmlbox.undoredomanager.js – Execute undo redo functions. Here I am showing codes for the main HTML file. To see codes for other files, you can download the “textarea_editor” zip folder from the link given above.
HTML File – textarea_editor.html
<!DOCTYPE html>
<html>
<head>
<title>Textarea TextEditor</title>
<script src="js/jquery-1.3.2.min.js" type="text/javascript"></script>
<script src="js/jquery.codify.min.js" type="text/javascript"></script>
<script src="js/htmlbox.colors.js" type="text/javascript"></script>
<script src="js/htmlbox.styles.js" type="text/javascript"></script>
<script src="js/htmlbox.syntax.js" type="text/javascript"></script>
<script src="js/htmlbox.undoredomanager.js" type="text/javascript"></script>
<script src="js/htmlbox.min.js" type="text/javascript"></script>
</head>
<body> <!-- Textarea Editor Heading.-->
<h2>Textarea Editor</h2> <!-- An ordinary textarea which will change into fancy text editor. -->
<textarea id="htmlbox_silk_icon_set_blue">Type Here....</textarea>
<!-- Added js of body part of Textarea editor (which is shown in browser as an output) -->
<script src="js/htmlbox.content.js" type="text/javascript"></script>
</body>
</html>
Adding (WYSIWYG-what you see is what you get)in htmlbox.content.js
 // Add WYSIWYG editing events into the Text Editor.
var hb_silk_icon_set_blue = $("#htmlbox_silk_icon_set_blue").css("height", "300").css("width", "600").htmlbox({ toolbars: [ ["cut", "copy", "paste", "separator_dots", "bold", "italic", "underline", "strike", "sub", "sup", "separator_dots", "undo", "redo", "separator_dots", "left", "center", "right", "justify", "separator_dots", "ol", "ul", "indent", "outdent", "separator_dots", "link", "unlink", "image" ], ["code", "removeformat", "striptags", "separator_dots", "quote", "paragraph", "hr", "separator_dots", { icon: "new.png", tooltip: "New", command: function() { hb_silk_icon_set_blue.set_text("<p></p>"); } }, { icon: "open.png", tooltip: "Open", command: function() { alert('Open') } }, { icon: "save.png", tooltip: "Save", command: function() { alert('Save') } }] ], icons: "silk", skin: "blue" });
Conclusion:
This tutorial has shared a complete JavaScript/jQuery code to create a text editor. So someone who wants to make their own text editor can take the help from here.
Recommended blogs –
- jQuery Enter Key Form Submit
- jQuery Password Strength Checker
Create Form Using jQuery

In this tutorial you will learn to create simple HTML form using jQuery script.
We have just created a blank div (form1) in HTML. Using jQuery we are updating complete HTML form in the div (form1). You can use the code directly in any of your project.
It consists of three files:
- Html file – jqueryform.html : In this file, a div is assigned to a form.
- jQuery file – jqueryform.js : Here, form elements are append in form using jQuery script.
- Css file – jqueryform.css : Here, look and feel of the form is optimized using css.
Below is our complete code with download and live demo option

HTML File – jqueryform.html
<!DOCTYPE html>
<html>
<head>
<title>Create Form Using jQuery - Demo Preview</title>
<link href="jqueryform.css" rel="stylesheet">
<script src="http://ajax.googleapis.com/ajax/libs/jquery/1.11.0/jquery.min.js"></script>
<script src="js/jqueryform.js"></script>
</head>
<body>
<div id="container">
<h2>Dynamically Created Form Using jQuery</h2>
<div id="form1">
<!-- Dynamic Form Div -->
</div>
</div>
</body>
</html>
jQueryFile -jqueryform.js
$(document).ready(function() {
$("div#form1").append(
// Creating Form Div and Adding <h2> and <p> Paragraph Tag in it.
$("<h3/>").text("Contact Form"), $("<p/>").text("This is my form. Please fill it out. It's awesome!"), $("<form/>", {
action: '#',
method: '#'
}).append(
// Create <form> Tag and Appending in HTML Div form1.
$("<input/>", {
type: 'text',
id: 'vname',
name: 'name',
placeholder: 'Your Name'
}), // Creating Input Element With Attribute.
$("<input/>", {
type: 'text',
id: 'vemail',
name: 'email',
placeholder: 'Your Email'
}), $("<textarea/>", {
rows: '5px',
cols: '27px',
type: 'text',
id: 'vmsg',
name: 'msg',
placeholder: 'Message'
}), $("<br/>"), $("<input/>", {
type: 'submit',
id: 'submit',
value: 'Submit'
})))
});
Css File -jqueryform.css
@import "http://fonts.googleapis.com/css?family=Raleway";
/*-----------------------------------------------------------------
CSS settings for HTML Div form1 (Dynamically Created using jQuery)
------------------------------------------------------------------*/
div#form1{
width:250px;
height:430px;
border:2px solid #a5a5a5;
padding:20px;
background-color:#f3f3f3;
border-radius:3px;
float:left;
text-align:center;
margin-left:100px;
margin-top:50px
}
h3,p{
text-align:center;
font-family:'Raleway',sans-serif;
color:#006400
}
input{
width:100%;
margin:10px 0;
padding:5px;
height:35px;
box-shadow:1px 1px 1px 1px gray;
border-radius:3px
}
input#submit{
width:100%;
margin:10px 15px 10px 0;
padding:5px;
background-color:#3fb8e8;
box-shadow:0 3px 0 0 #3293ba;
border-radius:3px;
color:#fff;
height:41px;
font-size:16px
}
textarea{
margin:10px 0;
padding:5px;
box-shadow:1px 1px 1px 1px gray;
border-radius:3px
}
div#container{
margin:50px auto;
width:960px
}
h2{
font-family:'Raleway',sans-serif;
color:#006400;
text-shadow:1px 1px 1px gray
}
Conclusion
Hope, this tutorial teach you about creating form using jQuery script.
Get more related stuff here –
- Textarea Enter Key Submit Data using jQuery
- jQuery Accordion Plugins
- jQuery Ajax Post Data
You can write down your feedback or share your codes in the comment form below:
Email Validation Using jQuery Codes

In this tutorial we will illustrate you how to do email validation in forms using jQuery.
Sometimes, user enter email address in wrong format. A form should not allow wrong email address. Instead, it should display an alert and notify user about the incorrect format of email address.
By inserting email validation codes, one can easily make smart form that could only accept right format of email address.
Below is our complete code with download and live demo option.

The codes will contain a simple regular expression that matches the input characters of email address.
Here is the expression:
/^[w-.+]+@[a-zA-Z0-9.-]+.[a-zA-z0-9]{2,4}$/;
It will scan the input email address, matches each and every character. If any of the character does not matches with the above expression, “invalid email” alert notification will display.
What above regular expression will match?
. : Matches any single character except a new line

+ : Matches the preceding character or repeated character.

$ : Matches character at the end of the line.

. : Matches only period.

^ : Matches the beginning of a line or string.

: Escapes a special character.

- : Range indicator. [a-z, A-Z]

-: Escapes a special character.(e.g. escaping - by -)

[0-9] : It matches digital number from 0-9.

[a-z] : It matches characters from lowercase ‘a’ to lowercase ‘z’.

[A-Z] : It matches characters from uppercase ‘A’ to lowercase ‘Z’.

w: Matches a word character and underscore. (a-z, A-Z, 0-9, _).

W: Matches a non word character (%, #, @, !).

{M, N} : Donates minimum M and maximum N value.
HTML File – emailvalidation.html
<html>
<head>
<title>Email Validation</title>
<!-- Include js File Here -->
<script src="http://ajax.googleapis.com/ajax/libs/jquery/1.11.0/jquery.min.js"></script>
<script type="text/javascript" src="js/emailvalidation.js"></script>
<!-- Include CSS File Here -->
<link href='css/emailvalidation.css' rel='stylesheet' type='text/css'>
</head>
<body>
<div class="main">
<div class="first">
<h1>Email Validation using jQuery</h1>
<form method="post" action="#">
<label>First Name:</label>
<input type='text' name="fname" id="fname" placeholder='First Name'/>
<label>Last Name: </label>
<input type='text' name="lname" id="lname" placeholder='Last Name'/>
<label>Email Address: </label>
<input type='text' name="ename" id='txtEmail' placeholder='Valid Email Address'/>
<input type='submit' id='btnValidate' name="submit" Value='Submit' />
</form>
</div>
</div>
</body>
</html>
jQuery File – emailvalidation.js
$(document).ready(function(e) {
$('#btnValidate').click(function() {
var sEmail = $('#txtEmail').val();
// Checking Empty Fields
if ($.trim(sEmail).length == 0 || $("#fname").val()=="" || $("#lname").val()=="") {
alert('All fields are mandatory');
e.preventDefault();
}
if (validateEmail(sEmail)) {
alert('Nice!! your Email is valid, now you can continue..');
}
else {
alert('Invalid Email Address');
e.preventDefault();
}
});
});
// Function that validates email address through a regular expression.
function validateEmail(sEmail) {
var filter = /^[w-.+]+@[a-zA-Z0-9.-]+.[a-zA-z0-9]{2,4}$/;
if (filter.test(sEmail)) {
return true;
}
else {
return false;
}
}
Css File – emailvalidation.css
@import "http://fonts.googleapis.com/css?family=Droid+Serif";
/* Above line is used for online google font */
h1 {
text-align:center
}
div.main {
width:960px;
height:655px;
margin:50px auto;
font-family:'Droid Serif',serif
}
div.first {
width:380px;
height:570px;
float:left;
padding:15px 60px;
background:#f8f8ff;
box-shadow:0 0 10px gray;
margin-top:20px
}
input {
width:100%;
padding:10px;
margin-top:10px;
font-size:16px;
margin-bottom:30px
}
#btnValidate {
width:100%;
padding:10px;
margin-top:10px;
background-color:#474242;
cursor:pointer;
color:#fff;
border:2px solid #adadad;
font-size:20px;
font-weight:700
}
#btnValidate:hover {
background-color:#adadad;
border:2px solid #474242
}
Conclusion
I hope, this tutorial for email validation using jQuery script is helpful for you. If you have any other method, you can share with us in the space given below.
jQuery Password Strength Checker
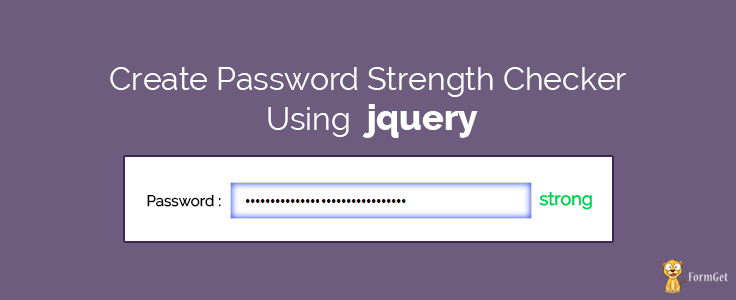
Password strength checker is very important for your signup form. It let’s you know the intensity of your password, whether it is weak or strong. If it is weak, you need to modify and make it stronger.
In this example you will learn how to create a strength checker in jQuery with four stages of strength – “Too short, Weak, Good, Strong” init. That enables anyone to choose it with high authority and relevancy..
Remember, a strong password is unbreakable and untraceable.

Before starting with the codes, I want to tell you some basic conditions that calculates the password strength. They are:
- Length.
- Use of special Characters like, [@, $].
- Use of uppercase [A – Z] and lowercase [a – z] letters.
- Use of numbers [0 – 9].
For a strong password, you need to take care including special characters along with your regular words.
Below is our complete code that contains HTML,jQuery and CSS file.
HTML File – passwordscheck.html
<!DOCTYPE HTML>
<html>
<head>
<title>Password strength checker in jQuery</title>
<link href='http://fonts.googleapis.com/css?family=Source+Sans+Pro|Open+Sans+Condensed:300|Raleway' rel='stylesheet' type='text/css'>
<script src="http://ajax.googleapis.com/ajax/libs/jquery/1.7.1/jquery.min.js"></script><!-- jQuery Library-->
<link rel="stylesheet" href="css/passwordscheck.css" /><!-- Include Your CSS file here-->
<script src="js/passwordscheck.js"></script><!-- Include Your jQUery file here-->
</head>
<body>
<div id="container">
<div id="header">
<h2>Password Strength Checking with jQuery</h2>
<hr>
</div>
<div id="content">
<form id="register">
<label for="password"><b>Password : </b></label>
<input name="password" id="password" type="password" placeholder="Type Your Password here"/>
<span id="result"></span>
</form>
</div>
</div>
</body>
</html>
jQuery File – passwordscheck.js
$(document).ready(function() {
$('#password').keyup(function() {
$('#result').html(checkStrength($('#password').val()))
})
function checkStrength(password) {
var strength = 0
if (password.length < 6) {
$('#result').removeClass()
$('#result').addClass('short')
return 'Too short'
}
if (password.length > 7) strength += 1
// If password contains both lower and uppercase characters, increase strength value.
if (password.match(/([a-z].*[A-Z])|([A-Z].*[a-z])/)) strength += 1
// If it has numbers and characters, increase strength value.
if (password.match(/([a-zA-Z])/) && password.match(/([0-9])/)) strength += 1
// If it has one special character, increase strength value.
if (password.match(/([!,%,&,@,#,$,^,*,?,_,~])/)) strength += 1
// If it has two special characters, increase strength value.
if (password.match(/(.*[!,%,&,@,#,$,^,*,?,_,~].*[!,%,&,@,#,$,^,*,?,_,~])/)) strength += 1
// Calculated strength value, we can return messages
// If value is less than 2
if (strength < 2) {
$('#result').removeClass()
$('#result').addClass('weak')
return 'Weak'
} else if (strength == 2) {
$('#result').removeClass()
$('#result').addClass('good')
return 'Good'
} else {
$('#result').removeClass()
$('#result').addClass('strong')
return 'Strong'
}
}
});
CSS File – passwordscheck.css
body{
margin: 0;
padding: 0;
font-family: 'Raleway', sans-serif;
font-size: 15px;
line-height: 1.5;
}
#container {
width: 535px;
background: #ffffff;
padding: 20px;
margin: 90px auto;
border-radius: 5px;
height: 150px;
border: 2px solid gray;
}
#header {
text-align: center;
background-color: #FEFFED;
border-radius: 5px;
margin: -39px -20px 10px -20px;
}
h2{
padding-top: 10px;
}
#content {
margin-left: 57px;
margin-top: 40px;
}
#register label{
margin-right:5px;
}
#register input {
padding: 5px 14px;
border: 1px solid #d5d9da;
box-shadow: 0 0 9px #0E34F5 inset;
width: 272px;
font-size: 1em;
height: 25px;
}
#register .short{
font-weight:bold;
color:#FF0000;
font-size:larger;
}
#register .weak{
font-weight:bold;
color:orange;
font-size:larger;
}
#register .good{
font-weight:bold;
color:#2D98F3;
font-size:larger;
}
#register .strong{
font-weight:bold;
color: limegreen;
font-size:larger;
}
Conclusion
If you don’t want hackers to crack your password, give a strong one. And, if you want to know whether your password is strong or not, use password strength checker in your form.
So that, you yourself and the users who will register on your signup form will feel relaxed when they see a “strong” strength of their password.
Recommended blogs –
- jQuery Form Shake Effect on Invalid Entry
- Implementing jQuery Text Editor in Textarea
Form Submit Without Page Refreshing- jQuery/PHP

This tutorial will teach you about creating form that will submit information without refreshing the form page. Instead, an notification message will display on successful submission.
For this, we have created a HTML form in “refreshform.html” file.
Further, we have created a database named “mydba”
CREATE DATABASE mydba;
..................
and using PHP inserted form details into it.
$query = mysql_query("insert into TABLE NAME(column1, column2, column3) values ('$value1','$value2','$value3')"); //Insert queryAs soon as you will click on the submit button, data will be sent to php script using $.post().
Syntax:
$(selector).post(URL,data,function(data,status,xhr),dataType)At this moment, form page will not refresh instead, a notification will be delivered “Data Submitted successfully” on successful form submission.

HTML File – refreshform.html
- Consists of form with id = “form”.
<!DOCTYPE html>
<html>
<head>
<title>Submit Form Without Refreshing Page</title>
<script src="http://ajax.googleapis.com/ajax/libs/jquery/1.11.0/jquery.min.js"></script>
<link href="css/refreshform.css" rel="stylesheet">
<script src="js/refreshform.js"></script>
</head>
<body>
<div id="mainform">
<h2>Submit Form Without Refreshing Page</h2>
<!-- Required Div Starts Here -->
<form id="form" name="form">
<h3>Fill Your Information!</h3>
<label>Name:</label>
<input id="name" placeholder="Your Name" type="text">
<label>Email:</label>
<input id="email" placeholder="Your Email" type="text">
<label>Contact No.</label>
<input id="contact" placeholder="Your Mobile No." type="text">
<label>Gender:</label>
<input name="gender" type="radio" value="male">Male
<input name="gender" type="radio" value="female">Female
<label>Message:</label>
<textarea id="msg" placeholder="Your message..">
</textarea>
<input id="submit" type="button" value="Submit">
</form>
</div>
</body>
</html>
jQuery File – refreshform.js
- Sends request to php script with form details. Return notification on successful data submission.
$(document).ready(function() {
$("#submit").click(function() {
var name = $("#name").val();
var email = $("#email").val();
var contact = $("#contact").val();
var gender = $("input[type=radio]:checked").val();
var msg = $("#msg").val();
if (name == '' || email == '' || contact == '' || gender == '' || msg == '') {
alert("Insertion Failed Some Fields are Blank....!!");
} else {
// Returns successful data submission message when the entered information is stored in database.
$.post("refreshform.php", {
name1: name,
email1: email,
contact1: contact,
gender1: gender,
msg1: msg
}, function(data) {
alert(data);
$('#form')[0].reset(); // To reset form fields
});
}
});
});
My-SQL Code
- My-SQL command for creation of database ‘mydba’ and table ‘form_elements’.
CREATE DATABASE mydba;
CREATE TABLE form_element (
id int(25) NOT NULL AUTO_INCREMENT,
name varchar(255) NOT NULL,
email varchar(255) NOT NULL,
contact int(25) NOT NULL,
gender varchar(255) NOT NULL,
message varchar(255) NOT NULL,
PRIMARY KEY (id)
)
PHP File – refreshform.php
- Insert form information into database.
<?php
// Establishing connection with server by passing "server_name", "user_id", "password".
$connection = mysql_connect("localhost", "root", "");
// Selecting Database by passing "database_name" and above connection variable.
$db = mysql_select_db("mydba", $connection);
$name2=$_POST['name1']; // Fetching Values from URL
$email2=$_POST['email1'];
$contact2=$_POST['contact1'];
$gender2=$_POST['gender1'];
$msg2=$_POST['msg1'];
$query = mysql_query("insert into form_element(name, email, contact, gender, message) values ('$name2','$email2','$contact2','$gender2','$msg2')"); //Insert query
if($query){
echo "Data Submitted succesfully";
}
mysql_close($connection); // Connection Closed.
?>
Css File – refreshform.css
- Includes basic styling of form.
@import "http://fonts.googleapis.com/css?family=Fauna+One|Muli";
#form{
background-color:#556b2f;
color:#D5FFFA;
border-radius:5px;
border:3px solid #d3cd3d;
padding:4px 30px;
font-weight:700;
width:350px;
font-size:12px;
float:left;
height:auto;
margin-left:35px
}
label{
font-size:15px
}
h3{
text-align:center;
font-size:21px
}
div#mainform{
width:960px;
margin:50px auto;
font-family:'Fauna One',serif
}
input[type=text]{
width:100%;
height:40px;
margin-top:10px;
border:none;
border-radius:3px;
padding:5px
}
textarea{
width:100%;
height:60px;
margin-top:10px;
border:none;
border-radius:3px;
padding:5px;
resize:none
}
input[type=radio]{
margin:10px 5px 5px
}
input[type=button]{
width:100%;
height:40px;
margin:35px 0 30px;
background-color:#f4a460;
border:1px solid #fff;
border-radius:3px;
font-family:'Fauna One',serif;
font-weight:700;
font-size:18px
}
Conclusion:
I hope this tutorial has given ins and out designing form that can submit data without refreshing. If you want to share your feedback, you can easily do it in the link given below.
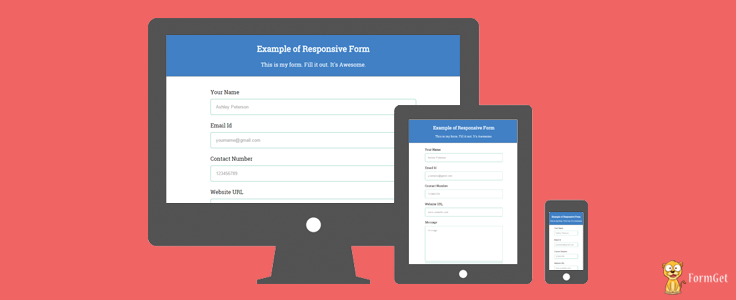
How To Make Simple Responsive Form Using CSS/HTML
Today is a mobile-internet era. Users love to surf net on their cells.
So, it’s been a hike in mobile web users year by year. Therefore, more focus is required to make your websites mobile-friendly.
In this aspect, your form should be user friendly on small screen too. Whether it’s about website login or signup process or completing purchase order, giving good user experience on small screen is the key.
Below is our complete code with download and live demo option

You are acquiring traffic on your site from different devices. So, it’s best to design your forms compatible for all devices.
You can have a basic idea that shows how to create responsive form for your site.
Here is a codes for creating responsive form:
Note : we have used special link tag in which media is used to define the screen size for a particular css, that will be implemented in that.
<link rel="stylesheet" media="screen and (max-width: Xpx) and (min-width: Ypx)" href="style.css" />
Responsive Form Code Details
HTML File – resform.html
<!DOCTYPE html>
<html>
<head>
<title>FormGet Responsive Form</title>
<!-----Including CSS for different screen sizes----->
<link rel="stylesheet" type="text/css" href="responsiveform.css">
<link rel="stylesheet" media="screen and (max-width: 1200px) and (min-width: 601px)" href="responsiveform1.css" />
<link rel="stylesheet" media="screen and (max-width: 600px) and (min-width: 351px)" href="responsiveform2.css" />
<link rel="stylesheet" media="screen and (max-width: 350px)" href="responsiveform3.css" />
</head>
<body>
<div id="envelope">
<form action="" method="post">
<header>
<h2>Example of Responsive Form</h2>
<p>This is my form. Fill it out. It's Awesome.</p>
</header>
<label>Your Name</label>
<input name="name" placeholder="Ashley Peterson" type="text" width="100px;">
<label>Email Id</label>
<input name="email" placeholder="[email protected]" type="text">
<label>Contact Number</label>
<input name="contact" placeholder="123456789" type="text">
<label>Website URL</label>
<input name="website" placeholder="www.yoursite.com" type="text">
<label>Message</label>
<textarea cols="15" name="message" placeholder="Message" rows="10">
</textarea>
<input id="submit" type="submit" value="Send Message">
</form>
</div>
</body>
</html>
CSS Files –
Below is our HTML styling in which we have used different css files that works based on screen sizes.
CSS for screen size greater than 1200px
1. responsiveform.css
@import url(http://fonts.googleapis.com/css?family=Roboto+Slab);
* {
/* With these codes padding and border does not increase it's width and gives intuitive style.*/

-webkit-box-sizing: border-box;
-moz-box-sizing: border-box;
box-sizing: border-box;
}
body {
margin:0;
padding:0;
font-family: 'Roboto Slab', serif;
}
div#envelope{
width: 55%;
margin: 10px 30% 10px 25%;
padding:10px 0;
border: 2px solid gray;
border-radius:10px;
}
form{
width:70%;
margin:4% 15%;
}
header{
background-color: #4180C5;
text-align: center;
padding-top: 12px;
padding-bottom: 8px;
margin-top: -11px;
margin-bottom: -8px;
border-radius: 10px 10px 0 0;
color: aliceblue;
}

/* Makes responsive fields. Sets size and field alignment.*/
input[type=text]{
margin-bottom: 20px;
margin-top: 10px;
width:100%;
padding: 15px;
border-radius:5px;
border:1px solid #7ac9b7;
}
input[type=submit]
{
margin-bottom: 20px;
width:100%;
padding: 15px;
border-radius:5px;
border:1px solid #7ac9b7;
background-color: #4180C5;
color: aliceblue;
font-size:15px;
cursor:pointer;
}
#submit:hover
{
background-color: black;
}
textarea{
width:100%;
padding: 15px;
margin-top: 10px;
border:1px solid #7ac9b7;
border-radius:5px;
margin-bottom: 20px;
resize:none;
}
input[type=text]:focus,textarea:focus {
border-color: #4697e4;
}
2. responsiveform1.css
CSS for screen size (max-width:1200px and min-width:601px)
div#envelope{
width: 80%;
margin: 10px 30% 10px 11%;
}
3. responsiveform2.css
CSS for screen size (max-width:600px and min-width:351px)
h2{
font-size:16px;
}
p{
font-size:14px;
}
label{
font-size:12px;
}
input[type=submit]{
padding:5px;
}
input[type=text]{
padding: 8px;
}
div#envelope{
width: 80%;
margin: 10px 30% 10px 11%;
}
4. responsiveform3.css
CSS for screen size (max-width:350px)
input[type=submit]
{
padding:4px;
font-size:12px;
}
input[type=text]{
padding: 8px;
}
label{
font-size:12px;
}
h2{
font-size:15px;
}
p{
font-size:12px;
}
div#envelope{
width: 80%;
margin: 10px 30% 10px 11%;
}
Conclusion:
It’s good to put forms that adapt to varying display sizes, on desktops, laptops, tablets and phones. This was all about making your form responsive with HTML/CSS. Keep reading our other blog posts for getting more coding tricks.
Go through the following stuff and collect more related information –
Form Validation Using JavaScript
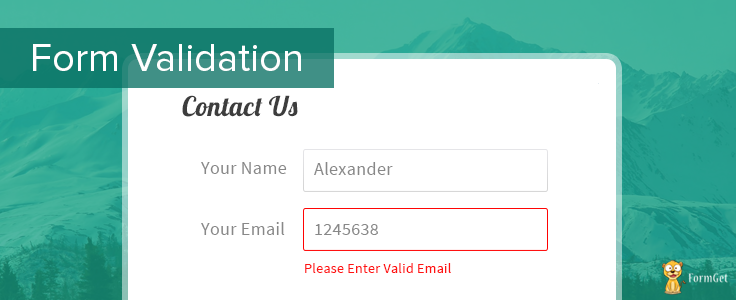
Form validation is done to check the accuracy of the user’s entered information before they could submit the form.
What validation checks in the form? It’s meant to check the following things:
- Check for Empty Field: Has the user left required field empty. If it’s there, returns alert message.
- Check for Numbers: User entered number in the text field where number is required, say in a Contact field.
- Check for Alphabets: Has the user entered characters in alphabets, say in name field.
- Check for Numbers and Letters: If a text input is all alphanumeric characters (numbers and letters), say in a message field
- Check for Characters: Has the user entered correct number of characters. (Useful when restricting the length of a username and/or password)
- Select for Drop Down List Item: If a selection has been made from HTML select input (the drop down selector)
- Email Validation: has the user entered valid email address.

To check, whether the user entered correct form of data, it’s must to apply form validation in any of the form. Here I am giving you the form validation codes in JavaScript. The codes contains some regular expression. These are simple meta characters which do pattern matching.

Regular Expression
Regular expression helps you in pattern matching in string.
. : Matches any single charcter except a new line

+ : Matches the preceding character or repeated character.

$ : Matches character at the end of the line.

.: Matches only period.

^ : Matches the beginning of a line or string.

: Escapes a special character.

- : Range indicator. [a-z, A-Z]

-: Escapes a special character.(e.g. escaping - by -)

[0-9] : It matches digital number from 0-9.

[a-z] : It matches characters from lowercase ‘a’ to lowercase ‘z’.

[A-Z] : It matches characters from uppercase ‘A’ to lowercase ‘Z’.

w: Matches a word character and underscore. (a-z, A-Z, 0-9, _).

W: Matches a non word character (%, #, @, !).

{M, N} : Donates minimum M and maximum N value.
Now, let’s dive deep into the codes. Checking for form completion: The first step of form validation is to check, whether the user have entered information in all the fields or not. If an user miss out any field, than the form will display error message. Validation codes will return an alert message, if it finds some empty fields in the form. That means, you could be very sure about the form, whether users have entered the details or not. If by mistake, user skips entering any detail, soon the alert message appear on the form. The codes for checking form empty fields are given below:
//This segment displays the validation rule for all field.
if(firstname.value.length == 0){
document.getElementById('head').innerText = "* All fields are mandatory *";
firstname.focus();
return false;
}
Checking for all Letters
There is an expression that checks whether the string contains only alphabets or not. The expression is: /^[a-zA-Z]+$/ The above expression checks whether the input characters in the string is alphabet or not. If the entered characters in the field is not in lower case or upper case. It will return a false value.
//This segment displays the validation rule for name text field.
function inputAlphabet(inputtext, alertMsg){
var alphaExp = /^[a-zA-Z]+$/;
if(inputtext.value.match(alphaExp)){
return true;
}else{
document.getElementById('p1').innerText = alertMsg;
inputtext.focus();
return false;
}
}
Checking for all numbers
When it’s about checking contact field or zip code field, one need to check whether only the number have been entered or not. The basic expression for matching entered value as number in the field is: /^[0-9]+$/. If the string value is numeric, it will return true, otherwise it will return false.
//This segment displays the validation rule for zip code field.
function textNumeric(inputtext, alertMsg){
var numericExpression = /^[0-9]+$/;
if(inputtext.value.match(numericExpression)){
return true;
}else{
document.getElementById('p6').innerText = alertMsg;
inputtext.focus();
return false;
}
}
Checking for all numbers and letters
By combining the expression for numbers and alphabetic characters, there is an expression that checks, whether the entered things includes numbers and alphabetic character or not. The expression for matching numbers and characters in the field is: /^[0-9a-zA-Z]+$/
//This segment displays the validation rule for address field.
function textAlphanumeric(inputtext, alertMsg){
var alphaExp = /^[0-9a-zA-Z]+$/;
if(inputtext.value.match(alphaExp)){
return true;
}else{
document.getElementById('p5').innerText = alertMsg;
inputtext.focus();
return false;
}
}
Restricting the length
If you want to restrict the number of characters, the user enters into the field, than it’s better to restrict the length of the field.
//This segment displays the validation rule for username.
function lengthDefine(inputtext, min, max){
var uInput = inputtext.value;
if(uInput.length >= min && uInput.length <= max){
return true;
}else{
document.getElementById('p2').innerText = "* Please enter between " +min+ " and " +max+ " characters *";
inputtext.focus();
return false;
}
}
Right Selection made from drop-down
It’s must to provide validation in the select field. It happens sometimes, when user forgets to choose option from the select feild. In that case, the form should convey about issue so that user can take the action.
//This segment displays the validation rule for selection field.
function trueSelection(inputtext, alertMsg){
if(inputtext.value == "Please Choose"){
document.getElementById('p4').innerText = alertMsg;
inputtext.focus();
return false;
}else{
return true;
}
}
Email Validation
Firstly, let’s have a look how a user can make mistake while entering wrong email address:
- @compem.net [no character before@]
- [email protected] [invalid character!]
- sunshine@mode_bright.com [underscore are not allowed in the domain name]
Now let’s see what a valid email address should contain:
- The combination of letters, numbers, periods, plus sign, and /or underscores.
- The @symbol.
- Combination of letters, numbers and periods.
- The top level domain. (com, net, org, us, gov)
So, just to make sure that user entered the email address in the correct format, it’s necessary to include email validation code inside the validation codes. A general expression to check valid email address is: /^[w-.+]+@[a-zA-Z0-9.]+.[a-zA-Z0-9]{2,4}$/ The expression checks the letters, numbers, and other symbol at a proper sequence. The sequence is defined as: [alphabets/numbers/underscore/plus sign-@-alphabets/numbers/periods.domain name] If the entered email address is not in a proper sequence, then the message will popup which says “Wrong Email Address”.
//This segment displays the validation rule for E-mail.
function emailValidation(inputtext, alertMsg){
var emailExp = /^[w-.+]+@[a-zA-Z0-9.-]+.[a-zA-z0-9]{2,4}$/;
if(inputtext.value.match(emailExp)){
return true;
}else{
document.getElementById('p3').innerText = alertMsg;
inputtext.focus();
return false;
}
}
Complete Form Validation Codes Using JavaScript
Here is a complete sequence of form validation codes. HTML File – formvalid.html
- Includes HTML form tags.
- onsubmit = return formValidation(). This means, formValidation() will be called as soon as user submit the form.
- The function will check the form details, whether the details are appropriate or not and then it alert messages if the user has entered wrong information or left any field empty.
<!DOCTYPE html>
<html>
<head>
<title>Form Validation:Demo Preview</title>
<meta content="noindex, nofollow" name="robots">
<link href="formvalid.css" rel="stylesheet">
<script src="formvalid.js"></script>
</head>
<body>
<div id="form">
<p id="head"></p>
<!-- This segment displays the validation rule -->
<h2>JavaScript Form Validation</h2>
<!-- Form starts from here -->
<form onsubmit='return formValidation()'>
<label>Full Name:</label>
<input id='firstname' type='text'>
<p id="p1"></p>
<!-- This segment displays the validation rule for name -->
<label>Username(6-8 characters):</label>
<input id='username' type='text'>
<p id="p2"></p>
<!-- This segment displays the validation rule for user name -->
<label>Email:</label>
<input id='email' type='text'>
<p id="p3"></p>
<!-- This segment displays the validation rule for email -->
<label>State:</label>
<select id='state'>
<option>
Please Choose
</option>
<option>
America
</option>
<option>
Australia
</option>
<option>
Sweden
</option>
<option>
Africa
</option>
</select>
<p id="p4"></p>
<!-- This segment displays the validation rule for selection -->
<label>Address:</label>
<input id='addr' type='text'>
<p id="p5"></p>
<!-- This segment displays the validation rule for address -->
<label>Zip Code:</label>
<input id='zip' type='text'>
<p id="p6"></p>
<!-- This segment displays the validation rule for zip -->
<input id="submit" type='submit' value='Check Form'>
</form>
</div>
</body>
</html>
JavaScript File – formvalid.js
- It includes various function to check validity of entered information.
- Like, formValidation() is the main function that runs as soon as the user clicks on submit button. Here, object is defined for each field. Objects are stored in different variable.
- Includes functions to check whether entered information in form is in correct format or not. This is done by regular expressions in each function. These regular expression matches the entered information in the form field. Function Calls -> Regular Expression matches data -> Wrong data pattern -> Display Alert Message.
function formValidation() {
// Make quick references to our fields.
var firstname = document.getElementById('firstname');
var addr = document.getElementById('addr');
var zip = document.getElementById('zip');
var state = document.getElementById('state');
var username = document.getElementById('username');
var email = document.getElementById('email');
// To check empty form fields.
if (firstname.value.length == 0) {
document.getElementById('head').innerText = "* All fields are mandatory *"; // This segment displays the validation rule for all fields
firstname.focus();
return false;
}
// Check each input in the order that it appears in the form.
if (inputAlphabet(firstname, "* For your name please use alphabets only *")) {
if (lengthDefine(username, 6, 8)) {
if (emailValidation(email, "* Please enter a valid email address *")) {
if (trueSelection(state, "* Please Choose any one option")) {
if (textAlphanumeric(addr, "* For Address please use numbers and letters *")) {
if (textNumeric(zip, "* Please enter a valid zip code *")) {
return true;
}
}
}
}
}
}
return false;
}
// Function that checks whether input text is numeric or not.
function textNumeric(inputtext, alertMsg) {
var numericExpression = /^[0-9]+$/;
if (inputtext.value.match(numericExpression)) {
return true;
} else {
document.getElementById('p6').innerText = alertMsg; // This segment displays the validation rule for zip.
inputtext.focus();
return false;
}
}
// Function that checks whether input text is an alphabetic character or not.
function inputAlphabet(inputtext, alertMsg) {
var alphaExp = /^[a-zA-Z]+$/;
if (inputtext.value.match(alphaExp)) {
return true;
} else {
document.getElementById('p1').innerText = alertMsg; // This segment displays the validation rule for name.
//alert(alertMsg);
inputtext.focus();
return false;
}
}
// Function that checks whether input text includes alphabetic and numeric characters.
function textAlphanumeric(inputtext, alertMsg) {
var alphaExp = /^[0-9a-zA-Z]+$/;
if (inputtext.value.match(alphaExp)) {
return true;
} else {
document.getElementById('p5').innerText = alertMsg; // This segment displays the validation rule for address.
inputtext.focus();
return false;
}
}
// Function that checks whether the input characters are restricted according to defined by user.
function lengthDefine(inputtext, min, max) {
var uInput = inputtext.value;
if (uInput.length >= min && uInput.length <= max) {
return true;
} else {
document.getElementById('p2').innerText = "* Please enter between " + min + " and " + max + " characters *"; // This segment displays the validation rule for username
inputtext.focus();
return false;
}
}
// Function that checks whether a option is selected from the selector and if it's not it displays an alert message.
function trueSelection(inputtext, alertMsg) {
if (inputtext.value == "Please Choose") {
document.getElementById('p4').innerText = alertMsg; //this segment displays the validation rule for selection.
inputtext.focus();
return false;
} else {
return true;
}
}
// Function that checks whether an user entered valid email address or not and displays alert message on wrong email address format.
function emailValidation(inputtext, alertMsg) {
var emailExp = /^[w-.+]+@[a-zA-Z0-9.-]+.[a-zA-z0-9]{2,4}$/;
if (inputtext.value.match(emailExp)) {
return true;
} else {
document.getElementById('p3').innerText = alertMsg; // This segment displays the validation rule for email.
inputtext.focus();
return false;
}
}
CSS File – formvalid.css
- Includes form style codes.
@import url(http://fonts.googleapis.com/css?family=Raleway);

#main{
width:960px;
margin:50px auto;
font-family:raleway;
}

span{
color:red;
}

h2{
background-color: #FEFFED;
text-align:center;
border-radius: 10px 10px 0 0;
margin: -10px -40px;
padding: 30px;
}

hr{
border:0;
border-bottom:1px solid #ccc;
margin: 10px -40px;
margin-bottom: 30px;
}

#form_layout{
width:300px;
float: left;
border-radius: 10px;
font-family:raleway;
border: 2px solid #ccc;
padding: 10px 40px 25px;
margin-top: -2px;
}

input[type=text],input[type=password],#state{
width:99.5%;
padding: 10px;
margin-top: 8px;
border: 1px solid #ccc;
padding-left: 5px;
font-size: 16px;
font-family:raleway;
}

input[type=submit]{
width: 100%;
background-color:#FFBC00;
color: white;
border: 2px solid #FFCB00;
padding: 10px;
font-size:20px;
cursor:pointer;
border-radius: 5px;
margin-bottom: 15px;
}

a{
text-decoration:none;
color: cornflowerblue;
}

i{
color: cornflowerblue;
}

p{
font-size:12px;
color:red;
}
Conclusion:
Above mentioned are simple codes for form validation. If you have any validation codes to share, please do share it in the below form.
How To Create Pop-up Contact Form Using JavaScript
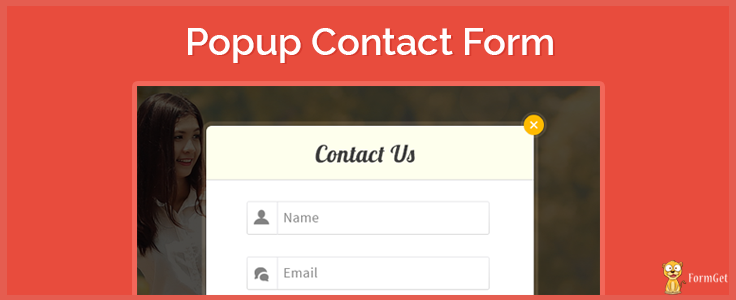
Pop up contact forms are the smart way to present contact forms on your site. Similar to sliding contact forms, these contact form will be available on every page of your site. That means, your prospects can fill out your form from every page.
Here, the popup button is just under the visitor’s eye. When the user clicks on the popup button, the form will pop up and appear on the screen using JavaScript on click event.
HTML Part :
<button id="popup" onclick="div_show()">Popup</button>JavaScript Part :
//Function To Display Popup
function div_show() {
document.getElementById('abc').style.display = "block";
}
Below is our complete code with download and live demo option

-: See Also :-
Send an Email On Form Submission
It will be easy for your prospects to access your contact form. In a way they can easily contact you from any page of your website. So, here are JavaScript codes to make Pop-up contact form :
HTML File – popupform.html
- Includes HTML tags to design form.
- Div id= “popupContact” includes all form elements.
<!DOCTYPE html>
<html>
<head>
<title>Popup contact form</title>
<link href="css/elements.css" rel="stylesheet">
<script src="js/my_js.js"></script>
</head>
<!-- Body Starts Here -->
<body id="body" style="overflow:hidden;">
<div id="abc">
<!-- Popup Div Starts Here -->
<div id="popupContact">
<!-- Contact Us Form -->
<form action="#" id="form" method="post" name="form">
<img id="close" src="images/3.png" onclick ="div_hide()">
<h2>Contact Us</h2>
<hr>
<input id="name" name="name" placeholder="Name" type="text">
<input id="email" name="email" placeholder="Email" type="text">
<textarea id="msg" name="message" placeholder="Message"></textarea>
<a href="javascript:%20check_empty()" id="submit">Send</a>
</form>
</div>
<!-- Popup Div Ends Here -->
</div>
<!-- Display Popup Button -->
<h1>Click Button To Popup Form Using Javascript</h1>
<button id="popup" onclick="div_show()">Popup</button>
</body>
<!-- Body Ends Here -->
</html>
JavaScript File – my_js.js
- Contains div_ show() function to display the contact form.
- Contains div_ hide() function to hide the contact form.
- Contains check_empty() function to validate the form fields.
// Validating Empty Field
function check_empty() {
if (document.getElementById('name').value == "" || document.getElementById('email').value == "" || document.getElementById('msg').value == "") {
alert("Fill All Fields !");
} else {
document.getElementById('form').submit();
alert("Form Submitted Successfully...");
}
}
//Function To Display Popup
function div_show() {
document.getElementById('abc').style.display = "block";
}
//Function to Hide Popup
function div_hide(){
document.getElementById('abc').style.display = "none";
}
CSS File – elements.css
- Design form button and form.
- Sets popup form to appear at exact center of screen.
@import "http://fonts.googleapis.com/css?family=Raleway";
/*----------------------------------------------
CSS settings for HTML div Exact Center
------------------------------------------------*/
#abc {
width:100%;
height:100%;
opacity:.95;
top:0;
left:0;
display:none;
position:fixed;
background-color:#313131;
overflow:auto
}
img#close {
position:absolute;
right:-14px;
top:-14px;
cursor:pointer
}
div#popupContact {
position:absolute;
left:50%;
top:17%;
margin-left:-202px;
font-family:'Raleway',sans-serif
}
form {
max-width:300px;
min-width:250px;
padding:10px 50px;
border:2px solid gray;
border-radius:10px;
font-family:raleway;
background-color:#fff
}
p {
margin-top:30px
}
h2 {
background-color:#FEFFED;
padding:20px 35px;
margin:-10px -50px;
text-align:center;
border-radius:10px 10px 0 0
}
hr {
margin:10px -50px;
border:0;
border-top:1px solid #ccc
}
input[type=text] {
width:82%;
padding:10px;
margin-top:30px;
border:1px solid #ccc;
padding-left:40px;
font-size:16px;
font-family:raleway
}
#name {
background-image:url(../images/name.jpg);
background-repeat:no-repeat;
background-position:5px 7px
}
#email {
background-image:url(../images/email.png);
background-repeat:no-repeat;
background-position:5px 7px
}
textarea {
background-image:url(../images/msg.png);
background-repeat:no-repeat;
background-position:5px 7px;
width:82%;
height:95px;
padding:10px;
resize:none;
margin-top:30px;
border:1px solid #ccc;
padding-left:40px;
font-size:16px;
font-family:raleway;
margin-bottom:30px
}
#submit {
text-decoration:none;
width:100%;
text-align:center;
display:block;
background-color:#FFBC00;
color:#fff;
border:1px solid #FFCB00;
padding:10px 0;
font-size:20px;
cursor:pointer;
border-radius:5px
}
span {
color:red;
font-weight:700
}
button {
width:10%;
height:45px;
border-radius:3px;
background-color:#cd853f;
color:#fff;
font-family:'Raleway',sans-serif;
font-size:18px;
cursor:pointer
}
Conclusion:
Popup contact form is event-triggered form. As the user clicks on the form button, it will appear on the screen. So, it will be comfortable for you to put these form buttons on every-page and users can easily access it.
Create Simple Contact Form Using JavaScript
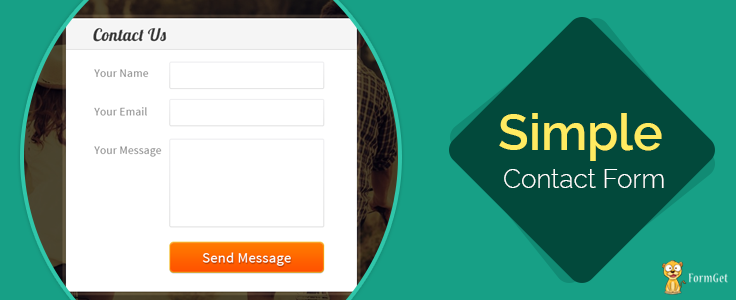
Learn creating contact form using simple JavaScript codes. Here is a tutorial guide to tell you about complete JavaScript codes to create Contact Form.
In this tutorial, we have created a form div with id “form_sample” in our html page.
<div id="form_sample"></div>
In our js code we have created form elements using .createElement function and appended the elements to html div using the .appendChild function of JavaScript.
var x = document.getElementById("form_sample");
var createform = document.createElement('form'); // Create New Element Form
x.appendChild(createform);
Further, we have included some CSS codes to give proper alignment to form.
Below is our complete code with download and live demo option

-: See Also :-
HTML File – demo.html
Simple HTML codes to add form Div.
<!DOCTYPE html>
<html>
<head>
<title>Contact Form using JavaScript</title> <!-- Include CSS file here -->
<link href="css/form.css" rel="stylesheet">
</head>
<body>
<div id="main">
<h1>Contact Form using JavaScript</h1>
<div id="form_sample"></div> <!-- Include JS file here -->
<script src="js/form.js"></script>
</div>
</body>
</html>
JavaScript File -form.js
- Create object for the form.
- Set action attribute (post method).
- Create field label.
- Append form fields and set it’s label.
// Fetching HTML Elements in Variables by ID.
var x = document.getElementById("form_sample");
var createform = document.createElement('form'); // Create New Element Form
createform.setAttribute("action", ""); // Setting Action Attribute on Form
createform.setAttribute("method", "post"); // Setting Method Attribute on Form
x.appendChild(createform);

var heading = document.createElement('h2'); // Heading of Form
heading.innerHTML = "Contact Form ";
createform.appendChild(heading);

var line = document.createElement('hr'); // Giving Horizontal Row After Heading
createform.appendChild(line);

var linebreak = document.createElement('br');
createform.appendChild(linebreak);

var namelabel = document.createElement('label'); // Create Label for Name Field
namelabel.innerHTML = "Your Name : "; // Set Field Labels
createform.appendChild(namelabel);

var inputelement = document.createElement('input'); // Create Input Field for Name
inputelement.setAttribute("type", "text");
inputelement.setAttribute("name", "dname");
createform.appendChild(inputelement);

var linebreak = document.createElement('br');
createform.appendChild(linebreak);

var emaillabel = document.createElement('label'); // Create Label for E-mail Field
emaillabel.innerHTML = "Your Email : ";
createform.appendChild(emaillabel);

var emailelement = document.createElement('input'); // Create Input Field for E-mail
emailelement.setAttribute("type", "text");
emailelement.setAttribute("name", "demail");
createform.appendChild(emailelement);

var emailbreak = document.createElement('br');
createform.appendChild(emailbreak);

var messagelabel = document.createElement('label'); // Append Textarea
messagelabel.innerHTML = "Your Message : ";
createform.appendChild(messagelabel);

var texareaelement = document.createElement('textarea');
texareaelement.setAttribute("name", "dmessage");
createform.appendChild(texareaelement);

var messagebreak = document.createElement('br');
createform.appendChild(messagebreak);

var submitelement = document.createElement('input'); // Append Submit Button
submitelement.setAttribute("type", "submit");
submitelement.setAttribute("name", "dsubmit");
submitelement.setAttribute("value", "Submit");
createform.appendChild(submitelement);
Css File – form.css
Css coding to give proper alignment to form elements and the complete form itself.
/* Below line is write to use Google font online */
@import "http://fonts.googleapis.com/css?family=Ubuntu";
div#main{
width:830px;
height:650px;
margin:0 auto;
font-family:'Ubuntu',sans-serif
}
div#form_sample{
text-align:center;
border:1px solid #ccc;
width:300px;
padding:0 50px 15px;
margin-top:20px;
box-shadow:0 0 15px;
border-radius:6px;
float:left
}
#main h1{
margin-top:40px
}
hr{
margin-top:-5px
}
label{
float:left;
font-size:16px
}
input[type="text"]{
width:100%;
margin-top:10px;
height:35px;
margin-bottom:25px;
padding:10px;
border:3px solid #2BC1F2
}
textarea{
width:100%;
border:3px solid #2BC1F2;
padding:10px;
margin-bottom:25px;
margin-top:10px;
height:100px;
resize:none
}
input[type="submit"]{
width:100%;
padding:10px 45px;
background-color:#2BC1F2;
border:none;
color:#fff;
font-size:18px;
font-weight:700;
cursor:pointer;
font-family:'Ubuntu',sans-serif
}
/* -------------------------------------
CSS for Sidebar (optional)
---------------------------------------- */
div#fugo{
float:right
}
Conclusion:
Given above is the JavaScript code to create simple contact form. If you want to style your form use above CSS ,
And if you have any query regarding the post, you can contact us or put commenst below any time.
You may also like –
- Chrome Extension Tutorial: to Display RSS Blog Feeds
- Chrome Extension: Inject Javascript Into Web Page
How To Create Sidebar Sliding Contact Form With JavaScript

Learn to create form that you can show on every page of your website!
Yes, these forms are known as sidebar sliding contact form. These will be visible on the sidebar of every page of your website. This means, visitor can access your contact form via every page of your website.
They need not to click on the contact us option, instead contact form is in front of them every-time. They can directly reach there just by clicking on the form button.
It’s a powerful way to improve your form conversion.
No hunting for contact page = More conversion.

You can simply create it with the help of JavaScript.
Here are the codes for the Sidebar sliding contact form:
HTML File- slider.html
- It contains two div.
- Div with Id = slider, includes button and form.
- On clicking the button, form will display in a sliding effect.
- Div with Id = sidebar, includes only button.
<!DOCTYPE html>
<html>
<head>
<title>Slide Contact Form - Demo Preview</title>
<link href="css/slider.css" rel="stylesheet"><!-- Include css file here-->
<link href='http://fonts.googleapis.com/css?family=Roboto+Slab' rel='stylesheet' type='text/css'><!-- Including google font-->
<script src="js/slider.js"></script>
</head>
<body>
<div id="title">
<h3>Click Contact Us Button to Slide In Contact Form</h3>
</div>
<!-- Sliding div starts here -->
<div id="slider" style="right:-342px;">
<div id="sidebar" onclick="open_panel()"><img src="images/contact.png"></div>
<div id="header">
<h2>Contact Form</h2>
<p>This is my form.Please fill it out.It's awesome!</p>
<input name="dname" type="text" value="Your Name">
<input name="demail" type="text" value="Your Email">
<h4>Query type</h4>
<select>
<option>General Query</option>
<option>Presales</option>
<option>Technical</option>
<option>Others</option>
</select>
<textarea>Message</textarea>
<button>Send Message</button>
</div>
</div>
<!-- Sliding div ends here -->
</body>
</html>
JavaScript File- slider.js
- It contains various functions that brings the sliding effect in form according to the onclick event on button.
/*
------------------------------------------------------------
Function to activate form button to open the slider.
------------------------------------------------------------
*/
function open_panel() {
slideIt();
var a = document.getElementById("sidebar");
a.setAttribute("id", "sidebar1");
a.setAttribute("onclick", "close_panel()");
}
/*
------------------------------------------------------------
Function to slide the sidebar form (open form)
------------------------------------------------------------
*/
function slideIt() {
var slidingDiv = document.getElementById("slider");
var stopPosition = 0;
if (parseInt(slidingDiv.style.right) < stopPosition) {
slidingDiv.style.right = parseInt(slidingDiv.style.right) + 2 + "px";
setTimeout(slideIt, 1);
}
}
/*
------------------------------------------------------------
Function to activate form button to close the slider.
------------------------------------------------------------
*/
function close_panel() {
slideIn();
a = document.getElementById("sidebar1");
a.setAttribute("id", "sidebar");
a.setAttribute("onclick", "open_panel()");
}
/*
------------------------------------------------------------
Function to slide the sidebar form (slide in form)
------------------------------------------------------------
*/
function slideIn() {
var slidingDiv = document.getElementById("slider");
var stopPosition = -342;
if (parseInt(slidingDiv.style.right) > stopPosition) {
slidingDiv.style.right = parseInt(slidingDiv.style.right) - 2 + "px";
setTimeout(slideIn, 1);
}
}
Css File- slider.css
- It includes basic css code to design form button.
body {
overflow:hidden;
width:960px;
margin:10px auto
}
p {
border-bottom:1px dotted #d8d8d8;
padding-bottom:15px;
font-size:17px
}
#slider {
width:500px;
top:100px;
position:absolute
}
#header {
width:260px;
height:520px;
position:absolute;
right:0;
border:1px solid #d8d8d8;
margin-left:40px;
padding:20px 40px;
border-radius:3px;
box-shadow:0 0 8px gray
}
#sidebar {
position:absolute;
top:180px;
left:113px;
box-shadow:0 0 8px gray
}
#sidebar1 {
position:absolute;
top:180px;
left:113px;
box-shadow:0 0 8px gray
}
h3 {
font-family:'Roboto Slab',serif
}
input[type=text] {
margin-top:10px;
padding:6px;
width:100%;
font-size:15px;
border-radius:2px;
border:3px solid #98d0f1
}
h4 {
font-size:15px
}
div#title {
position:absolute;
top:300px;
left:650px
}
select {
padding:6px;
width:100%;
font-size:15px;
border-radius:2px;
border:3px solid #98d0f1
}
textarea {
padding:6px;
font-size:15px;
border-radius:2px;
border:3px solid #98d0f1;
margin-top:10px;
height:80px;
width:100%
}
button {
background:#2bc1f2;
border:none;
color:#fff;
width:100%;
font-size:22px;
font-weight:bolder;
padding:8px 0;
border-radius:3px;
cursor:pointer;
margin-top:25px
}
Conclusion:
With the help of sliding contact form, your user can easily access contact form from every page of your website. It’s an easy method to grow your email list with little effort.
12 Inspiring Form Designs You Will Love To See (With PSD)

If you are among those, who wants to get an quick idea, about how your website form would look. And, if you are really searching for an amazing and attractive forms. Then, this could be the end of your search.
We have got some super attractive and elegant login forms with different styles. Now, get a form styling idea for any of your project super-easy.

User Registration Form: A simple and elegant form with background template.

Contact Form: A Full Screen Modern and beautiful contact form.

Login Form: A classic styling Login Form with irresistible looks.

FormGet Pop up: A simple and effective login form with flat and clean design.

Contact Form: An Elegant Contact us form with bright texture.

Login Form: An cool, aesthetic login form design with wonderful gradient.

Login Form: An effective Metro style login form with wide submit button.

Login Form: A neat login form with wonderful color effects.

Double Login Button: A simple login form with designer call-to-action and eminent texture view.

Login Form: A complete set of login form with corporate looks.

Sign-up-Form: An elegant sign up form with nice and cool gradient looks.

Subscriber Form: A wonderful newspaper subscriber form one can’t resist to fill.
Conclusion:
These are just the form style I have shown only for login forms. But, you can use these styling in any of the form too. Have a happy form building.
Recommended blogs –
- CSS Border Property
- CSS Form Field Elements Having Icon
Attractive Form Button Design Irresistible To Avoid (With PSD)

We have got some sweet & great looking button style.
Though there’s styling is quite simple but still it gives a very elegant look. And, it will completely suit your corporate website.
We have got 3 categories of button i.e. Basic style button, Rounded style button, and Tag buttons.
You can have a quick view over them.

For more related information go through following blogs –
How To Dynamically Add and Remove Form Fields Using JavaScript

In the last Blog, we have shown you how to dynamically add form fields to create form. This blog post tells about how to add and remove fields dynamically with the help of JavaScript codes. So while creating your form, you can easily add fields in a click and if you don’t want it, you can easily delete it in a click.

Here are the following code snippets for it.
HTML File – getform.html
Here, you can view HTML coding for the blog. It will display form buttons. When you click on those buttons, it’s respective field will appear.
<!DOCTYPE html>
<html>
<head>
<title>Create Dynamic form Using JavaScript</title>
<script src="js/form.js" type="text/javascript"></script>
<link href="form.css" rel="stylesheet" type="text/css">
</head>
<body>
<div class="main_content">
<!--
========================================================================================
Header Div.
========================================================================================
-->
<div class="first">
<p><a href="https://www.formget.com/app/"><img id="logo" src="logo.png">
</a> Online form builder.</p>
</div>
<!--
======================================================================================
This Div is for the Buttons. When user click on buttons, respective field will appear.
=======================================================================================
-->
<div class="two">
<h4>Frequently Used Form Fields</h4><button onclick="nameFunction()">Name</button>
<button onclick="emailFunction()">Email</button>
<button onclick="contactFunction()">Contact</button>
<button onclick="textareaFunction()">Message</button>
<button onclick="resetElements()">Reset</button>
</div>
<!--
========================================================================================
This Div is meant to display final form.
========================================================================================
-->
<div class="three">
<h2>Your Dynamic Form!</h2>
<form action="#" id="mainform" method="get" name="mainform">
<span id="myForm"></span>
<p></p><input type="submit" value="Submit">
</form>
</div>
<!--
========================================================================================
Footer Div.
========================================================================================
-->
<div class="four">
<p>2014 <a href="https://www.formget.com/app/"><img src="logo.png">
</a> All rights reserved.</p>
</div>
</div>
</body>
</html>
JavaScript File – form.js
var i = 0; /* Set Global Variable i */
function increment(){
i += 1; /* Function for automatic increment of field's "Name" attribute. */
}
/*
---------------------------------------------

Function to Remove Form Elements Dynamically
---------------------------------------------

*/
function removeElement(parentDiv, childDiv){
if (childDiv == parentDiv){
alert("The parent div cannot be removed.");
}
else if (document.getElementById(childDiv)){
var child = document.getElementById(childDiv);
var parent = document.getElementById(parentDiv);
parent.removeChild(child);
}
else{
alert("Child div has already been removed or does not exist.");
return false;
}
}
/*
----------------------------------------------------------------------------

Functions that will be called upon, when user click on the Name text field.

----------------------------------------------------------------------------
*/
function nameFunction(){
var r = document.createElement('span');
var y = document.createElement("INPUT");
y.setAttribute("type", "text");
y.setAttribute("placeholder", "Name");
var g = document.createElement("IMG");
g.setAttribute("src", "delete.png");
increment();
y.setAttribute("Name", "textelement_" + i);
r.appendChild(y);
g.setAttribute("onclick", "removeElement('myForm','id_" + i + "')");
r.appendChild(g);
r.setAttribute("id", "id_" + i);
document.getElementById("myForm").appendChild(r);
}
/*
-----------------------------------------------------------------------------

Functions that will be called upon, when user click on the E-mail text field.

------------------------------------------------------------------------------
*/
function emailFunction(){
var r = document.createElement('span');
var y = document.createElement("INPUT");
y.setAttribute("type", "text");
y.setAttribute("placeholder", "Email");
var g = document.createElement("IMG");
g.setAttribute("src", "delete.png");
increment();
y.setAttribute("Name", "textelement_" + i);
r.appendChild(y);
g.setAttribute("onclick", "removeElement('myForm','id_" + i + "')");
r.appendChild(g);
r.setAttribute("id", "id_" + i);
document.getElementById("myForm").appendChild(r);
}
/*
-----------------------------------------------------------------------------

Functions that will be called upon, when user click on the Contact text field.

------------------------------------------------------------------------------
*/
function contactFunction(){
var r = document.createElement('span');
var y = document.createElement("INPUT");
y.setAttribute("type", "text");
y.setAttribute("placeholder", "Contact");
var g = document.createElement("IMG");
g.setAttribute("src", "delete.png");
increment();
y.setAttribute("Name", "textelement_" + i);
r.appendChild(y);
g.setAttribute("onclick", "removeElement('myForm','id_" + i + "')");
r.appendChild(g);
r.setAttribute("id", "id_" + i);
document.getElementById("myForm").appendChild(r);
}
/*
-----------------------------------------------------------------------------

Functions that will be called upon, when user click on the Message textarea field.

------------------------------------------------------------------------------
*/
function textareaFunction(){
var r = document.createElement('span');
var y = document.createElement("TEXTAREA");
var g = document.createElement("IMG");
y.setAttribute("cols", "17");
y.setAttribute("placeholder", "message..");
g.setAttribute("src", "delete.png");
increment();
y.setAttribute("Name", "textelement_" + i);
r.appendChild(y);
g.setAttribute("onclick", "removeElement('myForm','id_" + i + "')");
r.appendChild(g);
r.setAttribute("id", "id_" + i);
document.getElementById("myForm").appendChild(r);
}
/*
-----------------------------------------------------------------------------

Functions that will be called upon, when user click on the Reset Button.

------------------------------------------------------------------------------
*/
function resetElements(){
document.getElementById('myForm').innerHTML = '';
}
CSS File – form.css
This contains css codes to give basic styling in the form
body{
width:960px;
margin:45px auto;
background-color:#f9ebe8
}
form{
width:330px;
border-top:1px dotted #D9D9D9;
margin:10px 180px
}
button{
width:246px;
height:40px;
color:#4C4C4C;
margin-bottom:20px;
margin-left:20px
}
input{
width:280px;
height:40px;
padding:5px;
margin:20px 0 10px;
border-radius:5px;
border:4px solid #acbfa5
}
input[type = submit]{
width:100px;
background-color:#35c8ef;
border-radius:5px;
border:2px solid blue;
color:#fff
}
textarea{
width:280px;
height:70px;
padding:5px;
margin:20px 0 10px;
border-radius:5px;
border:4px solid #acbfa5
}
.four p{
text-align:center;
color:#fff;
padding:15px 0
}
.first p{
padding:15px;
color:#fff
}
.two{
background-color:#fff;
width:290px;
float:left;
height:600px
}
.main_content{
width:960px;
height:auto;
background-color:#fff
}
.two h4{
color:#4C4C4C;
text-align:center
}
.three{
text-align:center;
width:660px;
border-left:1px solid #D0D0D0;
float:left;
background-color:#fff
}
.four,.first{
width:960px;
clear:both;
background-color:#41A2CD;
height:55px
}
Conclusion:
This is a basic concept of creating dynamic form. You can use these codes to create your own form. But if you want to add more functions, you need to customize your code accordingly.
How To Dynamically Add Form Fields And Increment “Name” Attribute Of The Field

In this tutorial you will learn-how to make dynamic form with JavaScript codes. The fields are dynamically added in the form. With it, “Name” and “Email” fields get incremented on click of respective buttons.
You can take a view on screenshots that shows dynamically addition of form elements.
As we click on the fields, they will appear on the right side. In this way, you can dynamically add fields and create form.

And, “Name” attribute of the fields will increment automatically:
Now, have a look on the codes to implement this function.
HTML File – getform.html
In html file we have made a html button for the form fields. When you click on those fields, it will instantly appear on form.
<!DOCTYPE html>
<html>
<head>
<title>Create Form Dynamically And Increment Value</title>
<script src="js/form.js" type="text/javascript"></script>
<link href="css/form.css" rel="stylesheet" type="text/css">
</head>
<body>
<div class="main">
<div class="header">
<h1>Create Form Dynamically And Increment Value</h1>
</div>
<!--
=================
First Div for the buttons. Click on the button to add field in the form.
=================
-->
<div class="two">
<button class="name" onclick="textBoxCreate()">Name</button>
<button class="email" onclick="emailBoxCreate()">Email</button>
</div>
<!--
=================
Form fields get added in the third div. Click on the button to add field in the form.
=================
-->
<div class="third">
<form action="" id="mainform" method="get" name="mainform">
<p id="myForm"></p><input type="submit" value="Submit">
</form>
</div>
</div>
</body>
</html>
JavaScript File – form.js
In this file, we have included JavaScript codes to add form fields dynamically.
// FormGet Online Form Builder JS Code
// Creating and Adding Dynamic Form Elements.
var i = 1; // Global Variable for Name
var j = 1; // Global Variable for E-mail
/*
=================
Creating Text Box for name field in the Form.
=================
*/
function textBoxCreate(){
var y = document.createElement("INPUT");
y.setAttribute("type", "text");
y.setAttribute("Placeholder", "Name_" + i);
y.setAttribute("Name", "Name_" + i);
document.getElementById("myForm").appendChild(y);
i++;
}
/*
=================
Creating Text Box for email field in the Form.
=================
*/
function emailBoxCreate(){
var y = document.createElement("INPUT");
var t = document.createTextNode("Email");
y.appendChild(t);
y.setAttribute("Placeholder", "Email_" + j);
y.setAttribute("Name", "Email_" + j);
document.getElementById("myForm").appendChild(y);
j++;
}
Css File – form.css
In this file we have designed form a little bit. It’s just a sample to enhance styling view.
.main{
border:1px solid #000;
background:#FAFAFA;
width:960px;
height:775px;
margin:10px auto;
overflow:auto
}
.header{
background-color:#40B1ED;
height:70px;
margin-top:-21px;
padding-top:10px;
color:#fff;
text-align:center;
border-bottom:1px solid #000
}
.name,.email{
padding:8px 90px;
font-size:16px;
font-weight:700;
background-color:#9acd32;
border:2px solid gray;
color:#fff;
box-shadow:0 0 10px gray;
margin-bottom:10px;
margin-top:5px;
cursor:pointer
}
input{
padding:8px;
width:65%;
border:3px solid #ddd;
box-shadow:0 0 2px;
margin-bottom:20px
}
input[type=submit]{
border:3px solid #fff;
background:linear-gradient(#c4fcfc,#02d2fa)
}
input[type=submit]:hover{
background:linear-gradient(#02d2fa,#c4fcfc)
}
img{
margin-top:100px
}
a{
text-decoration:none
}
.two{
text-align:center;
background-color:#fff;
width:290px;
height:593px;
padding:40px 15px;
border:1px solid #000;
border-radius:4px;
box-shadow:0 0 5px #000;
float:left;
margin:20px
}
.third{
background-color:#fff;
width:575px;
height:645px;
padding-top:30px;
border:1px solid #000;
border-radius:4px;
overflow:auto;
box-shadow:0 0 5px #000;
float:left;
margin-top:20px;
text-align:center
}
Conclusion:
To create dynamic form via code snippet is quiet difficult. Now it’s easy for your to download the codes and use it on your project.
For more related information just go through following blogs –
- Show And Hide Registration/Login Form Using jQuery
- Create Dynamic Form Fields Using jQuery
Drip Campaign: An Effective Email Marketing Strategy

Being a start-up, you might not be aware about the basic things that could make your audience engaged, before a final deal. Also, you need to adopt a method that helps you to be in continuous touch with your customer. Starting from the time they show interest in products till they buy the product.
Also, your prospect will take their time to make a final decision on your product. But, you can’t let them sit ideal till that time. You have to engage them.
To do the above thing, drip email campaign is a direct service, to engage your audience & warm up your leads !
But, before starting with the ins and outs of drip marketing, let me give an introduction about how this drip strategy are useful for marketing. Like,
- Giving frequent updates about the product
- Increasing customer retention
- Increasing website conversion
- Increase sales
- Build relationship with customers
What is Drip Campaign?
Email marketing is sending mail to your collected leads i.e. visitors/customers to let them know about the product updates, offers, etc.
In simple words, Drip campaign is one type of top email marketing, but here, a series of messages are sent in a pre-defined order and a pre-defined interval.
So you can start Drip mail from the time when the customer sign up on your website till he makes the deal.
You can also use effective form building tool like FormGet that allow you to store customer leads like their name and email directly from the sign form into your email marketing service like MadMimi, Constant Contact, Active Campaign, MailChimp, Aweber, iContact, GetResponse etc.
As you can see in the below image, FormGet allow you to do the following settings so easily.
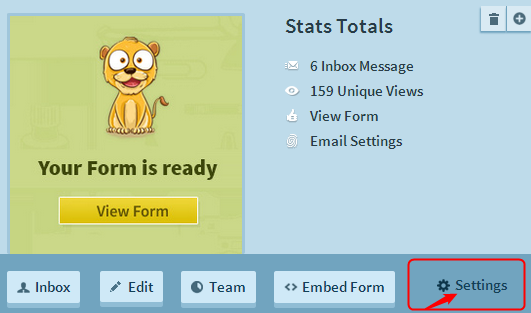
Just need to click on the button to start any of the marketing service, like you can see in the below image MailChimp is getting turned on.
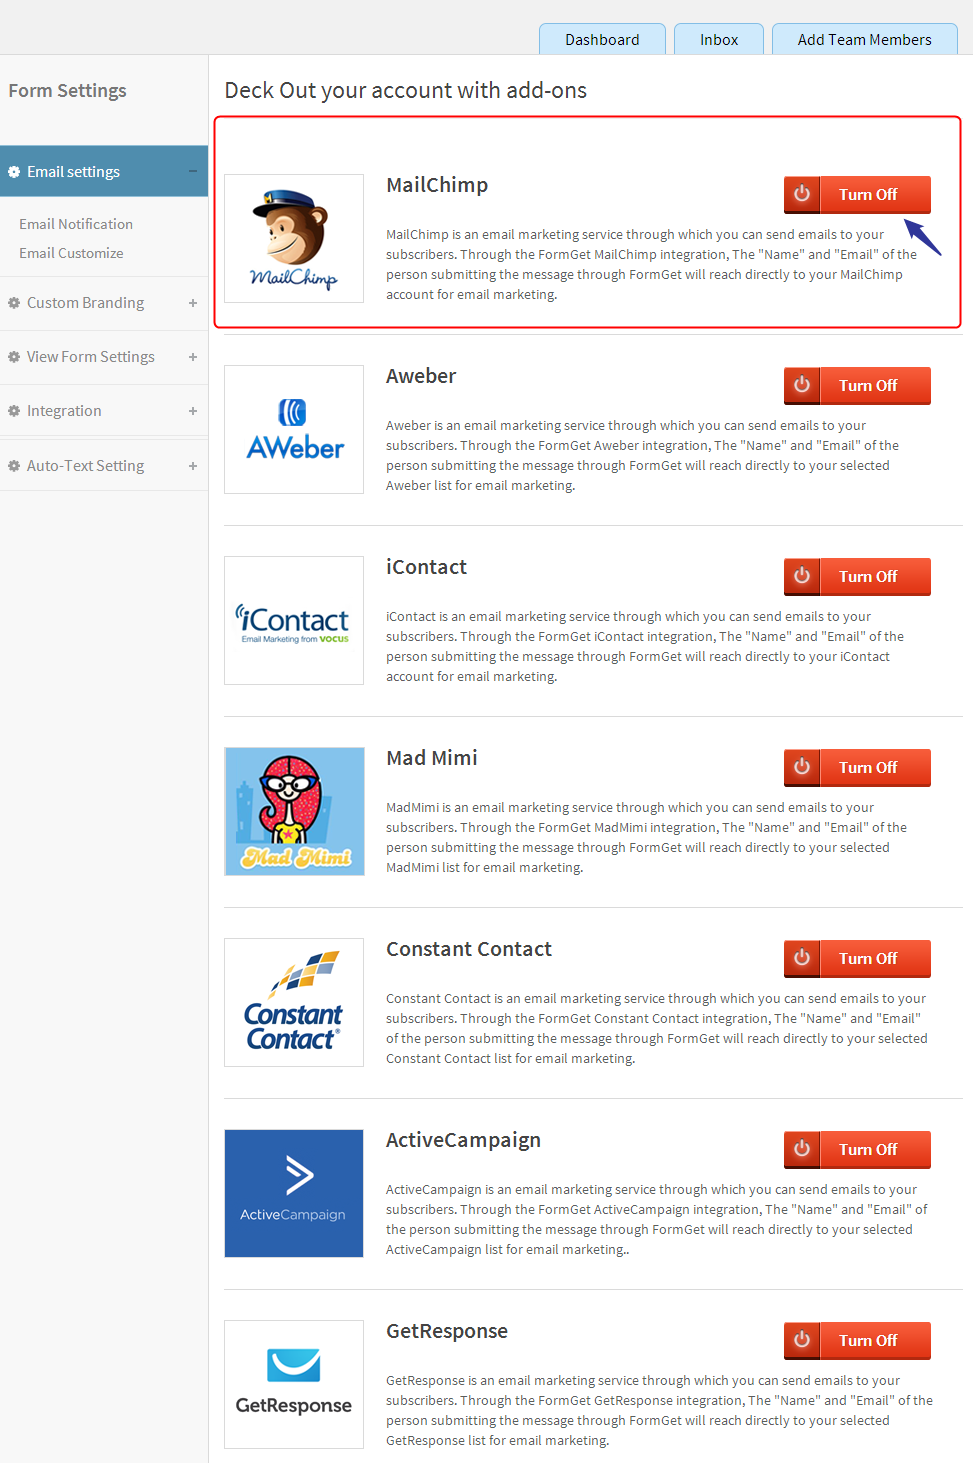
Now you just need to do set the few simple things-
- Just enter your API key of the email marketing service, here MailChimp API key is filled.
- Select your desired signup form from the “please select a mailing” option.
- Map fields of FormGet and MailChimp like email with email and name with name, as you can see in the image and then save it.
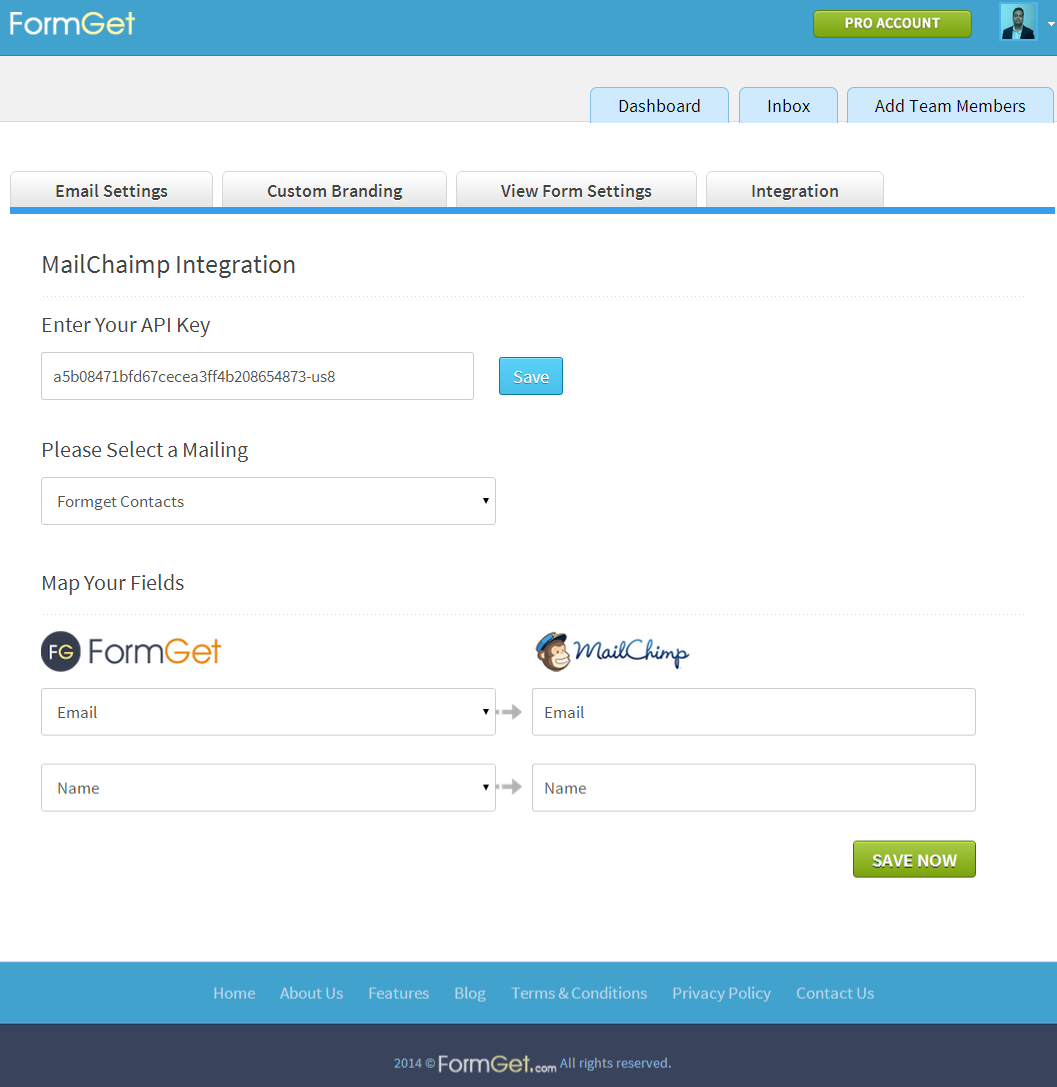
Now, all the leads coming from signup form will stored automatically into the dashboard of your email marketing service and you can use these leads for drip campaigning.
What is the need of Drip Campaign?
The only reason to create drip email is to eliminate the communication gap with your customer. Your customers don’t make an instant decision to buy products from you. They need a sufficient time to think about your product and it’s usage clearly.
So, it’s better to be in touch with them, just to keep them warm up with what’s new going on with your product and services .
The word “Drip” in Drip Emails itself suggests, emails are delivered in a sequence. It’s automatically triggered. Softwares such as Mailchimp, Madmini helps to send auto-responders. Let’s take a look at the stages where drip email is being sent one by one:
- Welcome Email – Sent on Day 0 ……………….(As soon as user sign up)
- Introduction – Sent on Day 1……………………(Promote your product)
- Feature Benefits – Sent on Day 3……………….(Educate about your product)
- Free Webinar (If any)– Send on Day 6…………(Method to give live product details)
- Ask feedback or give offers– 15 day…………….(Re-engage your missed prospect)
- Feature and service updates- 1Month………….(Educate more as required)
Above, are the few basic stages in the drip marketing. It’s just an example, you can set many more as pr your requirement.
Step To Execute in Drip Campaign
- Set Purpose
Before starting drip campaigns, clear yourself, what end results you want from this drip campaign. Just want to inform about the products or services or try to make out the sales.
For example, if you want to make sales, define your product and it’s benefit in a short and simple manner. Include product’s output related image.
Like in our case, as a theme company, whenever we launched a new theme, in the drip email, we use to share preview links of the theme. So that, it gives users a real idea about the website looks and the theme features.
- Engaging Content
While creating drip mail, good content is the name of the game. It should be engaging and should be simple to understand.
How to keep it simple : Words that reflects benefits. If your content is long, break them into chunks. Sometimes, reading the whole mail is not likeable to the user. They just read the headings and bullet points. So, better give powerful heading. Give bullet points that talks about product benefits.
How to keep it engaging: As I said above, the content should be simple. And, if it happens so, it will automatically become engaging. Moreover, it should be connected from the starting till the end line.
Be relevant: There is a big doubt in keeping relevancy in contents. What makes the content relevant? No matter the content is simple, engaging but still where’s the relevancy lying?
Content should be focused on the type of email drip you are creating. For example, if you are creating a drip to educate about product, then, it should not have promotional text.
Targeted user: Make sure that the correct marketing drip is sent to correct user.
For example, if you are an owning an e-store. And a user already make a purchase one of your product. If again, you will sent an email related to that purchased product, then one or the other day the user will be tired of getting unwanted emails. Certainly, he can hit on spam button or unsubscribe you. So, it will make your loss and you will missed a customer by your mistake.
- Good Plan
Keep a separate list of different targeted customer. Plan your email drips, their duration and their frequency.
As mentioned by marketing sherpa, 32% marketers top objective is to segment their email list.
But, there can be some conditions for segmenting the users in the list, important ones are given below:
- Email openers and non-openers
- Segment by date
- Segment by Interest
Why to segment email openers and non-openers users?
When you know who has opened up your mail and who has not, then you can easily follow the one who has not opened. You could maintain a separate list of non-openers and resend mail to them. Keep the time duration factor in mind. Don’t send the same marketing mail frequently! Keep a proper days gap while sending the same mail again and again. Make sure it does not irritate your mail receivers.
Why to segment users by interest?
In general, if you send user-interested content, you will not suffer from “spam or unsubscribe hit” and user will read your email. So, better to maintain a marketing list for segmented user as per interest.
Why to segment users by sign-up date?
Segmenting user according to user-signup-date is important, just to know which lead is extremely new or which one is old. This help you easily differentiate the users and the mails they need to be interacted with according to different level of sales funnel.
For e.g. Just-signup users has to be pinged by welcome mail. So, keeping a separate list of just-signup user will automatically trigger a welcome mail in their mail account.
Similarly, those who have shown interest in the product, promotional drip is the key for them.
Educational drip, Training drip are the important aspects for potential customers or real-time customers. Let’s understand these drips-
- Educational drip: As the name suggest this marketing strategy is about giving product-related information to your clients. It should be very simple to read. No clutter while telling the feature. Like, here you can have an example of educational drip email that talks about collecting payments through online custom form.
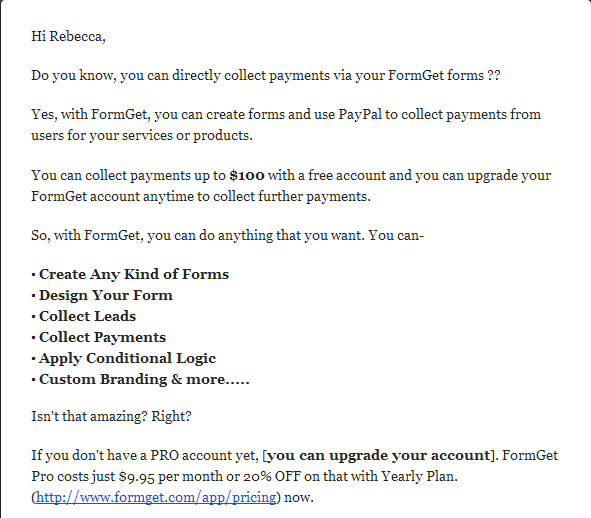
- Promotional drip: It’s entirely meant to highlight your products. But, while doing so, keep in mind it should not include any hype or false information about your product. It should include true benefits, that the user is getting from your product.
- Training drips: These emails are meant for educating your clients like providing them video or audio tutorial related to your product. Like, in our case we have made a drip email for FormGet, where, we have provided video tutorials to our audience, without any cost. Here is the snapshot of email copy:
- Re-engagement drip: It is meant for gaining your audience attention. There may be a possibility when an interested user become out of your reach, just by mistake or accidentally. So just to re-communicate with them again, you can send them a mail with some nice engaging discount offer.
Like, in our case we use to send these emails to our FormGet subscribers every month. You can look at it’s screenshot.
- Competitive drip: As the name suggest, these drips pins your competitor with your product.
Each of the drip plays an important role but focus on one objective that is to make the sales happen or increase the sales opportunity.
You have to plan out the sequence to make it a effective drip campaign The sequence can be like this:
#1 Promotional drip: Start up with your product promotion. It includes welcome message, product introduction message.
#2 Educational drip: Give details about your products, related to it’s features.
#3 Training drip: Provide Educational videos.
#4 Re-engagement drip: Ask for feedback to the already existing customer. Also, make it re-engaging for your missed lead. Offer discounts.
#5 Educational drip: Provide your product’s new features and updates.
#6 Training drip: Give information about how to use product’s new feature.
#7 Competitors drip: Sometimes, you can target your competitor’s product. Show the difference between yours and theirs product. Make it like a warm up email but effective for your conversion growth.
…….. and so on.
Tip: Take care of the time period and frequency of the marketing mails. 3-7 days gap is most trustworthy.
In all, you will come to know, which lead is fresh and which is close to sale and what kind of mails you will trigger to users.
Once you have all done, just sent drip email to users. Then what next? It’s time to track its performance.
Track Metrics
It’s said “No output without numbers”. You need to know how many people have opened your mails and how many have unsubscribed. How many have bounced up, or how many have really engaged. How many have clicked on your links and landed on your page. How many stays there and go through all your contents patiently.
And, after that if you have a well-defined sales page, with proper call to action, product benefits, your sales conversion will entirely depend on it. Whether you will win or loose, your sales page will decide.
Besides, to increase the number of email-clicks you can do certain experiments on your email-subject-line. In-fact, do it assuredly. According to socialquickstarter, 47% mails open just by going through email subject line. You can go through the screenshot below:
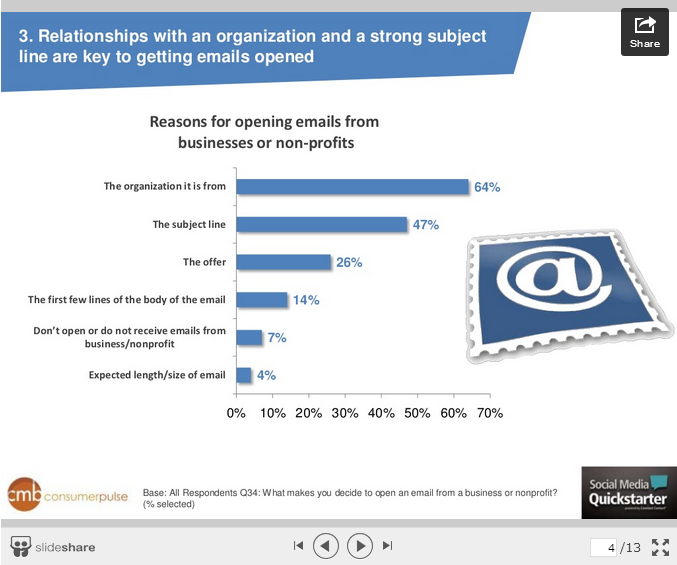
So, there is a good scope of optimizing your email click-through rate by introducing new tweak to your subjects line.
In all, the drip emails need to be on track, to know the output of their performance.
Don’t put the spam impression on your viewers:
By spam, I only mean, the marketing mails you are sending should be interest of users so that they should not trash with out reading it. I would like to share some mind-blowing stats given by socialquickstarter. They clearly explain what percentage of users unsubscribe for what reasons.
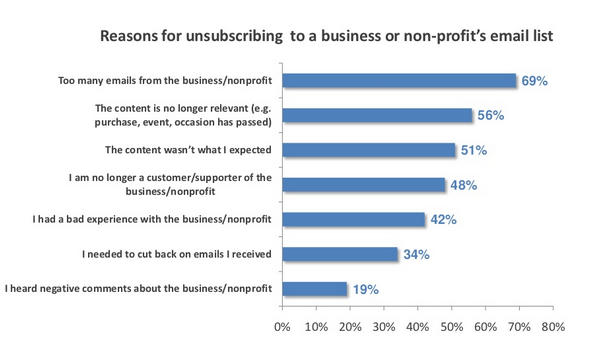
Note: By default, upto .05% mails go to the spam folder.
So to avoid this, just keep a marketing list of targeted audience, who are actually seeking that kind of product.
Number of emails sent
You should contact your clients at least 24 times/year. The maximum can be 30-50, but it should not irritate your leads or clients. It’s said, “the user will start to know about you and your product from the first mail but they show interest to interact with you after fifth mail”.
So, in this respect, you need to increase the frequency of your mails but simultaneously, validity and relevancy of your mails should touch the heights. In other words, sent likeable content to the targeted audience.
Besides, the particular time in which the email is sent also plays a major role in making your drift campaign successful.
In a study, the best timing to sent mail is between 6pm-midnight or 6am-12 noon.
The reason behind is, people find it good time to go through mails at 9 in the morning or between 3-4 pm in evening. Here, you can see a screenshot where stats are given by getresponse.com.
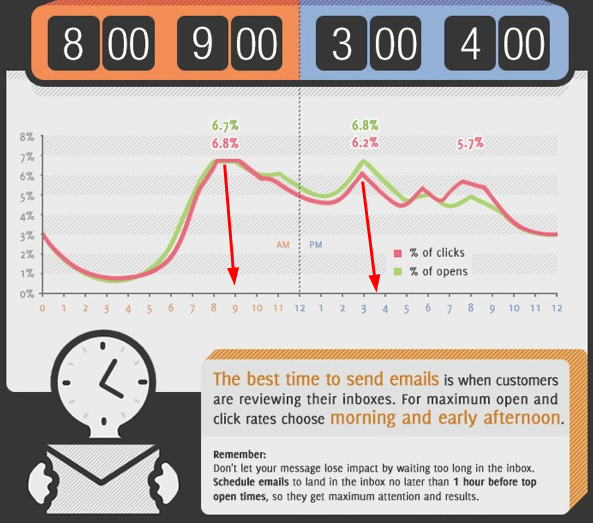
Why people like to open mails in the morning?
In my opinion, audience want to start their day with the useful content. Other reason is, there work time starts at this time, so before kicking-off anything they just want to know what important stuffs they have in their mail accounts.
Why people like to open mails between 3-4am ?
In this time period, people want to overcome their routine work. They want to go through something refreshing and useful content. So, they usually check out their mail box at this time.
What is the best day to send email?
Maximum 19.9% clickthrough rates are experienced on Tuesdays and Fridays. I would like to share the related stat from smartinsights.com in the given screenshot:
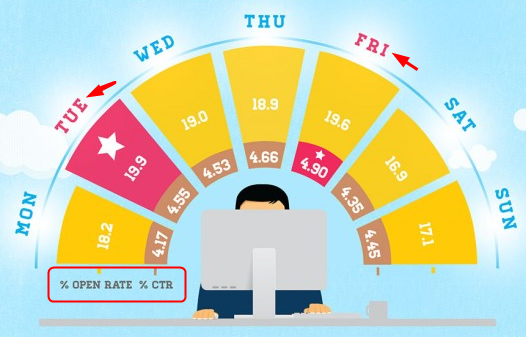
Therefore, it seems Tuesday or Friday is the best day to send mails. You can try campaigns on Monday, or Thursday too. You can do testing and analyse the metrics.
Last but not least, induce trust image in your audience eyes.
Give exact contact details, show your brand
Audience don’t want clutters from anywhere. They don’t want to make contact from that place where they think “things are not open”. They don’t want any risks.
Give proper contact details of your company. That is, tell your company’s address, contact numbers, email-id. An ending signature of company’s owner with his image will going to be effective.
So, above are some of the key-points to make effective email campaign. You have to initiate first, it will gradually will become effective.
Conclusion
Let yourself optimize your business revenue. Treat your customer at different points in sales cycle. It’s the most powerful method. Implement it to grow your sales and to sustain your business.
Have a look at the essentials of drip campaign once again:
- Re-engaging missed audience
- Inviting potential customer
It’s easy, effective, and affordable too.
So, what’s your strategy to drive revenue for your business?
Check out some more informative blogs here –
- FormGet Coding Script Marketplace
- Popup Contact Form – Grom Email Subscriptions