
You agree with the fact that content and design are the two important aspects that together make a good lead generation form that increases the conversion rate. And with an increase in conversion rate you can directly increase your sales. Isn’t it?
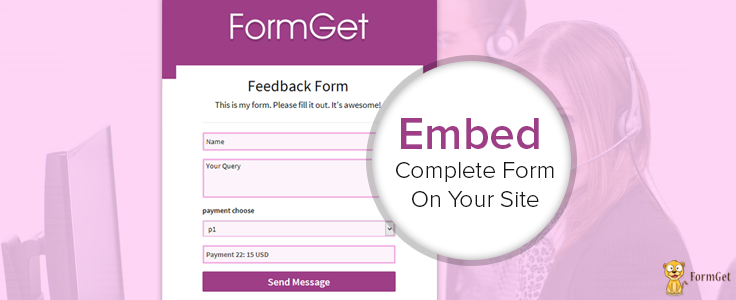
So, FormGet app added a new feature which allows you to embed a fully designed form( Web Forms ) on the pages/posts on your website. You can customize the form design according to your needs to make it more beautiful, moreover, represent as it is, in front of an audience and generate more and more leads.
For that, you need to follow the steps given below-
Step 1 : Login to your FormGet account
Login to your account on FormGet. If you don’t have then create new account and then your form first.

Step 2 : Checkout the form view
Now you will see the forms listed under the dashboard. As soon as you’ll click on the View Form option, you can view the form.

This is how the form looks and you can embed the same on your any of your website either wordpress or non-wordpress.

Now the next step is how will be going to embed the form in your WordPress website, so for that follow the steps depicted below.
Embed Full Form Design On Your WordPress Website
Step 3: Select the form and click on Embed Form option
You need to follow the steps given below in order to embed designed form on your website.
- Go to your forms that you want to embed.
- Click on Embed Form option.

Step 4: Select the form Embed Type
- As soon as you click on the Embed Form option, you will see form embed codes panel. Click on the Embed Full Form sub option, as shown in the image given below.

Step 5: Do the required settings and copy the form iframe code
- Click on COPY CODE option to copy the code, moreover, you can also set the height of your form according to your choice.

Step 6: Where and how to use the form code
You just need to copy and paste this code in any page/post on the website.
Let say, you create a Contact Us page in your wordpress website and paste the code in the text section of the page, as shown in the below image.

After publishing the page, this is how the form appears on your website.

Now suppose you wish you embed the form without header and footer in your website content then you have the option for it , use form plain embed code that will only contain the exact form part. You can use this form embed type in the sidebars that will also take less space.
Embed Plain Form On Your Website
Step 7: Do the required settings and copy the form iframe code
If you want to embed the plain form, without header and footer design, then just copy the code given for Plain Form, as shown in the image given below.

Similarly, paste it under the text section of the page/post on your website.

You can see this is how the plain form appears on your website.

I hope you will definitely use these best web forms feature of FormGet and enhance the conversion rate from your forms.
Generate Leads Directly From Twitter And Facebook By Sharing Forms

Everyone knows social network is a good platform for the engagement of the audience either through blogs, or via some great content and drive huge traffic to your website. Use of social media to explore things is mainly because-
- It is the fast channel to distribute information.
- It is easy to use.
- Broad reach, i.e. brings millions of people all around the world.
- Free and cost effective
Similarly, you can also take the advantage of these social media tool to collect leads.
How?
With FormGet, you can directly share your forms among various social networking sites like Facebook, Google Plus, Twitter, Pinterest etc and collect the user leads. Moreover, you do not need to have any website or any other source for sharing these forms with the audience.

So follow these steps to share your forms and generate more and more leads.
Step 1
You just need to create your form using FormGet in few simple steps.
Step 2
Your form is listed under FormGet dashboard. Now click on the View Form option.

Step 3
Your form is open now.

You can directly share your forms to Facebook, Google plus, Twitter, Pinterest by click on the options given below.

Step 4
You can also write some content in your Facebook status and share with your audience.

Step 5
Now, the form is successfully shared into your social network profile. This is how it looks on your Facebook status.

In a similar way, you can share the forms in other social networking sites. And with every form share, the counter is increased by 1. You can see here, the Facebook like counter gets incremented by 1.

So you can also analyze the popularity of your form with these number of shares. Moreover, your form goes viral among these platforms and get maximum views, which ultimately helps you to collect more and more leads.
Note: You can also watch the video tutorial of the shared information in order to understand better.
Alternative 1 :
Apart from social network you can also share your forms to any website you want by giving direct link.
For that, go to the Embed option given under FormGet dashboard.

As soon as you click on the Embed option, you can see the direct link of your form.
You need to copy this direct link and paste it to any page, post or website wherever you want to share your form.

Alternative 2:
Above all, FormGet also comes with additional feature where you can directly share your forms with your gmail contacts.
You can see the google plus share option appear under FormGet dashboard, which allow to share the forms directly with your saved gmail contacts.
For that, follow the steps given below-
Step 1
You need to click on the g+ share option under FormGet dashboard.

Step 2
You can write the subject and the email message related to your form in the respective fields that you want to send to your friends.

Step 3
You can either select all the contacts or select the respective contacts whom you want to send your form.

The form is successfully send to the respective emails.
Conclusion
Leads are the most crucial element for any business to grow. Once you have the user leads, you can make them aware about your latest products and services and convince them to become your potential customers. I hope you will definitely use this amazing app and take the full advantage of its effective feature. You can also share feedback about this one. 🙂
FormGet- As Email Marketing Tool

Have you ever looked for a single platform where you can find all necessary resources for your business? Like, a nice contact form on your website for user’s convenience. An effective help desk tool for support. Moreover, an Email Marketing tool to reach out users for your latest happenings. To collect payments directly from your Forms.

Wonder why they all are so important for a business exposure?
A Contact Form can allow users to submit their queries which they may have for your services. By displaying an appealing and optimized contact form on just about every single page of your website makes it easy for users to have an interaction.
Having an effective help desk allows you to provide effective customer support service. Like you can solve your customer’s query instantly and get back to them with a proper solution. Moreover, you can delegate the task with your team, each managing a particular segment.
You store leads from your Contact Form, Right?? Now what you are going to do with those data?
Obviously, there must have been an objective behind that for storing the leads. Isn’t it??
With the use of Email Marketing, you can reach out the audience and tell them about your various offers, latest events or just about anything that will give more exposure to your business services.
Till now with FormGet, you have the options of creating Custom Forms, use of integrated help desk. Now within few days this application is too going to work as an Email Marketing Tool.
You will just need to embed all the leads, compose a good sounding email and shoot it to your audience. They will be timely notified about the updates, discounts or whatever you wanna offer them.
Having an effective mailing system will keep users busy on your network and there is a good that they will recommend your services to others as well.
So, with FormGet, you can’t say like it’s only a Form Building app, in fact it’s beyond over a form building tool.
If you have not created a form yet and wanna try this app, start creating your form now.
Data Collection Form Without Website
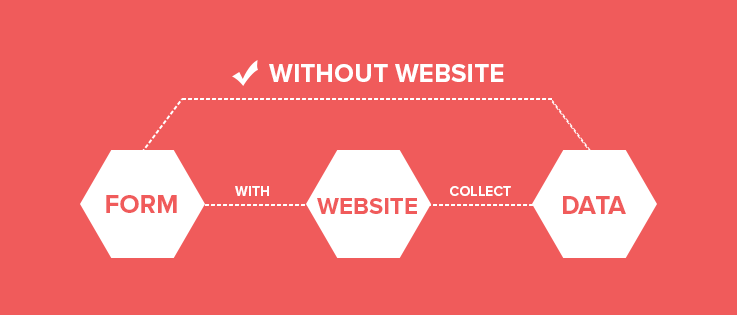
There are people who want to collect data without creating a website. But the problem is they cannot find a solution.
Maintaining website and all coding stuffs are really tough to manage for a normal users but now it’s easy to collect users data without having a website.
FormGet help you to create easy to use data collection forms for collecting users data. Once you create your Form, you can easily view form through Dashboard.
Create Your Form Now - It's Free
A default design template will appear on your Form. You can simply change the style, color, background, fonts of the template from the custom panel options.
Have a look to this FormGet predefined template.

Share your Form and User Collect Data
Once your form is ready, you can directly share the link of your form on other social networks or website of your desire. As you share form on other network globally you can leads start collecting on your dashboard.
Moreover, there are some useful social icons that will appear on the left hand side of your FormGet template. You can directly click on the social icons and share the Form on various social networks.

What make FormGet template so effective?
Managing template is so easy, You can easily customize the Template according to your desire needs.
- You can change the color & header image of your template.
- You can share form link directly across various social media network or other website of your choice.
- You can upload your own logo for self branding.
- You can easily export your collected data via export feature.
- You can collect payments using forms
- You can also redirect users to desired page after form submission.
- Put your website name, contact details and your social information on the footer of data collection form.
Self Branding using Form
You can easily give your branding to the form by setting header & background images. There are some prebuilt templates given in the option which you can use and change the background of the form. Moreover, you can upload your desired image. At last just save your changes.

Conclusion
The reason for writing this post is to tell you how FormGet can make things simple for you with an easy to use interface. Remember, you can turn things around for yourself by just creating a form.
The things which a website can do, the same your form can do. Now there is no need to make a website first to collect user’s data. Instead, create a form & start collecting data of users.
If you really want to start collecting data without a website then these FormGet templates are worth using.
So, do you want to create your website first or wanna use these templates to make things easier for yourself.
FormGet – Joomla Contact Form Plugin

This is our new plugin for J2.5/J3.x which give you ability to customize your contact form with few clicks and to integrate it on your Joomla website.
Step 1 : Download Plugin And Upload It.
- Download FormGet Joomla plugin from here.
- Login to your joomla administration and go to Extension Manager.
- Now browse the plugin from your pc and upload the FormGet plugin as shown in below image.

- Click on Upload and Install.
- You will find the successful message as “Installing The Plugin Was Successful“.
- It means plugin has been installed.

Step 2 : Enable Plugin.
- Enable the plugin before use.
- Go to Plugin Manager and click on cross button as shown below.

- The plugin is now enabled.

Step 3 : Create Your Form And Save It.
- Now click on FormGet Contact Form.
- You will see the plugin window.
- There you will find the option as Create Form Builder in the top bar. Click on it to go to FormGet site.
- Signup and login to your account. You will find the FormGet dashboard, now click on Create New Form.

- Add the fields in your form.
- And Click on Next Step to save the form.

Step 4 : Get The Form Embed Code And Use It.
- After customization go to your FormGet Dashboard, pick exact form and go to “Embed Form” section.

- You will find the form embed options as Embed Sliding Form, Embed Full form.
- Based upon your requirement use the code.
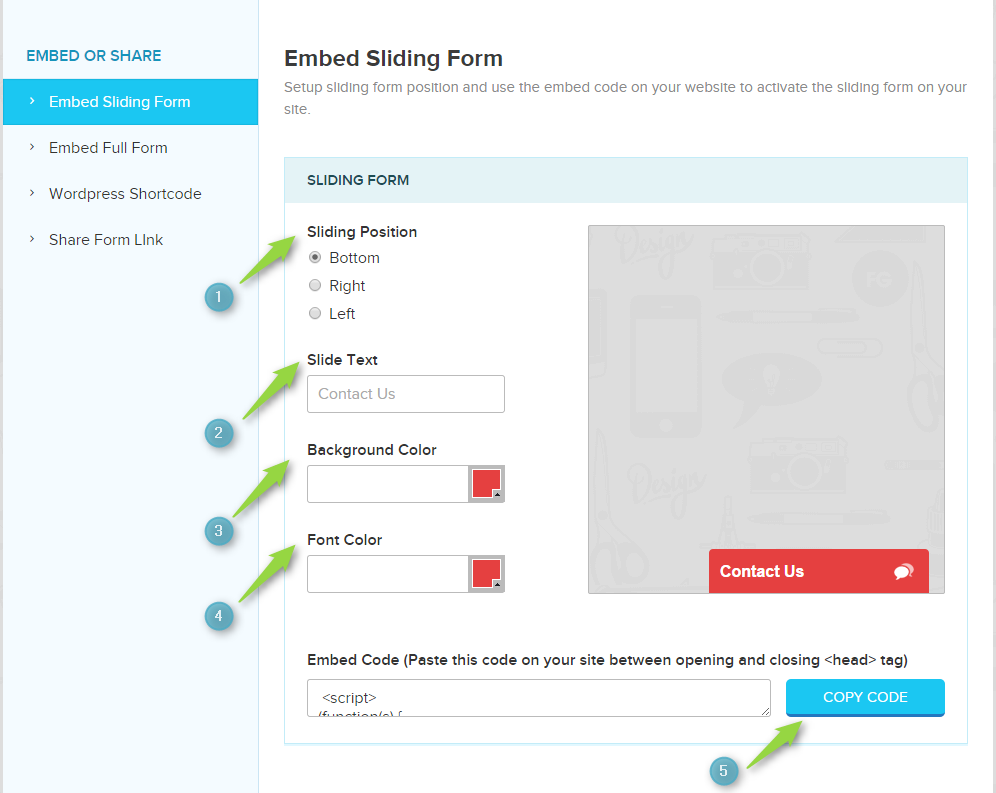
1. Step 4.1 : Use sliding form view to embed.
- Now the go to first option Embed Sliding Form and after setting form preferences copy the code.
- Now go to Embed Code For Tab View section.
- Copy the code there and click on save option.
- View the website page now.
- You may find this output.

2. Step 4.2 : Embed Complete Or Plain Form View.
Now there are two options to embed the from one is complete form view with form header & footer and another is without them i.e. plain form.
So first we will be going to embed complete form view in the joomla article and pages.
#Step 4.2.1 : Embed Complete Form In Articles.
Before that we need to do some settings to enable the iframe code supportable in articles. Follow up these steps:
- Go to Extensions -> Plugin Manager.
- There you will find plugin as Editor – TinyMCE.

- Click on it and under Plugin you will find Prohibited Elements, in that remove iframe and then click on Save and close.

- Now go to Content -> Article Manager -> Add New Article.
- Click on New. An article editor window will open up, under Content , write your content.

- Now get the iframe code from FormGet Contact Form plugin.
- To get the code follow this path Embed Full Form -> Embed Form 1 (With Design Including Header & Footer).
- Copy the code and go back to your article.
- Now in your article you will find the option as Tools -> Source code, paste the iframe code here at the place where you wish to make form appear.
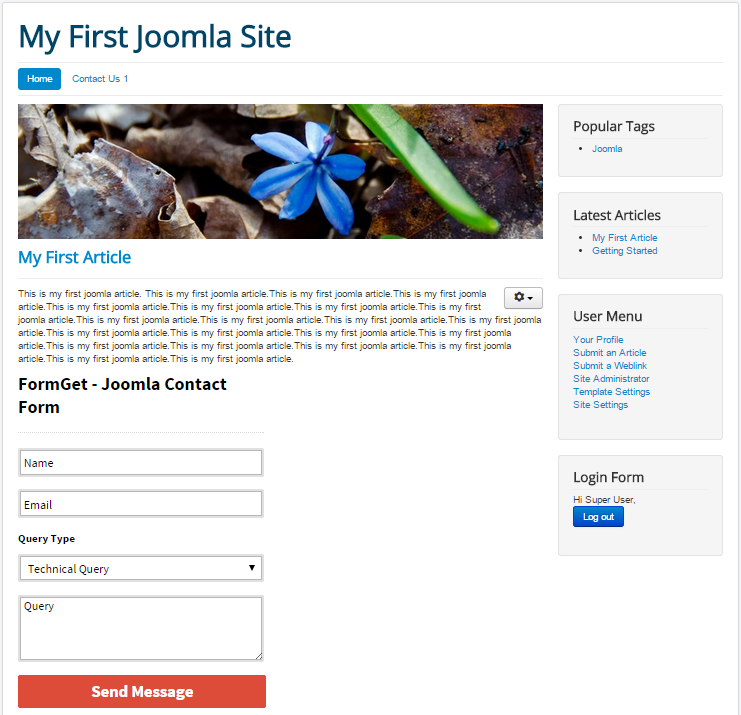
- As soon as you will paste the code you will find that form will start appearing.

- The form output will look like.

#Step 4.2.1 : Embed Plain Form In Articles.
- Like wise you can embed plain form in your article, you just have to get the code of plain form from Embed Form section.
- You may find the form output as.
Hope the above tutorial have helped you to install formget plugin and to embed the form into your joomla website , if you have any doubt and query then feel free to contact us.
Check out following blogs for more updates –
- Email Capture Form: Increase Your Conversion
- Popup Contact Form – Grom Email Subscriptions
How To Optimize Your Contact Form Conversion

Contact forms are something that help you to connect to the visitors coming to your website. An important segment for users when they need any help or want to interact with the website owner. With a simple contact form you have a chance of converting the users into your potential customers.
But are you really converting the users from your contact form?
Most of us neglect the very important thing on the website through which we can transform the conversions. If you are still not sure about the things that can make your form better then the following 7 points will help you.

Keep your form simple, decent and precise. Make users feel like your only objective is to help them.
If you have not created a form yet then you can create your forms using FormGet App.
I hope the above points mentioned in the infographics help you to optimize your form conversions. In case you need any help or suggestions you can post your comments below.
Feel free to embed the above image on your website. It’s good to share. 🙂 Copy the code below.
Steps To Receive Entry on Your Contact Form

After successful registering and creating your form , the next step is to check whether your form is receiving entries or not.
Important point : You can first check your contact form is successfully working or not by making a new entry on your form by itself. Moreover, you get an mail alert with the receive of every new entry.
For that follow the steps given below :
- Login to your FormGet Dashboard.
- Go to your contact form which is listed in FormGet dashboard and click on View Form.

- Your contact form is opened now. Fill all the respective fields and then click on the Send Message button.

- As soon as you click on the Send Message button, the following message appears on the screen.

Custom Branding Extension
Using Custom Branding Extension you will be able to brand your form in your branding and will be able to do more customization in your form design.
- After form submission you receive an mail alert on your desired account. The account will be your registered email id with which you have signed up for FormGet. To change the email id associated with your form you need to have Email Notification Extension Activated in your FormGet account.

- So now you can easily go to your FormGet dashboard to view the received entry and make a reply to it. For that click on Inbox option appear on the FormGet dashboard.

- This how the notification for new entry appears on your FormGet dashboard.

- Click on to it to view the form entry and reply the user from the same window.
You can now conclude from the above steps that your contact form is working properly.
So you can easily embed this contact form on the pages, posts, and sidebar of your website in order to receive an entry from your customers.
The above steps are very simple to use. I hope you will definitely embed the contact form on your website and make your website more interactive.
Embed Sliding Contact Form on WordPress/Non WordPress Website
You can create your form using Pabbly Form Builder, Once you create your form, you need to follow the steps given below to embed tabbed widget (Sliding Contact Form) on your WordPress/Non-WordPress website.
Create Your Form - Try it for Free
After successfully creating your form. You can place it in your website by just simply copying the embed code.
Watch the video tutorial given below
Step #1 : Login To Pabbly Form Builder Account, Get The Embed Code.
- Login to your Pabbly Form Builder account.
- Click on Embed Form option present in your Pabbly Form Builder dashboard.
- Choose first option Embed Sliding Form. Copy the Embed Code by just a single click on COPY CODE button.
Step #2 : Install Pabbly Form Builder WordPress Plugin And Paste The Code.
If you are using Pabbly Form Builder plugin then paste the copied code in the Embed Code section of the plugin, which appears on the Pabbly Form Builder Contact Form plugin dashboard inside the WordPress admin area.

Step #3 : Paste The Embed Code In Non-WordPress Sites.
If you want to directly add it on your website then follow the below step.
Place the embed code just before the end of the head tag in HTML segment of your website.

Step #4 : Form Final Output.
This is how the Tabbed Widget would appear on your WordPress website.
