Nowadays, most applications available in the market tend to have date and time associated data in it. If the application is not used just in a single location, then you likely have to deal with the date & time manipulation functionality in your application to synchronize everything according to the different timezone. But, managing date & time definitely adds some complexity in your system as you always have to remember too much calculation to properly adjust dates. So, these kinds of time zone conversion routines are a bit of a pain to use.
Now, you might be wondering how you can automate this with ease?
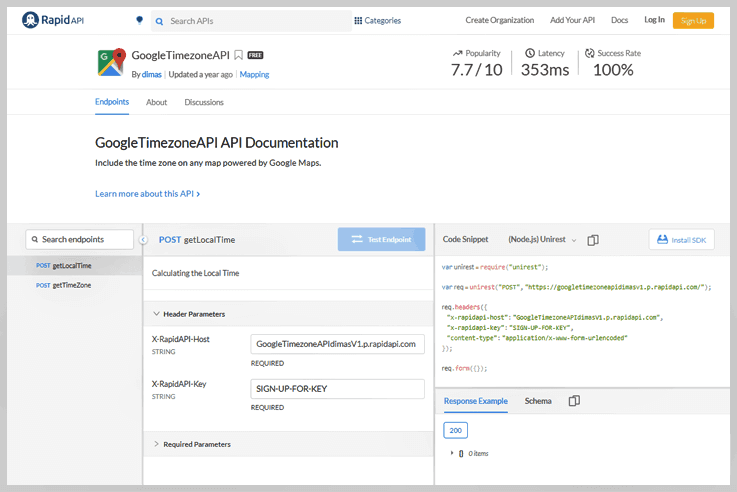
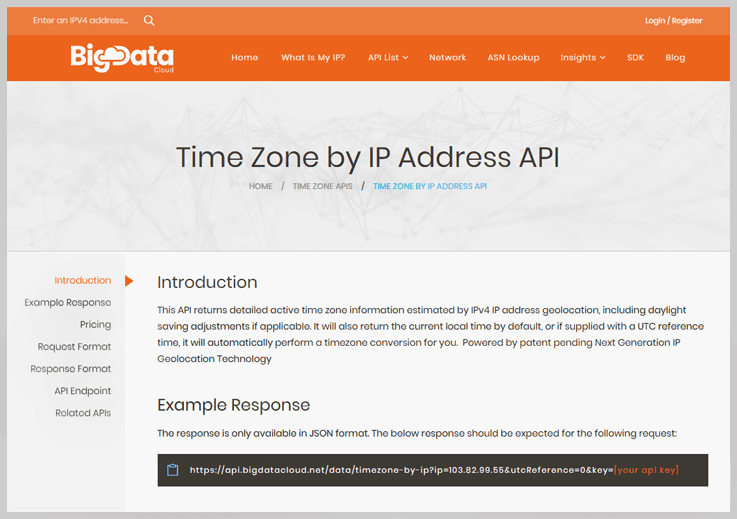
Don’t worry, we spent several weeks looking at over dozens of time zone API’s to determine which one makes dealing with multiple time zones easy and simple. On that basis, we created a list of Best Google Timezone API Services for you. Have a look at them, & try the best one according to your requirements & budget.
Google Timezone API

5 Best Time Zone Converter API Services 2022

Nowadays, most applications available in the market tend to have date and time associated data in it. If the application is not used just in a single location, then you likely have to deal with the date & time manipulation functionality in your application to synchronize everything according to the different timezone. But, managing date & time definitely adds some complexity in your system as you always have to remember too much calculation to properly adjust dates. So, these kinds of time zone conversion routines are a bit of a pain to use.
Now, you might be wondering how you can automate this with ease?
Don’t worry, we spent several weeks looking at over dozens of time zone API’s to determine which one makes dealing with multiple time zones easy and simple. On that basis, we created a list of Best Time Zone Converter API Services for you. Have a look at them, & choose the best one according to your requirements & budget.
Time Zone Converter
4 Best API Services To Convert Central Time To Eastern Time 2022

Nowadays, most applications available in the market tend to have date and time associated data in it. If the application is not used just in a single location, then you likely have to deal with the date & time manipulation functionality in your application to synchronize everything according to the different timezone. But, managing date & time definitely adds some complexity in your system as you always have to remember too much calculation to properly adjust dates. So, these kinds of time zone conversion routines are a bit of a pain to use.
Now, you might be wondering how you can automate this with ease?
Don’t worry, we spent several weeks looking at over dozens of time zone API’s to determine which one makes dealing with multiple time zones easy and simple. On that basis, we created a list of Best API Services To Convert Central Time To Eastern Time for you. Have a look at them, & try the best one according to your requirements & budget.
Convert Central Time To Eastern Time

4 Best API Services To Convert UTC To Local Time 2022

Nowadays, most applications available in the market tend to have date and time associated data in it. If the application is not used just in a single location, then you likely have to deal with the date & time manipulation functionality in your application to synchronize everything according to the different timezone. But, managing date & time definitely adds some complexity in your system as you always have to remember too much calculation to properly adjust dates. So, these kinds of time zone conversion routines are a bit of a pain to use.
Now, you might be wondering how you can automate this with ease?
Don’t worry, we spent several weeks looking at over dozens of time zone API’s to determine which one makes dealing with multiple time zones easy and simple. On that basis, we created a list of Best API Services To Convert UTC To Local Time for you. Have a look at them, & choose the best one according to your requirements & budget.
Convert Utc To Local Time
What are the limitations of uploading documents using Google Forms?

Even if you are a recruiter who needs to get all applicants’ resumes or a teacher who wants to collect students’ homework assignments, you all require a file uploading button in your form. Using this option, your respondents can easily add the document to their form during submission whether it is resumes, cover letters, photos, spreadsheets, and more with form entries.
File Upload Option in Google Forms
Basically, Google Forms is a good choice for users if they want to enable the file uploading option for form submitter. With it, users can easily upload attachments like document, presentation, spreadsheet, drawing, PDF, image, video and audio files in forms. But when you create a form with a file upload query, you need to consider several things like the form owner should have enough storage space in his/her Google Drive and respondents need to be signed into their Google accounts for responding.
Some of the limitations of Google Forms include:
- It doesn’t give permission to upload folders in the form so you can upload only one file at a time.
- Only signed-in users can upload files because the responses are saved in Google sheets.
- Its maximum file size limit is 10MB per form. Nevertheless, it includes the maximum cumulative options for submission like 1GB, 10GB, 100GB, and 1TB that can be selected from the settings.
- The uploaded files required to have different names for quick sorting (the form owner can specify how exactly the files should be named).
If you have just started, Google Forms is the best solution for you to collect information from many people through uploading fields. But if you want to collect unlimited files and media through your online forms then you can switch to Pabbly Form Builder. With this, you can handle unlimited files and makes your complications of file uploading easier.
Steps for uploading files in Google Forms
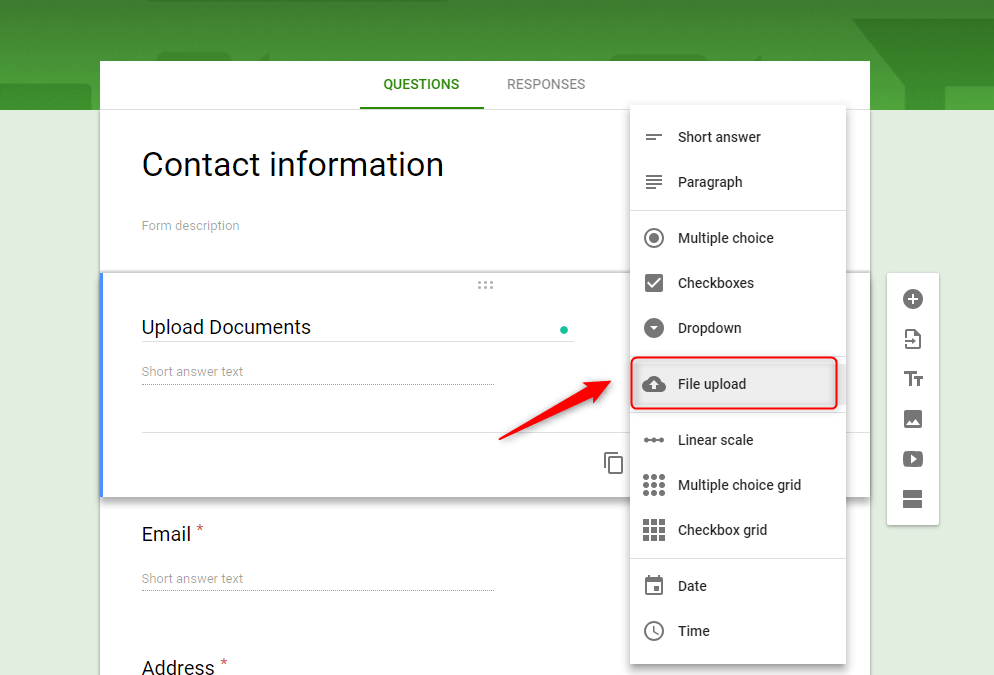
Step1: As a form creator, all you need to do is to create a form as usual and enter the necessary details like name and description. After that, you have to select the ‘File Upload’ option from the drop-down menu to add the upload field in the form.

Step 2: Click on the drop-down menu and select the File Upload option from the question type.
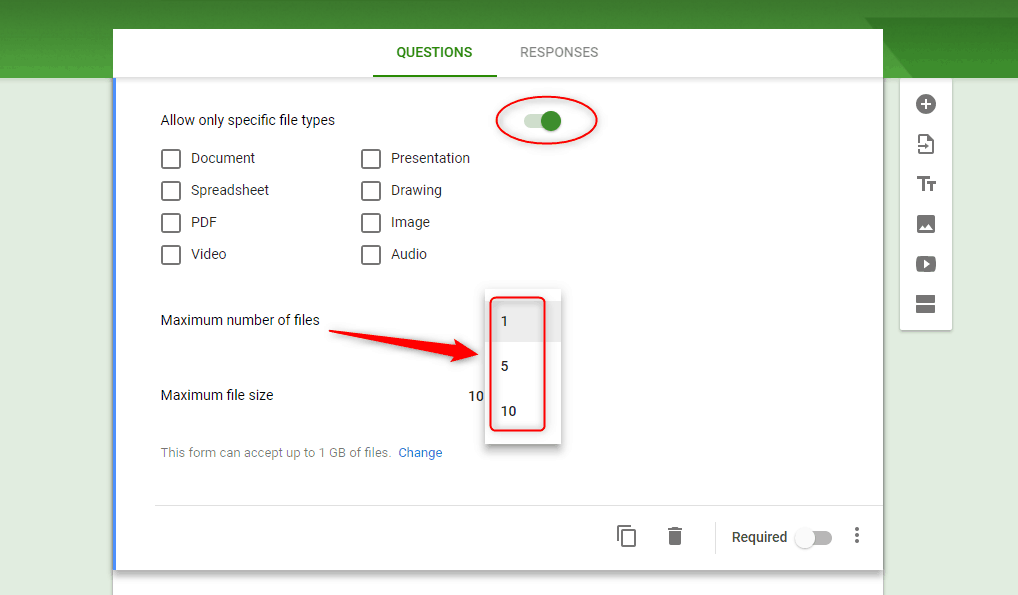
Step 3: Inside the file upload question, you’ll find several options such as – specific file type, max number of files, and max file size. You can select the specific file types by toggling the switch of ‘Allow only specific file types’. Also, you can choose the maximum number of files that a user can upload at once.
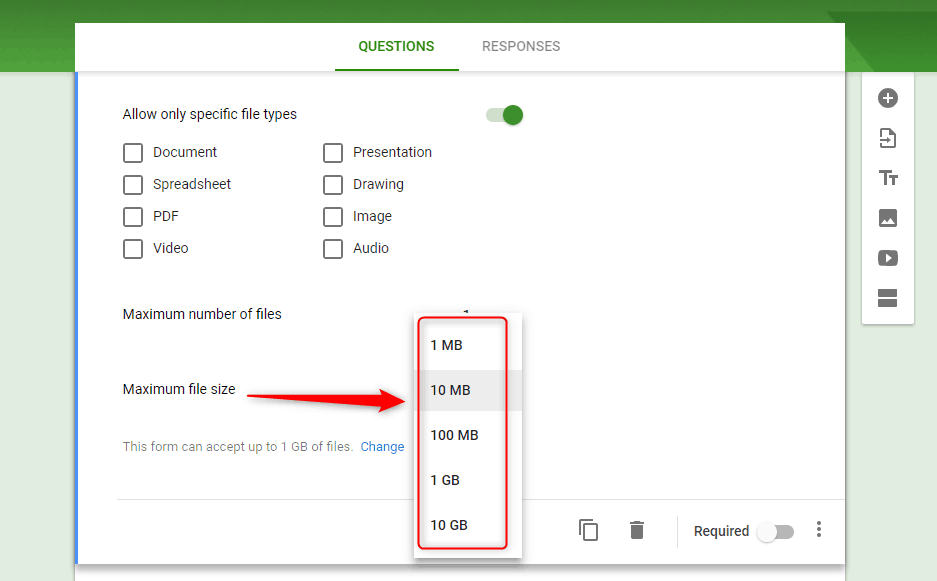
Step 4: In the ‘File upload’ parameters, maximum file size (from 1 MB to 10 GB) options are available. So, you can determine the maximum file-size up to which your Google Forms can continue collecting attachments.
Step 5: Once the button is added, your respondents will be able to upload their files to the form. After that, you can view your form by clicking the eye-shaped preview icon button available at the top-right corner.

Let’s see how you can add file upload option into your form via Pabbly Form Builder-
Here’s a guide on how you can build your own File Upload Forms in a few minutes via Pabbly Form Builder.
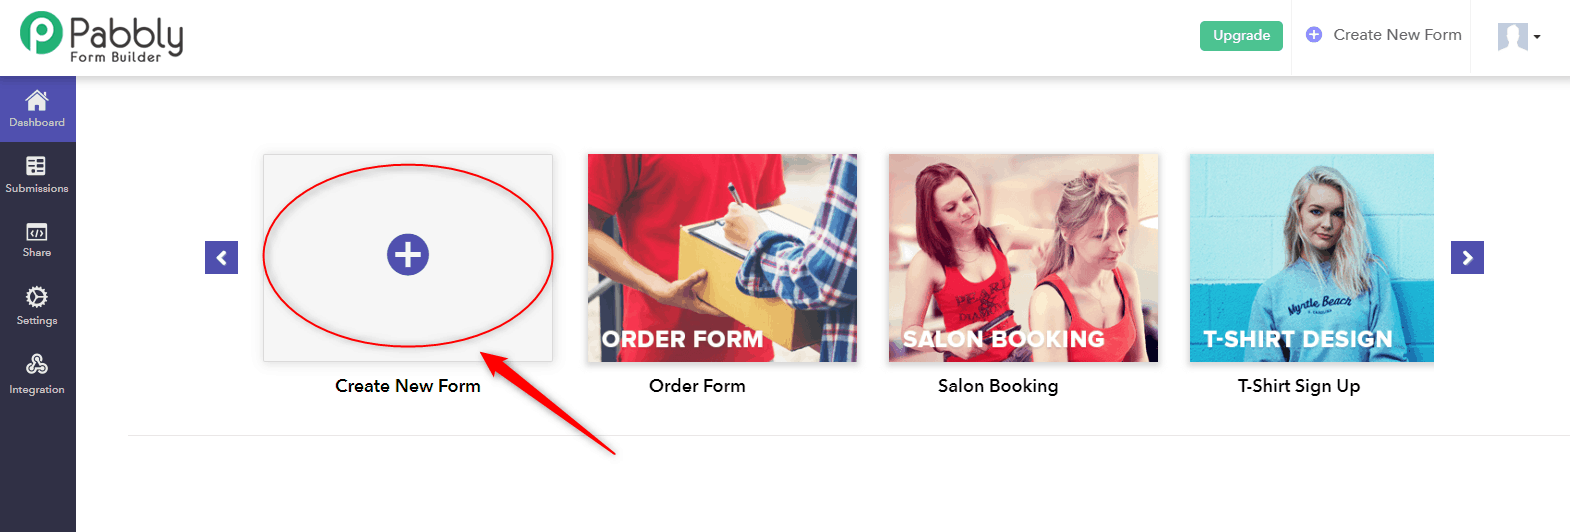
Step 1: Create your form by clicking the plus (+)/create new form option. Also, you can edit the pre-built templates as per your requirements.
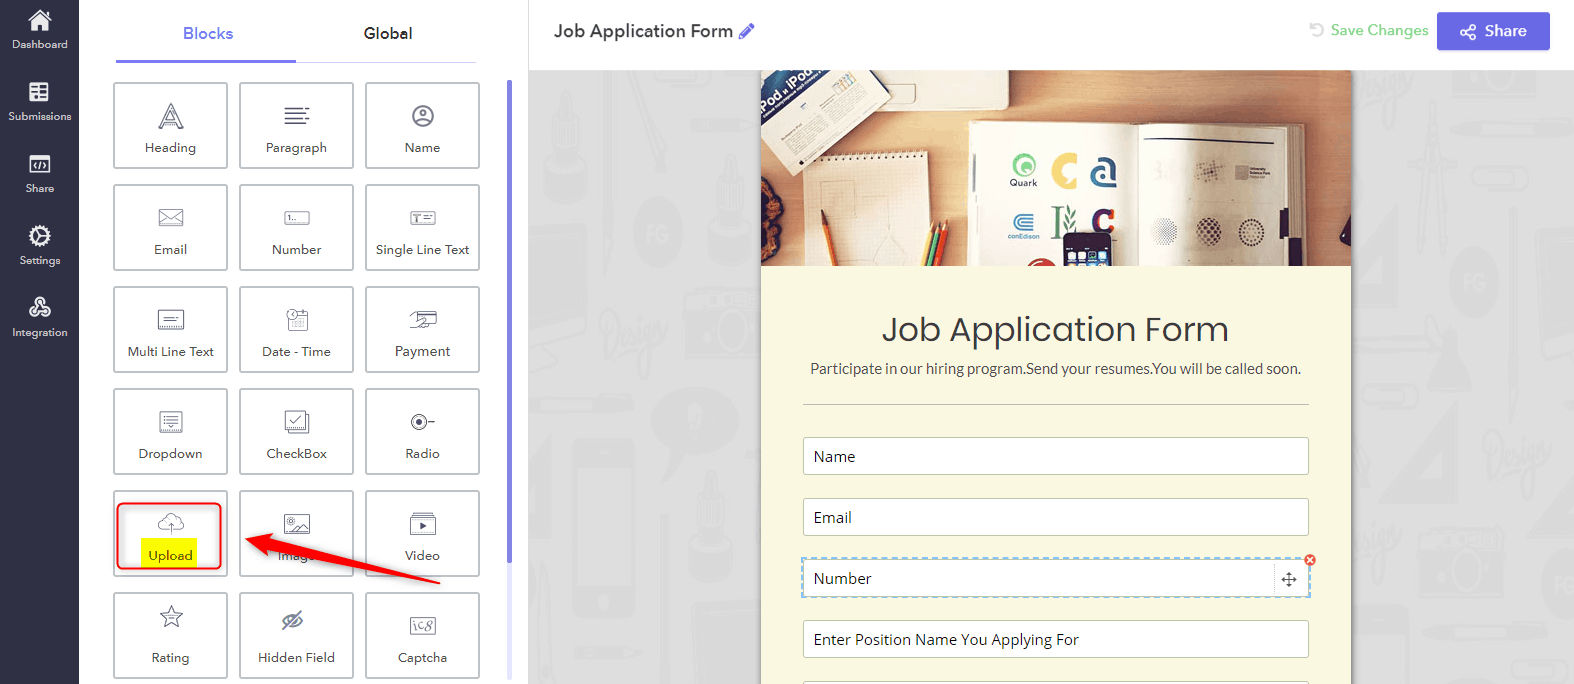
Step 2: After adding any question to your form you can select the ‘File upload’ option to enable the user (form submitter) to upload attachments.
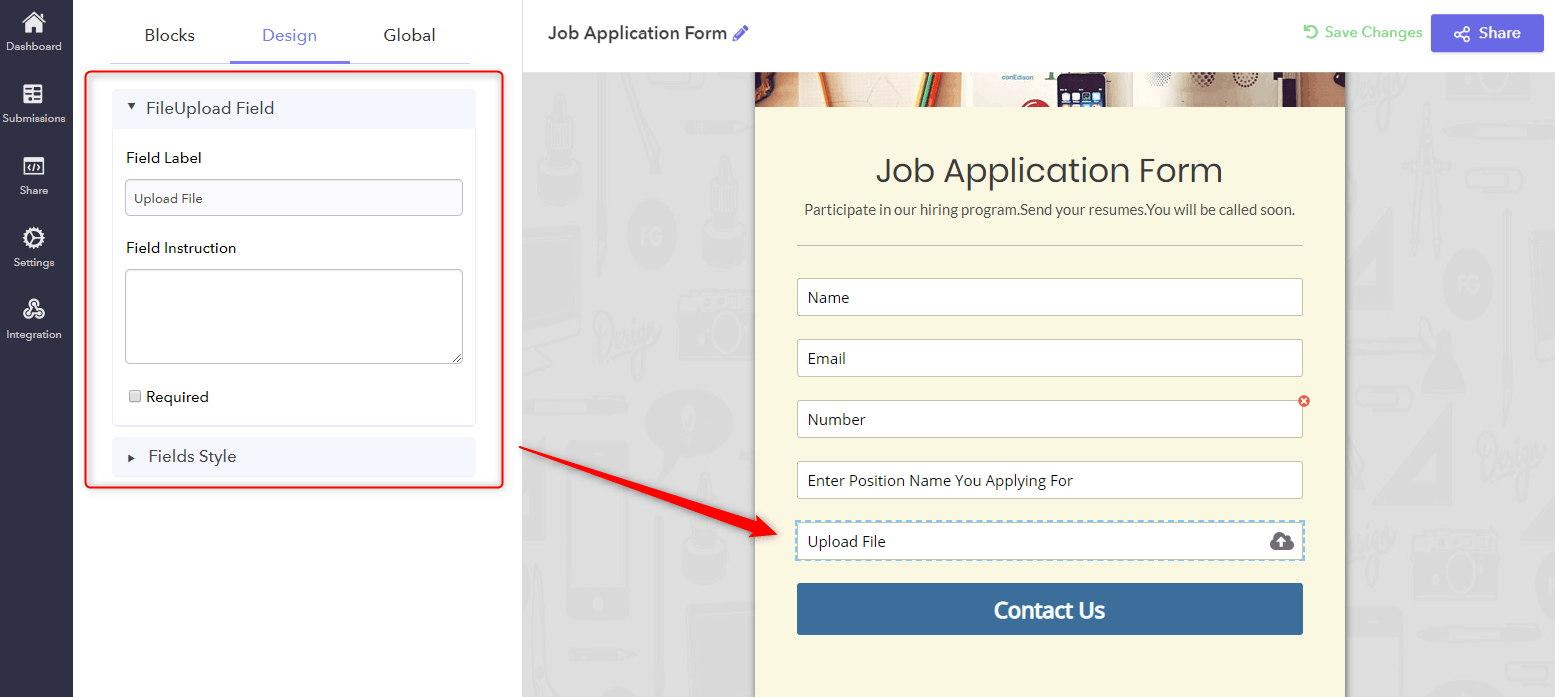
Step 3: Next, when you click on the upload field section, multiple customization options will get appear. Using this section, you can easily design the form fields and drag them to rearrange the order on your form.
With Pabbly Form Builder, you can easily add upload field functionality in your form in just 3 simple steps without any complications. And it lets your users upload unlimited files along with their form submission.
Conclusion
Hopefully, the suggested implementation gives the client a lot of flexibility to upload files in forms. You can include one or multiple file upload buttons in your web forms and receive files from anyone whether it’s big or small files.
If you are looking for a way to quickly create forms with the upload field then Pabbly Form Builder is the best bid for you. It gives an easy way to manage files and ensure safekeeping for your files.
You May Also Like To Read:
- How to create dynamic questions in Google Forms?
- How to track Google Forms submissions in Google Analytics?
What are the good alternatives of Google Forms with a file upload option?
We all know that the “free of cost” Google Forms have delighted us at first due to many reasons like its logic threading functionality, unlimited free forms, and responsiveness. But as soon as we encounter its drawbacks, it must have taken us aback.
Believe it or not, but this free platform restricts you with many important features such as limited design customization, lack of SSL security, conditional logic, etc.
Out of this list, one such limitation of Google Forms is the restricted file upload option. It allows you to upload files from 1 MB to 10 GB only. So, you can not upload more than this.
Further, for uploading files to Google Forms, you need to perform a lot of workarounds that involve complicated scripts and other methods.
Now, as soon as you come across these drawbacks, it must have taken you aback from using Google Forms. So, you must be wondering how you can allow your website visitors to upload more than 10 GB file attachments to your forms, that too very easily.
Is there a better alternative that can help you to collect files from your form?
Now that you have decided to get over the Google Forms, fortunately, there are a handful of pretty great alternatives to it. And, they offer many great options for file upload that you can try. The one best alternative of it would be Pabbly Form Builder. It is a sophisticated and more focused form builder that offers premium features like unlimited file upload, submissions, etc, that a free platform like Google Forms just can’t.
Pabbly Form Builder
Pabbly Form Builder is the only form builder that does not restrict you to use any of its features. It is the cheapest and most effective form creator that offers features like unlimited submission, payment collection, etc.
Yes, you heard it right!
Pabbly Form Builder is an inclusive tool that comes with great file upload capabilities. Unlike Google Forms, it does not restrict you to upload files by superimposing limits on it. It allows your clients to upload unlimited files with any size as many times as they want.
Let’s understand how Pabbly Form Builder stands out from others.
What sets it apart??
There are a lot of reasons behind calling Pabbly Form Builder the best tool for providing file upload option. Some of the functionalities of this alternative to Google Forms involve:
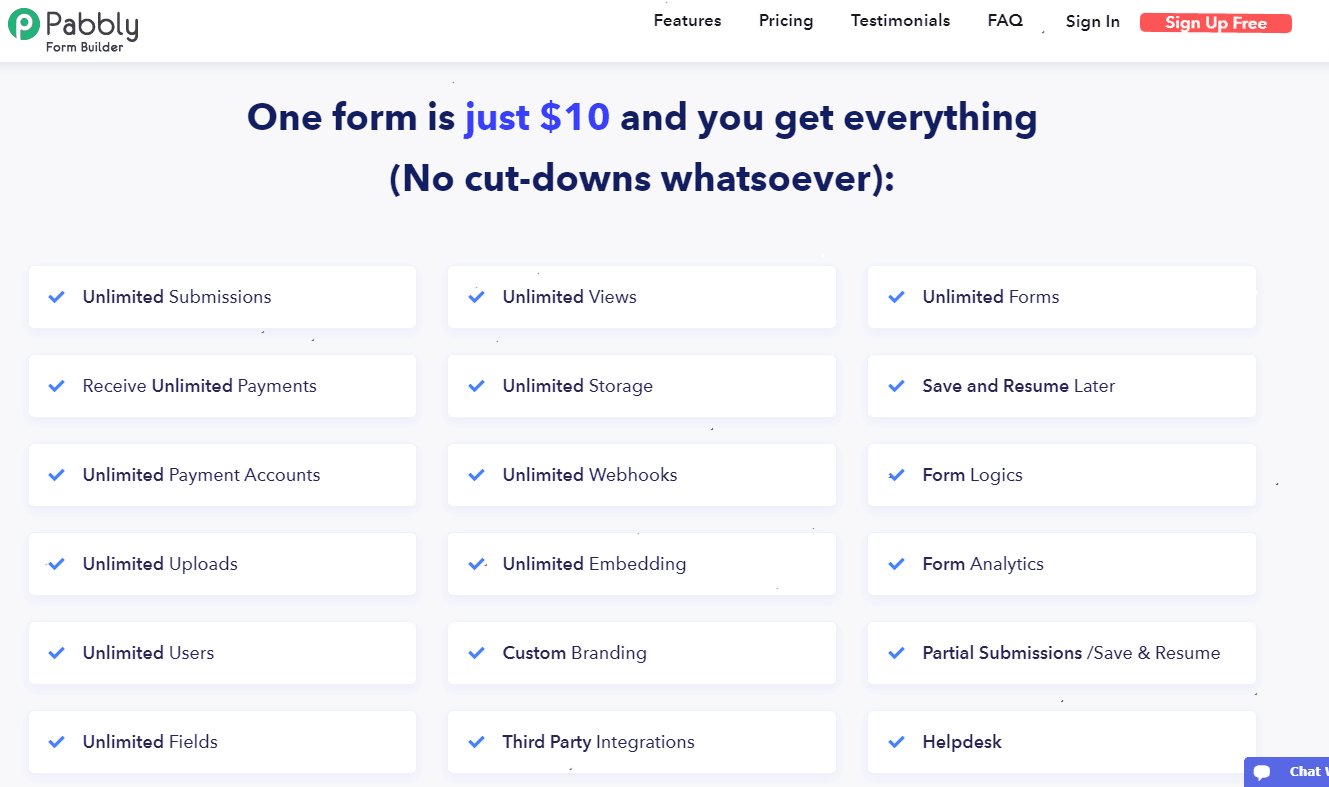
- Unlimited File Upload: There are no limitations to the size, number, and type of files that can be uploaded on a form. This gives you the flexibility to receive as many files as you want on a form.
- Anyone Can Upload Files: While Google Forms has a file upload option, it still requires anyone completing your form to be signed in to a Google account. This leaves out those who may not have a Google account and introduces a barrier to getting answers from your respondents. But, with Pabbly Form Builder, your clients do not require to sign in for uploading files.
- Move Files To DropBox: Pabbly Form Builder allows you to actually move the files from its database to your DropBox account.
After reading all these, you should be more than ready to create your first form with a file upload option with Pabbly Form Builder. But, how can you allow your visitor to do this?
How you can allow your visitors to do this?
Pabbly Form Builder supports uploading documents and files in several formats. You can find the file upload feature directly in the form builder’s dashboard. It allows you to add fields to your forms so that you can enable your users to upload any kind of file using it. Further, you can specify some particular format for which you want files to be uploaded into your forms. Once the files get uploaded, they get stored safely within Pabbly Form Builder’s database and you can access them at any time.
Further, it allows a user to upload images, docs, etc. through your forms. Besides this, different file extensions allowed to upload are jpg, gif, png, tif, doc, zip, pdf, rar, docx, ppt, mp3, mp4, mov, and flv.
Apart from this, Pabbly Form Builder enables your clients to upload an unlimited number of files without superimposing any limit on uploads.
Let’s see how you can add file upload option into your form via Pabbly Form Builder-
Step 1: First, you need to create a new form or you can also try one from the plethora of beautiful pre-built templates. Also, you can edit these templates as per your requirements.

Pabbly Form Builder provides you with plenty of design tools that you can use to customize your form inside the dashboard.
Step 2: Here, you can find & add the file upload option to your form from the “Blocks” tab on the left. Also, you can insert headings, dropdown, video, image, captcha, radio, etc by using its drag & drop editor.
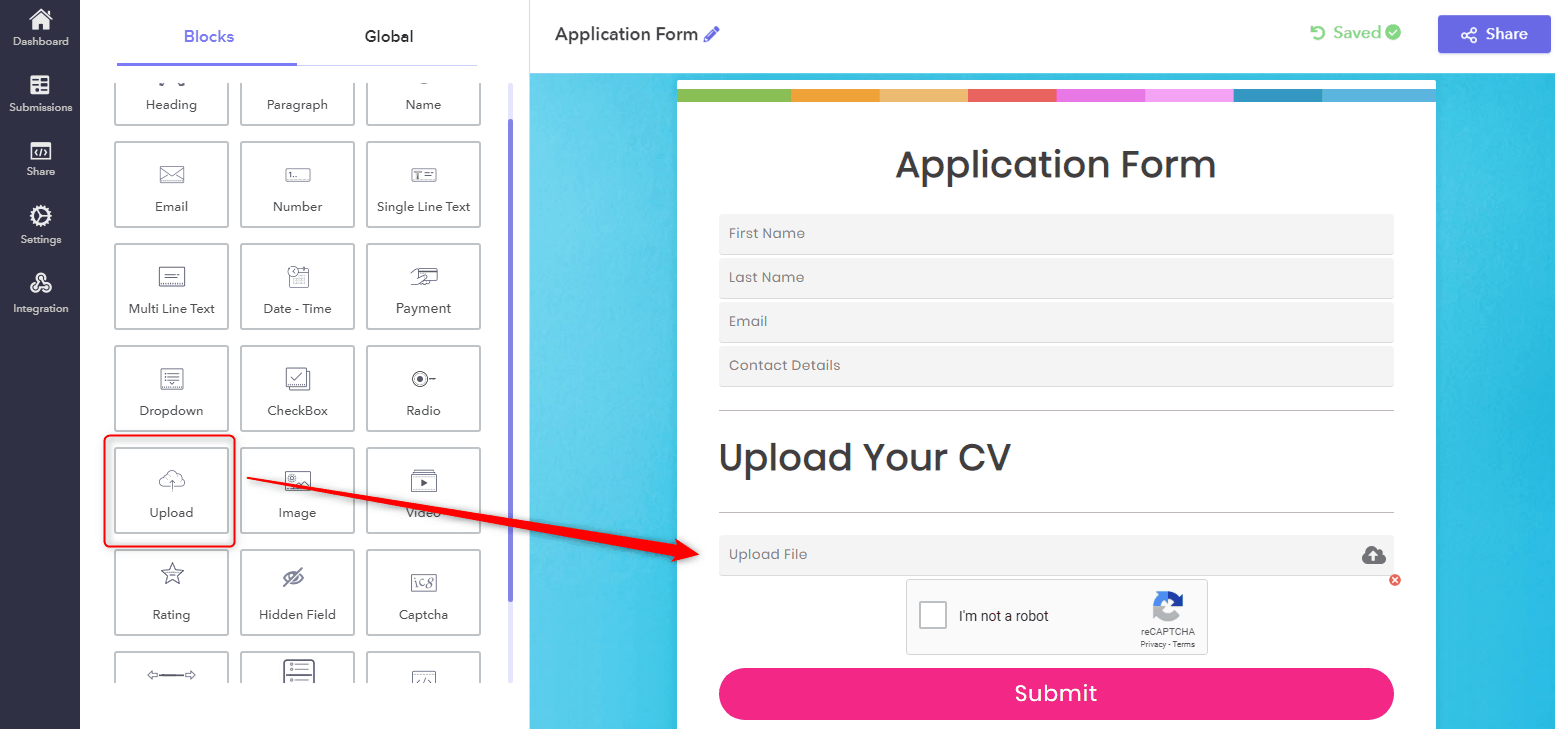
Step 3: Next, you can set up & customize the file upload field using the “FileUpload Field” section. Further, you can also click on the form fields and drag them to rearrange the order on your form.

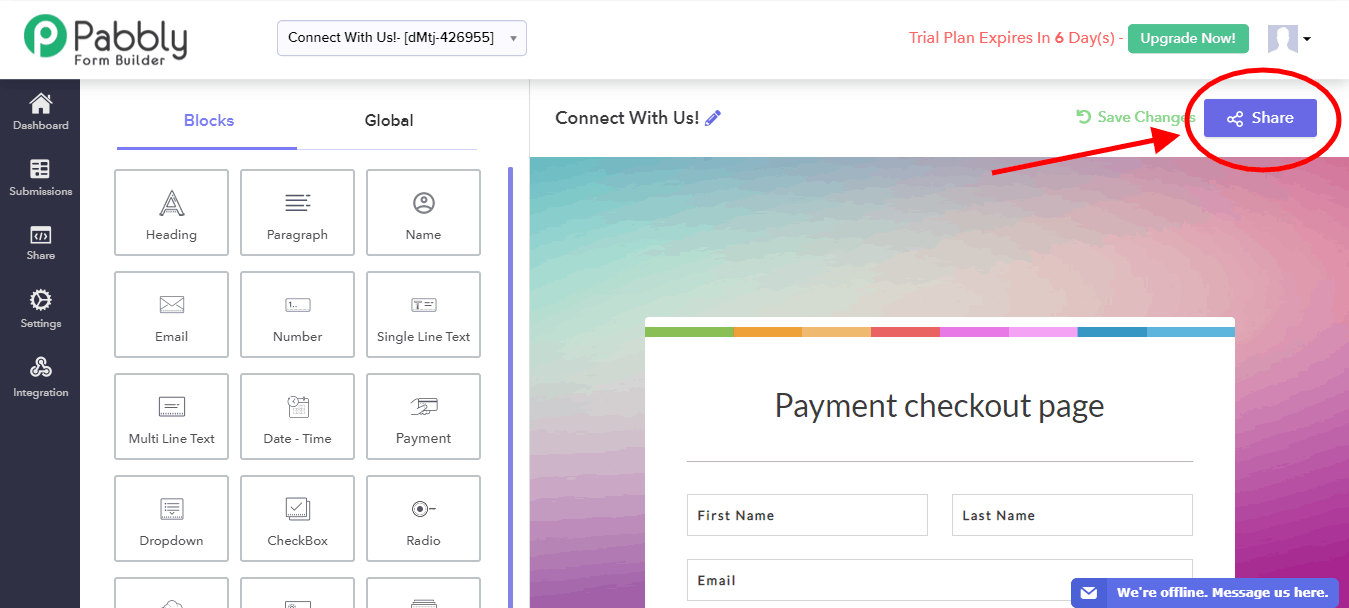
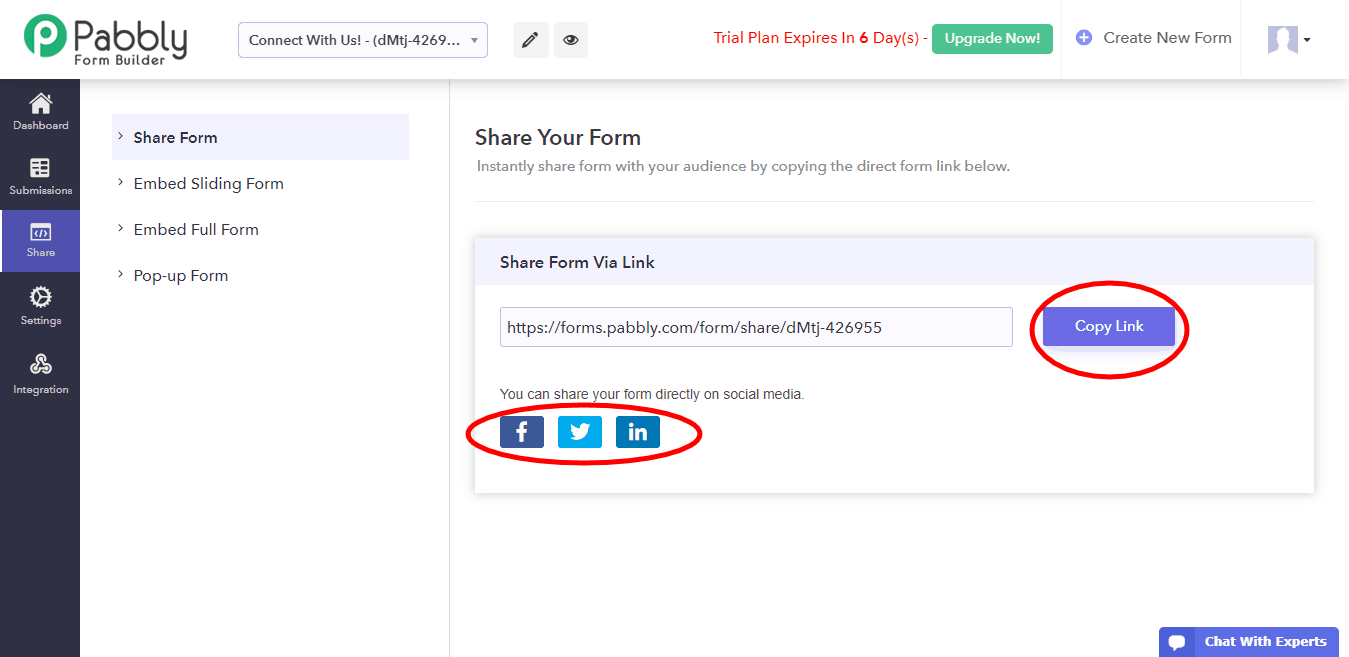
Step 4: After adding all the required fields into your form, you can save it for further use. Now, to share this form with your users, click on the “Share” button on the top right corner of the dashboard.
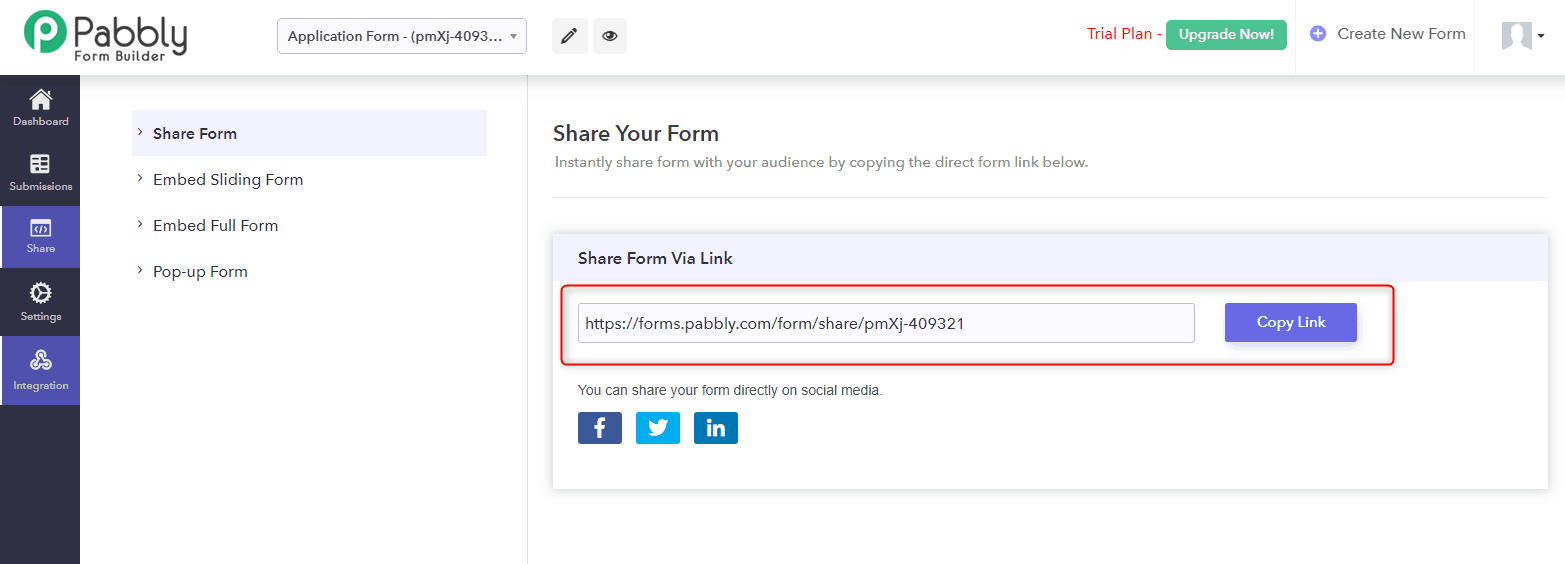
Step 5: In addition, it offers 4 types of form embedding options for sharing form: Direct Sharing, Sliding Form, Full Form, and Pop up Form. Besides, you can share the link directly on Facebook, Twitter or LinkedIn with your customers.
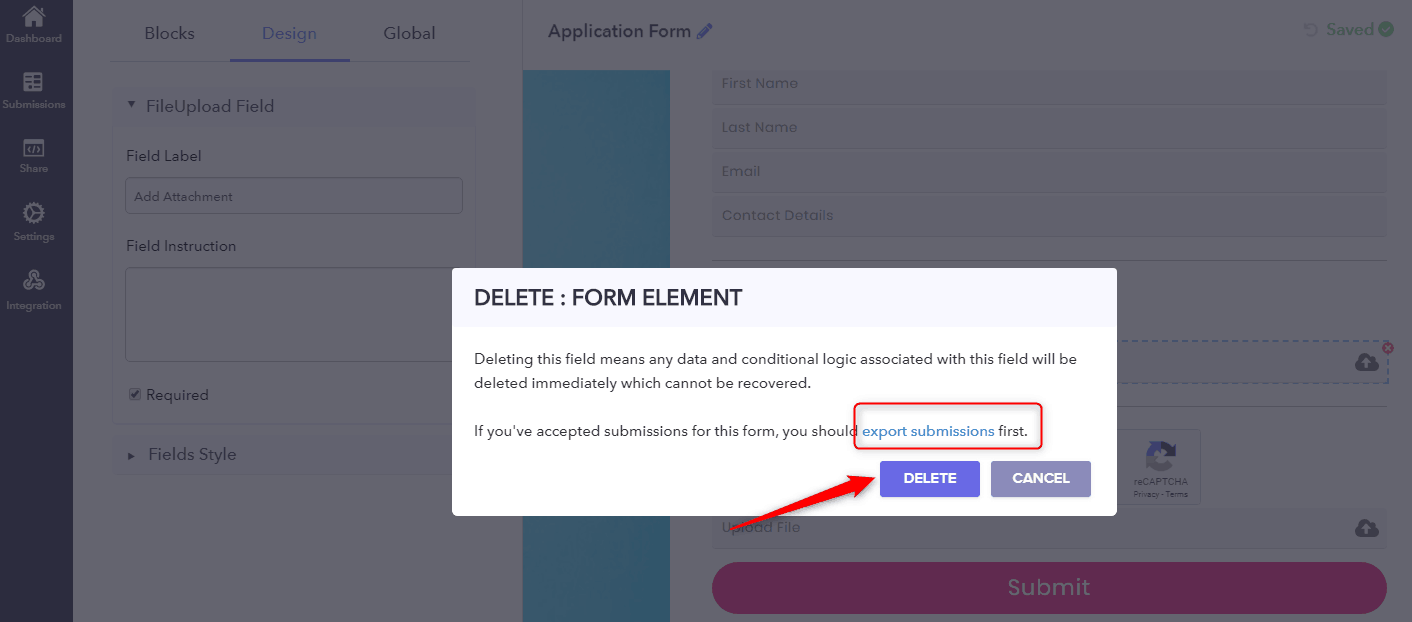
Step 6: You can easily delete the file upload option. But, make sure that if you have accepted any submission for this form, you should export submissions first.
How to view the submission & uploaded files?
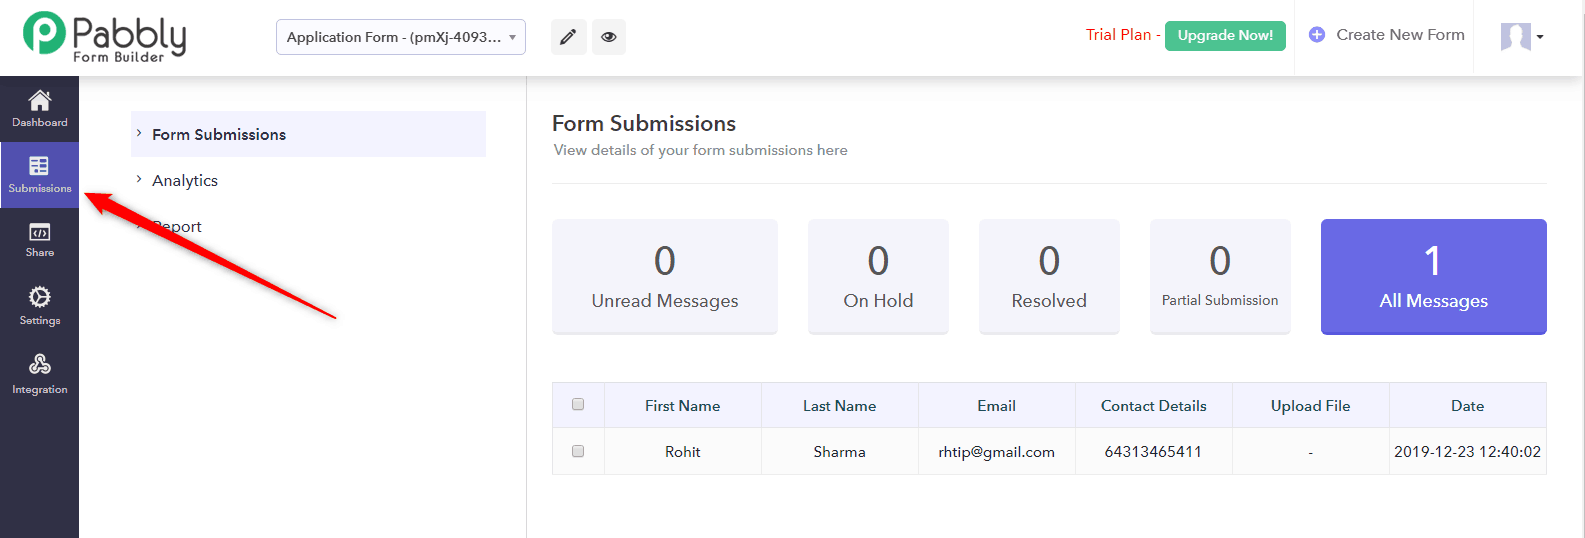
You can view the submissions directly from the “Submission” option available at the left-hand side panel in the dashboard.
Now, you can download the uploaded files & submissions directly from here. Besides this, you can download them into PDF format for further use.
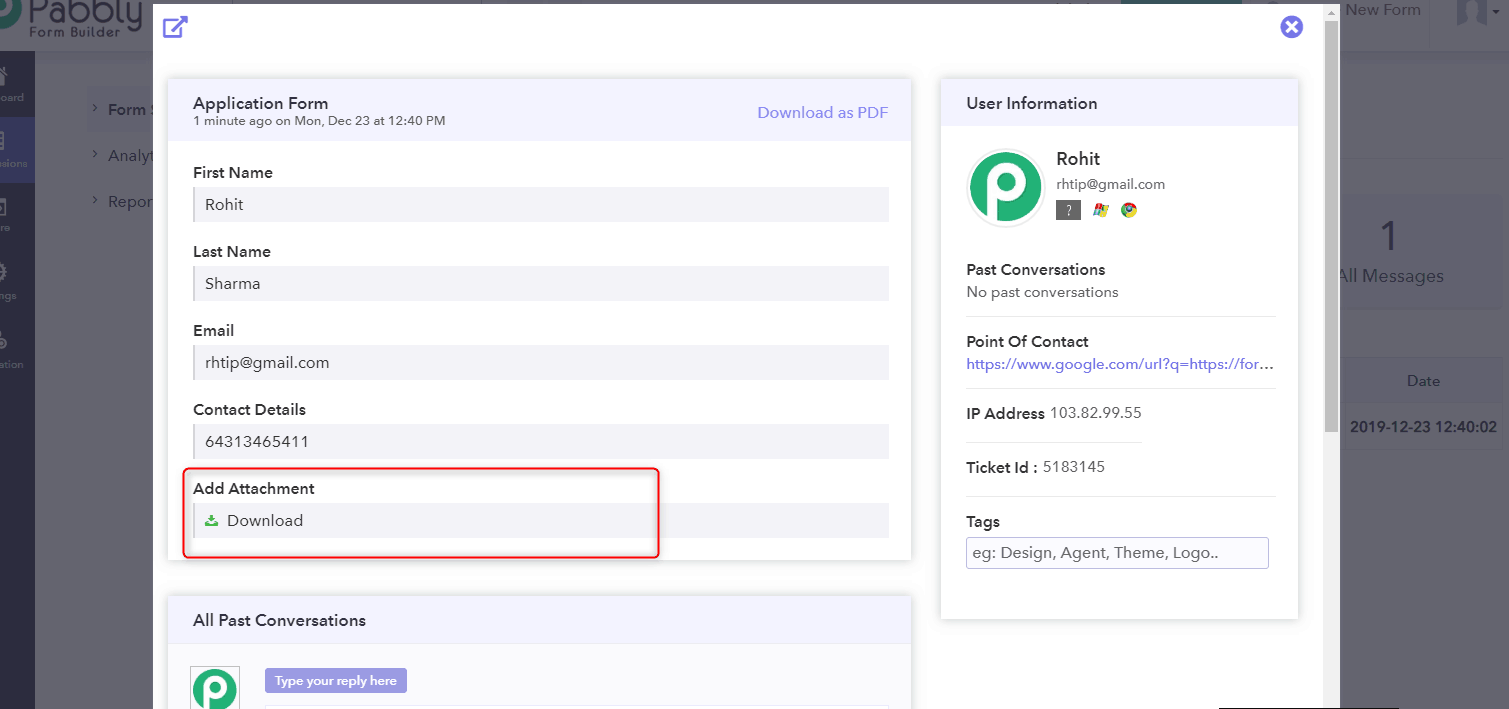
This is how you can successfully add a file upload option into your forms which can help you to collect files from your clients.
How much does it cost?
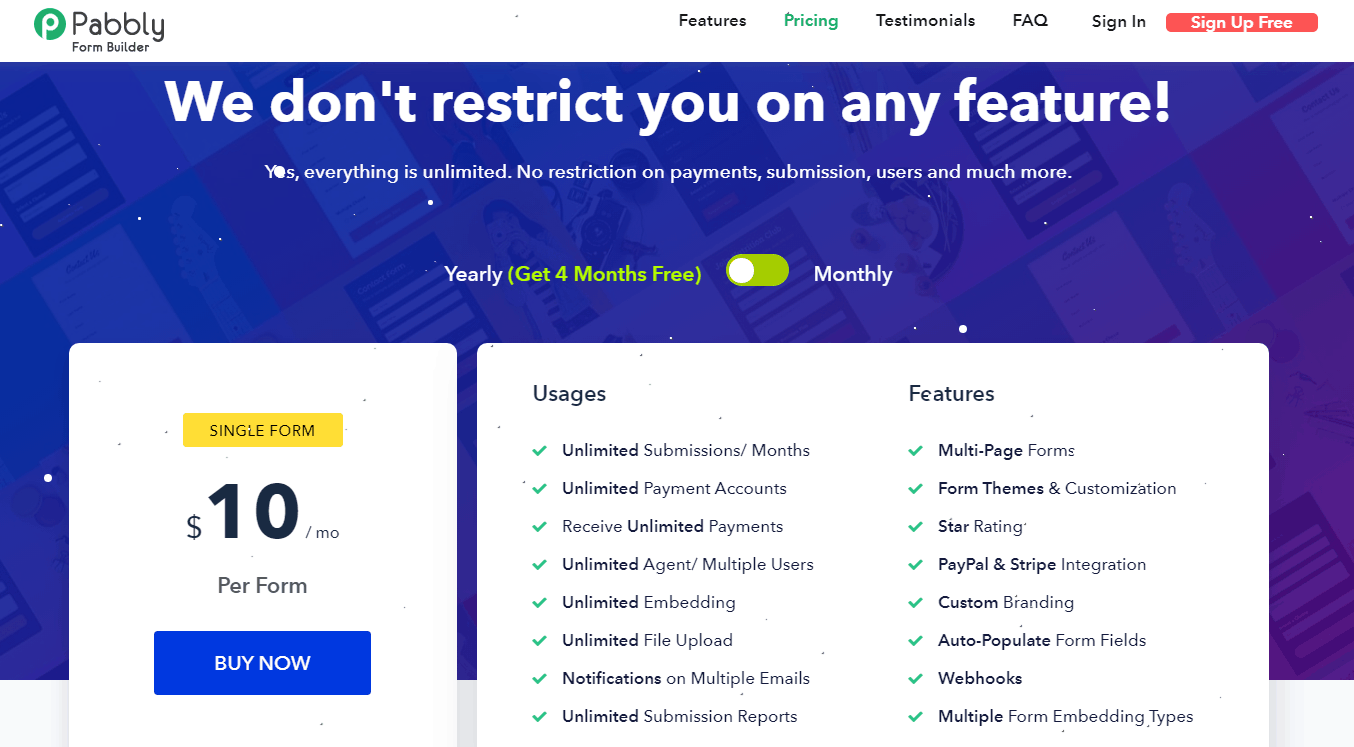
Pabbly Form Builder gives you the freedom of unlimited File Uploads, submissions, webhooks and many more just at the cost of $10 per month.
Try Pabbly Form Builder now!
Conclusion:
And, there you have it! You now know how to create a file upload form using Pabbly Form Builder. There was a reason why we made you familiar with this form creator.
First of all, you will be paying an amount now which wasn’t required at all while using Google Forms. So, it is your right to spend only on a dutiful form builder software.
Don’t think of the cost. Think of value.
And like I said earlier, there are numerous features that were not included in Google Forms, nor there is any scope to find them in the near future. That’s why its high time that you try this Google Form alternative that is meant to suffice your business needs.
So what are you waiting for? Get started with the amazing Pabbly Form Builder today!
How to integrate a payment gateway in a Google Forms?

You are probably already aware of Google Forms, aren’t you? They are a great way to simplify the process of making customer feedback surveys, order forms, event registration forms, RSVP forms, job applications and much more. Moreover, you can also use them to gather contact information and easily extract the data into a spreadsheet. For your convenience, it offers a ton of templates for the different categories of forms as well.
One of the most common uses of Google Forms is to design event registration, shopping checkout or similar pages which involve receiving payment from the customer’s side. While there are many payment checkout pages that businesses build using Google Forms, but they are not the best for collecting payments. Why it is so?
First of all, Google Forms are not Payment Card Industry (PCI) compliant. This means that they do not meet the technical and operational standards set for protecting credit card data provided by cardholders. Therefore, getting your customers to enter their payment details into Google Forms may not be the best idea.
Secondly, the forms simply do not have a way to collect payment from the visitor; you will have to redirect your customer to a third party website, which defeats the purpose of using Google Forms to create the payment checkout page in the first place. Nonetheless, if you are wondering how you can do that, let’s discuss that first.
Redirecting user to a third-party website from Google Forms for payment collection
When creating Google Forms, you can insert a confirmation text which is shown to the visitor after he or she submits the form. You are allowed to create a custom confirmation text which you can easily use to insert a link of the third-party payment website. This would redirect the users to the webpage where they can complete their payment.
While this may sound simple and effective, it leaves you with another task that you will need to complete on your end. After the customer makes the payment, you will have to manually check and record the payment received. This may not be possible without asking for a payment reference number from each customer.
You must have realized by now how hectic receiving payments can become if you stick to Google Forms. Is there a way out?
Pabbly Form Builder
Pabbly Form Builder is an online application on which you can design any kind of business forms, including payment forms. Here is how you can use Pabbly Form Builder to build your payment forms with ease:
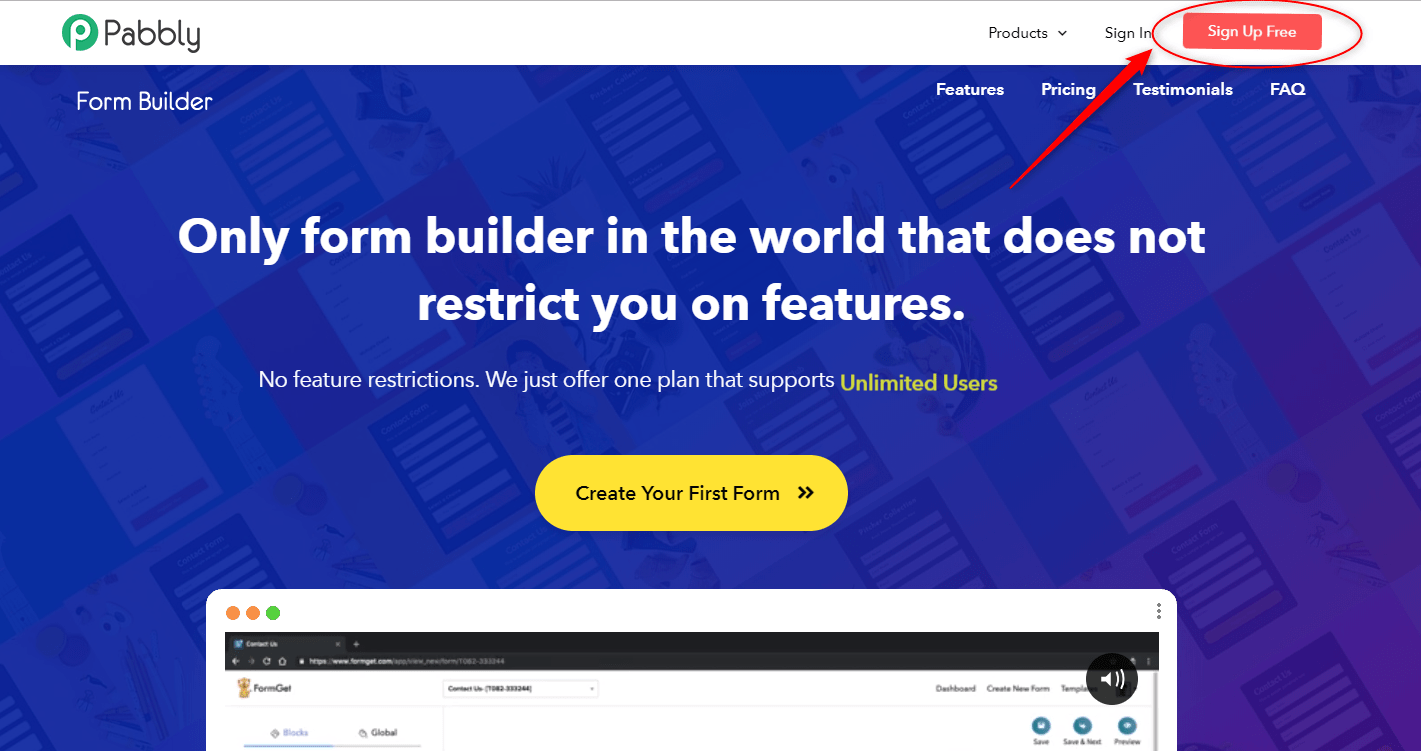
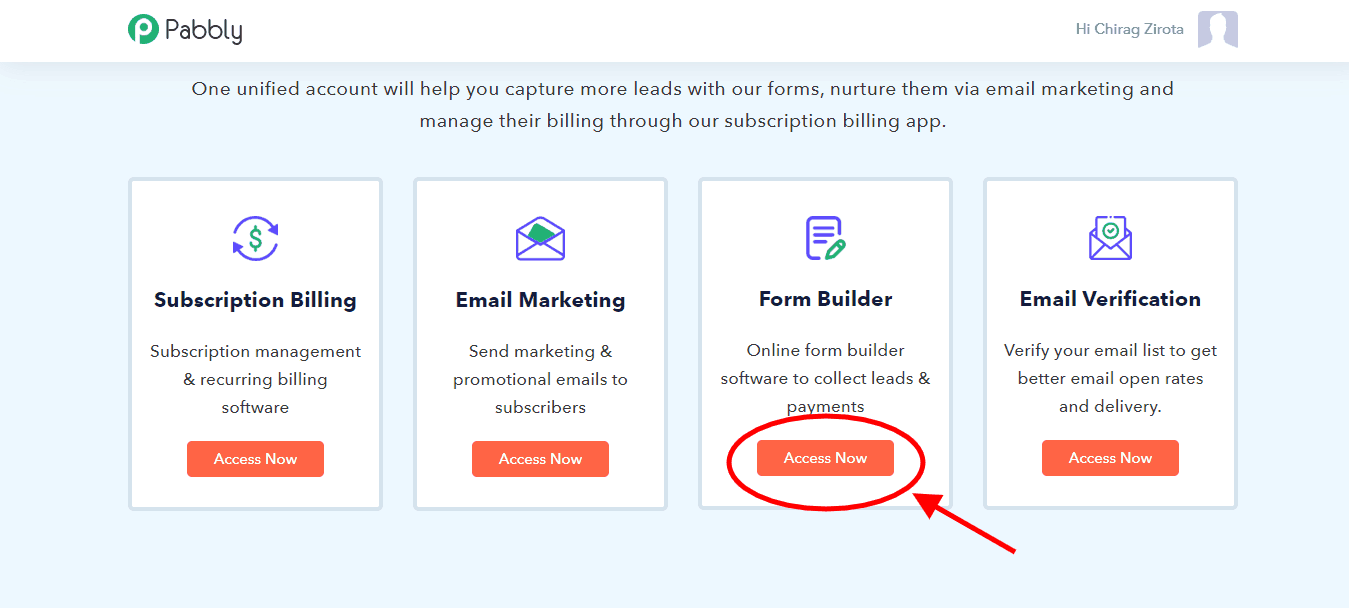
First, click on the “Sign Up Free” button on the top right corner of the Pabbly homepage and complete the signup process and open the form builder tool.
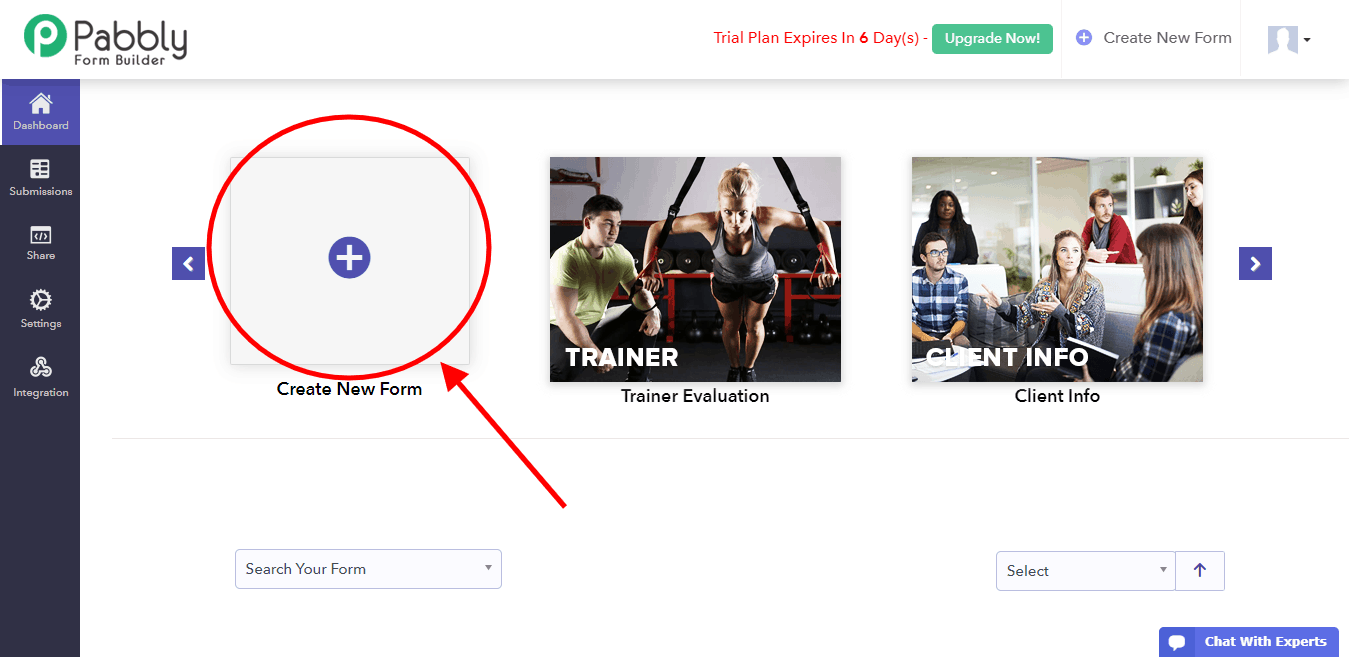
In order to start the form designing process, click the “Create New Form” button.
A default “Connect With Us” form will be displayed on the screen, which you can edit as per your requirements. The Pabbly Form Builder provides you with a plethora of designing tools which you can use to customize your form. You can insert headings, dropdown, video, image, captcha, radio, etc from the “Blocks” tab on the left.
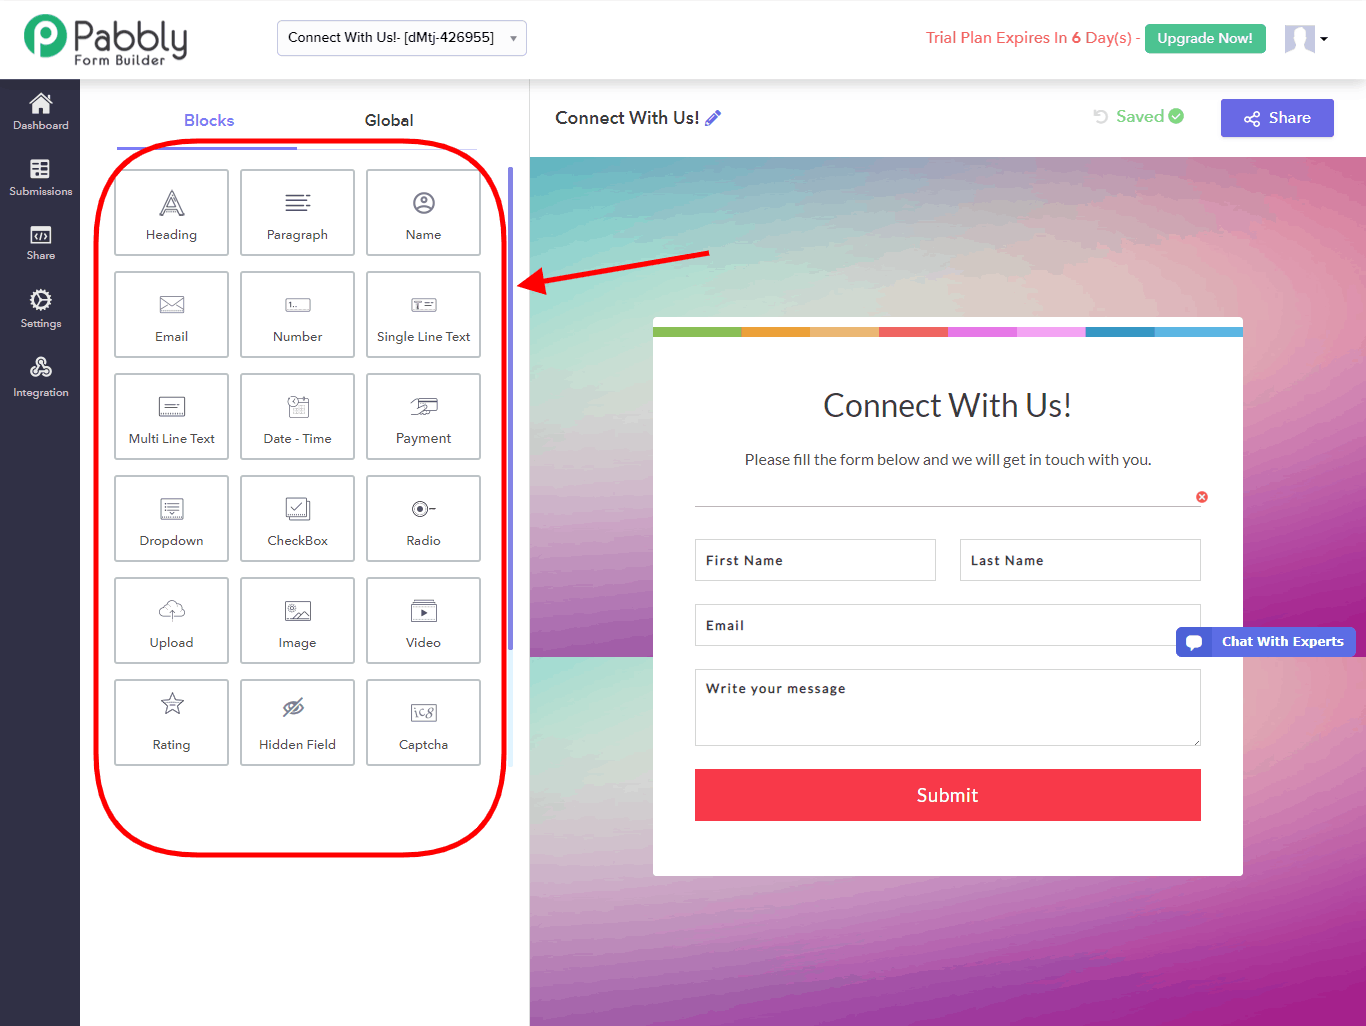
After you are done designing your form, it is time to add your products, which can be commodities, tickets, etc for which you wish to receive payment from your customers. For a payment checkout form, you will need to insert a payment box by clicking on the “Payment” block.
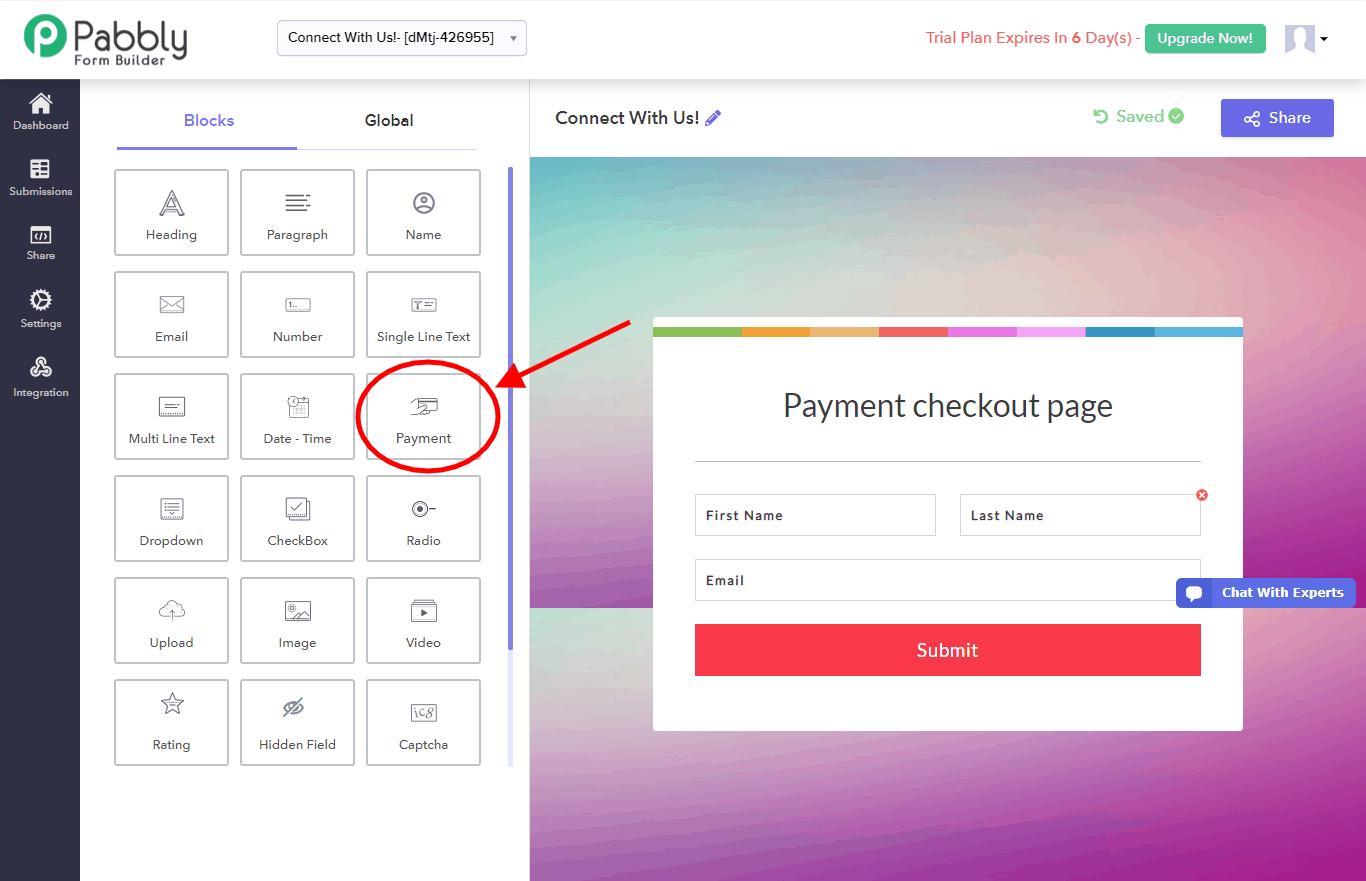
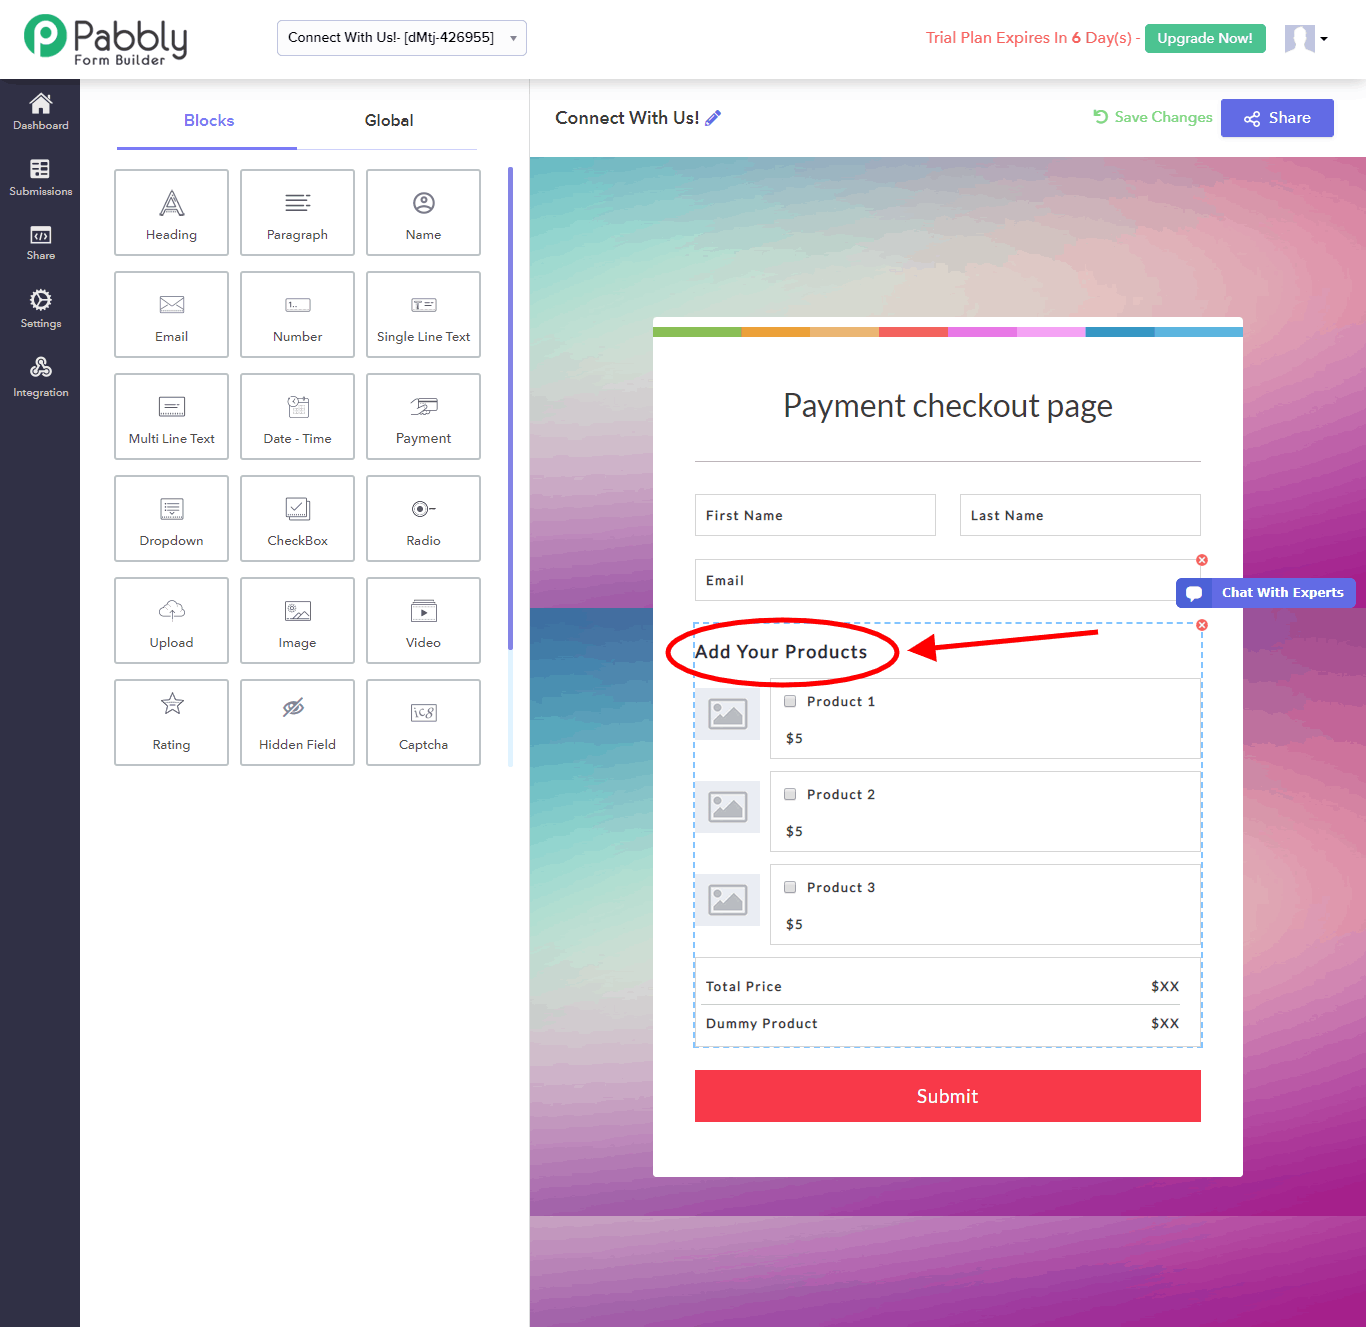
The application would automatically drop a default product list which would display product names, prices of each product and the total price of the purchase.
In order to add your products, click on the payment box that has just been inserted on your form.
This would open a “Configure Payment” dialogue box in which you need to fill in information about payment, products, and prices. Since this would be a long box, let’s go through it bit by bit.
You can change the field label through this dialogue box as well, which is currently “Add Your Products” by default. After that, you need to select the mode of payment from the “Select Merchant” drop-down menu.
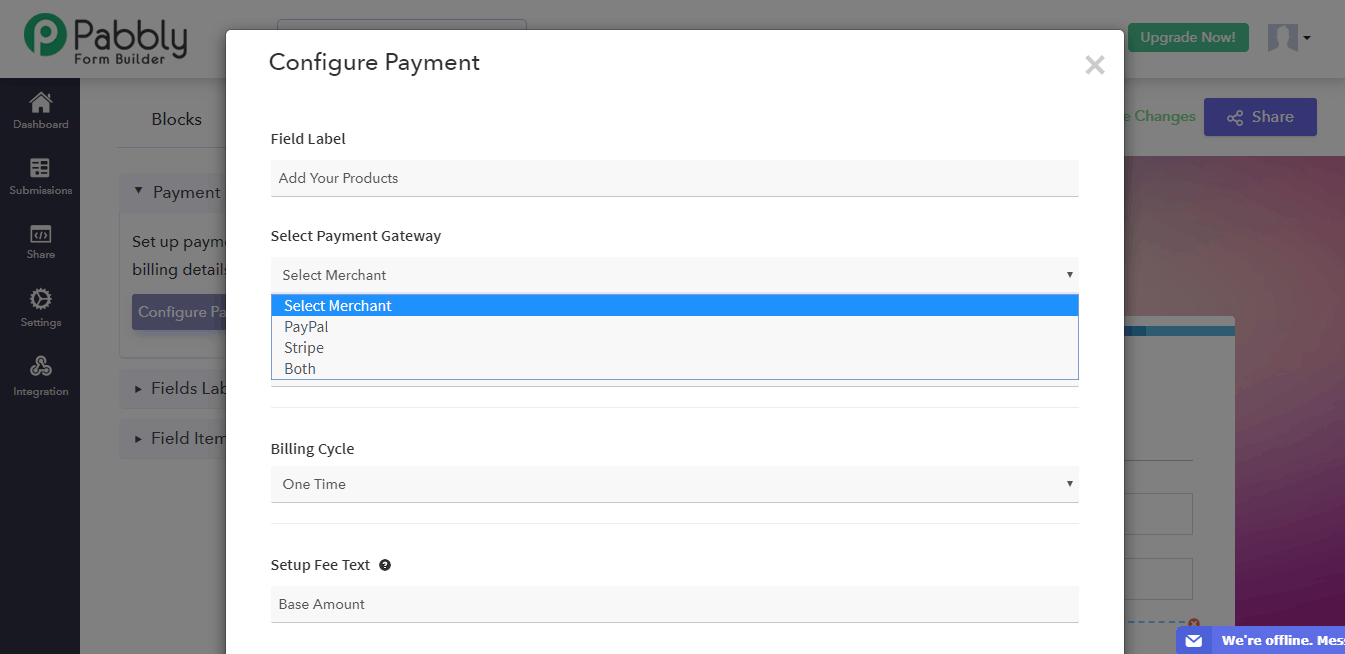
Pabbly Form Builder provides you with two options: PayPal and Stripe. In this form, we will select “Both” so you can understand the processes for both the merchants.
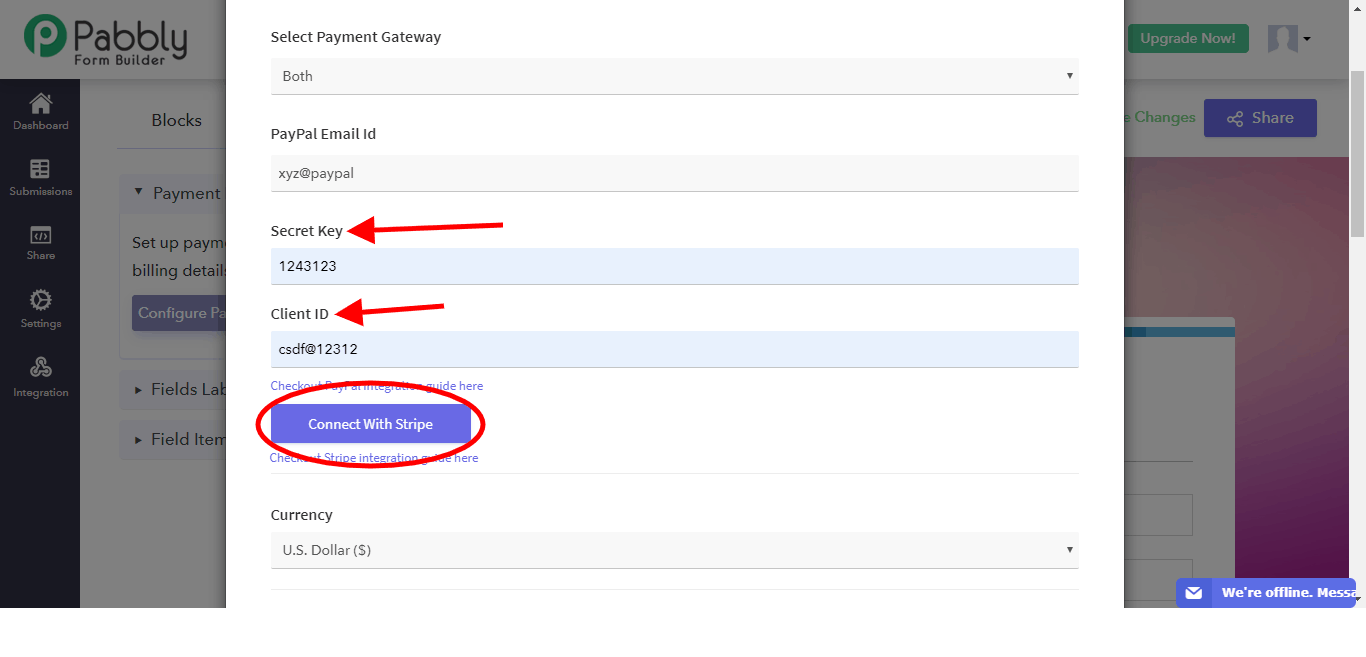
To receive payments, you will need to integrate your PayPal and Stripe accounts to the form. In order to learn how to do just that, visit the PayPal integration guide here and Stripe integration guide here.
PayPal integration will generate a “Secret Key” and “Client ID”, which you need to enter in the “Configure Payment” dialogue box. For Stripe, simply click on the “Connect With Stripe” button as shown below.
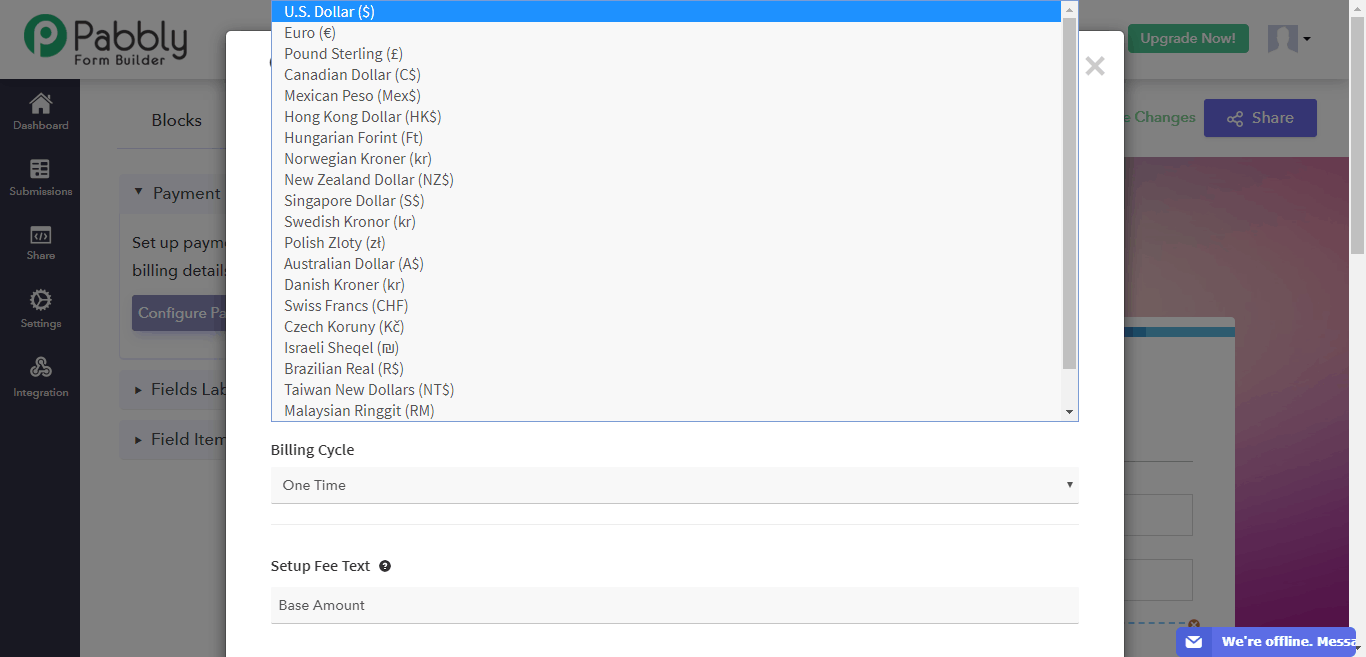
After the payment gateway integrations are done, select the currency in which you wish to receive the payments and the billing cycle from the “Currency” and “Billing Cycle” drop-down menus respectively.
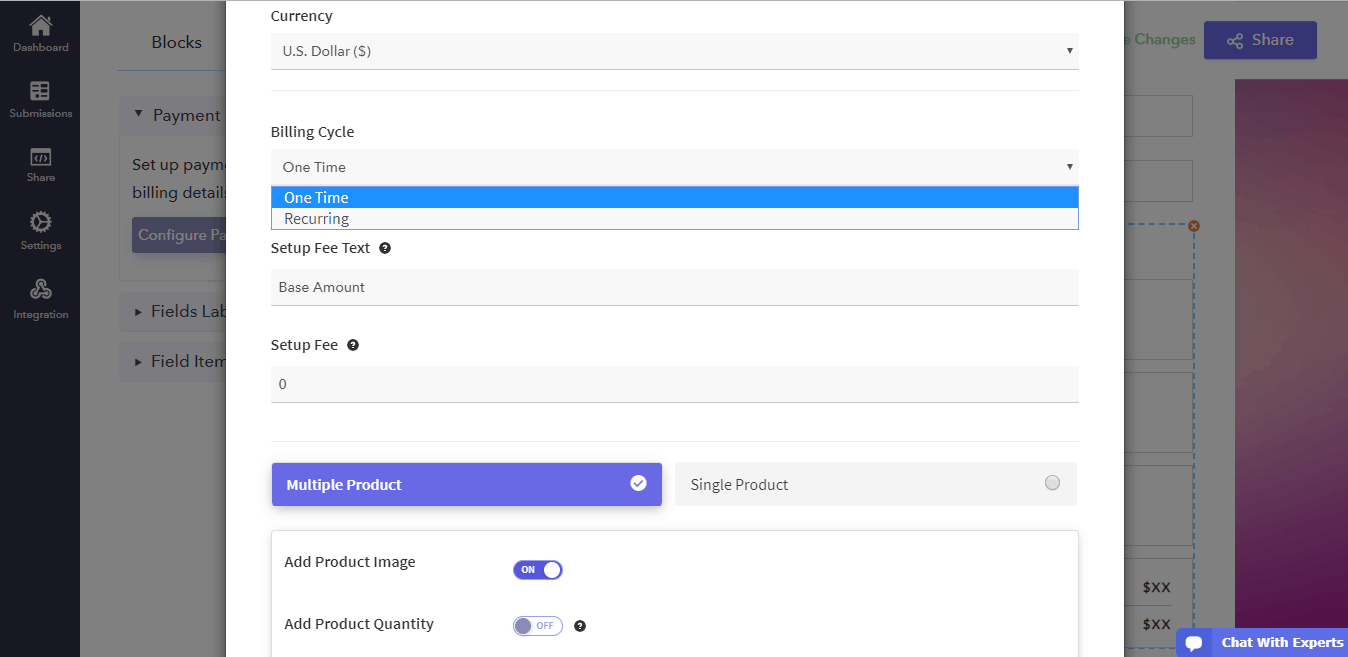
Use the “Setup Fee” to add any base amount for purchases.
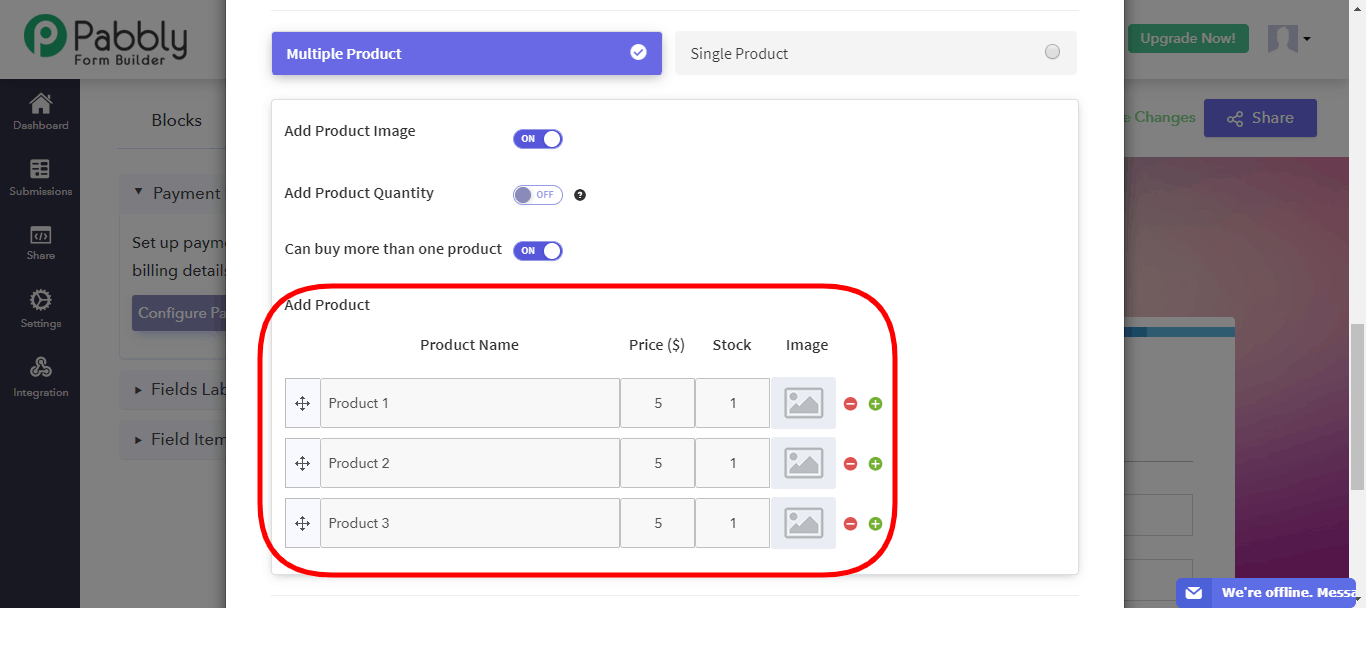
Now that you have completely filled in your payment details, it is time to add your products. In this example, we are assuming you have multiple products.
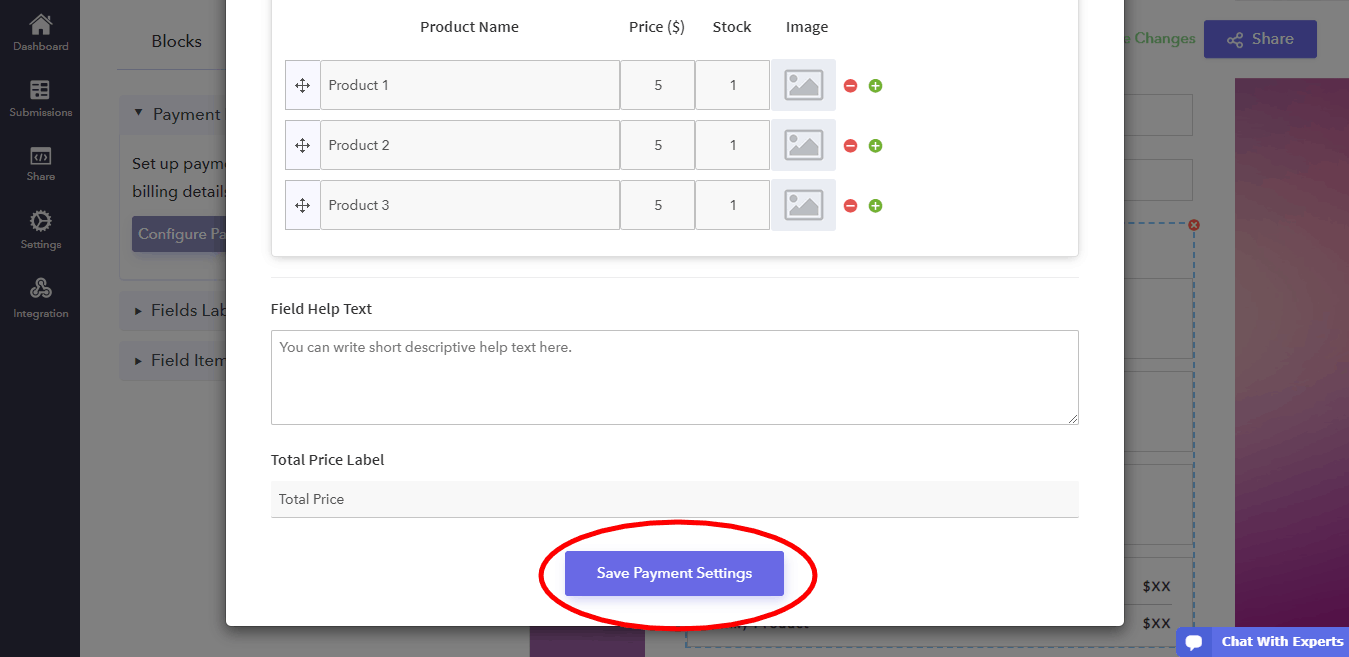
In the “Multiple Products” tab, enter in your product name, price, stock and image in the respective boxes.
After this is done, your payment form is complete. Remember that you can change the label names in their respective boxes and even add help text for your visitors in the dialogue box.
To complete the payment setup, click on the “Save Payment Settings” box at the bottom.
Congratulations! You have successfully finished designing your payment form!
In order to share it with your users, click on the “Share” button on the top right corner of the webpage.

You can either use a link or Facebook, Twitter and LinkedIn to share your form with your customers.
Final Words
That’s it! Everything on your end is done and you can sit back and receive payments directly through your forms.
Pabbly Form Builder is a useful tool to give your customers a convenient user-interface to fill in the form and, as shown in this guide, make payments. In addition to that, it eliminates the trouble of keeping track of payments of each customer manually.
Do check this amazing online application to make your online operations – like collecting contact information, payment processing, billing, etc. – more efficient.
You May Also Like:
- What are the limitations of uploading documents using Google Forms?
- How to create dynamic questions in Google Forms?
5 Best IP To Google Maps API Services 2022

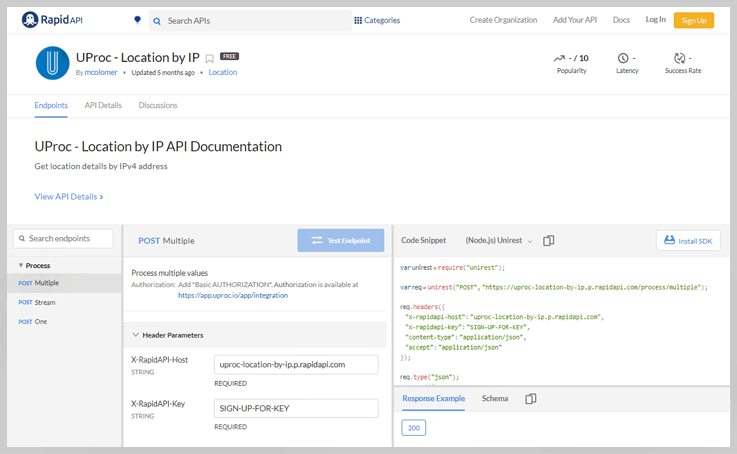
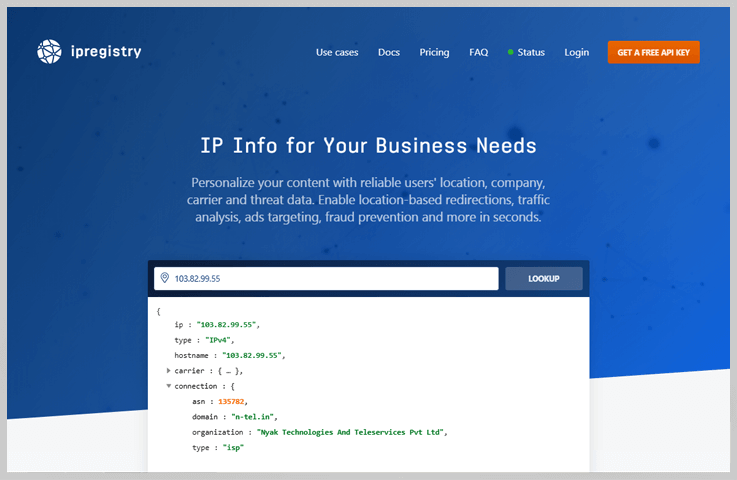
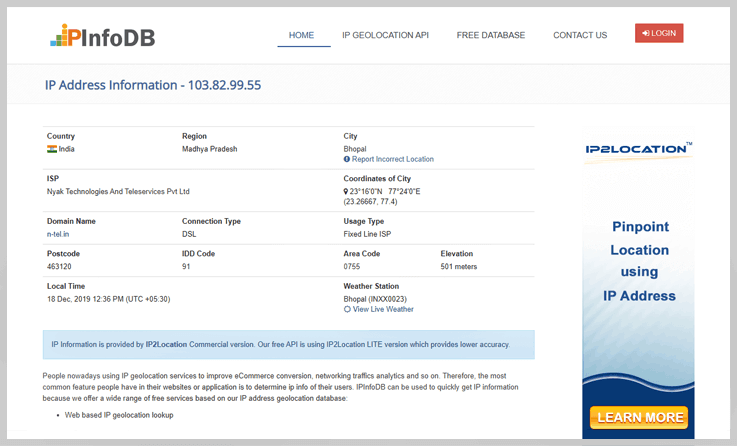
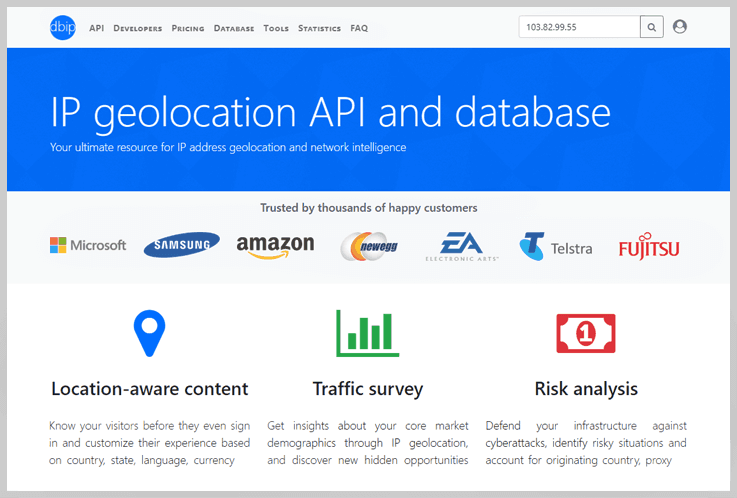
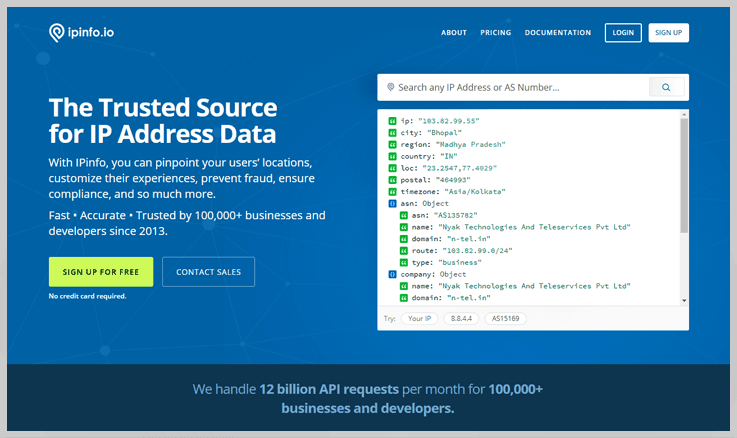
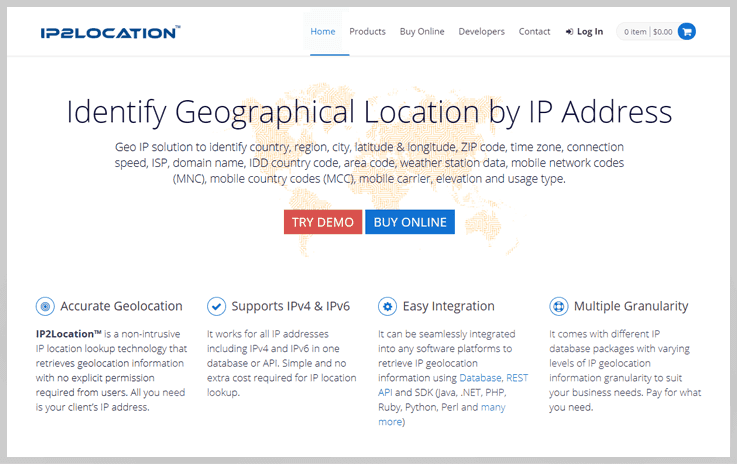
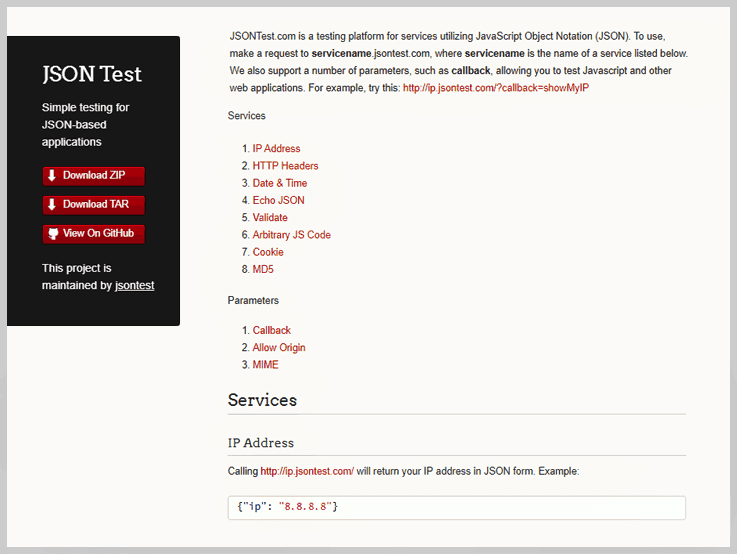
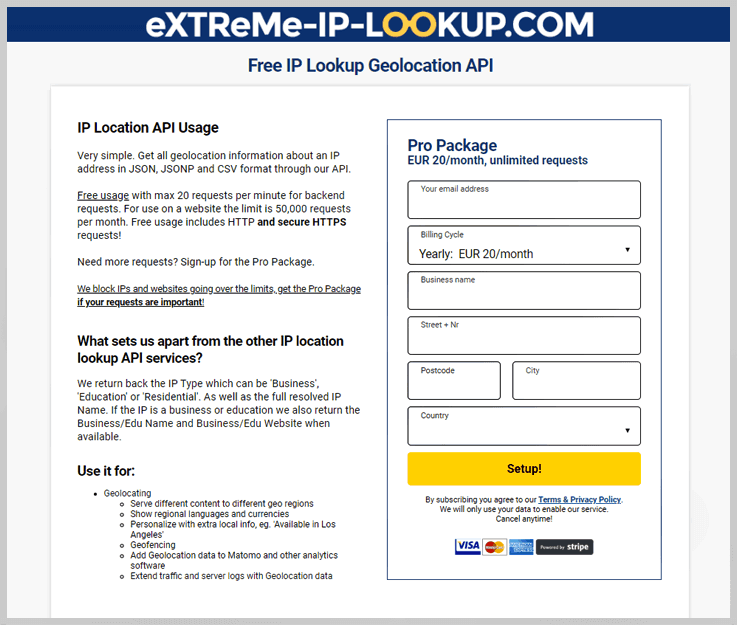
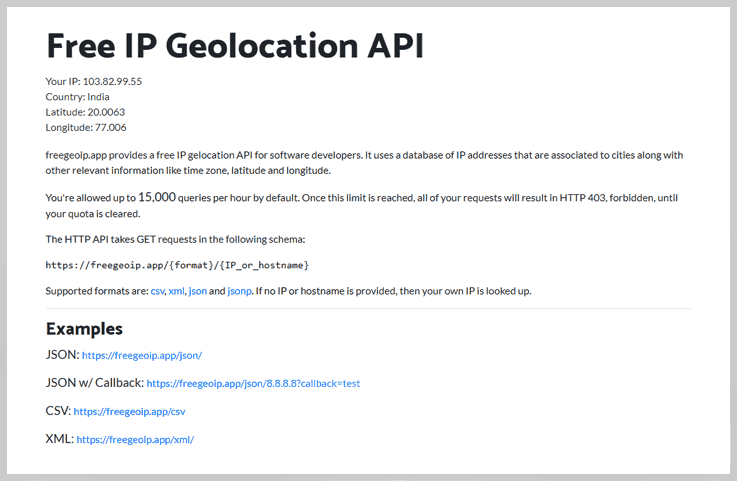
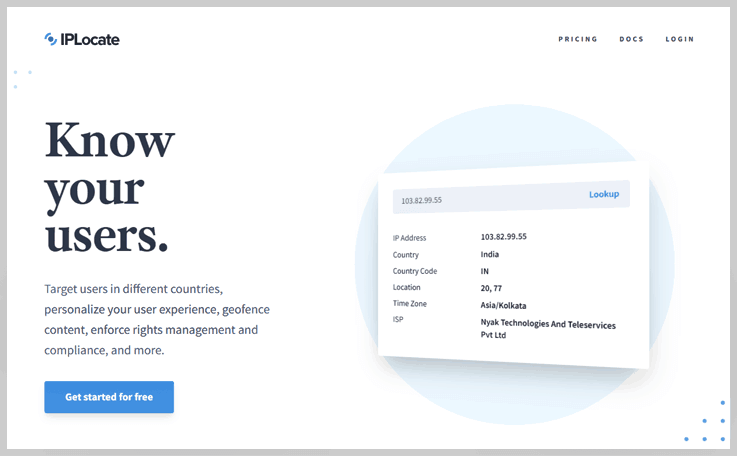
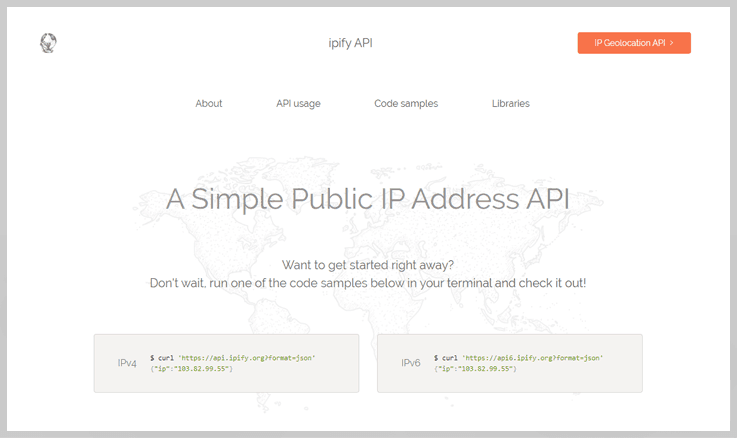
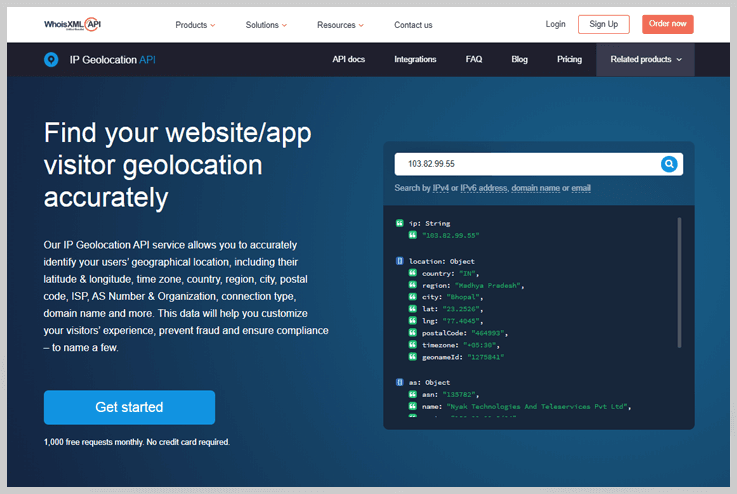
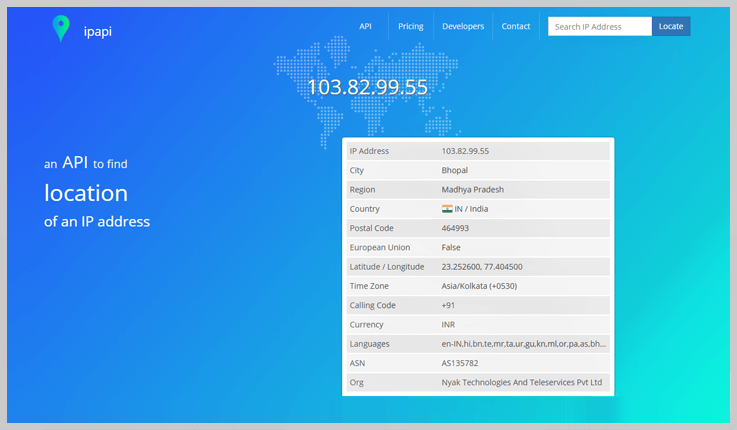
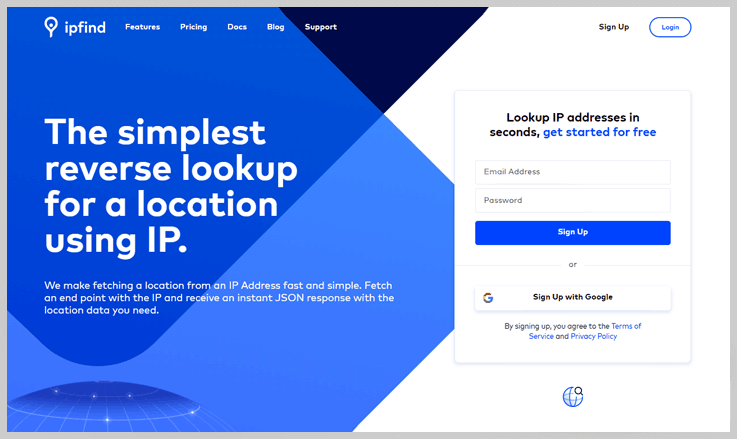
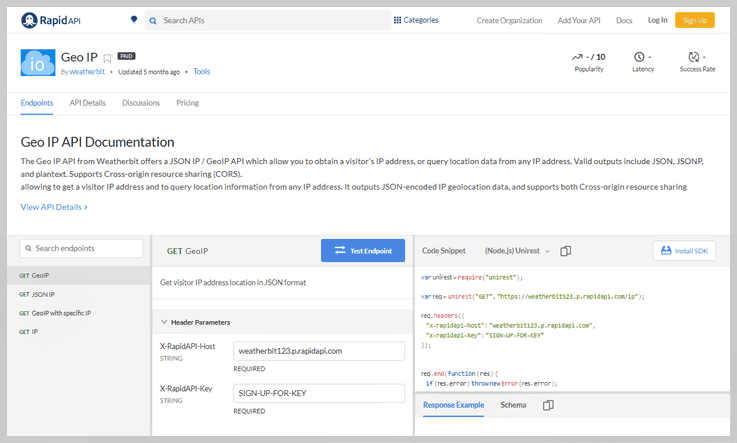
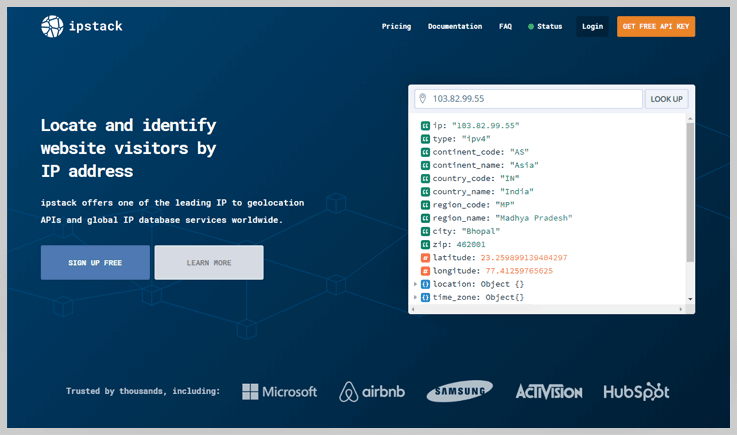
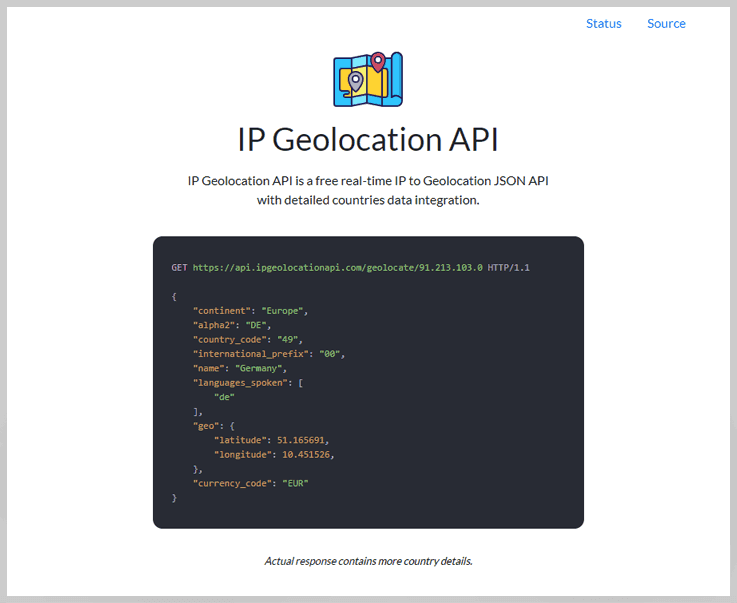
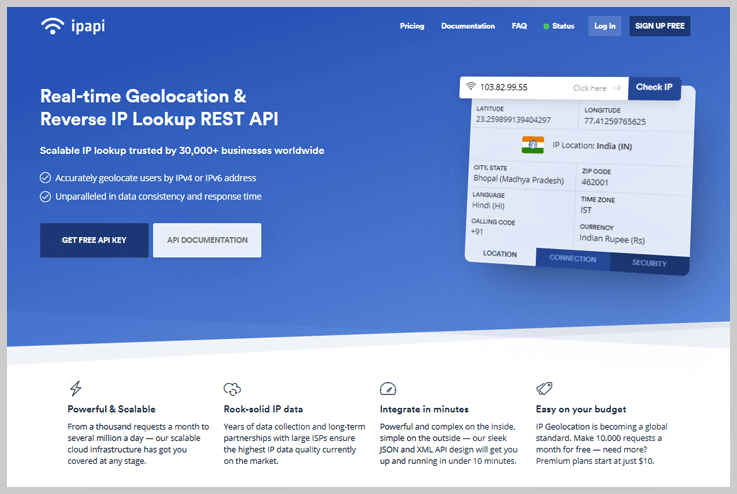
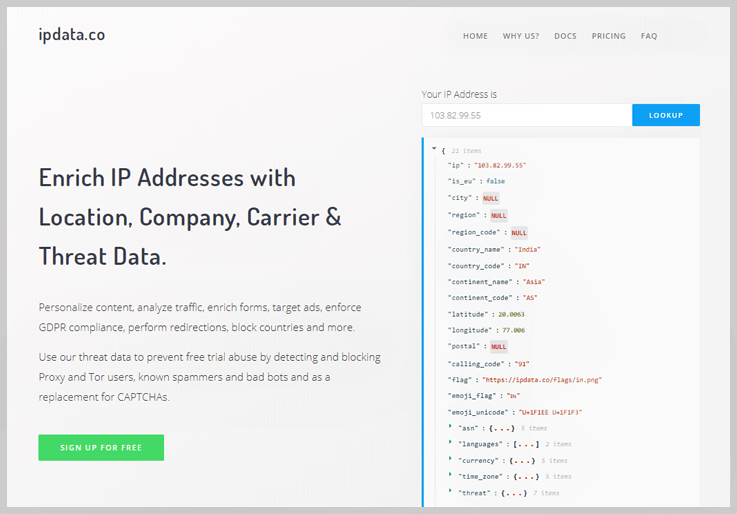
If your online business relies on the user’s location, & you have your clients’ IP addresses. Then you might need some kind of API to extract the location details of your website visitors right from their IPs.
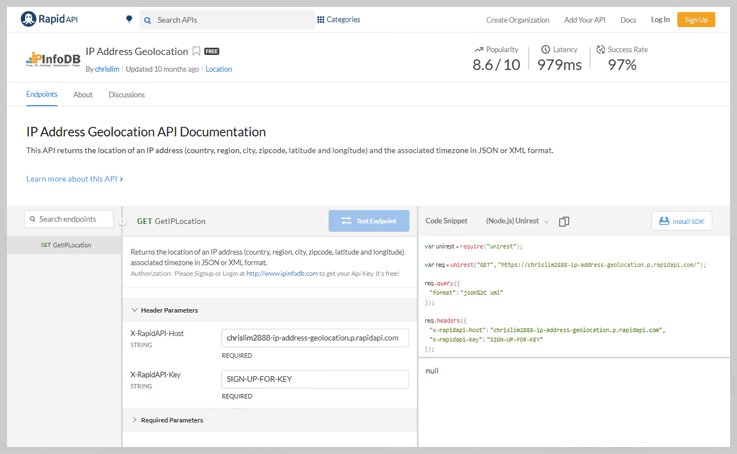
By leveraging Geolocation API, you can offer the relevant products, services, news, notifications to the users. You can directly integrate the API within your application to retrieve the necessary IP information.
Now, you may be wondering which is the Best IP To Location Lookup API Services?
Hence, in this blog, we have gathered and compared the list of a few free and premium API services that proffer outstanding features. Have a look at them, & choose the one according to your requirements & budget.
Ip To Google Maps

5 Best IP To Latitude Longitude API Services 2022

If your online business relies on the user’s location, & you have your clients’ IP addresses. Then you might need some kind of API to extract the location details of your website visitors right from their IPs.
By leveraging Geolocation API, you can offer the relevant products, services, news, notifications to the users. You can directly integrate the API within your application to retrieve the necessary IP information.
Now, you may be wondering which is the Best IP To Country API Services?
Hence, in this blog, we have gathered and compared the list of a few free and premium API services that proffer outstanding features. Have a look at them, & choose the one according to your requirements & budget.
Ip To Latitude Longitude
6 Best IP To Country API Services 2022

If your online business relies on the user’s location, & you have your clients’ IP addresses. Then you might need some kind of API to extract the location details of your website visitors right from their IPs.
By leveraging Geolocation API, you can offer the relevant products, services, news, notifications to the users. You can directly integrate the API within your application to retrieve the necessary IP information.
Now, you may be wondering which is the Best IP To Google Maps API Services?
Hence, in this blog, we have gathered and compared the list of a few free and premium API services that proffer outstanding features. Have a look at them, & choose the one according to your requirements & budget.
Ip To Country
5 Best IP To Location Lookup API Services 2022

If your online business relies on the user’s location, & you have your clients’ IP addresses. Then you might need some kind of API to extract the location details of your website visitors right from their IPs.
By leveraging Geolocation API, you can offer the relevant products, services, news, notifications to the users. You can directly integrate the API within your application to retrieve the necessary IP information.
Now, you may be wondering which is the Best IP To ZIP Code API Services?
Hence, in this blog, we have gathered and compared the list of a few free and premium API services that proffer outstanding features. Have a look at them, & choose the one according to your requirements & budget.
Ip To Location Lookup

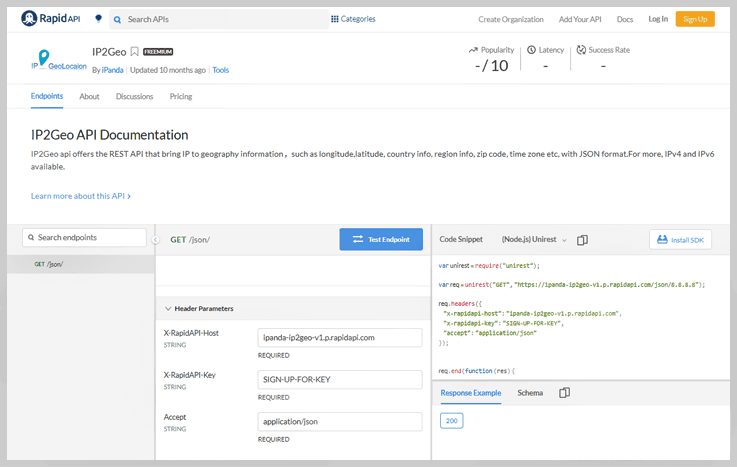
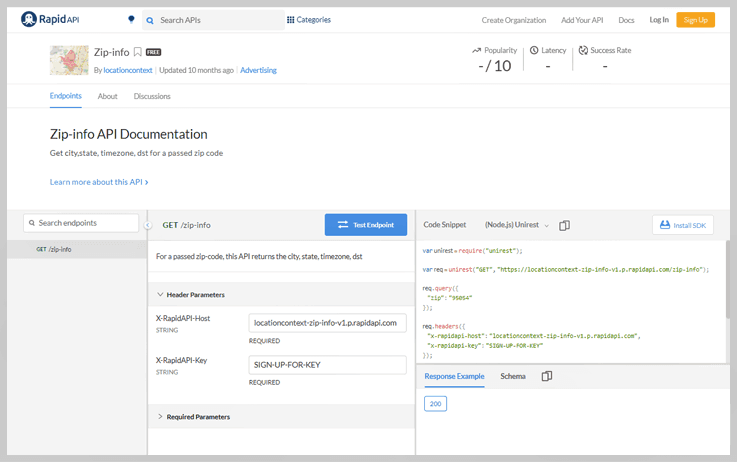
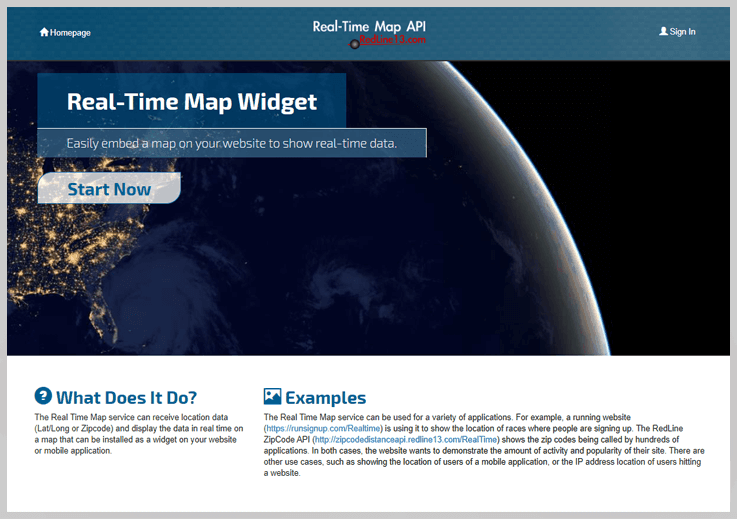
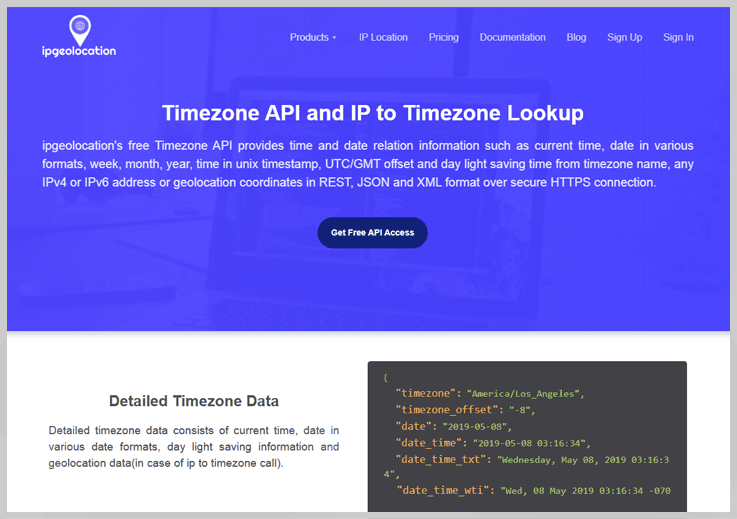
5 Best IP To ZIP Code API Services 2022

If your online business relies on the user’s location, & you have your clients’ IP addresses. Then you might need some kind of API to extract the location details of your website visitors right from their IPs.
By leveraging Geolocation API, you can offer the relevant products, services, news, notifications to the users. You can directly integrate the API within your application to retrieve the necessary IP information.
Now, you may be wondering which is the Best IP To Latitude Longitude API Services?
Hence, in this blog, we have gathered and compared the list of a few free and premium API services that proffer outstanding features. Have a look at them, & choose the one according to your requirements & budget.
Ip To Zip Code
5 Best IP To City API Services 2022

If your online business relies on the user’s location, & you have your clients’ IP addresses. Then you might need some kind of API to extract the location details of your website visitors right from their IPs.
By leveraging Geolocation API, you can offer the relevant products, services, news, notifications to the users. You can directly integrate the API within your application to retrieve the necessary IP information.
Now, you may be wondering which is the Best IP To City API Services?
Hence, in this blog, we have gathered and compared the list of a few free and premium API services that proffer outstanding features. Have a look at them, & choose the one according to your requirements & budget.
Ip To City
How to create dynamic questions in Google Forms?
If you want to create a form for a simple poll or dynamic survey then you can use conditional questioning or multi-branching logic in your form to deliver an AMAZING customer experience. With dynamic questions, you can show or hide certain fields of your forms and send respondents to specific pages based on their answers.
Google Forms VS Other Form Builders
Google Forms and other form builders have relatively similar features that help to build aesthetically pleasing forms. So, it is difficult to choose the best one when there are a lot more amazing form creators available in the market other than Google Forms like Pabbly Form Builder.
Create Your Dynamic Forms Now With Pabbly Form Builder
Google Forms empowers you to create dynamic forms that can change queries as a user fills out the form. It provides the option to create multiple sections in your form that will redirect the respondent to different sections depending on their response. In Google Forms, these jumps can be easily configured using the “Go to response-based portion” option. But it restricts you to create multi-branching logic jumps.
Limitations of Google Forms with dynamic field
- It is restricted to Dropdown and Radio button fields.
- Only gives the ability to jump to different sections of the form.
- Doesn’t provide a complex multi-branching/conditional logic option like IF/THEN, AND/OR.
Some of you would like to add complex dynamic fields in your forms, so you can choose Pabbly Form Builder.
Whereas, in Pabbly Form Builder, you can not only create dynamic fields with simple logic jumps (like Google Forms) but also handle multi-branching logic with complex conditions. It has advanced conditional logic rules for building smart, dynamic, interactive forms.
In addition, it provides the option to add multiple rules to your forms and you can skip and redirect users to any pages based on their entered field values.
When to Use Dynamic Field Choices?
You can collect feedback and opinions from your form submissions by providing dynamic fields like dropdowns, multiple-choice, or checkbox. These dynamic fields become convenient for respondents to select the appropriate option, without having to input it manually.
Let’s say, you are registering yourself for online shopping. In the questionnaire, Males /Females options are available for gender question. If you select a Male option, it will redirect you to men’s products and vice versa for Female option.
If you are not concerned about any of the above drawbacks, and data collection from the end-users is your one of the utmost importance then Google Forms is the best bid for you.
How to Add Conditional Logic to Google Forms?
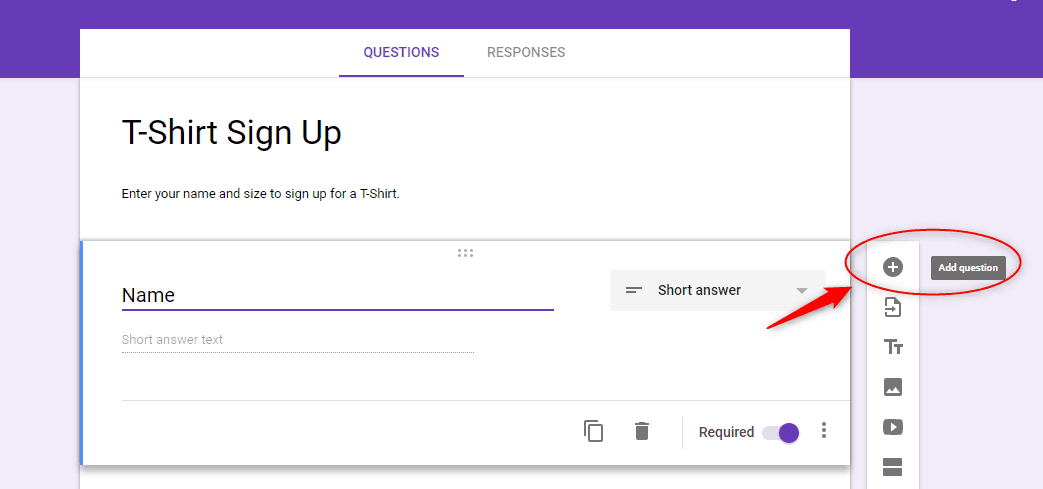
Step 1: To get started, create your form and add at least one question to your form. By clicking the plus sign (+).
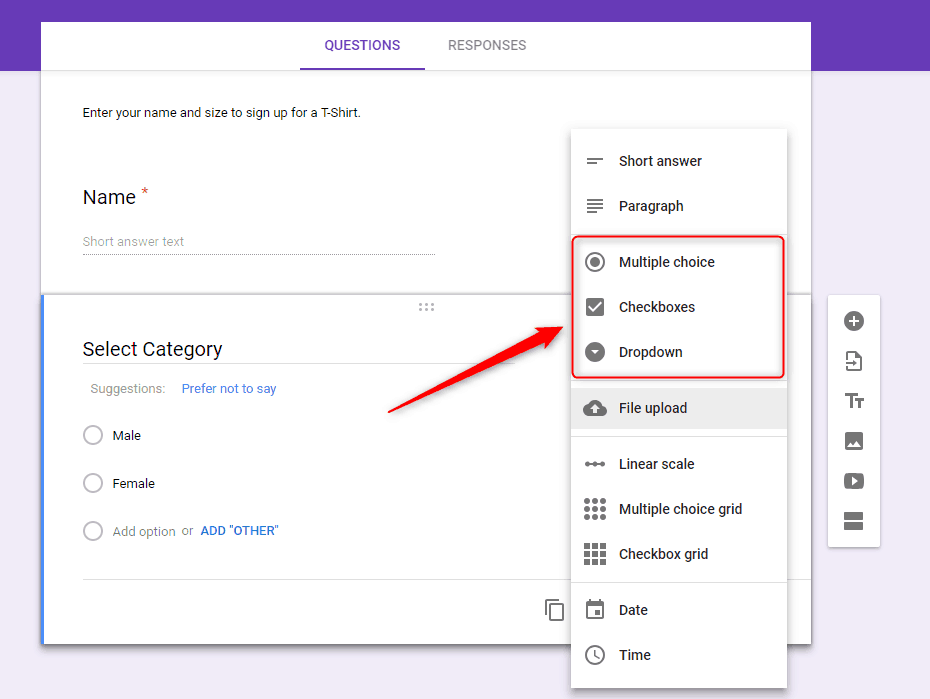
Step 2: Select an option for how the question will be answered i.e. Multiple Choice, Checkboxes or Dropdown. Further, customize the answers as per your requirements
Step 3: Next, you can add as many as the section you want to add in your form according to survey demand. When you click on the add section icon the new one will be added immediately.

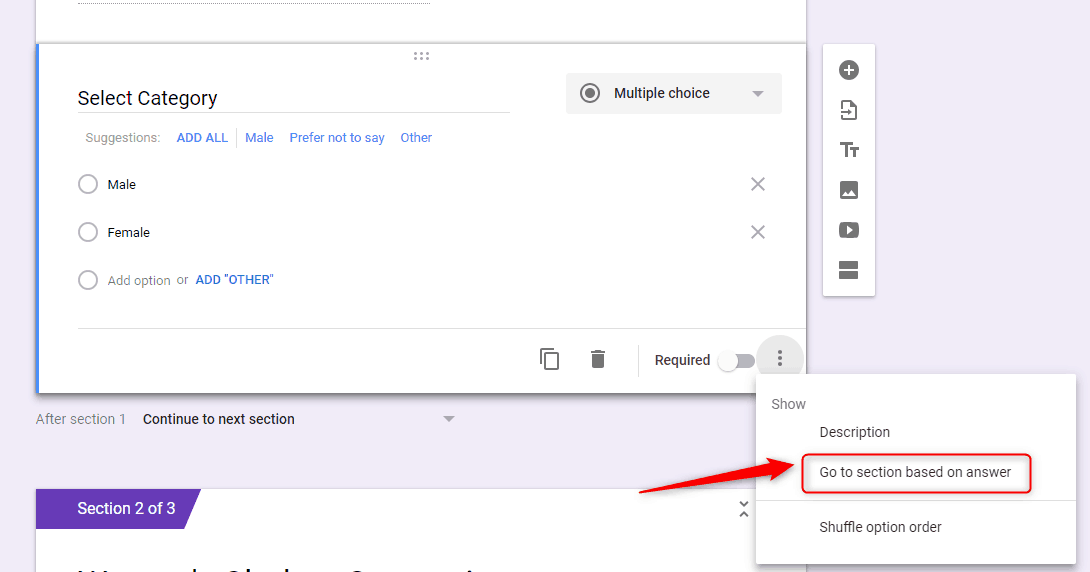
Step 4: Once done, get ready to add logic to the fields of your form with their respective “Go to section based on answer” options.
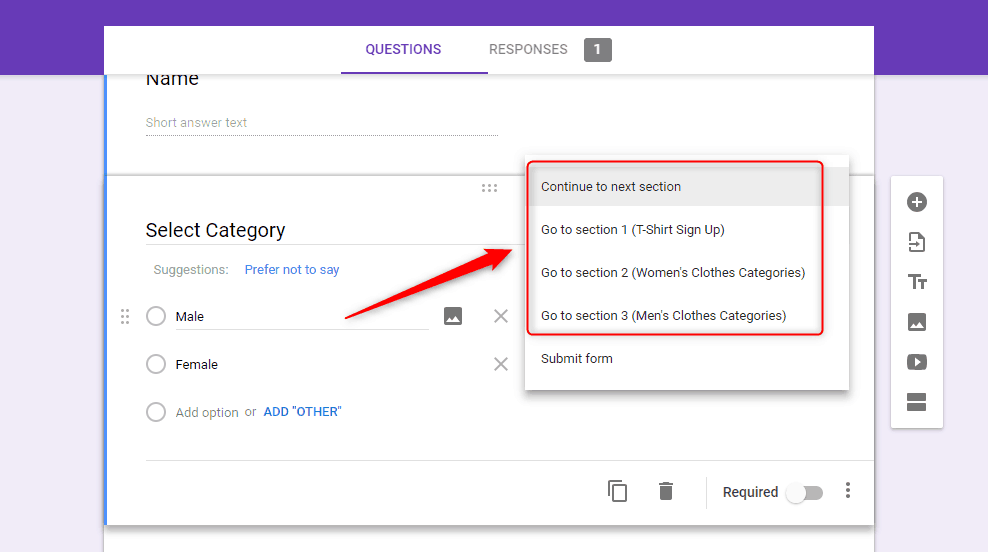
Step 5: Now, all you have to do is link the list of answers to the right section. Click the drop-down menu, and then choose the section where you want to redirect respondents when they select it.
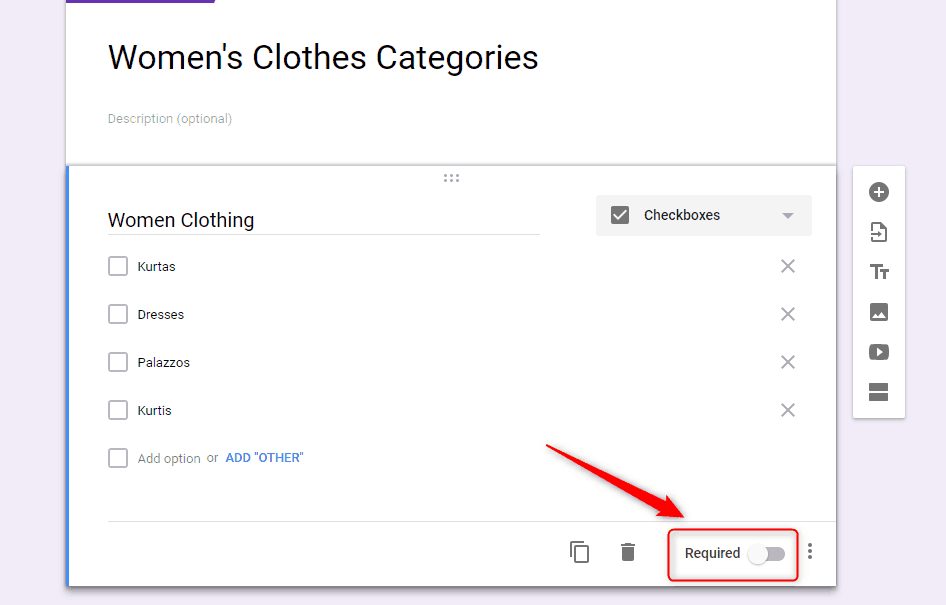
Step 6: If you don’t want a respondent to skip a question, you can make it mandatory to answer by toggling the “Required” switch that is available at the bottom of each item.
Step 7: When you get to the end of a logic chain, click the drop-down menu at the bottom of the section and then choose “Submit Form” from the list of options.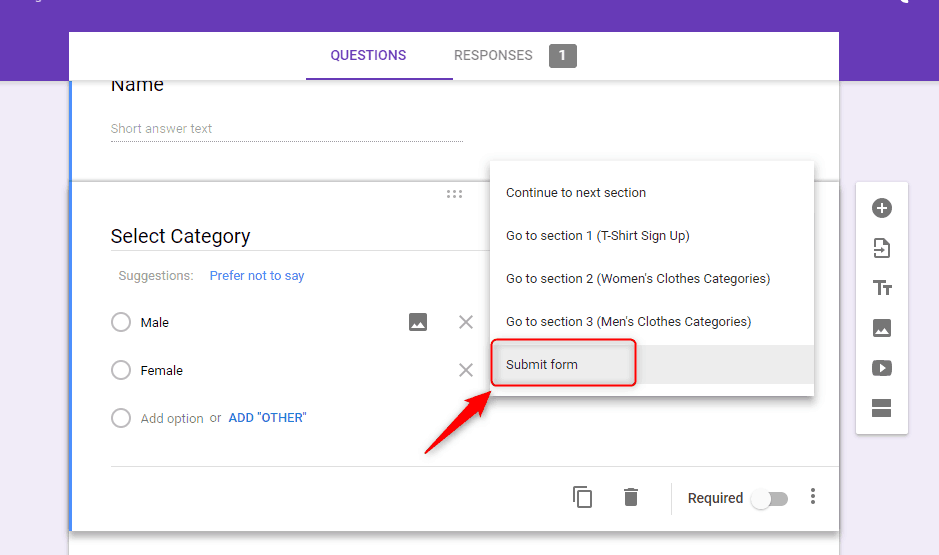
Steps for adding dynamic fields in Pabbly Form Builder
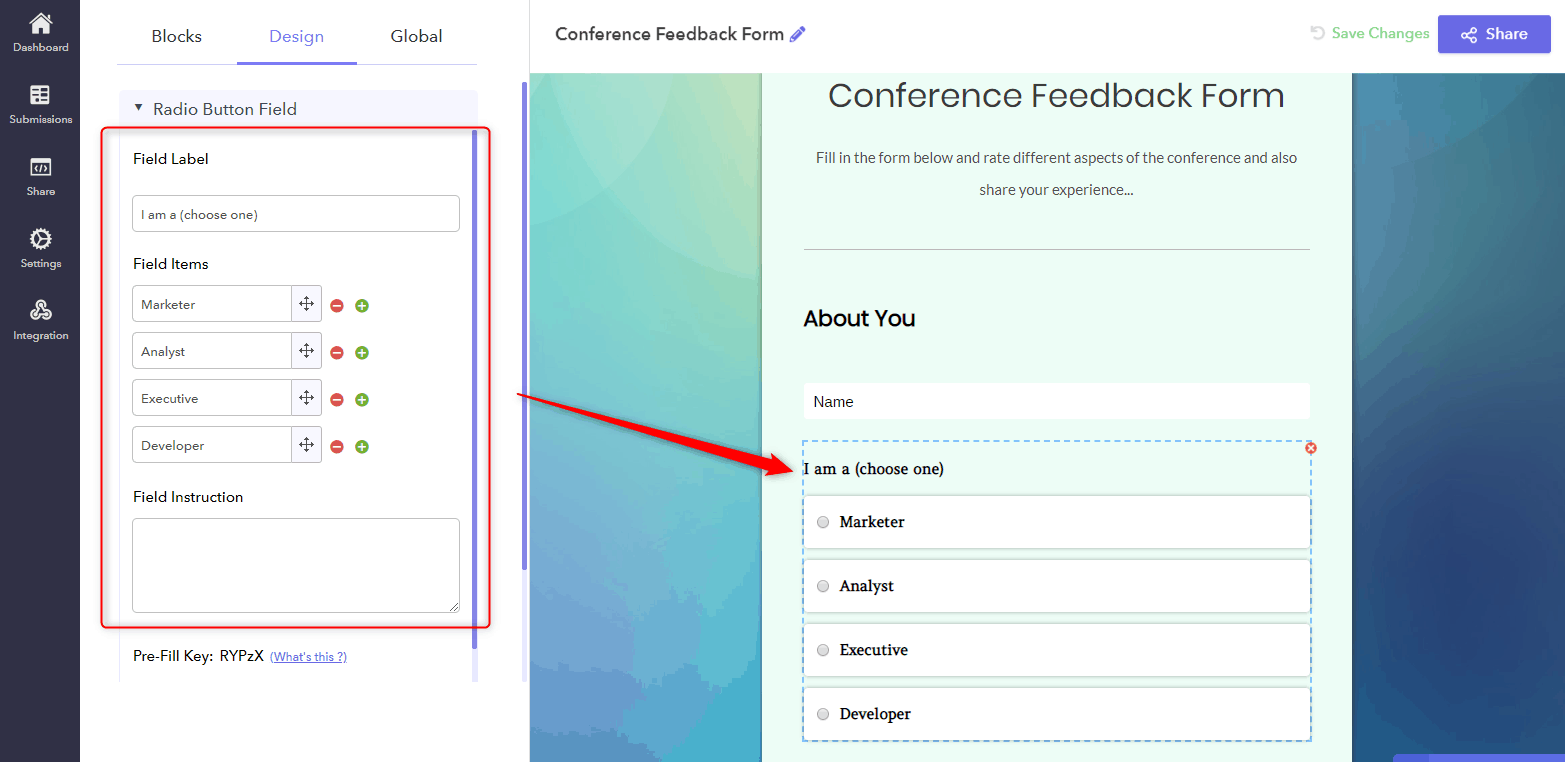
Step 1: Create your form and add atleast one question to your form with dropdown, checkbox, and radio field for the answer in your form.
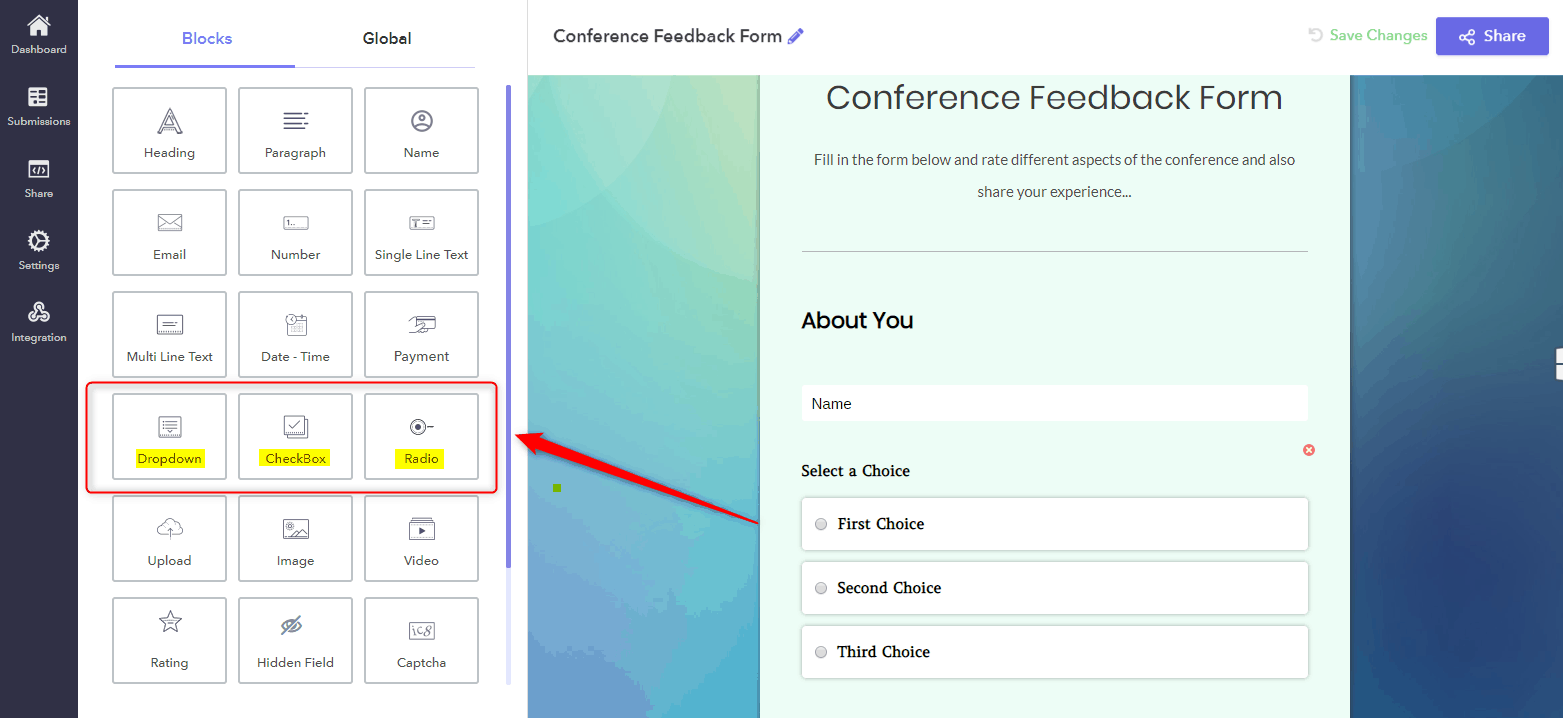
Step 2: Next, when you tap on the question the design options will get open in the left corner through which you can edit the field label. Give each section a title.
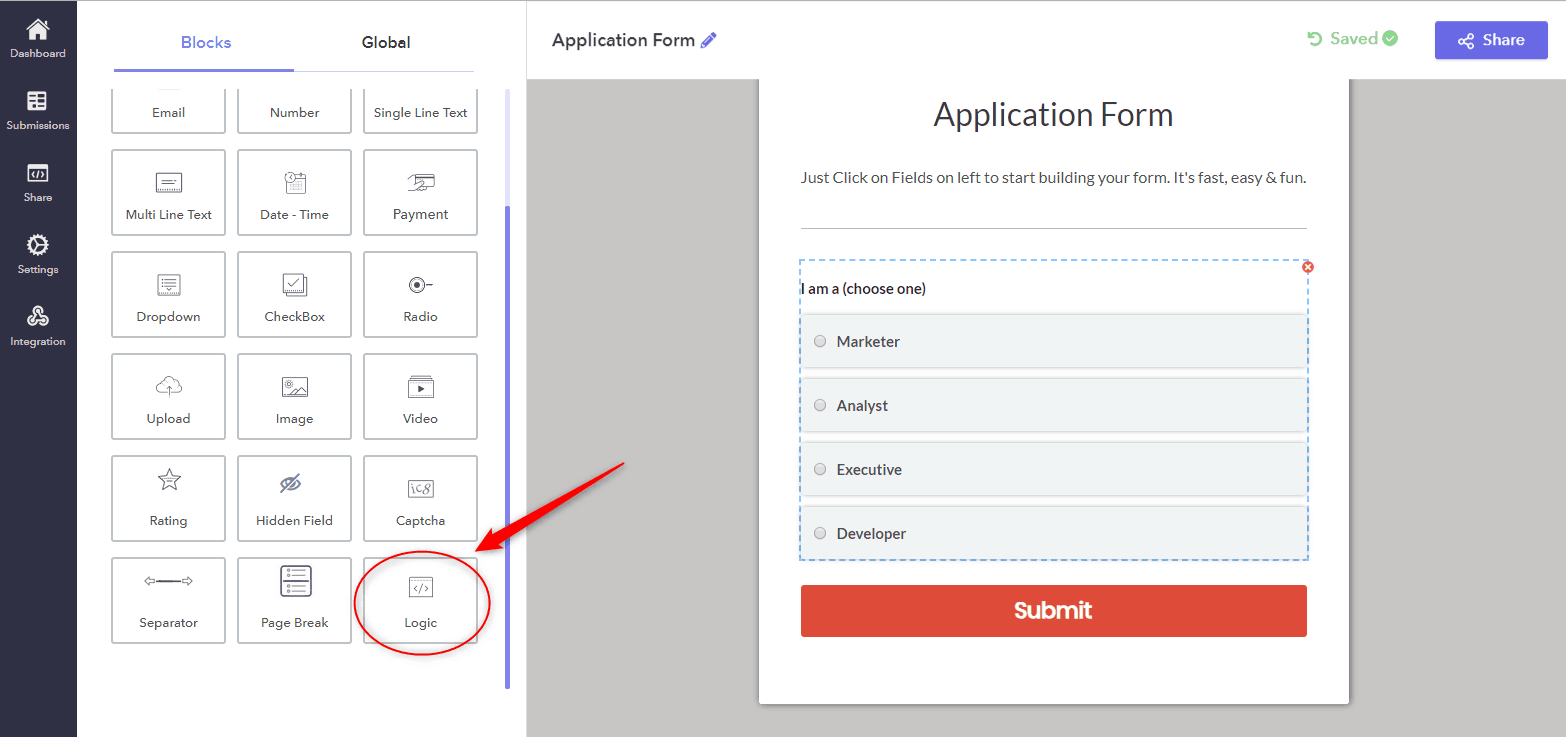
Step 3: After creating a form you can add logic to the fields of your form by selecting ‘Logics” options.
Step 4: When you click on the Logics option, the popup window will appear for applying the logic. In that section, you can add the logic according to your need in the form.
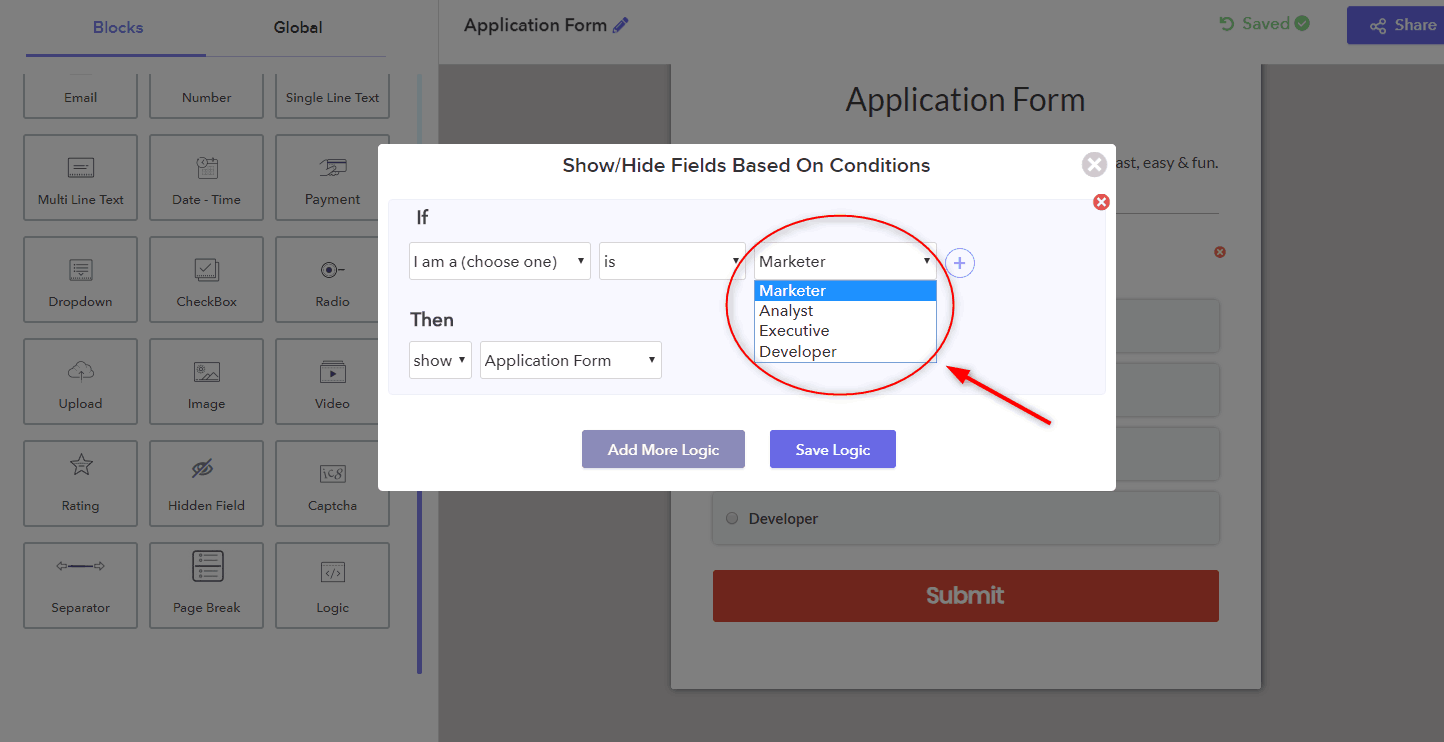
Step 5: For adding AND/OR logic to your form, click the plus sign (+). For removing any logic press minus sign (-).
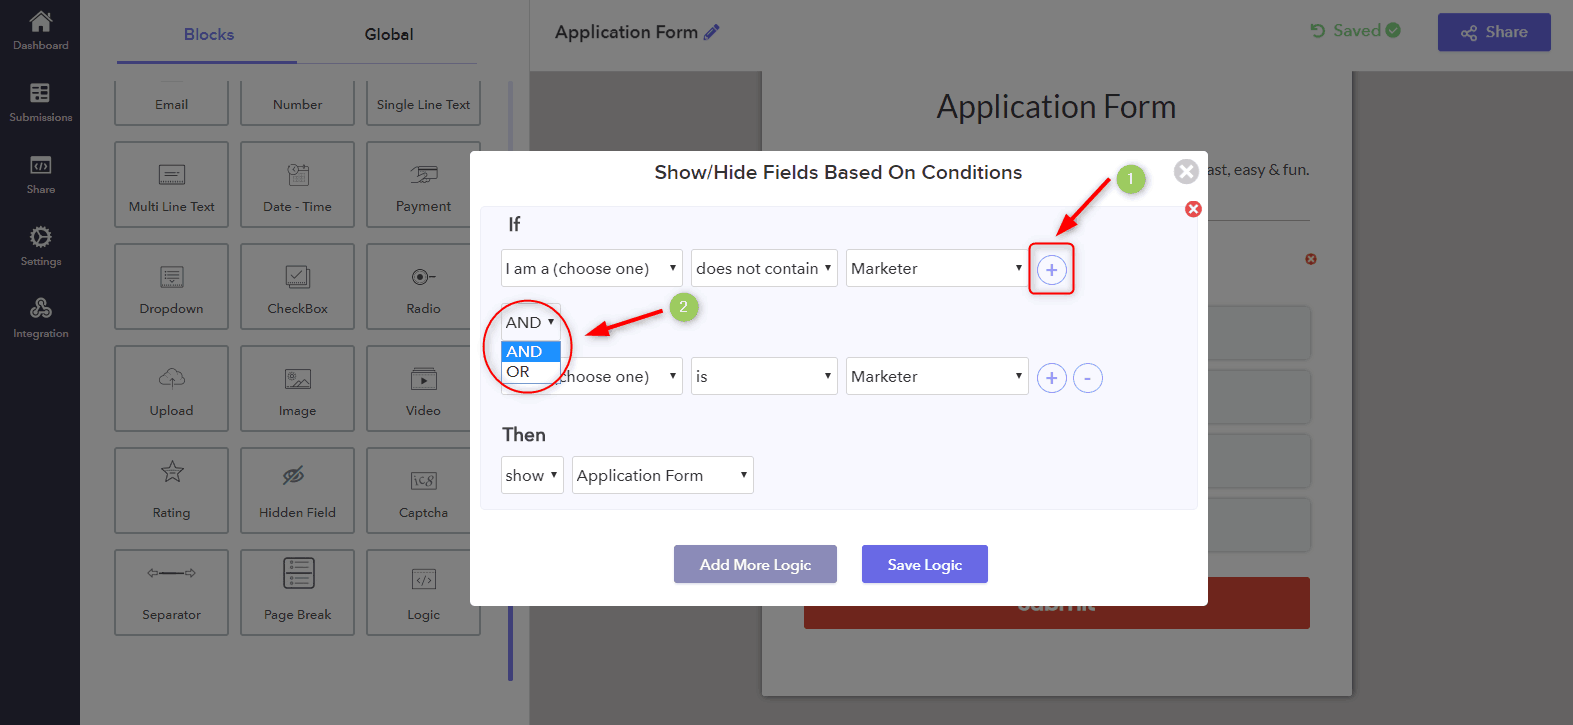
Step 6: In addition, you can also add several powerful logic in your form with complex conditions by clicking on the ‘Add more Logic’ button.

Step 7: Lastly, click on the ‘Save Logic’ button for saving the logic chain.

Conclusion
Now you’re all set! We hope that this tutorial helped you to create dynamic field questions in your form. Now, whenever your post types are updated, the form will be automatically updated along with them.
Although Google Forms provides most of the features (required to meet business needs) free of charge, there are few areas that have been shown to be a big let down. Its form design looks too simple but has some limitations on customization features. On top of this, the Pabbly Form Builder gives you the ability to perform multiple and complex logic jumps.
6 Best IP To Address API Services 2022

If your online business relies on the user’s location, & you have your clients’ IP addresses. Then you might need some kind of API to extract the location details of your website visitors right from their IPs.
By leveraging Geolocation API, you can offer the relevant products, services, news, notifications to the users. You can directly integrate the API within your application to retrieve the necessary IP information.
Now, you may be wondering which is the Best IP To Address API Services?
Hence, in this blog, we have gathered and compared the list of a few free and premium API services that proffer outstanding features. Have a look at them, & choose the one according to your requirements & budget.
Ip To Address
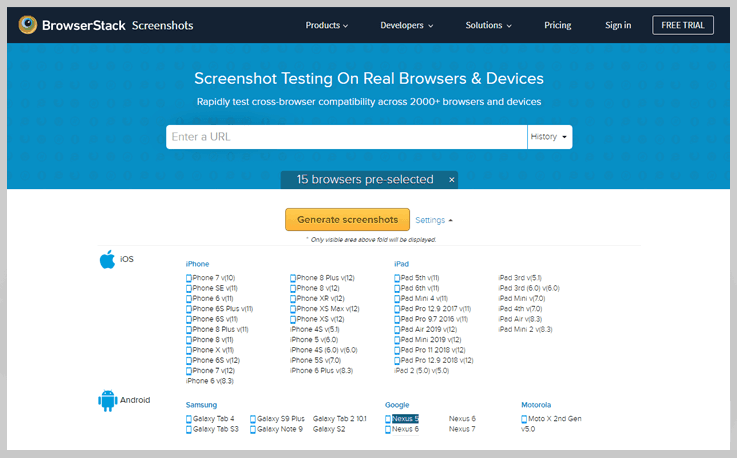
4 Best Capture Website Screenshot API Services 2022

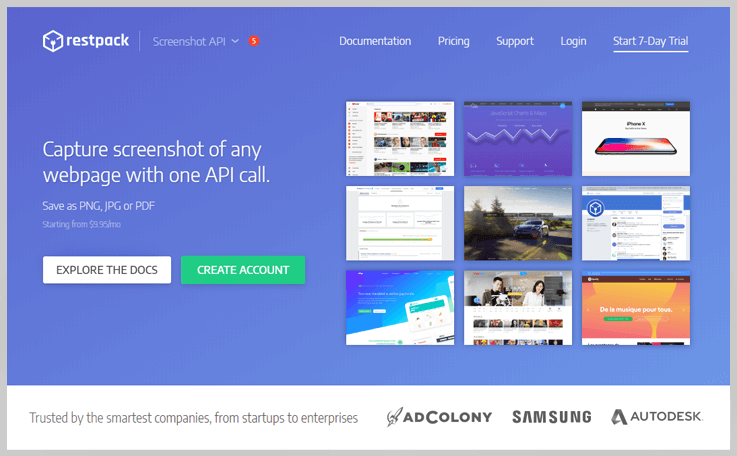
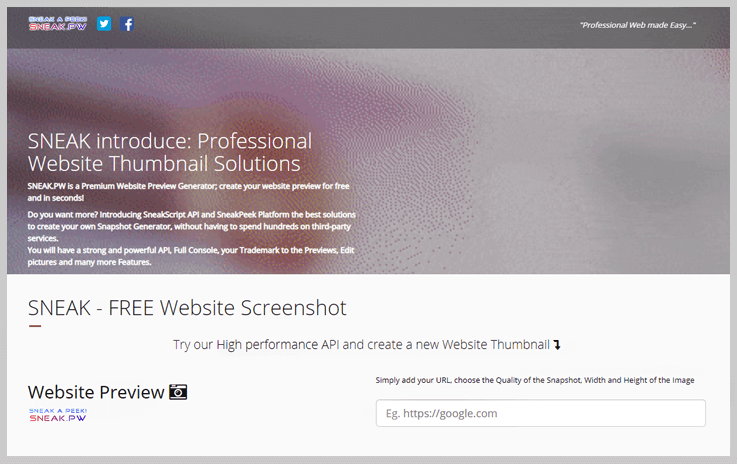
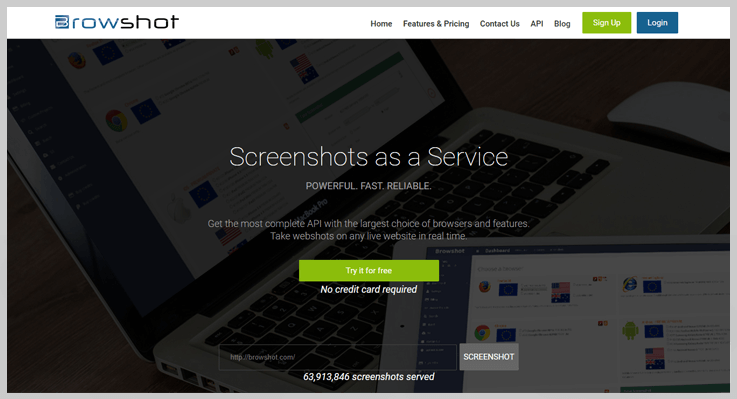
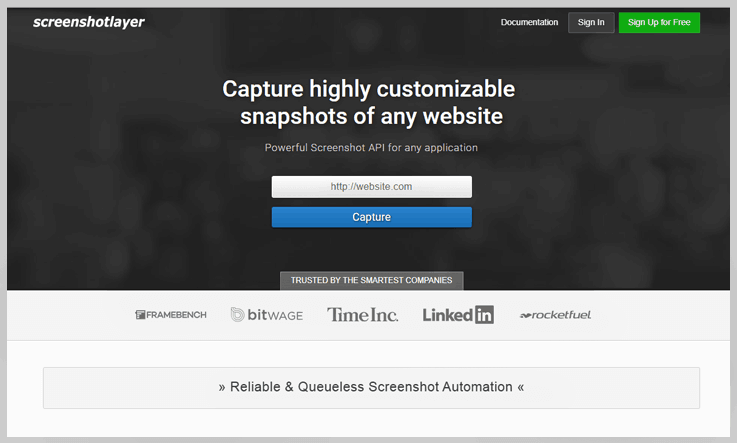
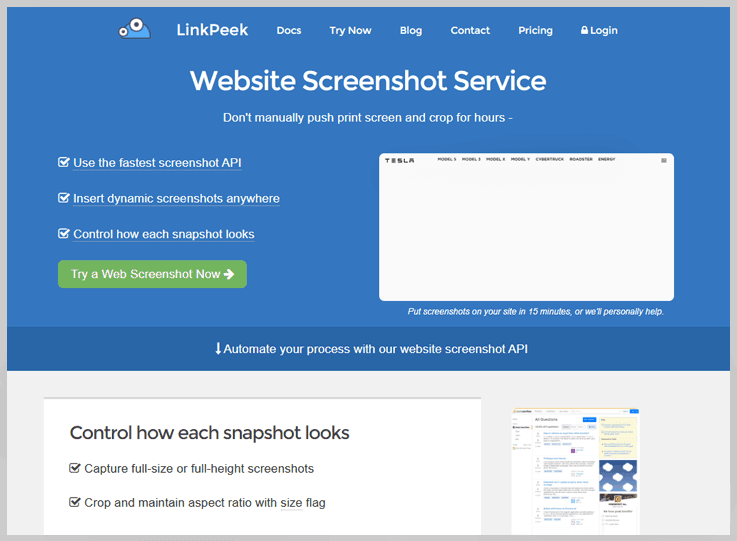
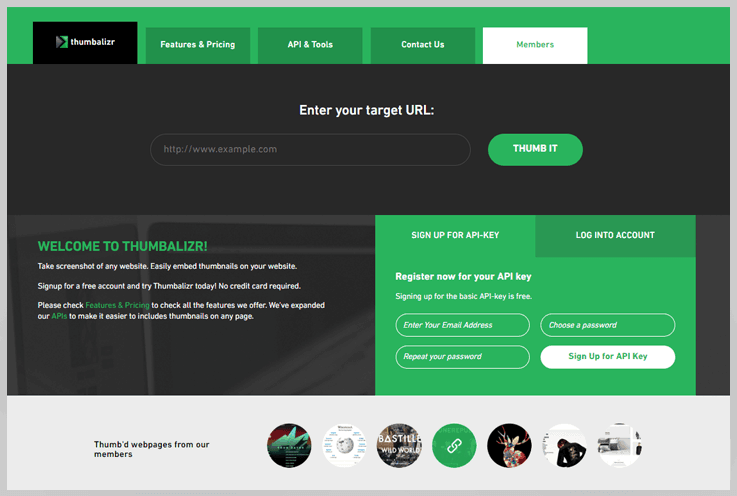
Try creating quality screenshots, crop them, resize and upload somewhere repetitively and you’ll see that it’s more complicated and time-consuming than it looks. By using a screenshot API, you can quickly generate hundreds of pixel-perfect screenshots within minutes. But, you may be wondering which is the best Capture Website Screenshot API Services.
To help you out, we gathered the best URL to screenshot API we could find and compared them so you can choose the one that suits you best.
Capture Website Screenshot
4 Best URL To PNG API Services 2022

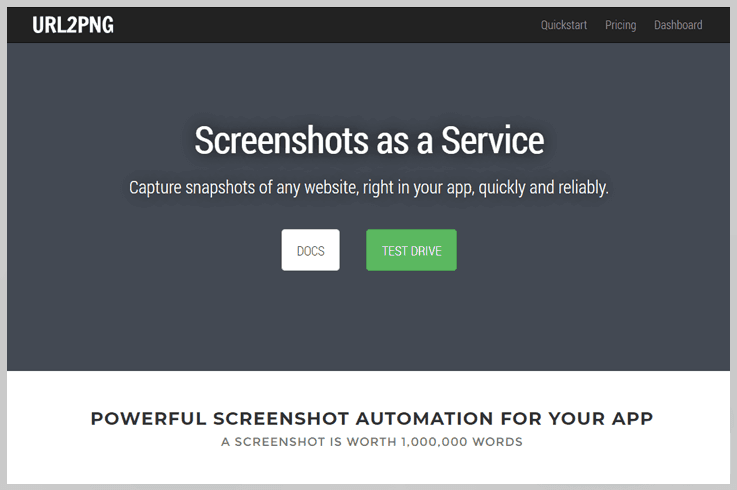
Try creating quality screenshots, crop them, resize and upload somewhere repetitively and you’ll see that it’s more complicated and time-consuming than it looks. By using a screenshot API, you can quickly generate hundreds of pixel-perfect screenshots within minutes. But, you may be wondering which is the best URL To PNG API Services.
To help you out, we gathered the best URL to screenshot API we could find and compared them so you can choose the one that suits you best.
Url To Png

4 Best URL To Image API Services 2022

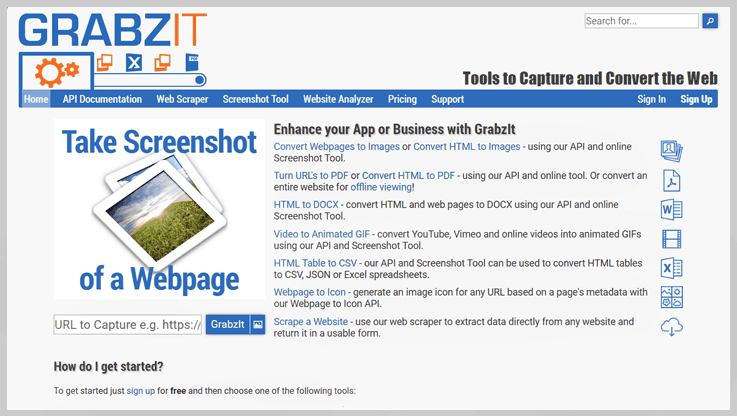
Try creating quality screenshots, crop them, resize and upload somewhere repetitively and you’ll see that it’s more complicated and time-consuming than it looks. By using a screenshot API, you can quickly generate hundreds of pixel-perfect screenshots within minutes. But, you may be wondering which is the best URL To Image API Services.
To help you out, we gathered the best URL to screenshot API we could find and compared them so you can choose the one that suits you best.
Url To Image