
This tutorial will help you to learn about the “background-size” property of CSS and how to set it in your HTML element.
The CSS3 method is strongly preferred now a days, as it has given the flexibility to resize the background image and can be reused in different contexts.
One can specify the size in pixels or percentages.
Background Size Syntax
Keywords syntax-
background-size: cover /*Background image will cover both the coordinate of containing box.*/
background-size: contain /*Small size images will spread till the containing box covers completely.*/

One-value syntax. First value is width and height will automatically set to auto-
background-size: 50%
background-size: 3em
background-size: 12px
background-size: auto

Two-value syntax. First value define the width and other value define the height-
background-size: 50% auto
background-size: 3em 25%
background-size: auto 6px
background-size: auto auto
Example 1 – Background Size in DIV
The below CSS code will show you background property. In the DIV section we have used background image and size property. In “background-image” property we have provide image name and its path and “background-size” is to provide the suitable size for the image which you can also vary as per requirement.

CSS Code
div{
background-image: url('images/wood.jpg');
background-size: 300px 100px;
background-repeat: no-repeat;
}
HTML Code
<!DOCTYPE html>
<html>
<head>
<title>Background CSS Example </title>
<!-- Include CSS file here -->
<link href="css/style.css" rel="stylesheet">
</head>
<body>
<!-- "Example of Background image size for div." By FormGet.com -->
<div id="head">
<h3>CSS Background-Size</h3>
<p>
This is a sample Text that is being used to show tutorial.<br/>
You can easily check the live demo with example.<br/>
FormGet is a <a href="https://www.formget.com">online form builder</a>.
</p>
</div>
</body>
</html>
Example 2 – Background Size in Textarea
In the above example we learned to use background property for DIV section. In this example we have cover it for textarea.

CSS Code
textarea{
background-image: url('images/diary-new.png');
background-size: 300px 100px;
background-repeat: no-repeat;
}
HTML Code
<!DOCTYPE html>
<html>
<head>
<title>Background CSS Example</title>
<!-- Include CSS file here -->
<link href="css/style.css" rel="stylesheet">
</head>
<body>
<!-- "Example of Background image size for Textarea." By FormGet.com -->
<div id="head">
<form action="#" method="post">
<label>Textarea Write your text</label><br />
<textarea id="sample" rows="10" cols="45"></textarea>
</form>
</div>
</body>
</html>
Conclusion:
This tutorial is aimed towards adding background image to any HTML element. Just follow the example and demo to add background image to any HTML element. This tutorial shows two examples in parallel on how the background image works on two different HTML elements. The download file contains both the examples in it. You can follow the tutorial all along to add background image to any possible HTML element.
To know more check out the below-mentioned blogs –
- CSS Gradient
- How To Make Simple Responsive Form Using CSS
Set JavaScript Form Action
In this tutorial, we illustrate you an example, which shows how to set JavaScript form action. Sometimes developers want to set form action attribute of a form through programming or through other means.

Here, we are using following JavaScript code to set form action on run time.
To set form action attribute via JavaScript :
document.getElementById("form_id").action = "success.php"; //Setting form action to "success.php" page
document.getElementById("form_id").submit(); // Submitting form
We have also called JavaScript validation function over form fields to validate form fields. For learning more, just go through our complete HTML and Javascript codes.
Watch our live demo or download our codes to use it.

HTML File: set_action.html
Here, we have created a simple HTML form with select option field, and it’s action attribute is not defined, As we will set this attribute using JavaScript
<!DOCTYPE html>
<html>
<head>
<title>Javascript Set Form Action Example</title>
<!-- Include CSS file here -->
<link href="css/style.css" rel="stylesheet">
<!-- Include JS file here -->
<script src="js/set_action.js"></script>
</head>
<body>
<div class="container main">
<form id="form_id" method="post" name="myform">
<h2>Javascript Set Form Action Example</h2>
<label>Name :</label>
<input id="name" name="name" placeholder="Name" type="text">
<label>Email :</label>
<input id="email" name="email" placeholder="Valid Email" type="text">
<label>Contact No. :</label>
<input id="contact" name="contact" placeholder="Contact No." type="text">
<input onclick="myfunction()" type="button" value="Submit">
<span><b class="note">Note :</b> Form action will be set to <b>success.php</b> on click of submit button.</span>
</form>
</div>
</body>
</html>
Javascript File: set_action.js
Given below is our complete set form action in JavaScript.
// Submit form with id function
function myfunction() {
var name = document.getElementById("name").value;
var email = document.getElementById("email").value;
var contact = document.getElementById("contact").value;
if (validation()) // Calling validation function
{
document.getElementById("form_id").action = "success.php"; // Setting form action to "success.php" page
document.getElementById("form_id").submit(); // Submitting form
}
}
// Name and Email validation Function
function validation() {
var name = document.getElementById("name").value;
var email = document.getElementById("email").value;
var contact = document.getElementById("contact").value;
var emailReg = /^([w-.]+@([w-]+.)+[w-]{2,4})?$/;
if (name === '' || email === '' || contact === '') {
alert("Please fill all fields...!!!!!!");
return false;
} else if (!(email).match(emailReg)) {
alert("Invalid Email...!!!!!!");
return false;
} else {
return true;
}
}
PHP page success.php
This page includes PHP script to display form field’s values
<?php
// Fetching Values from URL
$name=$_POST['name'];
$email=$_POST['email'];
?>
<!DOCTYPE html>
<html>
<head>
<title>Javascript Set Form Action Example</title>
<!-- Include CSS File Here -->
<link rel="stylesheet" href="css/style.css"/>
</head>
<body>
<div class="container">
<div class="main">
<h2>Form Data Received Here</h2>
<form>
<label>Name : </label><label><?php echo $name; ?></label>
<label>Email : </label><label><?php echo $email; ?></label>
<a href="set_action.html" class="back">Back</a>
</form>
</div>
</div>
</body>
</html>
CSS File: style.css
Styling of HTML elements.
/* Below line is used for online Google font */
@import url(http://fonts.googleapis.com/css?family=Raleway);
h2{
background-color: #FEFFED;
padding: 30px 35px;
margin: -10px -50px;
text-align:center;
border-radius: 10px 10px 0 0;
}
.note{
color:red;
}
.back{
font-size: 14px;
padding: 5px 15px;
text-decoration: none;
color: white;
background-color: rgb(34, 128, 172);
border-radius: 3px;
border: 1px solid rgb(9, 78, 133);
}
hr{
margin: 10px -50px;
border: 0;
border-top: 1px solid #ccc;
margin-bottom: 40px;
}
div.container{
width: 900px;
height: 610px;
margin:35px auto;
font-family: 'Raleway', sans-serif;
}
div.main{
width: 300px;
padding: 10px 50px 25px;
border: 2px solid gray;
border-radius: 10px;
font-family: raleway;
float:left;
margin-top:30px;
}
input[type=text]{
width: 95%;
height: 25px;
padding: 5px;
margin-bottom: 25px;
margin-top: 5px;
border: 2px solid #ccc;
color: #4f4f4f;
font-size: 16px;
border-radius: 5px;
}
label{
color: #464646;
text-shadow: 0 1px 0 #fff;
font-size: 14px;
font-weight: bold;
}
input[type=button]{
font-size: 16px;
background: linear-gradient(#ffbc00 5%, #ffdd7f 100%);
border: 1px solid #e5a900;
color: #4E4D4B;
font-weight: bold;
cursor: pointer;
width: 100%;
border-radius: 5px;
margin-bottom:10px;
padding: 10px 0;
outline:none;
}
input[type=button]:hover{
background: linear-gradient(#ffdd7f 5%, #ffbc00 100%);
}
Conclusion:
Thus, we can set form action using JavaScript in the above illustrated way. Hope that helped you a lot, keep reading our other blogs.
You may also like –
- Chrome Extension: Inject Javascript Into Web Page
- Change Form Action With Javascript
- How To Create Sidebar Sliding Contact Form With JavaScript
Javascript : Auto Submit Form Example
We have demonstrated various ways to submit a form in our earlier blogs. Sometimes there is a need to submit a form automatically. That brings up a great user experience while making them to submit entries.
Here we bring up this example, which demonstrates how to auto submit a form after a given interval of time.
Using window.onload event of JavaScript we have a initiated a timer and after that particular time form gets submitted.
There is a count down timer shown in our form to notify user that, form will submit in (say 20 seconds). Below are the glimpses for it :
// Initializing timer variable.
var x = 20;
var y = document.getElementById("timer");
// Display count down for 20 seconds
setInterval(function(){
if( x<=21 && x>=1)
{
x--;
y.innerHTML= ''+x+'';
if(x==1){
x=21;
}
}
}, 1000);
After completing 20 seconds, below Javascript function will submit form automatically.
// Form Submitting after 20 seconds.
var auto_refresh = setInterval(function() { submitform(); }, 20000);
// Form submit function.
function submitform(){
if( validate() ) // Calling validate function.
{ alert('Form is submitting.....');
document.getElementById("form").submit();
}
}
Our example, validates all fields before form submission by calling user defined validate() function.
Watch live demo or download our codes to use it.

Complete HTML and Javascript codes are given below.
HTML file: auto_submit.html
Given below our complete HTML code for a form without submit button.
<html>
<head>
<title>Javascript AutoSubmit Form Example</title>
<!-- Include CSS File Here-->
<link rel="stylesheet" href="css/style.css"/>
<!-- Include JS File Here-->
<script src="js/auto_submit.js"></script>
</head>
<body>
<div class="container">
<div class="main">
<form action="success.html" method="post" id="form">
<h2>Javascript AutoSubmit Form Example</h2>
<span>Form will automatically submit in <b id="timer">20</b> <b>seconds</b>.</span>
<label>Name :</label>
<input type="text" name="name" id="name" placeholder="Name" />
<label>Email :</label>
<input type="text" name="email" id="email" placeholder="Valid Email" />
<label>Gender :</label>
<input type="radio" name="gender" value="Male" id="male" />
<label>Male</label>
<input type="radio" name="gender" value="Female" id="female" />
<label>Female</label>
<label>Contact No. :</label>
<input type="text" name="contact" id="contact" placeholder="Contact No." />
</form>
</div>
</div>
</body>
</html>
Javascript file: auto_submit.js
In the below script, count down displays for 20 seconds and then form will submit automatically on load event.
window.onload = function() {
// Onload event of Javascript
// Initializing timer variable
var x = 20;
var y = document.getElementById("timer");
// Display count down for 20s
setInterval(function() {
if (x <= 21 && x >= 1) {
x--;
y.innerHTML = '' + x + '';
if (x == 1) {
x = 21;
}
}
}, 1000);
// Form Submitting after 20s
var auto_refresh = setInterval(function() {
submitform();
}, 20000);
// Form submit function
function submitform() {
if (validate()) // Calling validate function
{
alert('Form is submitting.....');
document.getElementById("form").submit();
}
}
// To validate form fields before submission
function validate() {
// Storing Field Values in variables
var name = document.getElementById("name").value;
var email = document.getElementById("email").value;
var contact = document.getElementById("contact").value;
// Regular Expression For Email
var emailReg = /^([w-.]+@([w-]+.)+[w-]{2,4})?$/;
// Conditions
if (name != '' && email != '' && contact != '') {
if (email.match(emailReg)) {
if (document.getElementById("male").checked || document.getElementById("female").checked) {
if (contact.length == 10) {
return true;
} else {
alert("The Contact No. must be at least 10 digit long!");
return false;
}
} else {
alert("You must select gender.....!");
return false;
}
} else {
alert("Invalid Email Address...!!!");
return false;
}
} else {
alert("All fields are required.....!");
return false;
}
}
};
CSS File: style.css
Styling HTML elements.
/* Below line is used for online Google font */
@import url(http://fonts.googleapis.com/css?family=Raleway);
h2{
background-color: #FEFFED;
padding: 30px 35px;
margin: -10px -50px;
text-align:center;
border-radius: 10px 10px 0 0;
}
span{
display: block;
margin-top: 10px;
font-weight:bold;
}
b{
color:red;
}
.back{
text-decoration: none;
border: 1px solid rgb(0, 143, 255);
background-color: rgb(0, 214, 255);
padding: 3px 20px;
border-radius: 2px;
color: black;
}
center{
font-size: 31px;
}
hr{
margin: 10px -50px;
border: 0;
border-top: 1px solid #ccc;
margin-bottom: 25px;
}
div.container{
width: 900px;
height: 610px;
margin:35px auto;
font-family: 'Raleway', sans-serif;
}
div.main{
width: 306px;
padding: 10px 50px 0px;
border: 2px solid gray;
border-radius: 10px;
font-family: raleway;
float:left;
margin-top: 30px;
}
input[type=text]{
width: 100%;
height: 40px;
padding: 5px;
margin-bottom: 25px;
margin-top: 5px;
border: 2px solid #ccc;
color: #4f4f4f;
font-size: 16px;
border-radius: 5px;
}
input[type=radio]{
margin: 10px 10px 0 10px;
}
label{
color: #464646;
text-shadow: 0 1px 0 #fff;
font-size: 14px;
font-weight: bold;
}
input[type=submit]{
font-size: 16px;
background: linear-gradient(#ffbc00 5%, #ffdd7f 100%);
border: 1px solid #e5a900;
color: #4E4D4B;
font-weight: bold;
cursor: pointer;
width: 100%;
border-radius: 5px;
padding: 10px 0;
outline:none;
}
input[type=submit]:hover{
background: linear-gradient(#ffdd7f 5%, #ffbc00 100%);
}
Conclusion:
This was all about to automatically submit a form using JavaScript. You can change the time limit of the form submit according to you. Hope you like it, keep reading our other blogs for more knowledge.
PHP GET and POST Method – Tutorial
While dealing with the forms, information can be submitted and transferred to same or another page. To send submitted data through form, one can use GET & POST method to do that in PHP.
A form data can be submitted using these two methods. Both are used for same purpose but stands apart under some specifications. As in GET method key values are passed in the Url while in POST, the information transfers in a hidden manner.
A form submitted information is appended in to the url in the form of Query String consisting of name=value pairs in URL. This string contains user values/data, which are separated by ampersand and spaces are replaced with + sign.
?name=john&[email protected]&contact=9877989898We have covered lot of examples in which, we set method attribute of form to GET or POST. Let’s discuss about them in detail.
-
GET Method
As explained above, before sending any information , it converts values/data into a query string in URL known as Url Encoding. Which contains both page link and encoded information separated by the ? character.
http://www.example.com/index.html?name=john&[email protected]&contact=9877989898Client Side: Below code is an HTML form with method=”get” for user to fill information.
<form action="#" method="get">
<input type="text" name="name" placeholder="Your Name"></input><br/>
<input type="text" name="email" placeholder="Your Email"></input><br/>
<input type="text" name="contact" placeholder="Your Mobile"></input><br/>
<input type="submit" name="submit" value="Submit"></input>
</form>
Server Side: Below code has PHP script where, $_GET associative array is used to receive sent information at server end.
<?php
if( $_GET["name"] || $_GET["email"] || $_GET["contact"])
{
echo "Welcome: ". $_GET['name']. "<br />";
echo "Your Email is: ". $_GET["email"]. "<br />";
echo "Your Mobile No. is: ". $_GET["contact"];
}
?>
Above query string of information, generated by Get method can be readable in address bar therefore, never use Get method for sending sensitive information to server.
One should avoid use of this method to send binary data like, Images or Word Document file to the server.
-
POST Method
As explained above, before sending information to server, it converts client’s information into a query string in URL.
Client Side: Below code is an HTML form with method=”post” for user to fill information.
<form action="#" method="post">
....
</form>
Server Side: Below code has PHP script where, $_POST associative array is used to receive sent information at server end.
<?php
if( $_POST["name"] || $_POST["email"] || $_POST["contact"])
{
echo "Welcome: ". $_POST['name']. "<br />";
echo "Your Email is: ". $_POST["email"]. "<br />";
echo "Your Mobile No. is: ". $_POST["contact"];
}
?>
Query string , generated by Post method never appears in address bar i.e. it is hidden for the user therefore, we can use this method for sending sensitive information to server. Moreover, we can make use of this method to send binary data to the server without any restrictions to data size.
In our example, we allow user to choose a method via radio button and this value is assigned to form’s method attribute.
$("input[type=radio]").change(function(){
var method = $(this).val();
$("#form").attr("method", method);   // Assigns Method Type From Radio Button
});
Watch our live demo or just follow our codes and download it.

Complete HTML and PHP codes are given below.
HTML form: first.php
Given below our complete HTML form.
<!DOCTYPE html>
<html>
<head>
<title>PHP GET and POST Method Example</title>
<!-- Include CSS  File Here-->
<link rel="stylesheet" href="css/style.css"/>
<!-- Include JavaScript File Here-->
<script src="http://ajax.googleapis.com/ajax/libs/jquery/1.11.1/jquery.min.js"></script>
<script type="text/javascript" src="js/get_post.js"></script>
</head>
<body>
<div class="container">
<div class="main">
<form method="" action="first.php" id="form">
<h2>PHP GET and POST Method Example</h2>
<label>Select Form Method :</label>
<span><input type="radio" name="method" value="post"> POST
<input type="radio" name="method" value="get"> GET </span>
<label>First Name :</label>
<input type="text" name="fname" id="fname" />
<label>Last Name :</label>
<input type="text" name="lname" id="lname" />
<input type="submit" name="submit" id="submit" value="Submit">
</form>
<?php include "second.php";?>
</div>
</div>
</body>
</html>
PHP code: second.php
Below PHP code display values on the basis of GET and POST method.
<!--  This code will execute when form method is set to POST  -->
<?php
if(isset($_POST['fname']))
{
$fname = $_POST['fname'];
$lname = $_POST['lname'];
echo "<span class='success'>Form Submitted By <b>POST METHOD</b></span><br/>";
echo "First Name : ".$fname."<br/>Last Name : ".$lname;
}
?>
<!--  This code will execute when form method is set to GET  -->
<?php
if(isset($_GET['fname']))
{
$fname = $_GET['fname'];
$lname = $_GET['lname'];
echo "<span class='success'>Form Submitted By <b>GET METHOD</b></span><br/>";
echo "First Name : ".$fname."<br/>Last Name : ".$lname;
}
?>
jQuery code: get_post.js
In the below script, we used on change event to get value of radio button. As this value is assigned to method attribute of form.
$(document).ready(function() {
$("input[type=radio]").change(function() {
var method = $(this).val();
$("#form").attr("method", method); // Assigns Method Type From Radio Button
});
// Function Executes On Submit Button's Click
$("#submit").click(function() {
var fname = $("#fname").val();
var lname = $("#lname").val();
if (fname != '' || lname != '') {
return true;
} else {
alert("Please fill all fields...!!!!!!");
return false;
}
});
});
CSS File: style.css
Styling HTML elements.
@import "http://fonts.googleapis.com/css?family=Raleway";
/* Above line is used for online google font */
h2 {
background-color:#FEFFED;
padding:30px 35px;
margin:-10px -50px;
text-align:center;
border-radius:10px 10px 0 0
}
span {
display:block;
margin-bottom:20px;
color:red
}
.success {
display:block;
margin-top:20px;
margin-bottom:0;
font-size:14px
}
b {
color:green
}
hr {
margin:10px -50px;
border:0;
border-top:1px solid #ccc;
margin-bottom:25px
}
div.container {
width:900px;
height:610px;
margin:35px auto;
font-family:'Raleway',sans-serif
}
div.main {
width:306px;
padding:10px 50px 30px;
border:2px solid gray;
border-radius:10px;
font-family:raleway;
float:left;
margin-top:15px
}
input[type=text] {
width:96%;
height:25px;
padding:5px;
margin-bottom:25px;
margin-top:5px;
border:2px solid #ccc;
color:#4f4f4f;
font-size:16px;
border-radius:5px
}
input[type=radio] {
margin:10px 10px 0
}
label {
color:#464646;
text-shadow:0 1px 0 #fff;
font-size:14px;
font-weight:700
}
input[type=submit] {
font-size:16px;
background:linear-gradient(#ffbc00 5%,#ffdd7f 100%);
border:1px solid #e5a900;
color:#4E4D4B;
font-weight:700;
cursor:pointer;
width:100%;
border-radius:5px;
padding:10px 0;
outline:none
}
input[type=submit]:hover {
background:linear-gradient(#ffdd7f 5%,#ffbc00 100%)
}
Conclusion:
For above reasons, POST method is widely used to send the information to server. Hope this tutorial helped you a lot, keep reading our other posts for more coding tricks.
JavaScript Onsubmit Event with form validation

This blog emphasize to onsubmit event in JavaScript. When a user clicks on submit button of a form, JavaScript onsubmit event will call a function.
Invoking JavaScript function on form submission:
<form action="#" method="post" onsubmit="return ValidationEvent()">
In our example, we call ValidationEvent() function on form submission.
That will first validate the form fields and will return a boolean value either true or false. Depending upon the returned value the form will submit if it will be true.
JavaScript Function:
// Below Function Executes On Form Submit
function ValidationEvent() {
......
return true;   // Returns Value
}
Below is our complete code with download and live demo option

HTML File: onsubmit_event.html
Here, we have created a simple HTML form with some fields, as user clicks submit button JavaScript code will execute.
<!DOCTYPE html>
<html>
<head>
<title>Javascript Onsubmit Event Example</title>
<link href="css/style.css" rel="stylesheet"> <!-- Include CSS File Here-->
<script src="js/onsubmit_event.js"></script>
</head>
<body>
<div class="container">
<div class="main">
<form action="#" method="post" onsubmit="return ValidationEvent()">
<h2>Javascript Onsubmit Event Example</h2>
<label>Name :</label>
<input id="name" name="name" placeholder="Name" type="text">
<label>Email :</label>
<input id="email" name="email" placeholder="Valid Email" type="text">
<label>Gender :</label>
<input id="male" name="gender" type="radio" value="Male">
<label>Male</label>
<input id="female" name="gender" type="radio" value="Female">
<label>Female</label>
<label>Contact No. :</label>
<input id="contact" name="contact" placeholder="Contact No." type="text">
<input type="submit" value="Submit">
<span>All type of validation will execute on OnSubmit Event.</span>
</form>
</div>
</div>
</body>
</html>
JavaScript File: onsubmit_event.js
Given below is our complete JavaScript code.
// Below Function Executes On Form Submit
function ValidationEvent() {
// Storing Field Values In Variables
var name = document.getElementById("name").value;
var email = document.getElementById("email").value;
var contact = document.getElementById("contact").value;
// Regular Expression For Email
var emailReg = /^([w-.]+@([w-]+.)+[w-]{2,4})?$/;
// Conditions
if (name != '' && email != '' && contact != '') {
if (email.match(emailReg)) {
if (document.getElementById("male").checked || document.getElementById("female").checked) {
if (contact.length == 10) {
alert("All type of validation has done on OnSubmit event.");
return true;
} else {
alert("The Contact No. must be at least 10 digit long!");
return false;
}
} else {
alert("You must select gender.....!");
return false;
}
} else {
alert("Invalid Email Address...!!!");
return false;
}
} else {
alert("All fields are required.....!");
return false;
}
}
CSS File: style.css
Styling of HTML elements.
@import "http://fonts.googleapis.com/css?family=Raleway";
/* Above line is used for online google font */
h2 {
background-color:#FEFFED;
padding:30px 35px;
margin:-10px -50px;
text-align:center;
border-radius:10px 10px 0 0
}
span {
display:block;
margin-top:10px;
color:red
}
hr {
margin:10px -50px;
border:0;
border-top:1px solid #ccc;
margin-bottom:25px
}
div.container {
width:900px;
height:610px;
margin:35px auto;
font-family:'Raleway',sans-serif
}
div.main {
width:306px;
padding:10px 50px;
border:2px solid gray;
border-radius:10px;
font-family:raleway;
float:left
}
input[type=text] {
width:100%;
height:40px;
padding:5px;
margin-bottom:25px;
margin-top:5px;
border:2px solid #ccc;
color:#4f4f4f;
font-size:16px;
border-radius:5px
}
input[type=radio] {
margin:10px 10px 0
}
label {
color:#464646;
text-shadow:0 1px 0 #fff;
font-size:14px;
font-weight:700
}
input[type=submit] {
font-size:16px;
background:linear-gradient(#ffbc00 5%,#ffdd7f 100%);
border:1px solid #e5a900;
color:#4E4D4B;
font-weight:700;
cursor:pointer;
width:100%;
border-radius:5px;
padding:10px 0;
outline:none
}
input[type=submit]:hover {
background:linear-gradient(#ffdd7f 5%,#ffbc00 100%)
}
Conclusion:
In this way, we can call other JavaScript functions on form submission. Hope you might have understood it, keep reading our other blogs posts for more coding tricks.
JavaScript Form Validation With Limit Login Attempts

Login form plays a key role in website development, which authenticate user access to other resources.
Here, we are giving our JavaScript codes for validating Login form. In our example, we have a login form with two input fields i.e. username and password, As user clicks on login button, JavaScript validation function comes into act.

Moreover, we allowed three attempts for user to login, after third attempt all fields get disabled.
var attempt = 3; //Variable to count number of attempts
............
attempt --; //Decrementing by one
.............
document.getElementById("username").disabled = true;
document.getElementById("password").disabled = true;
document.getElementById("submit").disabled = true;
return false;
}
}
}
Below is our complete code with download and live demo option

HTML File: javascript_login.html
Here, we have created a simple HTML form with some fields, as user clicks submit button JavaScript code will execute.
<html>
<head>
<title>Javascript Login Form Validation</title>
<!-- Include CSS File Here -->
<link rel="stylesheet" href="css/style.css"/>
<!-- Include JS File Here -->
<script src="js/login.js"></script>
</head>
<body>
<div class="container">
<div class="main">
<h2>Javascript Login Form Validation</h2>
<form id="form_id" method="post" name="myform">
<label>User Name :</label>
<input type="text" name="username" id="username"/>
<label>Password :</label>
<input type="password" name="password" id="password"/>
<input type="button" value="Login" id="submit" onclick="validate()"/>
</form>
<span><b class="note">Note : </b>For this demo use following username and password. <br/><b class="valid">User Name : Formget<br/>Password : formget#123</b></span>
</div>
</div>
</body>
</html>
Javascript File: login.js
Given below is our complete JavaScript code.
var attempt = 3; // Variable to count number of attempts.
// Below function Executes on click of login button.
function validate(){
var username = document.getElementById("username").value;
var password = document.getElementById("password").value;
if ( username == "Formget" && password == "formget#123"){
alert ("Login successfully");
window.location = "success.html"; // Redirecting to other page.
return false;
}
else{
attempt --;// Decrementing by one.
alert("You have left "+attempt+" attempt;");
// Disabling fields after 3 attempts.
if( attempt == 0){
document.getElementById("username").disabled = true;
document.getElementById("password").disabled = true;
document.getElementById("submit").disabled = true;
return false;
}
}
}
CSS File: style.css
Styling of HTML elements.
/* Below line is used for online Google font */
@import url(http://fonts.googleapis.com/css?family=Raleway);
h2{
background-color: #FEFFED;
padding: 30px 35px;
margin: -10px -50px;
text-align:center;
border-radius: 10px 10px 0 0;
}
hr{
margin: 10px -50px;
border: 0;
border-top: 1px solid #ccc;
margin-bottom: 40px;
}
div.container{
width: 900px;
height: 610px;
margin:35px auto;
font-family: 'Raleway', sans-serif;
}
div.main{
width: 300px;
padding: 10px 50px 25px;
border: 2px solid gray;
border-radius: 10px;
font-family: raleway;
float:left;
margin-top:50px;
}
input[type=text],input[type=password]{
width: 100%;
height: 40px;
padding: 5px;
margin-bottom: 25px;
margin-top: 5px;
border: 2px solid #ccc;
color: #4f4f4f;
font-size: 16px;
border-radius: 5px;
}
label{
color: #464646;
text-shadow: 0 1px 0 #fff;
font-size: 14px;
font-weight: bold;
}
center{
font-size:32px;
}
.note{
color:red;
}
.valid{
color:green;
}
.back{
text-decoration: none;
border: 1px solid rgb(0, 143, 255);
background-color: rgb(0, 214, 255);
padding: 3px 20px;
border-radius: 2px;
color: black;
}
input[type=button]{
font-size: 16px;
background: linear-gradient(#ffbc00 5%, #ffdd7f 100%);
border: 1px solid #e5a900;
color: #4E4D4B;
font-weight: bold;
cursor: pointer;
width: 100%;
border-radius: 5px;
padding: 10px 0;
outline:none;
}
input[type=button]:hover{
background: linear-gradient(#ffdd7f 5%, #ffbc00 100%);
}
Conclusion:
Hence, we have applied JavaScript validation on login form, you can also use database to verify user. Hope you like it, keep reading our other blogs in future.
JavaScript Change Form Action Dynamically
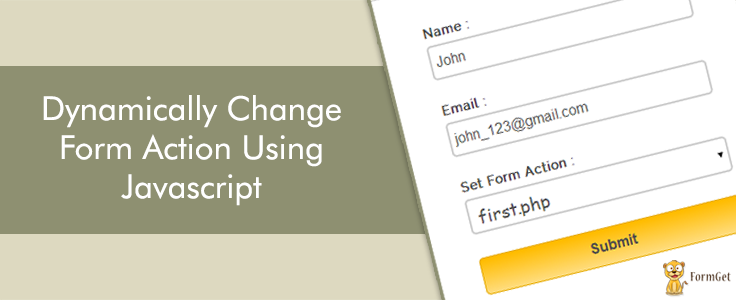
We have already explained, how to change form action dynamically using jQuery. Here, we are doing same, but using JavaScript.
Below example consists of an HTML form with a select option field, as user selects an option, form action gets dynamically set to respective page using .action() method of JavaScript.
document.getElementById("form_id").action = action;Where .action() is a method and action is a variable that stores the url to which the action is to be set. Like, action stores url as first.php
Function, to get selected value from select tag:
function select_change(){
var z = document.getElementById("form_action").selectedIndex;
var z1 = document.getElementsByTagName("option")[z].value;
alert ("Form action changed to "+z1);
}
To set form action field via JavaScript function:
// Select option value from select tag and storing it in a variable.
var x = document.getElementById("form_action").selectedIndex;
var action = document.getElementsByTagName("option")[x].value;
if(action !== ""){
document.getElementById("form_id").action = action;
document.getElementById("form_id").submit();
}
We have also applied JavaScript validation function over form fields. For more learning, just go through our complete HTML and JavaScript codes.
Watch our live demo or download our codes to use it.

HTML File: form_action.html
Here, we have created a simple HTML form with select option field, and it’s action attribute is not defined.
<!DOCTYPE html>
<html>
<head>
<title>Dynamically Change Form Action Using Javascript</title>
<!-- Include jQuery Library and File Here -->
<script type="text/javascript" src="js/form_action.js"></script>
<!-- Include CSS File Here -->
<link rel="stylesheet" href="css/style.css"/>
</head>
<body>
<div class="container">
<div class="main">
<h2>Dynamically Change Form Action Using Javascript</h2>
<form id="form_id" method="post" name="myform">
<label>Name :</label>
<input type="text" name="name" id="name"/>
<label>Email :</label>
<input type="text" name="email" id="email"/>
<label>Set Form Action :</label>
<select id="form_action" onChange="select_change()" >
<option value="">--- Set Form Action ---</option>
<option value="first.php">first.php</option>
<option value="second.php">second.php</option>
<option value="third.php">third.php</option>
</select>
<input type="button" value="Submit" onclick="myfunction()"/>
</form>
</div>
</div>
</body>
</html>
Javascript File: form_action.js
Given below is our complete JavaScript code.
function select_change() {
var z = document.getElementById("form_action").selectedIndex;
var z1 = document.getElementsByTagName("option")[z].value;
alert("Form action changed to " + z1);
}
function myfunction() {
if (validation()) {
// Calling Validation function.
//select option value from select tag and storing it in a variable.
var x = document.getElementById("form_action").selectedIndex;
var action = document.getElementsByTagName("option")[x].value;
if (action !== "") {
document.getElementById("form_id").action = action;
document.getElementById("form_id").submit();
} else {
alert("Please set form action");
}
}
}
// Name and Email validation Function.
function validation() {
var name = document.getElementById("name").value;
var email = document.getElementById("email").value;
var emailReg = /^([w-.]+@([w-]+.)+[w-]{2,4})?$/;
if (name === '' || email === '') {
alert("Please fill all fields...!!!!!!");
return false;
} else if (!(email).match(emailReg)) {
alert("Invalid Email...!!!!!!");
return false;
} else {
return true;
}
}
CSS File: style.css
Styling of HTML elements.
/* Below line is used for online Google font */
@import url(http://fonts.googleapis.com/css?family=Raleway);
h2{
background-color: #FEFFED;
padding: 30px 35px;
margin: -10px -50px;
text-align:center;
border-radius: 10px 10px 0 0;
}
.back{
font-size: 14px;
padding: 5px 15px;
text-decoration: none;
color: white;
background-color: rgb(34, 128, 172);
border-radius: 3px;
border: 1px solid rgb(9, 78, 133);
}
hr{
margin: 10px -50px;
border: 0;
border-top: 1px solid #ccc;
margin-bottom: 40px;
}
div.container{
width: 900px;
height: 610px;
margin:35px auto;
font-family: 'Raleway', sans-serif;
}
div.main{
width: 300px;
padding: 10px 50px 25px;
border: 2px solid gray;
border-radius: 10px;
font-family: raleway;
float:left;
margin-top:30px;
}
input[type=text],select{
width: 95%;
height: 25px;
padding: 5px;
margin-bottom: 25px;
margin-top: 5px;
border: 2px solid #ccc;
color: #4f4f4f;
font-size: 16px;
border-radius: 5px;
}
select{
width: 100%;
height:40px;
font-family:cursive;
font-size: 20px;
}
label{
color: #464646;
text-shadow: 0 1px 0 #fff;
font-size: 14px;
font-weight: bold;
}
input[type=button]{
font-size: 16px;
background: linear-gradient(#ffbc00 5%, #ffdd7f 100%);
border: 1px solid #e5a900;
color: #4E4D4B;
font-weight: bold;
cursor: pointer;
width: 100%;
border-radius: 5px;
margin-bottom:10px;
padding: 10px 0;
}
input[type=button]:hover{
background: linear-gradient(#ffdd7f 5%, #ffbc00 100%);
}
Conclusion:
Thus, we can change form action using JavaScript in this way, hope you have liked it. Keep reading our other blogs for getting coding tricks.
Recommended blogs –
- Javascript Auto Submit Form
- Create Multi Step Form Using Javascript and CSS
- How To Dynamically Add and Remove Form Fields Using JavaScript
JavaScript Serialize Form Data
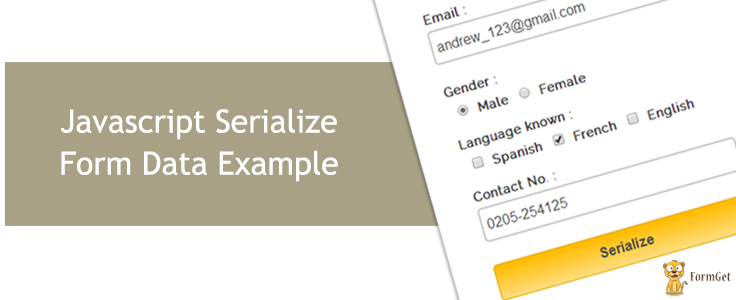
Serializing form data means to get all values of form fields in a text string (in URL query string format).
For example:
contact=598864552&language=French&gender=Male&email=john_12%40hotmail.com&name=John
jQuery has a method “serialize()” to serialize form data. However, JavaScript serialize form do not support this method directly. To allow form data serialize in JavaScript, we must import a library from google.
<!-- For Serialization Function -->
<script type="text/javascript" src="http://form-serialize.googlecode.com/svn/trunk/serialize-0.2.min.js"></script>
Form data can be serialized by both jQuery and JavaScript but, the major difference between them is that, jQuery’s serialize() method returns form field values in top down sequence whereas, serialize JavaScript returns it in bottom up sequence.
Here in this example you will see that contact number field’s value will be shown up first in the query string which is the last field of the form.
contact=598864552&language=French&gender=Male&email=john_12%40hotmail.com&name=JohnJavascript serialize method:
document.getElementById("wrapper").innerHTML = serialize(document.forms[0]); //Serialize Form Data
jQuery serialize method:
$("div").text($("form").serialize()); //Serialize Form Data
In our example, we have created an HTML form with some common form fields like “text”, “checkbox” and “radio” and to get their values, we used JavaScript serialize method which returns a string.
Watch out the live demo or download the code to use it.

Complete HTML and JavaScript codes are given below.
HTML file: serialize.html
Given below our complete HTML form.
<!DOCTYPE html>
<html>
<head>
<title>JavaScript Serialize Form Data Example</title>
<link href="css/style.css" rel="stylesheet"> <!-- Include CSS File Here-->
<script src="http://form-serialize.googlecode.com/svn/trunk/serialize-0.2.min.js" type="text/javascript"></script> <!-- For Serialization Function -->
<script src="js/serialize.js"></script> <!-- Include JavaScript File Here-->
</head>
<body>
<div class="container">
<div class="main">
<form action="" id="form" method="post" name="form">
<h2>JavaScript Serialize Form Data Example</h2>
<label>Name :</label>
<input id="name" name="name" placeholder="Name" type="text">
<label>Email :</label>
<input id="email" name="email" placeholder="Valid Email" type="text">
<label>Gender :</label>
<input name="gender" type="radio" value="Male">
<label>Male</label>
<input name="gender" type="radio" value="Female">
<label>Female</label>
<label>Language known :</label>
<input name="language" type="checkbox" value="Spanish">
<label>Spanish</label> <input name="language" type="checkbox" value="French">
<label>French</label>
<input name="language" type="checkbox" value="English">
<label>English</label>
<label>Contact No. :</label>
<input id="contact" name="contact" placeholder="Contact No." type="text">
<input onclick="myfunction()" type="button" value="Serialize">
<span>Serialized form data will be shown below.</span>
</form>
</div>
<!--Below Paragraph Tag Displays Serialized Form Data-->
<p id="wrapper"></p>
</div>
</body>
</html>
JavaScript file: serialize.js
In the below script, we validate all fields and then serialize form data.
function myfunction() {
if (validation()) // Calling Validation Function
{
// Serializing Form Data And Displaying It In <p id="wrapper"></p>
document.getElementById("wrapper").innerHTML = serialize(document.forms[0]); // Serialize Form Data
document.getElementById("form").reset(); // Reset Form Fields
}
}

// Name And Email Validation Function
function validation() {
var name = document.getElementById("name").value;
var email = document.getElementById("email").value;
var contact = document.getElementById("contact").value;
var emailReg = /^([w-.]+@([w-]+.)+[w-]{2,4})?$/;
if (name === '' || email === '' || contact === '') {
alert("Please fill all fields...!!!!!!");
return false;
} else if (!(email).match(emailReg)) {
alert("Invalid Email...!!!!!!");
return false;
} else {
return true;
}
}
CSS File: style.css
Styling HTML elements.
@import "http://fonts.googleapis.com/css?family=Raleway";
/* Above line is used for online google font */
h2 {
background-color:#FEFFED;
padding:30px 35px;
margin:-10px -50px;
text-align:center;
border-radius:10px 10px 0 0
}
span {
display:block;
margin-top:10px;
color:red
}
p {
color:green;
font-weight:700;
clear:both;
padding:15px
}
hr {
margin:10px -50px;
border:0;
border-top:1px solid #ccc;
margin-bottom:25px
}
div.container {
width:900px;
height:610px;
margin:35px auto;
font-family:'Raleway',sans-serif
}
div.main {
width:306px;
padding:10px 50px;
border:2px solid gray;
border-radius:10px;
font-family:raleway;
float:left
}
input[type=text] {
width:100%;
height:40px;
padding:5px;
margin-bottom:25px;
margin-top:5px;
border:2px solid #ccc;
color:#4f4f4f;
font-size:16px;
border-radius:5px
}
input[type=radio],input[type=checkbox] {
margin:10px 10px 0
}
label {
color:#464646;
text-shadow:0 1px 0 #fff;
font-size:14px;
font-weight:700
}
input[type=button] {
font-size:16px;
background:linear-gradient(#ffbc00 5%,#ffdd7f 100%);
border:1px solid #e5a900;
color:#4E4D4B;
font-weight:700;
cursor:pointer;
width:100%;
border-radius:5px;
padding:10px 0;
outline:none
}
input[type=button]:hover {
background:linear-gradient(#ffdd7f 5%,#ffbc00 100%)
}
Conclusion:
So, this was all about form data serialization using JavaScript. Hope you like it, keep reading our other blogs post and do provide us your valuable feedback.
Check out our latest blogs here –
- Chrome Extension Tutorial: to Display RSS Blog Feeds
- Reset Form Fields Using JavaScript
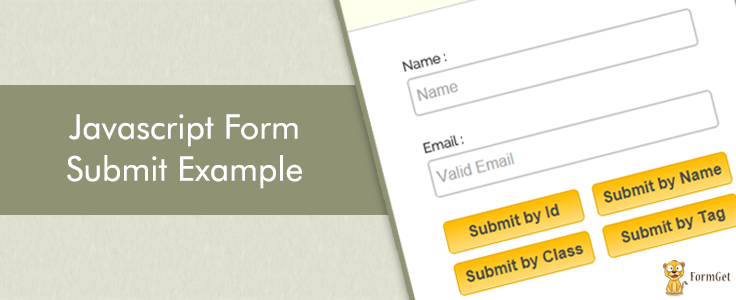
Onclick JavaScript Form Submit
In javascript onclick event , you can use form.submit() method to submit form.
You can perform submit action by, submit button, by clicking on hyperlink, button and image tag etc. You can also perform javascript form submission by form attributes like id, name, class, tag name as well.
In our previous blogs we have explained various ways to submit form using jQuery. Here in this tutorial, we will explain you different ways to submit a form using Javascript. In which we will use JavaScript submit() function to create an object, which keeps form attribute to perform submit acction. An attribute can be id, class, name or tag.
Watch out the live demo or download the code to use it.

Now we will be going to see different ways of submitting form :
onclick form submit by id
For example,if the ID of your form is ‘form_id’, the JavaScript code for the submit call is

document.getElementById("form_id").submit();// Form submissiononclick form submit by class
For example,if the class of your form is ‘form_class’, the JavaScript code for the submit call is

var x = document.getElementsByClassName("form_class");
x[0].submit(); // Form submission
onclick form submit by name
For example,if the name of your form is ‘form_name’, the JavaScript code for the submit call is

var x = document.getElementsByName('form_name');
x[0].submit(); // Form submission
onclick form submit by tag name
For example,By the tag name’, the JavaScript code for the submit call is

var x = document.getElementsByTagName("form");
x[0].submit();// Form submission
Complete FormValidation and Form Submission Using Javascript
Our example, also contains a validation function to validate name and email fields.
// Name and Email validation Function.
function validation(){
var name = document.getElementById("name").value;
var email = document.getElementById("email").value;
var emailReg = /^([w-.]+@([w-]+.)+[w-]{2,4})?$/;
if( name ==='' || email ===''){
alert("Please fill all fields...!!!!!!");
return false;
}else if(!(email).match(emailReg)){
alert("Invalid Email...!!!!!!");
return false;
}else{
return true;
}
}
Our complete HTML and Javascript codes are given below.
HTML file: submit_javascript.html
Given below our complete HTML code.
<html>
<head>
<title>Javascript Form Submit Example</title>
<!-- Include CSS File Here -->
<link rel="stylesheet" href="css/submit_javascript.css"/>
<!-- Include JS File Here -->
<script src="js/submit_javascript.js"></script>
</head>
<body>
<div class="container">
<div class="main">
<form action="#" method="post" name="form_name" id="form_id" class="form_class" >
<h2>Javascript Form Submit Example</h2>
<label>Name :</label>
<input type="text" name="name" id="name" placeholder="Name" />
<label>Email :</label>
<input type="text" name="email" id="email" placeholder="Valid Email" />
<input type="button" name="submit_id" id="btn_id" value="Submit by Id" onclick="submit_by_id()"/>
<input type="button" name="submit_name" id="btn_name" value="Submit by Name" onclick="submit_by_name()"/>
<input type="button" name="submit_class" id="btn_class" value="Submit by Class" onclick="submit_by_class()"/>
<input type="button" name="submit_tag" id="btn_tag" value="Submit by Tag" onclick="submit_by_tag()"/>
</form>
</div>
</div>
</body>
</html>
Javscript File: submit_javascript.js
Given below our complete Javascript code.
// Submit form with id function.
function submit_by_id() {
var name = document.getElementById("name").value;
var email = document.getElementById("email").value;
if (validation()) // Calling validation function
{
document.getElementById("form_id").submit(); //form submission
alert(" Name : " + name + " n Email : " + email + " n Form Id : " + document.getElementById("form_id").getAttribute("id") + "nn Form Submitted Successfully......");
}
}

// Submit form with name function.
function submit_by_name() {
var name = document.getElementById("name").value;
var email = document.getElementById("email").value;
if (validation()) // Calling validation function
{
var x = document.getElementsByName('form_name');
x[0].submit(); //form submission
alert(" Name : " + name + " n Email : " + email + " n Form Name : " + document.getElementById("form_id").getAttribute("name") + "nn Form Submitted Successfully......");
}
}

// Submit form with class function.
function submit_by_class() {
var name = document.getElementById("name").value;
var email = document.getElementById("email").value;
if (validation()) // Calling validation function
{
var x = document.getElementsByClassName("form_class");
x[0].submit(); //form submission
alert(" Name : " + name + " n Email : " + email + " n Form Class : " + document.getElementById("form_id").getAttribute("class") + "nn Form Submitted Successfully......");
}
}

// Submit form with HTML <form> tag function.
function submit_by_tag() {
var name = document.getElementById("name").value;
var email = document.getElementById("email").value;
if (validation()) // Calling validation function
{
var x = document.getElementsByTagName("form");
x[0].submit(); //form submission
alert(" Name : " + name + " n Email : " + email + " n Form Tag : <form>nn Form Submitted Successfully......");
}
}

// Name and Email validation Function.
function validation() {
var name = document.getElementById("name").value;
var email = document.getElementById("email").value;
var emailReg = /^([w-.]+@([w-]+.)+[w-]{2,4})?$/;
if (name === '' || email === '') {
alert("Please fill all fields...!!!!!!");
return false;
} else if (!(email).match(emailReg)) {
alert("Invalid Email...!!!!!!");
return false;
} else {
return true;
}
}
CSS File: submit_javascript.css
Styling HTML elements.
/* Below line is used for online Google font */
@import url(http://fonts.googleapis.com/css?family=Raleway);
h2{
background-color: #FEFFED;
padding: 30px 35px;
margin: -10px -50px;
text-align:center;
border-radius: 10px 10px 0 0;
}
hr{
margin: 10px -50px;
border: 0;
border-top: 1px solid #ccc;
margin-bottom: 40px;
}
div.container{
width: 900px;
height: 610px;
margin:35px auto;
font-family: 'Raleway', sans-serif;
}
div.main{
width: 300px;
padding: 10px 50px 10px;
border: 2px solid gray;
border-radius: 10px;
font-family: raleway;
float:left;
margin-top:60px;
}
input[type=text]{
width: 100%;
height: 40px;
padding: 5px;
margin-bottom: 25px;
margin-top: 5px;
border: 2px solid #ccc;
color: #4f4f4f;
font-size: 16px;
border-radius: 5px;
}
label{
color: #464646;
text-shadow: 0 1px 0 #fff;
font-size: 14px;
font-weight: bold;
}
#btn_id,#btn_name,#btn_class,#btn_tag{
font-size: 16px;
background: linear-gradient(#ffbc00 5%, #ffdd7f 100%);
border: 1px solid #e5a900;
color: #4E4D4B;
font-weight: bold;
cursor: pointer;
width: 47.5%;
border-radius: 5px;
margin-bottom:10px;
padding: 7px 0;
}
#btn_id:hover,#btn_name:hover,#btn_class:hover,#btn_tag:hover{
background: linear-gradient(#ffdd7f 5%, #ffbc00 100%);
}
#btn_name,#btn_tag{
margin-left: 10px;
}
Conclusion:
This was all about different ways of form submission through JavaScript. Hope you have liked it, keep reading our other blogs posts, to know more coding tricks.
Strong PHP Password Generator Script
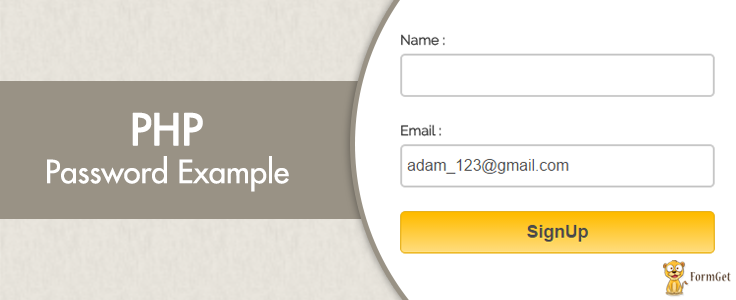
PHP password generator is an integrated, working random password generation function for PHP. This blog post concerns how to generate online secure and strong random password via PHP and to mail it to anybody’s email ID when they forgot their password.
Also, once the user log in to his/her account using auto-generated password, they would be asked to change their password for the first time.
We have applied sha1() function for PHP password encryption that store and only allows authentic users to login and access a specific web page.
In our example, our objectives is to generate passwords in PHP :
- Generating strong and secure random password for a user and mailing it to his/her email ID.
// Generating Password
$chars = "abcdefghijklmnopqrstuvwxyzABCDEFGHIJKLMNOPQRSTUVWXYZ0123456789!@#$%&*_";
$password = substr( str_shuffle( $chars ), 0, 8 );
- User is allowed to Login using same password (which is emailed earlier).
- If, user forgot his password, then newly auto generated password will be send on his/her mail account.
// Generating New password as done in above function and Update it in database by below query
$password1= sha1($password); //Encrypting Password
$query = mysql_query("UPDATE registration SET password='$password1' WHERE email='$email'");
if($query){
$to = $email;
$subject = 'Your New Password...';
$message = 'Hello User
Your new password : '.$password.'
E-mail: '.$email.'
Now you can login with this email and password.';
/* Send the message using mail() function */
if(mail($to, $subject, $message ))
{
echo "New Password has been sent to your mail, Please check your mail and SignIn.";
}
- After successful login, a session will be created for user then, user can change his/her auto-generated password online.
$_SESSION['login_user']=$email;//Initializing Session with user email
We have also used MySQL database to store user generated password.
Watch our live demo or download our code to use the PHP Password Generator.

Complete HTML and PHP codes are given below.
PHP file: password_form.php
Given below our complete HTML for login form.
<?php include 'password_generator.php'; ?>
<!DOCTYPE html>
<html>
<head>
<title>PHP Password Generator</title>
<link href="css/password.css" rel="stylesheet">
</head>
<body>
<div class="container">
<div class="main">
<h2>PHP Password Generator</h2>
<form action="password_form.php" method="post">
<label class="heading">Name :</label>
<input name="name" type="text">
<span class="error"><?php echo $nameError;?></span>
<label class="heading">Email :</label>
<input name="email" type="text">
<span class="error"><?php echo $emailError;?></span>
<input name="submit" type="submit" value="SignUp">
<span class="success"><?php echo $successMessage;?></span>
<span class="success"><?php echo $passwordMessage;?></span>
</form>
<p><b>Note :</b> Fill this form and password will be send to your email address.</p>
<a class="login" href="password_login.php">SignIn</a>
</div>
</div>
</body>
</html>
PHP file: password_generator.php
In the below script, we validate all fields and then mail the generated password. We have also applied sha1() encryption function to store encrypted password in database.
<?php
// Initialize Variables To Null.
$name =""; // Sender's Name
$email =""; // Sender's Email ID
$nameError ="";
$emailError ="";
$successMessage ="";
$passwordMessage ="";
//On Submitting Form Below Function Will Execute
if(isset($_POST['submit']))
{
// Checking Null Values In Message
if (!($_POST["name"]== "")){
$name = $_POST["name"];
// Check Name Only Contains Letters And Whitespace
if (preg_match("/^[a-zA-Z ]*$/",$name)){
if (!($_POST["email"]=="")) {
$email =$_POST["email"]; // Calling Function To Remove Special Characters From Email
// Check If E-mail Address Syntax Is Valid Or Not
$email = filter_var($email, FILTER_SANITIZE_EMAIL); // Sanitizing Email(Remove Unexpected Symbol like <,>,?,#,!, etc.)
if (filter_var($email, FILTER_VALIDATE_EMAIL)){
// Generating Password
$chars = "abcdefghijklmnopqrstuvwxyzABCDEFGHIJKLMNOPQRSTUVWXYZ0123456789!@#$%&*_";
$password = substr( str_shuffle( $chars ), 0, 8 );
$password1= sha1($password); //Encrypting Password
$connection = mysql_connect("localhost", "root", ""); // Establishing Connection With Server..
$db = mysql_select_db("college", $connection); // Selecting Database
$result = mysql_query("SELECT * FROM registration WHERE email='$email'");
$data = mysql_num_rows($result);
if(($data)==0){
// Insert query
$query = mysql_query("insert into registration(name, email, password) values ('$name', '$email', '$password1')");
if($query){
$to = $email;
$subject = 'Your registration is completed';
/* Let's Prepare The Message For The E-mail */
$message = 'Hello'.$name.'
Your email and password is following:
E-mail: '.$email.'
Your new password : '.$password.'
Now you can login with this email and password.';
/* Send The Message Using mail() Function */
if(mail($to, $subject, $message ))
{
$successMessage = "Password has been sent to your mail, Please check your mail and SignIn.";
}
}
}
else{
$emailError = "This email is already registered, Please try another email...";
}
}
else{
$emailError = "Invalid Email"; }
}
else{
$emailError = "Email is required";
}
}
else{
$nameError = "Only letters and white space allowed";
}
}
else {
$nameError = "Name is required";
}
}
?>
PHP file: password_login.php
Given below our complete HTML for login form.
<?php include 'login_validation.php'; ?>
<!DOCTYPE html>
<html>
<head>
<title>PHP Login Form</title>
<link href="css/password.css" rel="stylesheet">
</head>
<body>
<div class="container">
<div class="main">
<h2>PHP Login Form</h2>
<form action="password_login.php" method="post">
<label class="heading">Email :</label>
<input name="email" type="text">
<label class="heading">Password :</label>
<input name="password" type="password">
<input name="submit" type="submit" value="SignIn">
<span class="error"><?php echo $Error;?></span>
<span class="success"><?php echo $successMessage;?></span>
</form><a class="forgot" href="forgot_password.php">forgot password ?</a>
<a class="login" href="password_form.php">SignUp</a>
</div>
</div>
</body>
</html>
PHP file: login_validation.php
In the below script, we validate all fields and then, verifies entered email, if, it exists in database then, session will be created for this email.
<?php
session_start(); // Starting Session
$Error =""; // Initialize Variables To Null.
$successMessage ="";
if (isset($_POST['submit']))
{
if ( !( $_POST['email'] == "" && $_POST['password'] == "" ) )
{
$email=$_POST['email']; // Fetching Values From URL
$password= sha1($_POST['password']); // Password Encryption, If you like you can also leave sha1
$email = filter_var($email, FILTER_SANITIZE_EMAIL); // Sanitizing E-mail(Remove unexpected symbol like <,>,?,#,!, etc.)
if (filter_var($email, FILTER_VALIDATE_EMAIL)) // Check if E-mail Address Syntax is Valid or Not
{
$connection = mysql_connect("localhost", "root", ""); // Establishing Connection with Server..
$db = mysql_select_db("college", $connection); // Selecting Database
// Matching User Input E-mail and Password with stored E-mail and Password in Database
$result = mysql_query("SELECT * FROM registration WHERE email='$email' AND password='$password'");
$data = mysql_num_rows($result);
if($data==1){
$_SESSION['login_user']=$email; // Initializing Session
header('Location: profile.php');
}
else{
$Error ="Email or Password is wrong...!!!!";
}
mysql_close ($connection); // Connection Closed
}
else{
$Error ="Invalid Email Format....!!!!";
}
}
else{
$Error ="Email or Password is Empty...!!!!";
}
}
?>
PHP file: profile.php
Given below our complete HTML for user profile page, here user can change his password.
<?php include 'profile_validation.php'; ?>
<!DOCTYPE html>
<html>
<head>
<title>PHP Profile Page</title>
<link href="css/password.css" rel="stylesheet">
</head>
<body>
<div class="container">
<div class="main">
<h2>Welcome ! <i><?php echo $login_session; ?></i></h2>
<form action="profile.php" method="post">
<a class="logout" href="logout.php">SignOut</a>
<h3>Now you can change password.</h3><label>New Password :</label>
<input name="newpassword" type="password">
<label>Confirm New Password :</label>
<input name="cnewpassword" type="password">
<input name="submit" type="submit" value="Change Password">
<span class="error"><?php echo $Error;?></span>
<span class="success"><?php echo $successMessage;?></span>
</form>
</div>
</body>
</html>
PHP file: profile_validation.php
In the below script, we validate all fields and then, update password field in Database for the same user.
<?php
include('session.php');
$Error ="";  // Initialize Variables to Null.
$successMessage ="";
if (isset($_POST['submit']))
{
if ( !($_POST['newpassword'] == "" && $_POST['cnewpassword'] == "" ))
{
$newpassword=$_POST['newpassword'];  // Fetching Values from URL
$cnewpassword=$_POST['cnewpassword'];
if( $newpassword == $cnewpassword )
{
$password= sha1($cnewpassword);
$connection = mysql_connect("localhost", "root", "");  // Establishing Connection with Server..
$db = mysql_select_db("college", $connection);  // Selecting Database
$query = mysql_query("UPDATE registration SET password='$password' WHERE password='$login_password'");
if($query)
{
$successMessage ="Password Changed Successfully.";
}
}
else{
$Error ="Password not match...!!!!";
}
}
else{
$Error ="Password should not be empty....!!!!";
}
}
?>
PHP file: session.php
In the below script, user details get fetched from database by passing session in SQL query.
<?php
//  Establishing Connection with Server by Passing server_name, user_id and password as a Parameter.
$connection = mysql_connect("localhost", "root", "");
$db = mysql_select_db("college", $connection);  // Selecting Database
session_start();  // Starting Session
$email_check=$_SESSION['login_user'];  // Storing Session
//  SQL Query to Fetch Complete Information of User.
$ses_sql=mysql_query("select * from registration where email='$email_check'", $connection);
$row = mysql_fetch_assoc($ses_sql);
$login_session =$row['name'];
$login_password =$row['password'];
if(!isset($login_session))
{
mysql_close($connection); // Closing Connection
header('Location: password_login.php'); // Redirecting to Home Page
}
?>
PHP file: forgot_password.php
Given below our complete HTML for forgot password page, here user put his email and newly generated password will sent on his email.
<?php include 'forgot_password_generate.php'; ?>
<!DOCTYPE html>
<html>
<head>
<title>PHP Forgot Password</title>
<link href="css/password.css" rel="stylesheet">
</head>
<body>
<div class="container main">
<h2>Forgot Password</h2>
<form action="forgot_password.php" method="post">
<label class="heading">Email :</label>
<input name="email" type="text">
<input name="submit" type="submit" value="Resend Password">
<span class="error"><?php echo $Error;?></span>
<span class="success"><?php echo $successMessage;?></span>
</form>
<p><b>Note :</b> Enter your email, password will be send to your email address.</p>
<a class="login" href="password_login.php">SignIn</a>
</div>
</body>
</html>
PHP file: forgot_password_generate.php
In the below script, we validate all fields and then mail the newly generated password. We have also applied sha1() encryption function to Update encrypted password in database.
<?php
// Initialize Variables to Null.
$email =""; // Sender's E-mail ID
$Error ="";
$successMessage ="";
// On Submitting Form Below Function Will Execute
if(isset($_POST['submit']))
{
if (!($_POST["email"]==""))
{
$email =$_POST["email"];  // Calling Function To Remove Special Characters From E-mail
$email = filter_var($email, FILTER_SANITIZE_EMAIL);  // Sanitizing E-mail(Remove unexpected symbol like <,>,?,#,!, etc.)
if (filter_var($email, FILTER_VALIDATE_EMAIL))
{
$chars = "abcdefghijklmnopqrstuvwxyzABCDEFGHIJKLMNOPQRSTUVWXYZ0123456789!@#$%&*_"; // Generating Password
$password = substr( str_shuffle( $chars ), 0, 8 );
$password1= sha1($password);
$connection = mysql_connect("localhost", "root", "");  // Establishing Connection With Server..
$db = mysql_select_db("college", $connection);  // Selecting Database
$query = mysql_query("UPDATE registration SET password='$password1' WHERE email='$email'");
if($query)
{
$to = $email;
$subject = 'Your New Password...';
// Let's Prepare The Message For E-mail.
$message = 'Hello User
Your new password : '.$password.'
E-mail: '.$email.'
Now you can login with this email and password.';
// Send The Message Using mail() Function.
if(mail($to, $subject, $message ))
{
$successMessage = "New Password has been sent to your mail, Please check your mail and SignIn.";
}
}
}
else{
$Error = "Invalid Email";
}
}
else{
$Error = "Email is required";
}
}
?>
PHP file: logout.php
In the below script, all sessions will be destroyed and user get redirected to home page i.e. login.php page.
<?php
session_start();
if(session_destroy()) // Destroying All Sessions
{
header("Location: password_login.php"); // Redirecting to Home Page
}
?>
CSS File: password.css
Styling HTML elements.
@import "http://fonts.googleapis.com/css?family=Raleway";
/* Above line is used for online google font */
h2{
background-color:#FEFFED;
padding:30px 35px;
margin:-10px -50px;
text-align:center;
border-radius:10px 10px 0 0
}
h3{
font-size:21px;
margin-bottom:40px;
color:#000;
font-family:serif
}
hr{
margin:10px -50px;
border:0;
border-top:1px solid #ccc;
margin-bottom:40px
}
p{
font-size:14px
}
i{
color:#07b300;
font-weight:700
}
b{
color:red;
font-weight:700;
font-size:16px
}
span{
color:red
}
.forgot{
text-decoration:none;
display:block;
float:left;
margin-top:5px;
margin-left:5px;
color:blue
}
.logout{
text-decoration:none;
color:red;
background-color:#e6e6fa;
padding:5px 12px;
border:1px solid #8a2be2;
float:right;
border-radius:0 0 0 5px;
margin-top:-40px;
margin-right:-50px;
font-size:12px;
font-weight:700
}
.login{
float:right;
text-align:center;
text-decoration:none;
color:#000;
font-weight:700;
width:25%;
padding:5px;
background-color:#f5f5dc;
border:1px solid gray;
border-radius:5px;
outline:none
}
.success{
color:green;
display:block;
font-weight:700
}
div.container{
width:900px;
height:610px;
margin:35px auto;
font-family:'Raleway',sans-serif
}
div.main{
width:320px;
padding:10px 50px 25px;
border:2px solid gray;
border-radius:10px;
font-family:raleway;
float:left;
margin-top:60px
}
input[type=text],input[type=password]{
width:95.7%;
height:30px;
padding:5px;
margin-bottom:5px;
margin-top:5px;
border:2px solid #ccc;
color:#4f4f4f;
font-size:16px;
border-radius:5px
}
label{
color:#464646;
text-shadow:0 1px 0 #fff;
font-size:14px;
font-weight:700
}
input[type=submit]{
padding:10px;
font-size:18px;
background:linear-gradient(#ffbc00 5%,#ffdd7f 100%);
border:1px solid #e5a900;
color:#4E4D4B;
font-weight:700;
cursor:pointer;
width:100%;
border-radius:5px;
margin-bottom:10px
}
input[type=submit]:hover{
background:linear-gradient(#ffdd7f 5%,#ffbc00 100%)
}
Conclusion:
In this way, you can allow access to your website resources only to authentic users. Hope you like it, keep reading our other blogs.
Recommended blog –
- PHP Insert Data Into Database
PHP Multi Page Form

A multi page form in PHP can be created using sessions, that are used to retain values of a form and can transfer them from one page to another .
By seeing popularity of such forms, we bring this tutorial to create a multi page form using PHP script. However, we have already covered multi step form using jQuery and JavaScript.
In our example, we have used :
- PHP sessions to store page wise form field values in three steps.
- Also, we have applied some validations on each page.
- At the end, we collects values from all forms and store them in a database.
Watch our live demo or download our codes to use it.

Our complete HTML and PHP codes are given below.
PHP file: page1_form.php
Given below are the codes for first part of the form, as user fills it and clicks on next button, it will redirect to second page .
<?php
session_start(); // Session starts here.
?><!DOCTYPE HTML>
<html>
 <head>
 <title>PHP Multi Page Form</title>
 <link rel="stylesheet" href="style.css" />
 </head>
 <body>
 <div class="container">
 <div class="main">
 <h2>PHP Multi Page Form</h2>
 <span id="error">
 <!---- Initializing Session for errors --->
 <?php
 if (!empty($_SESSION['error'])) {
 echo $_SESSION['error'];
 unset($_SESSION['error']);
 }
 ?>
 </span>
 <form action="page2_form.php" method="post">
 <label>Full Name :<span>*</span></label>
 <input name="name" type="text" placeholder="Ex-James Anderson" required>
 <label>Email :<span>*</span></label>
 <input name="email" type="email" placeholder="[email protected]" required>
 <label>Contact :<span>*</span></label>
 <input name="contact" type="text" placeholder="10-digit number" required>
 <label>Password :<span>*</span></label>
 <input name="password" type="Password" placeholder="*****" />
 <label>Re-enter Password :<span>*</span></label>
 <input name="confirm" type="password" placeholder="*****" >
 <input type="reset" value="Reset" />
 <input type="submit" value="Next" />
 </form>
 </div>
 </div>
 </body>
</html>
PHP file: page2_form.php
In the below script, we validate all fields of page1 and set sessions for page1 errors.
<?php
session_start();
// Checking first page values for empty,If it finds any blank field then redirected to first page.
if (isset($_POST['name'])){
 if (empty($_POST['name'])
 || empty($_POST['email'])
 || empty($_POST['contact'])
 || empty($_POST['password'])
 || empty($_POST['confirm'])){
 // Setting error message
 $_SESSION['error'] = "Mandatory field(s) are missing, Please fill it again";
 header("location: page1_form.php"); // Redirecting to first page
 } else {
 // Sanitizing email field to remove unwanted characters.
 $_POST['email'] = filter_var($_POST['email'], FILTER_SANITIZE_EMAIL);
 // After sanitization Validation is performed.
 if (filter_var($_POST['email'], FILTER_VALIDATE_EMAIL)){
 // Validating Contact Field using regex.
 if (!preg_match("/^[0-9]{10}$/", $_POST['contact'])){
 $_SESSION['error'] = "10 digit contact number is required.";
 header("location: page1_form.php");
 } else {
 if (($_POST['password']) === ($_POST['confirm'])) {
 foreach ($_POST as $key => $value) {
 $_SESSION['post'][$key] = $value;
 }
 } else {
 $_SESSION['error'] = "Password does not match with Confirm Password.";
 header("location: page1_form.php"); //redirecting to first page
 }
 }
 } else {
 $_SESSION['error'] = "Invalid Email Address";
 header("location: page1_form.php");//redirecting to first page
 }
 }
} else {
 if (empty($_SESSION['error_page2'])) {
 header("location: page1_form.php");//redirecting to first page
 }
}
?>
<!DOCTYPE HTML>
<html>
 <head>
 <title>PHP Multi Page Form</title>
 <link rel="stylesheet" href="style.css" />
 </head>
 <body>
 <div class="container">
 <div class="main">
 <h2>PHP Multi Page Form</h2><hr/>
 <span id="error">
<?php
// To show error of page 2.
if (!empty($_SESSION['error_page2'])) {
 echo $_SESSION['error_page2'];
 unset($_SESSION['error_page2']);
}
?>
 </span>
 <form action="page3_form.php" method="post">
 <label>Religion :<span>*</span></label>
 <input name="religion" id="religion" type="text" value="" >
 <label>Nationality :<span>*</span></label><br />
 <input name="nationality" id="nationality" type="text" value="" >
 <label>Gender :<span>*</span></label>
 <input type="radio" name="gender" value="male" required>Male
 <input type="radio" name="gender" value="female">Female
 <label>Educational Qualification :<span>*</span></label>
 <select name="qualification">
 <option value="">----Select----</options>
 <option value="graduation" value="">Graduation </options>
 <option value="postgraduation" value="">Post Graduation </options>
 <option value="other" value="">Other </options>
 </select>
 <label>Job Experience :<span>*</span></label>
 <select name="experience">
 <option value="">----Select----</options>
 <option value="fresher" value="">Fresher </options>
 <option value="less" value="">Less Than 2 year </options>
 <option value="more" value="">More Than 2 year</options>
 </select>
 <input type="reset" value="Reset" />
 <input type="submit" value="Next" />
 </form>
 </div>
 </div>
 </body>
</html>
PHP file: page3_form.php
In the below script, we validate all fields of page2 and set sessions for page2 errors.
<?php
session_start();
// Checking second page values for empty, If it finds any blank field then redirected to second page.
if (isset($_POST['gender'])){
 if (empty($_POST['gender'])
 || empty($_POST['nationality'])
 || empty($_POST['religion'])
 || empty($_POST['qualification'])
 || empty($_POST['experience'])){
 $_SESSION['error_page2'] = "Mandatory field(s) are missing, Please fill it again"; // Setting error message.
 header("location: page2_form.php"); // Redirecting to second page.
 } else {
 // Fetching all values posted from second page and storing it in variable.
 foreach ($_POST as $key => $value) {
 $_SESSION['post'][$key] = $value;
 }
 }
} else {
 if (empty($_SESSION['error_page3'])) {
 header("location: page1_form.php");// Redirecting to first page.
 }
}
?>
<!DOCTYPE HTML>
<html>
 <head>
 <title>PHP Multi Page Form</title>
 <link rel="stylesheet" href="style.css" />
 </head>
 <body>
 <div class="container">
 <div class="main">
 <h2>PHP Multi Page Form</h2><hr/>
 <span id="error">
 <?php
 if (!empty($_SESSION['error_page3'])) {
 echo $_SESSION['error_page3'];
 unset($_SESSION['error_page3']);
 }
 ?>
 </span>
 <form action="page4_insertdata.php" method="post">
 <b>Complete Address :</b>
 <label>Address Line1 :<span>*</span></label>
 <input name="address1" id="address1" type="text" size="30" required>
 <label>Address Line2 :</label>
 <input name="address2" id="address2" type="text" size="50">
 <label>City :<span>*</span></label>
 <input name="city" id="city" type="text" size="25" required>
 <label>Pin Code :<span>*</span></label>
 <input name="pin" id="pin" type="text" size="10" required>
 <label>State :<span>*</span></label>
 <input name="state" id="state" type="text" size="30" required>
 <input type="reset" value="Reset" />
 <input name="submit" type="submit" value="Submit" />
 </form>
 </div>
 </div>
 </body>
</html>
PHP file: page4_form.php
Here, we collects values of all pages and store them in database.
<!DOCTYPE HTML>
<html>
 <head>
 <title>PHP Multi Page Form</title>
 <link rel="stylesheet" href="style.css" />
 </head>
 <body>
 <div class="container">
 <div class="main">
 <h2>PHP Multi Page Form</h2>
 <?php
 session_start();
 if (isset($_POST['state'])) {
 if (!empty($_SESSION['post'])){
 if (empty($_POST['address1'])
 || empty($_POST['city'])
 || empty($_POST['pin'])
 || empty($_POST['state'])){
 // Setting error for page 3.
 $_SESSION['error_page3'] = "Mandatory field(s) are missing, Please fill it again";
 header("location: page3_form.php"); // Redirecting to third page.
 } else {
 foreach ($_POST as $key => $value) {
 $_SESSION['post'][$key] = $value;
 }
 extract($_SESSION['post']); // Function to extract array.
 $connection = mysql_connect("localhost", "root", "");
 $db = mysql_select_db("phpmultipage", $connection); // Storing values in database.
 $query = mysql_query("insert into detail (name,email,contact,password,religion,nationality,gender,qualification,experience,address1,address2,city,pin,state) values('$name','$email','$contact','$password','$religion','$nationality','$gender','$qualification','$experience','$address1','$address2','$city','$pin','$state')", $connection);
 if ($query) {
 echo '<p><span id="success">Form Submitted successfully..!!</span></p>';
 } else {
 echo '<p><span>Form Submission Failed..!!</span></p>';
 }
 unset($_SESSION['post']); // Destroying session.
 }
 } else {
 header("location: page1_form.php"); // Redirecting to first page.
 }
 } else {
 header("location: page1_form.php"); // Redirecting to first page.
 }
 ?>
 </div>
 </div>
 </body>
</html>
MySQL Codes:
To create table in MySQL Database.
CREATE TABLE detail (
user_id int(10) NOT NULL AUTO_INCREMENT,
name varchar(255) NOT NULL,
email varchar(255) NOT NULL,
contact int(15) NOT NULL,
password varchar(255) NOT NULL,
religion varchar(255) NOT NULL,
nationality varchar(255) NOT NULL,
gender varchar(255) NOT NULL,
qualification varchar(255) NOT NULL,
experience varchar(255) NOT NULL,
address1 varchar(255) NOT NULL,
address2 varchar(255) NOT NULL,
city varchar(255) NOT NULL,
pin int(10) NOT NULL,
state varchar(255) NOT NULL,
PRIMARY KEY (user_id)
)
CSS File: style.css
Styling HTML elements.
@import url(http://fonts.googleapis.com/css?family=Raleway);
div.container{
 width: 960px;
 height: 610px;
 margin:50px auto;
}
div.main{
 width: 308px;
 margin-top: 35px;
 float:left;
 border-radius: 5px;
 Border:2px solid #999900;
 padding:0px 50px 20px;
 font-family: 'Raleway', sans-serif;
}
#error{
 display:block;
 margin-top: 10px;
 margin-bottom: 10px;
}
#success{
 color:green;
 font-weight:bold;
}
span{
 color:red;
}
h2{
background-color: #FEFFED;
padding: 32px;
margin: 0 -50px;
text-align: center;
border-radius: 5px 5px 0 0;
}
b{
font-size:18px;
display: block;
color: #555;
}
hr{
margin: 0 -50px;
border: 0;
border-bottom: 1px solid #ccc;
margin-bottom:25px;
}
label{
color: #464646;
font-size: 14px;
font-weight: bold;
}
input[type=text],
input[type=password],
input[type=number],
input[type=email]{
width:96%;
height:25px;
padding:5px;
margin-top:5px;
margin-bottom:15px;
}
input[type=radio]
{
margin:20px;
}
select{
margin-bottom: 15px;
margin-top: 5px;
width: 100%;
height: 35px;
font-size: 16px;
font-family: cursive;
}
input[type=submit],
input[type=reset]{
padding: 10px;
background: linear-gradient(#ffbc00 5%, #ffdd7f 100%);
border: 1px solid #e5a900;
color: #524f49;
cursor: pointer;
width: 49.2%;
border-radius: 2px;
margin-bottom: 15px;
font-weight:bold;
font-size:16px;
}
input[type=submit]:hover,
input[type=reset]:hover
{
background: linear-gradient(#ffdd7f 5%, #ffbc00 100%);
}
Conclusion:
This was all about, to create multi page form in PHP that would have helped you a lot. Always provide us your valuable feedback and do visit again for getting more coding tricks.
PHP: Get Value of Select Option and Radio Button
PHP script for SELECT OPTION FIELD:
HTML select tag allows user to choose one or more options from the given drop down list. Below example contains PHP script to get a single or multiple selected values from given HTML select tag. We are covering following operations on select option field using PHP script.
To get value of a selected option from select tag:
<form action="#" method="post">
<select name="Color">
<option value="Red">Red</option>
<option value="Green">Green</option>
<option value="Blue">Blue</option>
<option value="Pink">Pink</option>
<option value="Yellow">Yellow</option>
</select>
<input type="submit" name="submit" value="Get Selected Values" />
</form>
<?php
if(isset($_POST['submit'])){
$selected_val = $_POST['Color'];  // Storing Selected Value In Variable
echo "You have selected :" .$selected_val;  // Displaying Selected Value
}
?>
To get value of multiple select option from select tag, name attribute in HTML <select> tag should be initialize with an array [ ]:
<form action="#" method="post">
<select name="Color[]" multiple> // Initializing Name With An Array
<option value="Red">Red</option>
<option value="Green">Green</option>
<option value="Blue">Blue</option>
<option value="Pink">Pink</option>
<option value="Yellow">Yellow</option>
</select>
<input type="submit" name="submit" value="Get Selected Values" />
</form>
<?php
if(isset($_POST['submit'])){
// As output of $_POST['Color'] is an array we have to use foreach Loop to display individual value
foreach ($_POST['Color'] as $select)
{
echo "You have selected :" .$select; // Displaying Selected Value
}
?>
PHP script for RADIO BUTTON FIELD:
HTML <input type=”radio”> allows user to choose one option from the given choices. Below codes contains PHP script to get a selected value from given HTML <input type=”radio”>.
To get selected value of a radio button:
<form action="" method="post">
<input type="radio" name="radio" value="Radio 1">Radio 1
<input type="radio" name="radio" value="Radio 2">Radio 2
<input type="radio" name="radio" value="Radio 3">Radio 3
<input type="submit" name="submit" value="Get Selected Values" />
</form>
<?php
if (isset($_POST['submit'])) {
if(isset($_POST['radio']))
{
echo "You have selected :".$_POST['radio'];  //  Displaying Selected Value
}
?>
In below example, we have created a form having select tag and some radio buttons, As user submits it, Value of selected options will be displayed.
Watch our live demo or download our codes to use it.
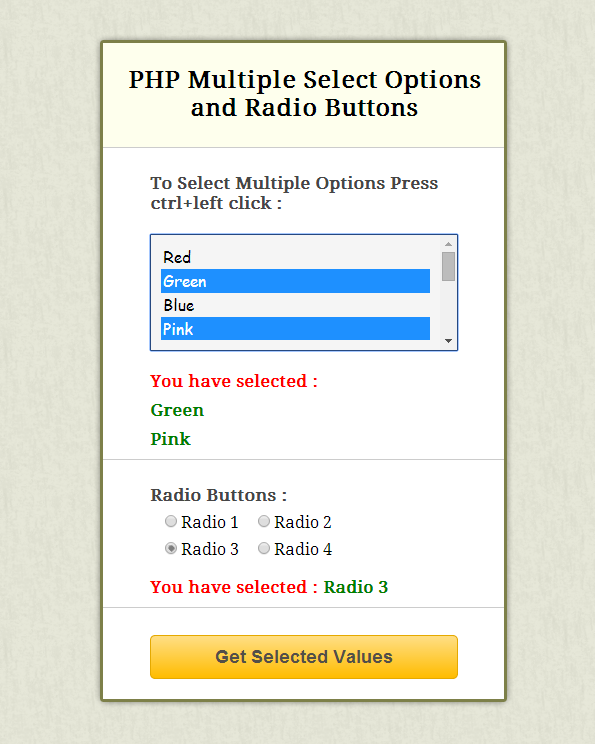
Our complete HTML and PHP codes are given below.
PHP file: form.php
Given below our complete HTML contact form.
<!DOCTYPE html>
<html>
<head>
<title>PHP Get Value of Select Option and Radio Button</title> <!-- Include CSS File Here-->
<link href="css/style.css" rel="stylesheet">
</head>
<body>
<div class="container">
<div class="main">
<h2>PHP Multiple Select Options and Radio Buttons</h2>
<form action="form.php" method="post">
<!----- Select Option Fields Starts Here ----->
<label class="heading">To Select Multiple Options Press ctrl+left click :</label>
<select multiple name="Color[]">
<option value="Red">Red</option>
<option value="Green">Green</option>
<option value="Blue">Blue</option>
<option value="Pink">Pink</option>
<option value="Yellow">Yellow</option>
<option value="White">White</option>
<option value="Black">Black</option>
<option value="Violet">Violet</option>
<option value="Limegreen">Limegreen</option>
<option value="Brown">Brown</option>
<option value="Orange">Orange</option>
</select>
<?php include'select_value.php'; ?>
<!---- Radio Button Starts Here ----->
<label class="heading">Radio Buttons :</label>
<input name="radio" type="radio" value="Radio 1">Radio 1
<input name="radio" type="radio" value="Radio 2">Radio 2
<input name="radio" type="radio" value="Radio 3">Radio 3
<input name="radio" type="radio" value="Radio 4">Radio 4
<?php include'radio_value.php'; ?>
<input name="submit" type="submit" value="Get Selected Values">
</form>
</div>
</div>
</body>
</html>
PHP file: select_value.php
To display multiple values, we used foreach loop here.
<?php
if(isset($_POST['submit'])){
if(!empty($_POST['Color'])) {
echo "<span>You have selected :</span><br/>";
// As output of $_POST['Color'] is an array we have to use Foreach Loop to display individual value
foreach ($_POST['Color'] as $select)
{
echo "<span><b>".$select."</b></span><br/>";
}
}
else { echo "<span>Please Select Atleast One Color.</span><br/>";}
}
?>
PHP file: radio_value.php
To display radio buttons value.
<?php
if (isset($_POST['submit'])) {
if(isset($_POST['radio']))
{
echo "<span>You have selected :<b> ".$_POST['radio']."</b></span>";
}
else{ echo "<span>Please choose any radio button.</span>";}
}
?>
CSS File: style.css
Styling HTML elements.
@import "http://fonts.googleapis.com/css?family=Droid+Serif";
/* Above line is used for online google font */
div.container {
width:960px;
height:610px;
margin:50px auto;
font-family:'Droid Serif',serif
}
div.main {
width:308px;
float:left;
border-radius:5px;
border:2px solid #990;
padding:0 50px 20px
}
span {
color:red;
font-weight:700;
display:inline-block;
margin-bottom:10px
}
b {
color:green;
font-weight:700
}
h2 {
background-color:#FEFFED;
padding:25px;
margin:0 -50px;
text-align:center;
border-radius:5px 5px 0 0
}
hr {
margin:0 -50px;
border:0;
border-bottom:1px solid #ccc;
margin-bottom:25px
}
label {
color:#464646;
text-shadow:0 1px 0 #fff;
font-size:14px;
font-weight:700;
font-size:17px
}
select {
width:100%;
font-family:cursive;
font-size:16px;
background:#f5f5f5;
padding:10px;
border:1px solid
}
input[type=radio] {
margin-left:15px;
margin-top:10px
}
input[type=submit] {
padding:10px;
text-align:center;
font-size:18px;
background:linear-gradient(#ffbc00 5%,#ffdd7f 100%);
border:2px solid #e5a900;
color:#fff;
font-weight:700;
cursor:pointer;
width:100%;
border-radius:5px
}
input[type=submit]:hover {
background:linear-gradient(#ffdd7f 5%,#ffbc00 100%)
}
Conclusion:
Using these values you can perform other operations like CRUD (Create, Read, Update & Delete) in database. Hope you like it, keep reading our other blogs.
PHP: Get Values of Multiple Checked Checkboxes

In our previous tutorials, we have performed various operations on different form elements using Javascript and jQuery. In this tutorial, our concern is to get values of multiple checked checkboxes using PHP as follows:
To get value of a checked checkbox :
<form action="#" method="post">
<input type="checkbox" name="gender" value="Male">Male</input>
<input type="checkbox" name="gender" value="Female">Female</input>
<input type="submit" name="submit" value="Submit"/>
</form>
<?php
if (isset($_POST['gender'])){
echo $_POST['gender']; // Displays value of checked checkbox.
}
?>
To get value of multiple checked checkboxes, name attribute in HTML input type=”checkbox” tag must be initialize with an array, to do this write [ ] at the end of it’s name attribute :
<form action="#" method="post">
<input type="checkbox" name="check_list[]" value="C/C++"><label>C/C++</label><br/>
<input type="checkbox" name="check_list[]" value="Java"><label>Java</label><br/>
<input type="checkbox" name="check_list[]" value="PHP"><label>PHP</label><br/>
<input type="submit" name="submit" value="Submit"/>
</form>
<?php
if(isset($_POST['submit'])){//to run PHP script on submit
if(!empty($_POST['check_list'])){
// Loop to store and display values of individual checked checkbox.
foreach($_POST['check_list'] as $selected){
echo $selected."</br>";
}
}
}
?>
In our example, there is a form contains some checkboxes, User checks them and when he/she hits submit button, multiple values of checkboxes will be display.
Watch our live demo or download our codes to use it.

Our example’s complete HTML and PHP codes are given below.
HTML Codes: php_checkbox.php
Given below our complete HTML codes.
<!DOCTYPE html>
<html>
<head>
<title>PHP: Get Values of Multiple Checked Checkboxes</title>
<link rel="stylesheet" href="css/php_checkbox.css" />
</head>
<body>
<div class="container">
<div class="main">
<h2>PHP: Get Values of Multiple Checked Checkboxes</h2>
<form action="php_checkbox.php" method="post">
<label class="heading">Select Your Technical Exposure:</label>
<input type="checkbox" name="check_list[]" value="C/C++"><label>C/C++</label>
<input type="checkbox" name="check_list[]" value="Java"><label>Java</label>
<input type="checkbox" name="check_list[]" value="PHP"><label>PHP</label>
<input type="checkbox" name="check_list[]" value="HTML/CSS"><label>HTML/CSS</label>
<input type="checkbox" name="check_list[]" value="UNIX/LINUX"><label>UNIX/LINUX</label>
<input type="submit" name="submit" Value="Submit"/>
<!----- Including PHP Script ----->
<?php include 'checkbox_value.php';?>
</form>
</div>
</div>
</body>
</html>
PHP Codes: checkbox_value.php
In the below script, we used foreach loop to display individual value of checked checkboxes, we have also used a counter to count number of checked checkboxes.
<?php
if(isset($_POST['submit'])){
if(!empty($_POST['check_list'])) {
// Counting number of checked checkboxes.
$checked_count = count($_POST['check_list']);
echo "You have selected following ".$checked_count." option(s): <br/>";
// Loop to store and display values of individual checked checkbox.
foreach($_POST['check_list'] as $selected) {
echo "<p>".$selected ."</p>";
}
echo "<br/><b>Note :</b> <span>Similarily, You Can Also Perform CRUD Operations using These Selected Values.</span>";
}
else{
echo "<b>Please Select Atleast One Option.</b>";
}
}
?>
CSS File: php_checkbox.css
Styling HTML elements.
/* Below line is used for online Google font */
@import url(http://fonts.googleapis.com/css?family=Droid+Serif);
div.container{
width: 960px;
height: 610px;
margin:50px auto;
font-family: 'Droid Serif', serif;
}
div.main{
width: 308px;
margin-top: 35px;
float:left;
border-radius: 5px;
Border:2px solid #999900;
padding:0px 50px 20px;
}
p{
margin-top: 5px;
margin-bottom: 5px;
color:green;
font-weight: bold;
}
h2{
background-color: #FEFFED;
padding: 25px;
margin: 0 -50px;
text-align: center;
border-radius: 5px 5px 0 0;
}
hr{
margin: 0 -50px;
border: 0;
border-bottom: 1px solid #ccc;
margin-bottom:25px;
}
span{
font-size:13.5px;
}
label{
color: #464646;
text-shadow: 0 1px 0 #fff;
font-size: 14px;
font-weight: bold;
}
.heading{
font-size: 17px;
}
b{
color:red;
}
input[type=checkbox]{
margin-bottom:10px;
margin-right: 10px;
}
input[type=submit]{
padding: 10px;
text-align: center;
font-size: 18px;
background: linear-gradient(#ffbc00 5%, #ffdd7f 100%);
border: 2px solid #e5a900;
color: #ffffff;
font-weight: bold;
cursor: pointer;
text-shadow: 0px 1px 0px #13506D;
width: 100%;
border-radius: 5px;
margin-bottom: 15px;
}
input[type=submit]:hover{
background: linear-gradient(#ffdd7f 5%, #ffbc00 100%);
}
Conclusion:
Once you got the value of checked checkbox(es), you can also perform CRUD (Create, Read, Update & Delete) operations in database. Hope you like it, keep reading our other blogs.
PHP Contact Form with Validation

Contact form of websites led user to communicate with website owners. This shows a genuine or loyal behavior of an organization towards its customers. Here we bring up in front of you the PHP contact form with validation feature.
In our previous blogs, we have applied JavaScript and jQuery codes on the contact form. Now, this tutorial emphasizes on applying PHP validations and mail() function over contact form.
Here, our PHP validation includes the following steps:
- Checking for empty fields.
- Checking for data filtration.
- Input comparison with Regular expression.
- First, we used PHP empty() function to check for empty fields.
if (empty($_POST["name"]))
{
echo "Name is required";
}
- Second, we pass the non empty value to a user defined function test_input($data) to filter user input.
// Function for filtering input values.
function test_input($data)
{
$data = trim($data);
$data = stripslashes($data);
$data = htmlspecialchars($data);
return $data;
}
- Third, we applied preg_match() function to the above filtered value to get user input in correct format based on regular expression.
preg_match("/^[a-zA-Z ]*$/",$_POST['name']) // For a name or other text fields.
preg_match("/([w-]+@[w-]+.[w-]+)/",$_POST['email'])// For email field.
And at the end, we mail user input message using PHP mail () function in such a way that the sender will also get the copy of his mail.
mail("[email protected]",$msg, $header);
Watch our live demo or download our codes to use it. 
Complete HTML and PHP codes are given below.
PHP file: contact_form.php
Given below our complete HTML contact form.
<?php include 'validation.php';?>
<!DOCTYPE HTML>
<html>
<head>
<title>PHP Contact Form with Validation</title>
<link rel="stylesheet" href="css/style.css" />
</head>
<body>
<div class="container">
<div class="main">
<h2>PHP Contact Form with Validation</h2>
<form method="post" action="contact_form.php">
<label>Name :</label>
<input class="input" type="text" name="name" value="">
<span class="error"><?php echo $nameError;?></span>
<label>Email :</label>
<input class="input" type="text" name="email" value="">
<span class="error"><?php echo $emailError;?></span>
<label>Purpose :</label>
<input class="input" type="text" name="purpose" value="">
<span class="error"><?php echo $purposeError;?></span>
<label>Message :</label>
<textarea name="message" val=""></textarea>
<span class="error"><?php echo $messageError;?></span>
<input class="submit" type="submit" name="submit" value="Submit">
<span class="success"><?php echo $successMessage;?></span>
</form>
</div>
</div>
</body>
</html>
PHP file: validation.php
In the below script, we validate all fields and then mail the message using PHP mail() function. Also, the sender will get the copy of his mail.
<?php // Initialize variables to null.
$name =""; // Sender Name
$email =""; // Sender's email ID
$purpose =""; // Subject of mail
$message =""; // Sender's Message
$nameError ="";
$emailError ="";
$purposeError ="";
$messageError ="";
$successMessage =""; // On submittingform below function will execute.
if(isset($_POST['submit'])) { // Checking null values in message.
if (empty($_POST["name"])){
$nameError = "Name is required";
}
else
 {
$name = test_input($_POST["name"]); // check name only contains letters and whitespace
if (!preg_match("/^[a-zA-Z ]*$/",$name))
{
$nameError = "Only letters and white space allowed";
}
} // Checking null values inthe message.
if (empty($_POST["email"]))
{
$emailError = "Email is required";
}
else
 {
$email = test_input($_POST["email"]);
} // Checking null values inmessage.
if (empty($_POST["purpose"]))
{
$purposeError = "Purpose is required";
}
else
{
$purpose = test_input($_POST["purpose"]);
} // Checking null values inmessage.
if (empty($_POST["message"]))
{
$messageError = "Message is required";
}
else
 {
$message = test_input($_POST["message"]);
} // Checking null values inthe message.
if( !($name=='') && !($email=='') && !($purpose=='') &&!($message=='') )
{ // Checking valid email.
if (preg_match("/([w-]+@[w-]+.[w-]+)/",$email))
{
$header= $name."<". $email .">";
$headers = "FormGet.com"; /* Let's prepare the message for the e-mail */
$msg = "Hello! $name Thank you...! For Contacting Us.
Name: $name
E-mail: $email
Purpose: $purpose
Message: $message
This is a Contact Confirmation mail. We Will contact You as soon as possible.";
$msg1 = " $name Contacted Us. Hereis some information about $name.
Name: $name
E-mail: $email
Purpose: $purpose
Message: $message "; /* Send the message using mail() function */
if(mail($email, $headers, $msg ) && mail("[email protected]", $header, $msg1 ))
{
$successMessage = "Message sent successfully.......";
}
}
else
{ $emailError = "Invalid Email";
 }
 }
} // Function for filtering input values.function test_input($data)
{
$data = trim($data);
$data =stripslashes($data);
$data =htmlspecialchars($data);
return $data;
}
?>
CSS File: style.css
Styling HTML elements.
/* Below line is used for online Google font */
@import url(http://fonts.googleapis.com/css?family=Raleway);
h2
{
background-color: #FEFFED;
padding: 15px 35px;
margin: -10px -50px;
text-align:center;
border-radius: 10px 10px 0 0;
}
hr
{
margin: 10px -50px;
border: 0;
border-top: 1px solid #ccc;
}
span
{
color:red;
}
div.container
{
width: 960px;
height: 610px;
margin:35px auto;
font-family: 'Raleway', sans-serif;
}
div.main
{
width: 350px;
padding: 10px 50px 30px;
border: 2px solid gray;
border-radius: 10px;
font-family: raleway;
float:left;
}
input[type=text],textarea
{
width: 97.7%;
height: 34px;
padding-left: 5px;
margin-bottom: 5px;
margin-top: 5px;
border: 2px solid #ccc;
color: #4f4f4f;
font-size: 16px;
border-radius: 5px;
}
textarea
{
resize:none;
height:80px;
}
label
{
color: #464646;
text-shadow: 0 1px 0 #fff;
font-size: 14px;
font-weight: bold;
}
.submit
{
padding: 10px;
text-align: center;
font-size: 18px;
background: linear-gradient(#ffbc00 5%, #ffdd7f 100%);
border: 2px solid #e5a900;
color: #ffffff;
font-weight: bold;
cursor: pointer;
text-shadow: 0px 1px 0px #13506D;
width: 100%;
border-radius: 5px;
}
.submit:hover
{
background: linear-gradient(#ffdd7f 5%, #ffbc00 100%);
}
Conclusion: This was all about, contact form validation in PHP. Hope you like it, keep reading our other blogs posts and do provide us your valuable feedback.
PHP Login Form with Sessions
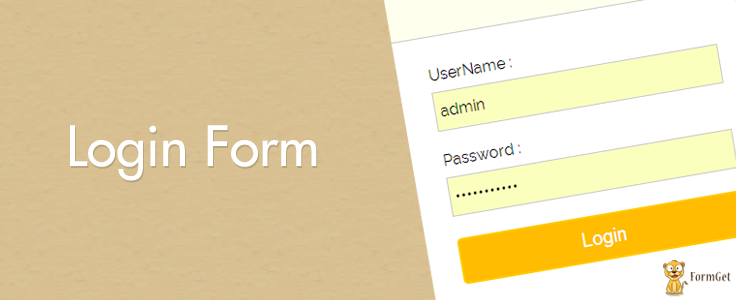
Session variables are used to store individual client’s information on the web server for later use, as a web server does not know which client’s request to be respond because HTTP address does not maintain state.
This tutorial enables you to create sessions in PHP via Login form and web server respond according to his/her request.
To Start a PHP Session:
<?php
session_start();
// Do Something
?>
To Store values in PHP Session variable:
<?php
session_start();
// Store Session Data
$_SESSION['login_user']= $username;  // Initializing Session with value of PHP Variable
To Read values of PHP Session variable:
<?php
session_start();
// Store Session Data
$_SESSION['login_user']= $username;  // Initializing Session with value of PHP Variable
echo $_SESSION['login_user'];
To Unset or Destroy a PHP Session:
<?php
session_destroy(); // Is Used To Destroy All Sessions
//Or
if(isset($_SESSION['id']))
unset($_SESSION['id']);  //Is Used To Destroy Specified Session
In our example, we have a login form when user fills up required fields and press login button, a session will be created on server which assigns him a unique ID and stores user information for later use.
Watch out live demo or download the given codes to use it.

Recommended Products to create login forms.

1. Advance user registration and login scriptIt is a simple login and registration system is totally based on core PHP. This script fulfills all the basic to advance level login needs that a coder or a developer usually.
Buy Now

2. Advanced Security – PHP Register/LoginAdvanced Security is user registration/login system written in pure PHP. It is designed to provide very high-security level of any part of your system.
Buy Now

3.PHP AJAX Login & Register Form with SocialFlux – Clean, fast and very easy to customize with an elegant design. Useful – Can be integrated in every website or page in a few minutes, simple and fast.
Buy Now

4. AJAX User Registration and Login with CookieLet your users create accounts and login to your site with this script. Every request is made through ajax, which makes for a very easy user interaction with the site.
Buy Now
Complete HTML and PHP codes are given below.
PHP File: index.php
Given below code creates an HTML login form.
<?php
include('login.php'); // Includes Login Script

if(isset($_SESSION['login_user'])){
header("location: profile.php");
}
?>
<!DOCTYPE html>
<html>
<head>
<title>Login Form in PHP with Session</title>
<link href="style.css" rel="stylesheet" type="text/css">
</head>
<body>
<div id="main">
<h1>PHP Login Session Example</h1>
<div id="login">
<h2>Login Form</h2>
<form action="" method="post">
<label>UserName :</label>
<input id="name" name="username" placeholder="username" type="text">
<label>Password :</label>
<input id="password" name="password" placeholder="**********" type="password">
<input name="submit" type="submit" value=" Login ">
<span><?php echo $error; ?></span>
</form>
</div>
</div>
</body>
</html>
PHP File: login.php
Consists of login script in which PHP session is intialized.
<?php
session_start(); // Starting Session
$error=''; // Variable To Store Error Message
if (isset($_POST['submit'])) {
if (empty($_POST['username']) || empty($_POST['password'])) {
$error = "Username or Password is invalid";
}
else
{
// Define $username and $password
$username=$_POST['username'];
$password=$_POST['password'];
// Establishing Connection with Server by passing server_name, user_id and password as a parameter
$connection = mysql_connect("localhost", "root", "");
// To protect MySQL injection for Security purpose
$username = stripslashes($username);
$password = stripslashes($password);
$username = mysql_real_escape_string($username);
$password = mysql_real_escape_string($password);
// Selecting Database
$db = mysql_select_db("company", $connection);
// SQL query to fetch information of registerd users and finds user match.
$query = mysql_query("select * from login where password='$password' AND username='$username'", $connection);
$rows = mysql_num_rows($query);
if ($rows == 1) {
$_SESSION['login_user']=$username; // Initializing Session
header("location: profile.php"); // Redirecting To Other Page
} else {
$error = "Username or Password is invalid";
}
mysql_close($connection); // Closing Connection
}
}
?>
PHP File: profile.php
It is the redirected page on successful login.
<?php
include('session.php');
?>
<!DOCTYPE html>
<html>
<head>
<title>Your Home Page</title>
<link href="style.css" rel="stylesheet" type="text/css">
</head>
<body>
<div id="profile">
<b id="welcome">Welcome : <i><?php echo $login_session; ?></i></b>
<b id="logout"><a href="logout.php">Log Out</a></b>
</div>
</body>
</html>
PHP File: session.php
This page, fetches complete information of the logged in user.
<?php
// Establishing Connection with Server by passing server_name, user_id and password as a parameter
$connection = mysql_connect("localhost", "root", "");
// Selecting Database
$db = mysql_select_db("company", $connection);
session_start();// Starting Session
// Storing Session
$user_check=$_SESSION['login_user'];
// SQL Query To Fetch Complete Information Of User
$ses_sql=mysql_query("select username from login where username='$user_check'", $connection);
$row = mysql_fetch_assoc($ses_sql);
$login_session =$row['username'];
if(!isset($login_session)){
mysql_close($connection); // Closing Connection
header('Location: index.php'); // Redirecting To Home Page
}
?>
PHP File: logout.php
To destroy all the sessions and redirecting to home page.
<?php
session_start();
if(session_destroy()) // Destroying All Sessions
{
header("Location: index.php"); // Redirecting To Home Page
}
?>
My SQL Code Segment:
To create database and table, execute following codes in your My SQL .
CREATE DATABASE company;
CREATE TABLE login(
id int(10) NOT NULL AUTO_INCREMENT,
username varchar(255) NOT NULL,
password varchar(255) NOT NULL,
PRIMARY KEY (id)
)
CSS File: style.css
Styling HTML elements.
@import http://fonts.googleapis.com/css?family=Raleway;
/*----------------------------------------------
CSS Settings For HTML Div ExactCenter
------------------------------------------------*/
#main {
width:960px;
margin:50px auto;
font-family:raleway
}
span {
color:red
}
h2 {
background-color:#FEFFED;
text-align:center;
border-radius:10px 10px 0 0;
margin:-10px -40px;
padding:15px
}
hr {
border:0;
border-bottom:1px solid #ccc;
margin:10px -40px;
margin-bottom:30px
}
#login {
width:300px;
float:left;
border-radius:10px;
font-family:raleway;
border:2px solid #ccc;
padding:10px 40px 25px;
margin-top:70px
}
input[type=text],input[type=password] {
width:99.5%;
padding:10px;
margin-top:8px;
border:1px solid #ccc;
padding-left:5px;
font-size:16px;
font-family:raleway
}
input[type=submit] {
width:100%;
background-color:#FFBC00;
color:#fff;
border:2px solid #FFCB00;
padding:10px;
font-size:20px;
cursor:pointer;
border-radius:5px;
margin-bottom:15px
}
#profile {
padding:50px;
border:1px dashed grey;
font-size:20px;
background-color:#DCE6F7
}
#logout {
float:right;
padding:5px;
border:dashed 1px gray
}
a {
text-decoration:none;
color:#6495ed
}
i {
color:#6495ed
}
Conclusion:
Through Login/Logout form it becomes easy to deal with sessions in PHP. Hope you like it, keep reading our other blogs.
jQuery Mobile Form Example

In this Era of smartphones and tablets, jQuery Mobile plays an important role for web application development.
jQuery mobile is a framework to develop mobile friendly web applications. It uses HTML5 & CSS3 for laying out pages with minimal scripting. It also contains lot of functions or events to make user interaction smooth and effective.
In this example, we explains how to add jQuery mobile library to your HTML page and create a simple form using it.
Following code must be used in HTML, To add or link jQuery mobile library from CDN (Content Delivery Network) :
<head>
<meta name="viewport" content="width=device-width, initial-scale=1">
<link rel="stylesheet" href="http://code.jquery.com/mobile/1.4.2/jquery.mobile-1.4.2.min.css">
<script src="http://code.jquery.com/jquery-1.10.2.min.js"></script>
<script src="http://code.jquery.com/mobile/1.4.2/jquery.mobile-1.4.2.min.js"></script>
</head>
Above code includes jQuery mobile “.js” and “.css” files to your web page so that, you don’t need to apply external CSS on it.
Standard HTML part of jQuery mobile form is given below:
<body>
<div data-role="page">
<div data-role="header">
<h1>jQuery Mobile Form</h1>
</div>
<div data-role="main" class="ui-content">
// Other HTML (Form Elements)
</div>
<div data-role="footer">
<h1>FormGet.com</h1>
</div>
</div>
</body>
Description of above HTML code is given below:
data-role=”page” is the page to be displayed in browser.
data-role=”header” may contains heading ,tool bar or search fields of the page.
data-role=”main” Main content of the page is to be coded here.
data-role=”footer” defines basic toolbar and links at the bottom of the page.
In our example, we have applied some validation rules over form fields to validate them before form submission.
Watch our live demo or download our codes to use it.

Our Complete HTML and jQuery codes are given below.
HTML file: jquery-mobile.html
Given below our complete HTML code.
<!DOCTYPE html>
<html>
<head>
<title>jQuery Mobile Form</title>
<meta name="viewport" content="width=device-width, initial-scale=1">
<link rel="stylesheet" href="http://code.jquery.com/mobile/1.4.2/jquery.mobile-1.4.2.min.css">
<script src="http://code.jquery.com/jquery-1.10.2.min.js"></script>
<script src="http://code.jquery.com/mobile/1.4.2/jquery.mobile-1.4.2.min.js"></script>
<link rel="stylesheet" href="jquery-mobile.css">
<script src="jquery-mobile.js"></script>
</head>
<body>
<!-------------- First page for form ----------->
<div data-role="page">
<!-------------- First page header ----------->
<div data-role="header">
<h1>jQuery Mobile Form</h1>
</div>
<!-------------- First page main content ----------->
<div data-role="main" class="ui-content">
<form method="post" action="#pageone" data-ajax="false">
<label for="name">Name : <span>*</span></label>
<input type="text" name="name" id="name" placeholder="Name">
<label for="email">Email: <span>*</span></label>
<input type="email" id="email" name="email" placeholder="Email"/>
<fieldset data-role="controlgroup">
<legend>Gender:</legend>
<label for="male">Male</label>
<input type="radio" name="gender" id="male" value="male">
<label for="female">Female</label>
<input type="radio" name="gender" id="female" value="female">
</fieldset>
<fieldset data-role="controlgroup">
<legend>Qualification:</legend>
<label for="graduation">Graduation</label>
<input type="checkbox" id="graduation" value="graduation">
<label for="postgraduation">Post Graduation</label>
<input type="checkbox" id="postgraduation" value="postgraduation">
<label for="other">Other</label>
<input type="checkbox" id="other" value="other">
</fieldset>
<label for="info">Message:</label>
<textarea name="addinfo" id="info" placeholder="Message"></textarea>
<input type="submit" data-inline="true" value="Submit" data-theme="b">
</form>
</div>
<!-------------------------------------------------------------
End of First page
-------------------------------------------------------------->
<!-------------- Second page ----------->
<div data-role="page" id="pageone">
<!-------------- Second page header ----------->
<div data-role="header">
<h1>JQuery Mobile Form</h1>
</div>
<!-------------- Second page main content ----------->
<div data-role="main" class="ui-content">
<h2>Form Submitted Successfully...!!</h2>
</div>
</div>
<!-------------------------------------------------------------
End of Second page
-------------------------------------------------------------->
</body>
</html>
jQuery File: jquery-mobile.js
Given below our complete jQuery code.
$(document).ready(function() {
$("input[type=submit]").click(function(e) {
var name = $("#name").val();
var email = $("#email").val();
if (name == '' || email == '') {
e.preventDefault();
alert("Please Fill Required Fields");
}
});
});
CSS File: jquery-mobile.css
As we have already linked CSS for jQuery mobile from CDN, hence, it needs little bit styling.
.ui-mobile [data-role=header],.ui-mobile [data-role=footer]{
background-color: rgba(0, 89, 187, 0.71);
color: beige;
text-shadow: 1px 1px 12px #000;
font-size: 22px;
}
img{
width:100%;
}
form label,legend
{
color:#123456;
}
p{
text-align:center;
}
span{
color:red;
}
Conclusion:
This was all about, how to use jQuery mobile library to create simple form in your web page. hope you like it, keep reading our other blogs.
For more realated information check out the following blogs –
- jQuery Select Option Tag Common Operations
- jQuery Form Shake Effect On Invalid Entry
jQuery Ajax Post Data Example
jQuery $.post() method is used to request data from a webpage and to display the returned result (sent from requested page) on to that webpage from where the request has been sent without page refresh.
$.post() method sends request along with some data using an HTTP POST request.
Under this, a request is send to a webpage (here it is jquery_post.php) from another page (say jquery_send.php) using syntax :
Syntax:
$.post( URL, data, callback);
Parameters:
- URL
The URL parameter is defined for the URL of requested page which may communicate with database to return results.
$.post("jquery_post.php",data,callback);
- data
The data parameter is defined to send some data along with the request.
,{   // Data Sending With Request To Server
name:vname,
email:vemail
}
- callback
The callback parameter is defined for a function to be executed if the request gets succeeded. This contains two sub parameters , the first one holds the returned data from the requested page and second one holds the status of the request.
,function(response,status){ // Required Callback Function
//"response" receives - whatever written in echo of above PHP script.
alert("*----Received Data----*nnResponse : " + response+"nnStatus : " + status);
}
Note : Both ‘ data ‘ and ‘ callback ‘ parameters are optional parameters, whereas URL is mandatory for $.post() method.
Below is our complete code with download and live demo option
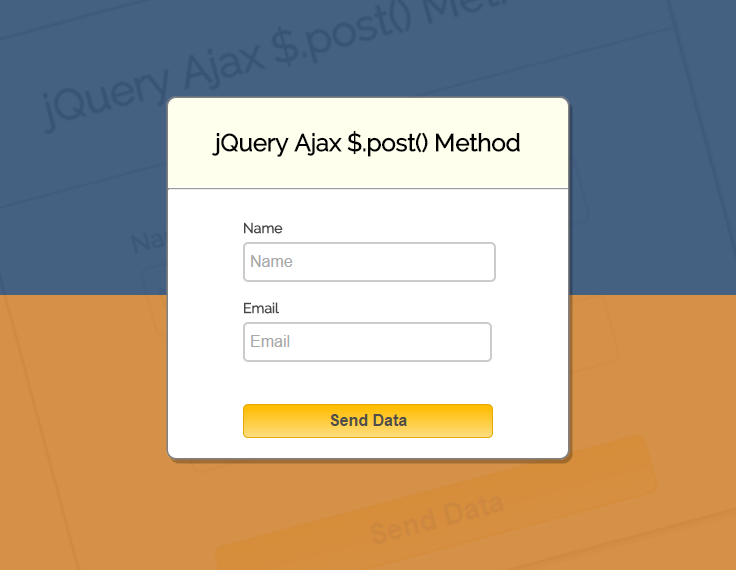
Example:
The following example uses the $.post() method to send some data along with the request.
This is jquery_send.php page that contains jQuery $.post() method which can be implemented as given below:
<html>
<head>
<link href='http://fonts.googleapis.com/css?family=Source+Sans+Pro|Open+Sans+Condensed:300|Raleway' rel='stylesheet' type='text/css'>
<!-- Include JS File Here -->
<link href="style.css" rel="stylesheet"/>
<!-- Include JS File Here -->
<script src="http://ajax.googleapis.com/ajax/libs/jquery/1.11.1/jquery.min.js"></script>
<script>
$(document).ready(function(){
$("#btn").click(function(){
var vname = $("#name").val();
var vemail = $("#email").val();
if(vname=='' && vemail=='')
{
alert("Please fill out the form");
}
else if(vname=='' && vemail!==''){alert('Name field is required')}
else if(vemail=='' && vname!==''){alert('Email field is required')}
else{
$.post("jquery_post.php", //Required URL of the page on server
{ // Data Sending With Request To Server
name:vname,
email:vemail
},
function(response,status){ // Required Callback Function
alert("*----Received Data----*nnResponse : " + response+"nnStatus : " + status);//"response" receives - whatever written in echo of above PHP script.
$("#form")[0].reset();
});
}
});
});
</script>
</head>
<body>
<div id="main">
<h2>jQuery Ajax $.post() Method</h2>
<hr>
<form id="form" method="post">
<div id="namediv"><label>Name</label>
<input type="text" name="name" id="name" placeholder="Name"/><br></div>
<div id="emaildiv"><label>Email</label>
<input type="text" name="email" id="email" placeholder="Email"/></div>
</form>
<button id="btn">Send Data</button>
</div>
</body>
</html>
And here we have “jquery_post.php” file , which contains following PHP codes, that reads the request, processes it and return the result.
<?php
if($_POST["name"])
{
$name = $_POST["name"];
$email = $_POST["email"];
// Here, you can also perform some database query operations with above values.
echo "Welcome ". $name ."!"; // Success Message
}
?>
For more reference you can visit our below link:
Form Submit Without Page Refreshing-jQuery/PHP
Conclusion:
With above tutorial you became familiar with jQuery’s $.post() method. Hope you might have liked it, to learn more & to get more coding tricks keep reading our other blogs.
jQuery Form Submit by Id, Class, Name and Tag
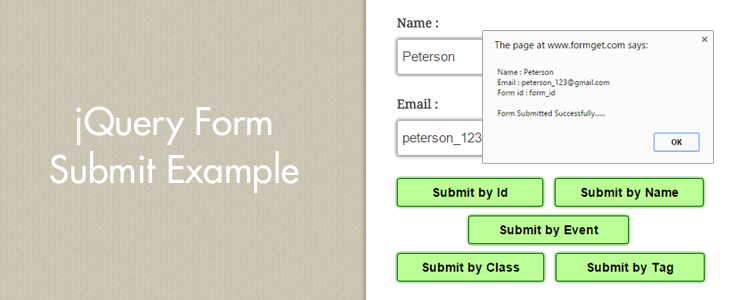
Submitting the form can be a tricky task, how ? Using jQuery it is possible. When a user filled out form completely, he/she clicks on button to submit the form. However, from the developers point of view, there may be need to submit forms programmatically, which can be done via jQuery codes in many ways.
This tutorial is focused on jQuery’s submit() function to submit form by following ways:
Submit form by it’s “Id”
$("#form_id").submit();Submit form by it’s “class”
$(".form_class").submit();Submit form by it’s “name”
$("form[name='form_name']").submit();Submit form by it’s “tag”
$("form").submit();
We can use submit “event handler” for making form submission dependent on a function. If it returns true, form will be submitted successfully else, not.
$("form").submit(function(){
alert('Form is submitting....');
// Or Do Something...
return true;
});
$("form").submit();
In our example, we have applied some validation rules over form fields to validate them before form submission.
Watch our live demo or download our codes to use it.

Complete HTML and jQuery codes are given below.
HTML file: submit_jquery.html
Given below our complete HTML code.
<html>
<head>
<title>jQuery Form Submit Example</title>
<!-- Include CSS File Here -->
<link rel="stylesheet" href="css/submit_jquery.css"/>
<!-- Include JS File Here -->
<script src="http://ajax.googleapis.com/ajax/libs/jquery/1.11.1/jquery.min.js"></script>
<script src="js/submit_jquery.js"></script>
</head>
<body>
<div class="container">
<div class="main">
<form action="#" method="post" name="form_name" id="form_id" class="form_class" >
<h2>jQuery Form Submit Example</h2>
<label>Name :</label>
<input type="text" name="name" id="name" placeholder="Name" />
<label>Email :</label>
<input type="text" name="email" id="email" placeholder="Valid Email" />
<input type="button" name="submit_id" id="btn_id" value="Submit by Id" />
<input type="button" name="submit_name" id="btn_name" value="Submit by Name" />
<input type="button" name="submit_event" id="btn_event" value="Submit by Event" />
<input type="button" name="submit_class" id="btn_class" value="Submit by Class" />
<input type="button" name="submit_tag" id="btn_tag" value="Submit by Tag" />
</form>
</div>
</div>
</body>
</html>
jQuery File: submit_jquery.js
Given below our complete jQuery code.
$(document).ready(function() {
// Submit form with id function.
$("#btn_id").click(function() {
var name = $("#name").val();
var email = $("#email").val();
if (validation()) // Calling validation function.
{
$("#form_id").submit(); // Form submission.
alert(" Name : " + name + " n Email : " + email + " n Form id : " + $("#form_id").attr('id') + "nn Form Submitted Successfully......");
}
});

// Submit form with name function.
$("#btn_name").click(function() {
var name = $("#name").val();
var email = $("#email").val();
if (validation()) // Calling validation function.
{
$("form[name='form_name']").submit(); // Form Submission
alert(" Name : " + name + " n Email : " + email + " n Form name : " + $("form[name='form_name']").attr('name') + "nn Form Submitted Successfully......");
}
});

// Submit form with class function.
$("#btn_class").click(function() {
var name = $("#name").val();
var email = $("#email").val();
if (validation()) // Calling validation function.
{
$(".form_class").submit(); // Form Submission.
alert(" Name : " + name + " n Email : " + email + " n Form class : " + $(".form_class").attr('class') + "nn Form is Submitted Successfully......");
}
});

$("#btn_tag").click(function() {
var name = $("#name").val();
var email = $("#email").val();
if (validation()) // Calling validation function.
{
$("form").submit(); // Form submission.
alert(" Name : " + name + " n Email : " + email + " n Tag : formnn Form Submitted Successfully......");
}
});

// Submit form with Event Handler function.
$("#btn_event").click(function() {
var name = $("#name").val();
var email = $("#email").val();
if (validation()) // Calling validation function.
{
$("#form_id").submit(function() {
alert('Form is submitting....');
//or Do Something...
return true;
});
$("#form_id").submit(); // Form Submission
alert(" Name : " + name + " n Email : " + email + "nn Form Submitted Successfully......");
}
});

// Name and Email validation Function.
function validation() {
var name = $("#name").val();
var email = $("#email").val();
var emailReg = /^([w-.]+@([w-]+.)+[w-]{2,4})?$/;
if (name === '' || email === '') {
alert("Please fill all fields...!!!!!!");
return false;
} else if (!(email).match(emailReg)) {
alert("Invalid Email...!!!!!!");
return false;
} else {
return true;
}
}
});
CSS File: submit_jquery.css
Styling HTML elements.
/* Below line is used for online Google font */
@import url(http://fonts.googleapis.com/css?family=Droid+Serif);
h2{
text-align: center;
font-size: 21px;
}
hr{
margin-bottom: 30px;
margin-top: -7px;
border: 0;
border-bottom: 1px solid #ccc;
}
div.container{
width: 960px;
margin:50px auto;
font-family: 'Droid Serif', serif;
position:relative;
}
div.main{
width: 350px;
float:left;
padding: 15px 60px 35px;
margin-top: 60px;
box-shadow: 0 0 10px;
border-radius: 2px;
font-size: 13px;
}
input[type=text]{
width: 99.8%;
height: 40px;
padding-left: 5px;
margin-bottom: 25px;
margin-top: 10px;
box-shadow: 0 0 5px;
border: 1px solid #b7b7b7;
color: #4f4f4f;
font-size: 15px;
}
label{
color: #464646;
font-size: 14px;
font-weight: bold;
}
#btn_id,#btn_name,#btn_class,#btn_tag ,#btn_event{
font-size: 14px;
border: 1px solid green;
background-color: #BCFF96;
font-weight: bold;
box-shadow: 0 0 5px #318600;
border-radius: 3px;
cursor: pointer;
outline: none;
}
#btn_id{
padding: 7px 38px;
}
#btn_name{
padding: 7px 27px;
margin-left: 10px;
}
#btn_class{
padding: 7px 26px;
margin-top: 10px;
}
#btn_tag{
padding: 7px 33px;
margin-left: 10px;
}
#btn_event{
padding: 7px 33px;
margin-top: 10px;
margin-left: 80px;
}
Conclusion:
This was all about different ways of form submission through jQuery. Hope you liked it, keep reading our other blogs.