
Adding more to our features, We have now launched Wufoo integration with MailGet.
When you integrate your Wufoo account with MailGet, any form entry in your Wufoo account with name or email address will automatically be added to your MailGet email list to allow emailing to your Wufoo contacts.
Here are the simple steps to follow for integrating Wufoo with MailGet.
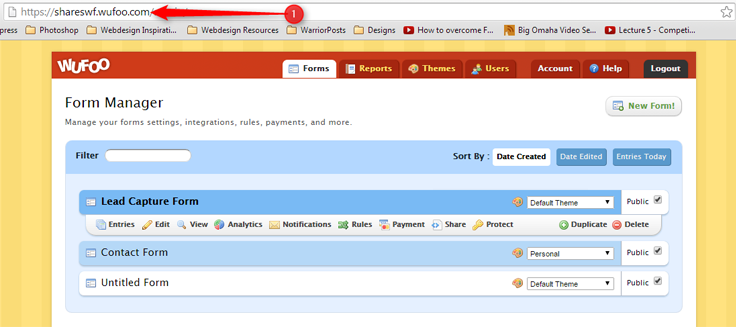
Step 1 : Login to your Wufoo Account.
Step 2 : Copy the URL of your account including the sub-domain of your account (See screenshot 1)
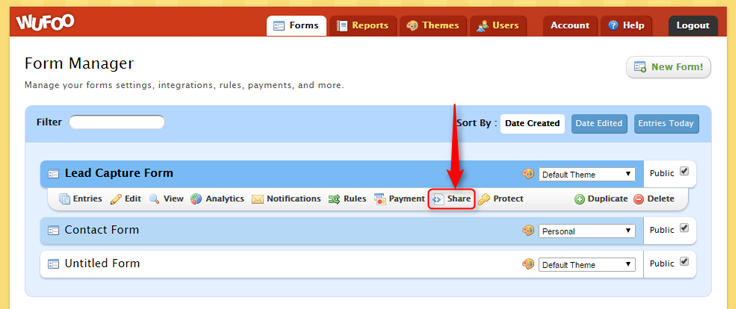
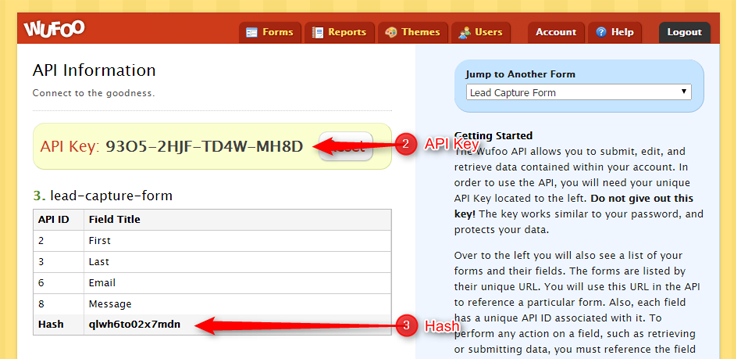
Step 3 : Next, we need the API key of your account. For that click the Share link on the dashboard and then on the API information button and access your API information.
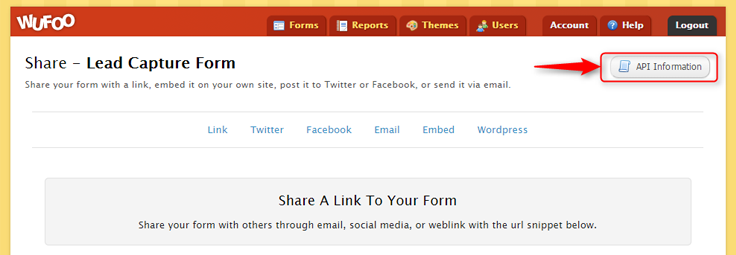
Every form has its own unique hash code, likewise you also need the hash code of the form.
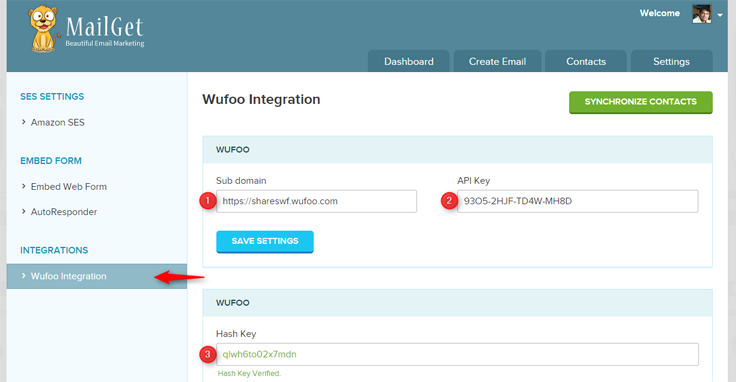
Step 4 : After gathering the 3 key information from your Wufoo account (URL of your account, API key and hash code ), head-over to your MailGet account and click on Settings -> Wufoo Integration.
Enter the details as shown in the screenshot below.
Step 5 : Once the Hash key is verified, the form will expand in MailGet to link your Wufoo Form to MailGet list. Choose the appropriate list and map the form fields with your email list Name and Email field.
Step 6 : Click on Save settings and then click “Synchronize Contacts” button on the top right. All your Wufoo contacts will then be populated in your email list.
Note: Everytime you broadcast to your email list, make sure that you sync your contacts by pressing the “Syncronize Now” button.
iContact Email Marketing Alternative : MailGet Bolt

Comparisons are always beneficial, especially when they are done before taking up a product or a service. They help us know the advantages and shortcomings of the product or service we want to use. They guide us to take correct decisions and here we have iContact Alternative MailGet Bolt.
Same is the case with email marketing services; services that allow you send bulk emails for marketing and transactional purposes. Before taking up a service, you should compare all the features you require for your email marketing campaigns well.
And on the same notion, in this post, I’m going to compare between a top-notch email marketing service iContact and a fresh and fabulous email marketing service – MailGet Bolt.
iContact is rated high among existing email marketing services, but still at many places, it lacks. It is costlier to MailGet Bolt and has deliverability and support issues. For you to understand better, I will compare features of MailGet Bolt and iContact one by one in detail.
Some other alternatves which can help you switch from old & ineffecient email marketing service:-
- Alternative For MailChimp : MailGet Bolt Best For Email Marketing
- Constant Contact Alternative : Get A Replacement For Existing Emailing Service
- Aweber Alternative : To Generate Higher Open Results In Every Campaign
Pricing :
MailGet Bolt is cheaper than iContact if you have a subscriber list of more than 2500 contacts. iContact charges you on the basis of number of subscribers. Also above 15000 subscribers, it provides customized plans under the heading of Premier Accounts. Table below explains the pricing plans of iContact.

Although iContact offers a discount of 15% on annual payments, still their plans appear to be costlier than MailGet Bolt.
The MailGet Bolt pricing plan has described in the table below.

Premier Accounts :
Over a subscriber list of 15,000, icontact offers ”Premier Accounts” to its users. All the important features like use of the iContact design team, priority access to technical support, and Google Analytics integration are reserved for the premium users.
And for this, it charges lot more dollars than the basic plans. So, we can assume that Vocus wants to sell iContact Premier more and so it keeps its Basic plans feature-starved.
MailGet Bolt doesn’t have any such classification. All of of its features and services are available for every user and at no additional prices. Therefore you can enjoy all of MailGet Bolt with a single and affordable monthly payment.
Email Editor :
Many users have issues with the email editor of iContact that it is a bit buggy and adds an extra HTML code when one copy/pastes from word document. Also navigating through dashboards is a bit difficult too.
MailGet Bolt has a very simple and effective WYSIWYG email editor with easy drag-n-drop functioning. Creating emails with MailGet Bolt is a fun experience and the designed emails look fabulous in the inbox.
Image Hosting :
iContact provides an image hosting upto only 5 mb, which is quite low as per the standards and most of the users may quickly outgrow this limit.
And to expand it to 10 to 25 mb, you have to pay extra as per your contacts list size. This means that for the same 25 mb space, someone with a bigger subscriber list pays more than someone with a smaller list.
Now, when it comes to MailGet Bolt, it provides unlimited image hosting for its users. Here you are free to upload as many images you want at no additional charges.
Deliverability :
According to user reviews, deliverability of iContact is not satisfactory and particularly for Gmail and Hotmail, the emails land in spam folder.
On the other hand, MailGet Bolt connects with Amazon SES for sending emails, therefore high deliverability is guaranteed. Amazon SES uses content filtering technologies to scan whether the content in the mail meets ISP standards or not and then only queues it for sending.
Amazon SES also detects email containing viruses and malware and blocks them right there. So you can be assured about MailGet Bolt’s deliverability as it is bound to deliver high quality content with no compromises.
To Conclude…
No doubt iContact is a big fish and MailGet Bolt in its evolution stage, still the overall experience with Mailget Bolt is appreciable. Its low cost and cutting edge technology matches up with the present day email marketing needs and allows you simple email sending with considerable ROI.
For new and establishing businesses, MailGet Bolt can be a scene changer and allow businesses growth graphs go steeper. Moreover all small and medium size business can consider MailGet Bolt as an alternative to their existing email marketing solutions. And no wonder if MailGet Bolt in near future becomes the new definition of email marketing .
Free Email Marketing…Does it really exist..??

A planned start is half the victory..!!
When I say so, I mean that before starting up anything, you should have all the arrows in your quiver to hit your target at bullseye.
And in context of email marketing, what you can understand is that you should be ready with all the necessary resources and a perfect plan of action before starting up with email marketing.
When someone starts a new business or a firm and wants to try email marketing for it, he generally dives into free plans which certain email marketing services provide. Free plans tempt customers by different ways and a user believes he would get served free of cost.
But these plans are never free, they are designed to fetch new users, restrict them at some point or the other and then persuade them to buy the paid plans.
As an email marketer, you need to be well aware of all the catches of the free plans and so, I am explaining below in detail where these services put a barrier in your way and try to redirect you towards their paid plans. Stay tuned…
-
The List :
The first restriction they put is on the number of subscribers. At max, they allow a contact list of 2,000 to 2,500 subscribers.
No smart marketer does email marketing with such a low subscriber base like this, and even if he does, the contacts list exceeds this range within a month or two. And then again, you have to switch to their “premium” plans.
-
Volume of Emails :
Another variant of these could be a free plan upto 10,000 or 20,000 emails per month which you can send to unlimited subscribers. But this limit is also too short to sustain.
But till then you become used to the service and continue with its paid plans reluctantly, without comparing it with other services.
-
Combined Plan :
The most common of these plans is the combined plan. In a combined plan they allow you to send 10,000 to 20,000 emails to 500 to 2,500 contacts per month.
Now this is worst as here you are restricted for both, the contacts lists and the number of emails. I mean who would let these limits bind him forever.
-
Features :
Numerous features which are damn necessary for a successful campaign, are locked in free accounts of all email marketing services.
These features can make your email marketing mere a cakewalk but you are either debarred from them or you have to pay for them separately. In any case you can’t access them free of cost.
- Autoresponders – Autoresponders are quite a necessity in today’s automated world. You can’t send a welcome email to every new subscriber manually or can’t appoint a person just to send anniversary wishes. You need an automated feature, but majority of service providers don’t include autoresponders in their free plans.
- Analytics Tools – The analytics tool is vital for proper tracking and reporting of the sent emails. It allows you to understand your subscribers’ behavior and their chances of conversion. But to avail this, again you will have to switch to their paid plans.
- Image Hosting – Image hosting refers to storing images for your newsletters within your account. This saves you from juggling between your drives to find images required for a particular email. Again this service is unavailable in free accounts and you have to buy space to store your images.
- A/B Testing – A/B testing, one more important feature is also generally not included in free plans of email marketing services. This feature allows you to compare between two email layouts by sending them to two different groups and analyzing opens and clicks. The one with better numbers of opens and clicks is then sent to the rest of the list.
- Social Connect – Social connect is something which is more or less required in every sphere of existence. Facebook, Twitter, Google+ have become an integral part of our life and so can help a business grow better. But free plans of mostly all services are deprived of social connect too.
- Support – Most of the email marketing solutions don’t provide support for free accounts. Now this, I feel is the worst, I mean how can one judge the requirement of help and support on the basis of freeship or paidship.
All these features are both relevant and important for both paid as well as free users. Without them you can’t attain maximum efficiency in your email marketing campaigns. So neglecting them by taking up free plans can never be a good idea.
-
Sign-up Forms :
Certain email marketing services allow importing contacts through signup forms only. This can again be a pull back for a new business.
Since a new business is yet to gain trust among its customers, expecting it to add subscribers through signup forms may not be a good option.
After sharing this piece of information my question to you is – What’s the use of an Internet marketing tool if you can’t even use it at full potential..??
May these plans be free, but are of no use, I feel. You may save $50 per month using these plans but you can’t convert users with such plans. Taking up paid services won’t cost you more than 100 dollars a month, but surely would give you returns on your investments.
There are many email marketing solutions (like Pabbly Email Marketing, MailGet, AWeber, etc) that don’t show off free plans, instead they charge a modest and genuine fee and provide you all the necessary features required to execute value generating email campaigns.
So what I will suggest you is that don’t fall prey to these free plans, instead compare well between services, make proper plans, explore your resources to the fuller and then start up with email marketing.
10+ Best Autoresponder Email Marketing Softwares 2022

| Quick Comparison Between Autoresponder Email Marketing Services | |||||
| Services | Monthly Pricing | No. Of Contacts | API | Free Trial | In-built SMTP |
| Pabbly Email Marketing | $29 | 5,000 | Yes | Yes | Yes |
| MailGet | $29 | 5,000 | Yes | Yes | No |
| SendinBlue | $25 | 10,000 | Yes | No | Yes |
| Moosend | $30 | 5,000 | Yes | Yes | Yes |
| SendPulse | $12.8 | 1500 | Yes | Yes | Yes |
Autoresponder is one of the most efficient features of an email marketing service. It saves a lot of time and manual efforts by automating the process of communicating with your customers.
Autoresponder email marketing is used by many customers in their business for purposes like –
- Welcoming new subscribers to your list and appreciating their interest.
- Sending “Thank you” messages to your customers after they purchase your products or services.
- Confirming the registration of users and their details.
- Sending e-courses or e-books modules daily or weekly, to your customers.
- Sending rewards and incentives to encourage users for subscribing to your service.
- Informing them about upcoming products or services.
- Wish them on their birthdays or greet them for an occasion, etc.
Henceforth, we have compiled a list of 12 such email marketing services that are known to facilitate you with the essential feature of the autoresponder.
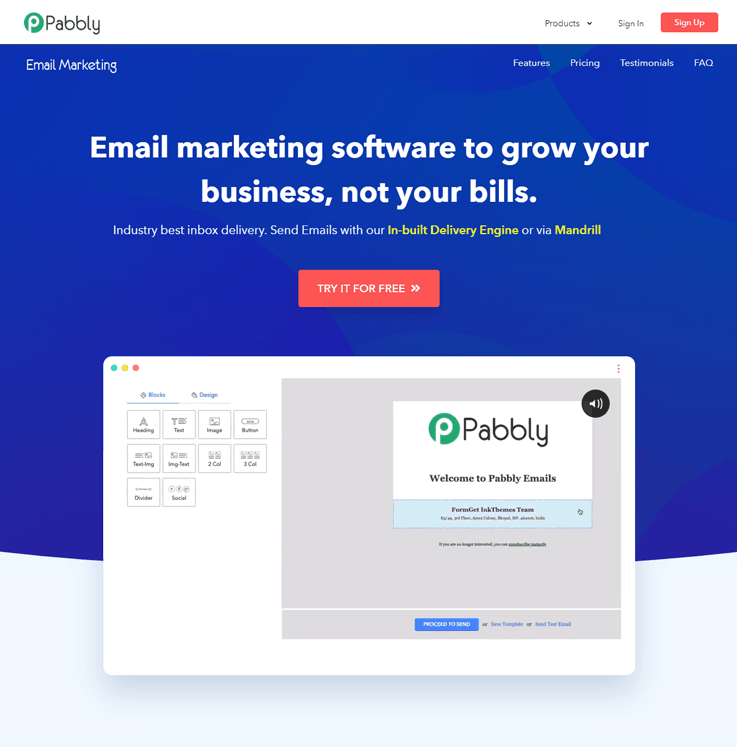
1. Pabbly Email Marketing:
The first in the list of autoresponder email marketing software is Pabbly Email Marketing that lets you connect with your customers instantly. It automatically sends emails to your customers which saves a lot of time and work efforts of a person, which he can utilize in some other profitable organizational’s work.
Autoresponder –
Autoresponder is the special functionality of Pabbly Email Marketing where you just need to pre-write the replies & responses and all the emails will be self-triggered and reach to client’s inbox as soon as the person get subscribed to your mailing list.
Using autoresponder, you can send welcome emails, personalized emails, triggers based on subscriber activity and much more.
Pricing –
- Starters – Enjoy exploring Pabbly Email Marketing and connecting 3 SMTPs at $0
- Rookie – Get the Rookie plan at just $29/month to send emails to 5000 subscribers along with features like 3 SMTP connections, unlimited monthly campaigns email builder, automatic follow-ups & more.
- Pro – You can avail this plan by spending just $49/month to send emails to 15,000 subscribers. Moreover, it also facilitates you with advanced features like live chat support, unlimited SMTP connections, SMTP routing, etc.
- Advanced –This plan comprises various pricing schemes starting from $99/month for sending 50,000 emails to $1599/month for sending emails to 10,00,000 subscribers along with many enhanced features. Subsequently, it has got 10+ such schemes that differ according to the number of subscribers.
As per my research Pabbly Email Marketing has an edge over others when it comes to the autoresponder email service as you can create the autoresponder mail in a jiffy and the mechanism work such that as soon the form is filled by the customer on the website the mail is delivered to them.
An added advantage is the affordable pricing of the software which makes it more desirable which is $49 per month, also the OPEN rate is very high which is striking at 2X in the initial level.
2. MailGet
MailGet is one of the most affordable email marketing services that benefits all business firms, especially small and medium ones.
Whether to design a beautiful professional looking email or to track your email campaign, MailGet profits you in every possible way including guaranteed deliverability of emails to your contacts, autoresponder feature, affordable pricing and much more.

Autoresponder –
MailGet’s autoresponder allows you to easily send automated emails to a selected list of subscribers. Creating an autoresponder email is super simple in MailGet.
You just have to fill general fields like Name, Email, Subject & Message under Autoresponder setting, to set up an email of your desire and start sending to your contacts.
Pricing –
Pricing plan of MailGet is based on the number of subscribers as well as the volume of emails sent. MailGet connects with Amazon SES for sending emails, and Amazon SES charges $1 per 10,000 emails sent. Following are its 4 amazing pricing plans:-
- Starters – Send emails to 5000 subscribers at the cost of $5 per month only & avail features like email builder, 10 monthly campaigns & option to connect with 1 SMTP server.
- Rookie – You can buy this that comes with the price tag of $29/month & enables you to send emails to 25,000 subscribers. Features included will be automatic follow-ups, email builder, unlimited monthly campaigns, 3 SMTP connections, etc. with this plan.
- Pro – The Pro plan will let you send emails to 50,000 subscribers in just $49/month. The list of features comprises unlimited SMTP connections, SMTP routing, live chat support etc. besides other basic facilities.
- Advanced – Its advanced plan has multiple other schemes starting from $79/month to send 1,00,000 emails. Bundled with most advanced features, its highest plan will cost you only $672/month to send mails to 1,000,000 subscribers.
It is my personal recommendation that you should go with MailGet as it is providing the finest autoresponder mail sending software which sends the mail created by you.
The software along with other amazing features is also very cheap in terms of price as it is available at $5 per month, also the deliverability rate is 99% which is very praiseworthy.
Check Out Our Other Popular Post –
3. HubSpot Email Marketing
HubSpot Email Marketing offers one of the most powerful autoresponder capabilities on the market. Particularly if you’re using other tools in HubSpot’s Marketing Hub, such as our form builder and popup forms, you can easily set up auto-response emails upon form submission.

Autoresponder
There are two ways to send an automatic email response:
- You can set up a follow-up email in the form options on your HubSpot page, once a contact has submitted a form. This is available with the free plan (up to 2000 email send/month), as well as the Starter plan.
- Alternatively, you can send an automated email through a workflow. For that, you’ll need a Marketing Hub Professional or Enterprise plan.
Through HubSpot’s workflows you can get quite robust with your targeting and follow-up email assignment. For instance, you can break things down by contact property data you’ve collected, like company size or which service the subscriber is interested in. This allows you to customize your follow-up emails to make sure they’re perfectly tailored to the contact’s needs.
In addition, you can set a sequence of several autoresponder emails, and can also include behaviorally triggered messages — the options are pretty much endless.
Pricing:
- Free: The HubSpot Email Marketing tool is free for up to 2,000 email sends per month.
- Starter: Upgrade solutions start at $50 with the Marketing Hub Starter. With this plan, you can send up to 5X contact tier email send limit, based on the number of contacts you have in your HubSpot CRM. Say if you have 1000 contacts, and upgrade to Marketing Starter, you can send 5 times that number in sends so email marketing send limit per month will be 5000.
- Professional: With the Professional plan, at $800/month, you can send up to 10x contact tier email send limit per month.
- Enterprise: With the Enterprise plan, at $3200/month, you can send up to 10x contact tier email send limit per month, plus you get access to many additional features.
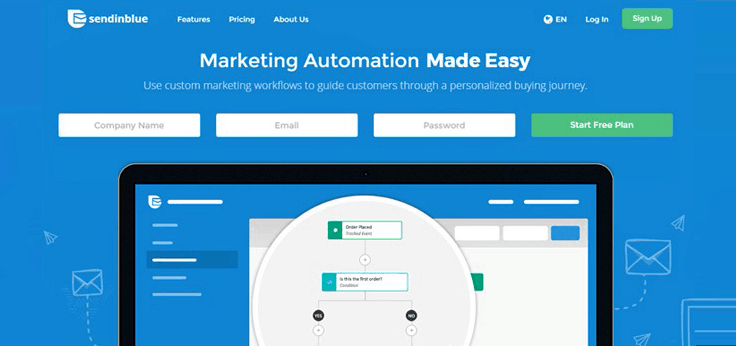
4. SendinBlue
SendinBlue is another effective email marketing service for your business. It enables you to create professional looking newsletters in minutes and offers many marketing tools like easy-to-create sign-up forms, RSS to email, email analytics, and QuickStats, manage subscribers list, 700 HTML templates, subscriber segmenting, etc.
Autoresponder –
SendinBlue helps you to reach more people in less time with unlimited autoresponders. It also allows you to select the days and times you want your followup messages delivered, and then it will be sent to your subscribers in sequential order.
Pricing –
- Free – Send 300 emails/month to unlimited contacts at $0 as it is a free plan & get access to features like A/B testing, email personalization, mobile-friendly email designer, etc.
- Lite – New marketers can get this plan for sending 100,000 emails in a month at just $25/month. Furthermore, it provides you with amazing features along with the option of a zero daily sending limits.
- Premium – This advance plan for marketers is apt for sending 100,0000 emails in a month at $65/month with advanced features like send time optimization, landing page builder.
Note:- Contact sales team to know the pricing details of Enterprise plan which & avail benefits of dedicated account manager & service pack.
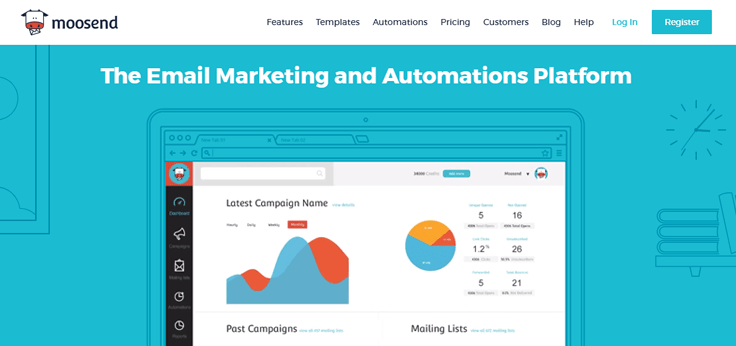
5. Moosend
Moosend is an amazing solution that lets you create outstandingThe service provides you with a variety of features like responsive newsletters, personalization, email analytics, member management, preview option to check the appearance of email on different devices, and much more.
Autoresponder –
With Moosend, you can easily select which emails to trigger on different actions performed by users.
This automation process consists of various emails for events like sending new subscription, welcome email, follow-ups or a series of emails with specified time intervals.
Pricing –
- Free Plan – You can send unlimited emails up to 1K subscribers without spending a penny using this free plan. Not just this, you can also access basic features like spam test, email marketing automation, real-time analytics, etc.
- Paid Plan – The paid plan consists of multiple sub-plans & starts from $10/month for 2000 subscribers. The list of features includes advanced list segmentation, 3rd party integrations, custom opt-in forms, removal of Moosend branding, etc. Take a look at some of the other cost schemes with different number of subscribers & unlimited email campaigns:-
- 10,000 subscribers – $55
- 50,000 subscribers – $205
- 1,00,000 subscribers – $390
- 1,000,000 subscribers – $3,650
- Pay As You Go – You can go with this option for sending occasional emails & pay only for sent emails. For instance, you can buy 1000 credits* in $3 ( price/email is $0.003)
*1 credit = 1 email sent to 1 recipient.
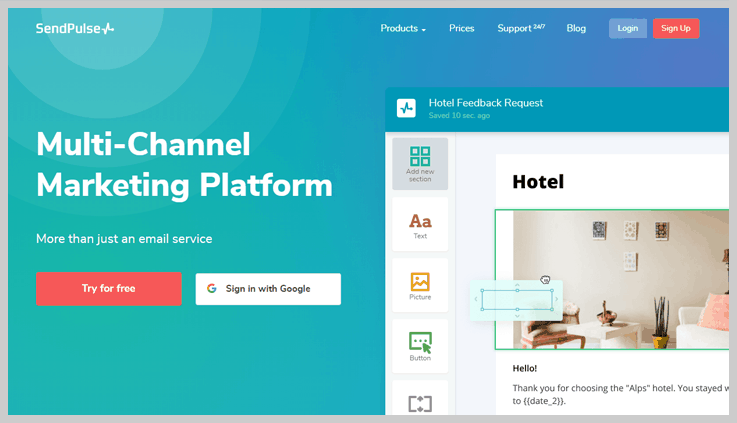
6. SendPulse
SendPulse is another feature-rich email marketing solution for professional email marketers, agencies, and also to Internet retailers.
Apart from designing effective email campaigns, it offers various advanced features like email segmentation, autoresponders, email workflows, email reporting, contacts lists, email templates, elements API and much more.
Autoresponder –
It offers autoresponder named Triggered, to send emails on a daily, weekly, monthly or annual basis based on the date you select.
You can send an email to customers and prospects based on actions they take, such as clicking a specific link in your email campaign or for special promotions and reactionary messages.
Pricing –
SendPulse comes up with different pricing plans based on the number of contacts you have.
- Monthly subscription – This plan is suitable for beginners in the email marketing whose pricing starts from $6.4/mo. for up to 500 subscribers.
- Pay as you go – The second plan begins at $32 for contacts up to 10,000 and is chosen mostly by growing business
- VIP Plan– While for knowing a high volume sender pricing option for over 1 million subscribers, you can contact its professional client service team. This plan also provides multi-tiered support, custom pricing & custom made email template.
Note:- The above-mentioned pricing schemes have sub-plans with different price & features which you can visit on the website.
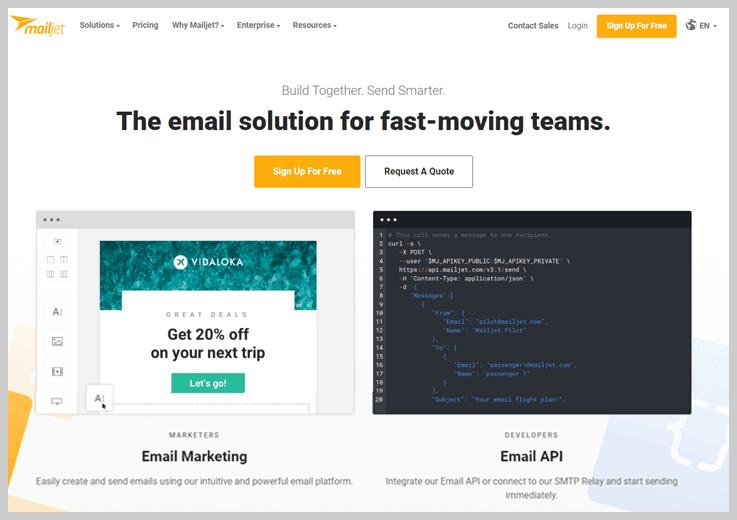
7. Mailjet
Mailjet is an email marketing tool built for designers that make beautiful emails that are easy to create & send, lists management, track the results of your campaigns, A/B testing, etc.
Autoresponder –
Mailjet offers time-based autoresponders to send welcome messages, birthday greetings and other data-based campaigns to your contacts. When an autoresponder starts being sent, reports will be generated to show opens, clicks and unsubscribes.
Pricing –
Mailjet comes up with four monthly plans that will cost you according to the number of people you are sending emails to.
- Free – Cost you nothing and allows you to send 6,000 emails per month.
- Basic – This basic plan comes with a price tag of $8.69/month for 30,000 emails sent.
- Premium – For this plan, you need to pay $18.86/month for 30,000 emails sent and all the advanced features like online customer support, No Mailjet logo to enhance marketing strategy.
- Enterprise – To get this plan, you need to contact their expert as it is a custom plan for high volume senders.
8. Constant Contact
Constant Contacts is an email marketing service, created to strengthen email marketing practices of small businesses, associations, nonprofits organizations, etc. It offers WYSIWYG editor to create an email campaign, secure contacts list management, social stats reporting tools, images/texts import feature, real-time tracking of your email campaign, etc.
Autoresponder –
It allows you to create an autoresponder email, assign it to the particular contacts list and start scheduling it on a particular day and time. For editing or changing the status of your autoresponder email, you need to first deactivate it.
You can also get a report of your sent autoresponder emails like their number of bounces, spam, opt-outs, opens, clicks, and forwards.
Pricing –
Constant Contact provides 2 monthly plans whose price depends on the number of contacts with first month free.
- Email – The plan starts with a minimal cost of $20/mo for 1 user & lets you unlimited emails along with features like 1 GB storage, list-building tools, e-commerce, customizable templates, apps & integration, live support & more.
- Email Plus – This plan has initial price of $45/mo for 10 users loaded with features like unlimited email sending, 2 GB storage, email automation, surveys & polls, subject line A/B testing, email scheduling etc.
9. GetResponse
GetResponse is a web-based email marketing solution enriched with many features like to build permission-based mailing lists, powerful drag-n-drop editor, built-in web forms, track email marketing, autoresponder feature, list management, social media integration, A/B testing, etc.

Autoresponder –
To automate email marketing campaign, GetResponse offers time-based and action-based autoresponders. It automatically sends a series of emails on the scheduled date or time that you set up once.
You can also create and set up an automated message to deliver to each subscriber on specific actions they take after subscribing, like contact sign-up, completed transactions, opens, and clicks, changes in contact preferences, birthdays or other important dates.
Pricing –
- Email – This plan is perfect for email marketing beginners that starts from $12.76/month for the list of 1000 contacts. This plan offers multiple basic features like autoresponders, landing pages (basic), workflows and more for 1 user.
- Pro – Pro plan begins with $40.83/month for 5000 contact list. The plan is mostly used by marketers for availing features like automation segmentation, e-commerce, CRM, and a lot more for 3 users.
- Max – This plan is the ultimate choice for marketing professionals where the range starts from $140.07 for 10,000 contacts and so on. In addition to all the Pro features, it also includes options for custom DKIM, campaign consulting etc. for 5 users.
- Enterprise – The most advanced plan begins with $1526.81 for the list size of 100,000+ contacts. Additionally, you can avail some of the best features like account manager, dedicated IP, transactional emails, deliverability consulting etc.
10. Benchmark Email
Benchmark is another effective email marketing solution with an easy drag-n-drop editor to create and send email newsletters, obtain real-time reports, contacts list management, sign up forms, 400 customizable email templates, A/B testing, integrated with social media options, etc.
Autoresponder –
Using Benchmark autoresponder system, you can create as many autoresponders as you need, each one targeting a specific email list. It allows you to schedule individual emails at the time of your desire like a day, a week, month or even a year. Also, you can send automatic birthday emails to each of your subscribers on their special days.
It also obtains the autoresponder reports to describe the activity of an autoresponder as a whole. Like, it contains the individual reports for Bounces, Clicks, Opens, etc.
Pricing –
Benchmark comes up with 3-pricing plans based on the number of emails, number of subscribers and high volume.
- Medium – This plan starts from $11.91 for 600 subscribers to $268.86 for 50,000 subscribers.
- Large – The range starts from $288.99 for sending emails to 55,000 subscribers to $507.82 for 1,00,000 subscribers.
- Extra Large – The initial cost of this plan is $609.30 for your 1,25,000 contacts to $3684.99 for 1,000,000 contacts.
- Massive – Buy this plan starting from $4081.84 for 1,070,000 subscribers to $26486.58 for 7,140,000 subscribers.
Note:- This email marketing service also provides you with a free trial for 30 days or up to 250 emails sent.
11. iContact
iContact is an email marketing service that offers hundreds of well-designed templates, easy to use tools that move you seamlessly from building lists and designing emails, sending messages, tracking and reporting of email campaigns, etc.
It also contains features like autoresponders, integration with third-party apps and online surveying.

Autoresponder –
With iContact, you can quickly create and name an autoresponder email and also set the specific date range like beginning and ending date to perform that autoresponder.
You can also track the performance of your list of autoresponders email by viewing the number of clicks, opens, bounces, unsubscribes, and complaints.
Pricing –
iContact offers 2 pricing plans that will cost differently for your contact list size. You can also get benefited with 15% discount for 12 months pre-pay on annual billing. Here is an example for further illustration:-
For 500 contacts
Essential – This plan will cost you $14/mo with features like drag & drop editor, A/B split testing, sign-up form creation etc.
Professional – You can buy this plan at the cost of $99/mo and avail features like engagement & behavioral tracking, funnel reports, Zapier integrations & more.
For 25,000 contacts
Essential – Spend $149/mo to avail this plan & amazing features like API support, Google analytics, pre-built design template library, unlimited users per account & much more.
Professional – Get this plan at just $369/mo with essential options such as workflows, social monitoring & a lot more.
Note:- Contact sales team to know the details of 4 premier services for your business.
12. MailChimp
MailChimp is another popular email marketing service in the industry. It allows you to create and send email newsletters to your customers, manage subscriber lists, track campaign performance and much more. Aso, it offers responsive email templates that look great on mobile devices and different screens. MailChimp automatically takes care of your sign-ups, un-subscribes, and bounce-back cleaning.
Autoresponder –
MailChimp allows you to send automated emails based on customer behavior and preferences. Although, MailChimp offers a free trial, but their autoresponder feature is only available in paid accounts. It allows you to create an autoresponder email easily, and you can set the event to trigger this autoresponder. Additionally, you can also select the day and accurate time to send it to your subscribers.
Pricing –
It has different pricing plans for entrepreneurs, growing businesses & high volume senders.
- Free – You can send 12,000 emails/month to 2,000 subscribers without paying a dime as it is absolutely free.
- Grow – This plan starts at $10/mo for unlimited subscribers & emails/month that includes features like multi-user accounts, email & chat support, time-zone delivery, A/B testing etc.
- Pro – The advanced plan starts at $199/mo & lets you send unlimited emails & subscribers with amazing features like premium support, advanced segmentation, comparative reports, testing & more.
If you are not a frequent email sender, you can pick “Pay as you go” plan, where you can purchase credits that work like stamps for email. Like, for 300 email credits, you can prepay $9, which means it costs $.030 per email.
13. Mad Mimi
Mad Mimi is an email marketing service that comes up with simplified design tools to create, send, share and track email newsletters online.
Besides, It also contains many features like smart list management, robust social sharing tools, plenty of add-ons like web forms, social links, autoresponders, integrations, etc.
Autoresponder –
Drip campaigns work same as an autoresponder. Additionally, it allows you to send a series of interval-based emails to people, automatically, when they added to a particular list in your audience.
A Drip Campaign consists of any number of ‘Drip Emails’ that you create, place in a particular order, and specify the intervals between them. You can send welcome emails, follow-ups or a series of emails all about a specific topic easily through this.
Pricing –
Mad Mimi offers 4 different pricing plans based on the number of subscribers for different individual & business purposes.
- Basic – This plan is best for individuals who aim to target maximum of 5,000 contacts. The plan will cost you $10/mo for 500 contacts, $12/mo for 1000 contacts & so on.
- Pro – The plan starts from $42/mo for 10,000 contacts to $139/mo for 35,000 contacts of your list.
- Silver – It comes with the starting price tag of $199/mo for 50,000 and is mostly picked up by business firms.
- Gold – The price range of this advanced plan starts from $1,049 per month for 350,000 contacts with few more higher pricing schemes for large business groups.
Note:- Mad Mimi offers an amazing offer of customizing a plan as per the number of contacts with different features.
Conclusion
Now that you have gone through the various email marketing autoresponder comparison, choose well and decide which one to opt for.
Is there any autoresponder email marketing service left out..?? Comment in the space provided below.. 🙂
Check out here for the comparison of
- 65 Best Email Marketing Services
- Email List Cleaning System
- Best Drip Email Marketing Solutions
- Top SendinBlue Alternatives
A Fresh and Affordable Email Marketing Service : MailGet
Fed-up with outdated, complex and highly priced email marketing services that have a clunky user interface; and need a fresh email marketing service that is highly affordable and designed according to the needs of present-day marketing scenario..???
You have landed on the right page…MailGet – Email Marketing Platform awaits you..!!!
Hey there !!
I’m Fugo, Fugo from FormGet, and I bring to you, MailGet – a fresh and affordable email marketing service that is carved especially for young-blood businesses. It’s a service that will definitely allow an ease to your pocket and may revive your idea of email marketing even.
Moreover, I’m here to help you out in every possible problem you might face while marketing your products & services through email campaigns.
Proceeding to the same, I’d describe now, why I’m calling MailGet fresh, reasonable and best fit for today’s email marketing needs. Taking up its specifications one by one, I’ll explain how you can get benefited with the amazing features of MailGet.
Freshness :
Launched in 2022, MailGet is designed keeping in mind all the problems that a person or a business might face while using an email marketing solution. Its fresh and simple approach gets reflected in all its segments, may it be its Email builder or be its Contacts Management.
Its pricing too is kept low keeping in mind the high volume of subscribers, businesses have today. The design aesthetics of MailGet also reflect its vision of being simple but relevant and effective at the same time.
Pricing :
MailGet has the lowest of all pricing, among all existing email marketing services. Its pricing plan is based on number of subscribers as well as the volume of emails sent, in one packet.
MailGet connects with Amazon SES for sending emails and Amazon SES charges $0.10 per thousand emails sent. As far as pricing of MailGet is concerned, it charges monthly on the basis of number of subscribers in three slots mentioned below.
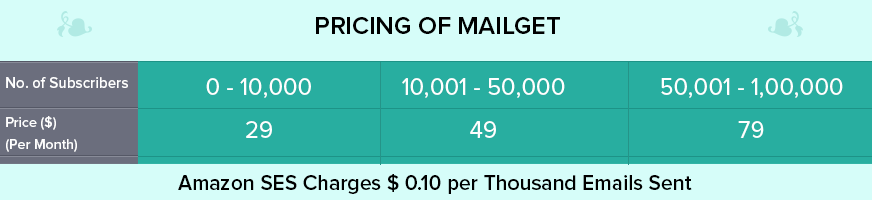
You have to pay for both MailGet and Amazon SES separately. For understanding the pricing better read the illustration below :
Say you have a subscriber base of around 20,000 people whom you send 5 emails each, per month. So you can say, you send 1,00,000 emails monthly.
Now MailGet will charge $49 for sending unlimited emails to 20,000 subscribers and Amazon will charge $10 for sending 1,00,000 emails. So what you are going to have in your monthly bill is just $59.
This means sending 1,00,000 emails to 20,000 ( 5 each ) subscribers costs you only $59 using MailGet. Isn’t that great..!!
Pre-requisites :
It is a web-based service, so one needs to have an internet connection for sure. Other than that, the only requirement to use MailGet would be an Amazon SES account. After you setup Amazon SES account, you will have to generate your IAM credentials, which would be entered in MailGet’s settings panel. This will setup a payment mode for SES.
For MailGet you can pay through a PayPal account or through a Credit/Debit card. After doing so, you have all the ammunitions to trigger email campaigns to your subscribers.
Ease of Use :
Ease of use is the prime requirement of present times and so is the prime focus of MailGet. Its dashboard is simple, appealing and relevant to use. On it, you have your recent email campaigns along with their statistics.
Its email editor is also easy to use and gives the same results as complex editors of other services give.
The look and the feel of the interface is so fresh-n-attractive that you will never feel bored working on it. It doesn’t have a plethora of information dumped up on a single page, instead it has tabs that are actually needed while creating, sending and tracking emails.
In short, the entire process of emailing in MailGet is worth enjoying.
Features :
All the co-existing email advertising services claim to serve numerous features to their clients but quite a few of those features are actually useful for them. But as mentioned earlier, MailGet’s approach is different.
It avails its users, only those features which are relevant and necessary for a successful email marketing campaign. A few of them are mentioned below.
Email Editor – It has a stunning WYSIWYG email editor that frees you from the hectic HTML coding. Here, you can design eyeball-grabbing emails newsletters that capture quick attention of the audience, in just a few clicks. But considering every type of users, it also has a Basic Text Editor and a Custom Code Editor.
Sign up Forms – MailGet has an embed web form feature, through which you can embed signup forms in your website to generate leads.
Autoresponders – MailGet also provides Autoresponder service for every subscription; through this service, one can send messages to his users automatically, based on their actions. These messages may include welcome messages, coupons, payment confirmations, etc.
Email Drips – This feature allows you to send automated emails in a pre-defined order and at pre-defined timelines. And as soon as someone gets added to your list, he or she starts receiving these drips.
Include/Exclude – This feature of MailGet allows you to exclude a list of recipients whom you don’t want send emails. When one excludes an email list while sending an email campaign, all the email addresses of that list are automatically expelled from all the lists for that particular campaign.
HTML to Plain Text Alternative – It is an awesome feature where if a person has blocked HTML templates, a plain text version of the template you created will be sent automatically to him.
Deliverability :
MailGet uses Amazon SES as an email server, therefore high deliverability is guaranteed. The content filtering technologies of Amazon SES first scan whether the email content meets ISP standards or not and only then queue it for sending.
It also detects and blocks emails containing viruses and malware. So you can rely fully on MailGet’s deliverability.
Tracking and Reporting :
You can have a complete record of opens, clicks and unsubscribes of recent campaigns, right on the dashboard. Further, if you want to see the spam and bounces graphically, you can find that on Amzaon SES’s dashboard.
In this way, you can have a two-tier assessment of your campaigns, the necessary one in MailGet and the secondary in Amazon SES.
Support :
It provides fast and effective email support, so you can get your solutions in a very short time. Additionally, It has video as well as blog tutorials to help you out when you are stuck somewhere.
MailGet’s supports its customers at every step of the whole process, right from creating an account to tracking your emails.
Business Size :
For now, MailGet is focusing on small and medium business sizes i.e. up to a subscriber base of 1,00,000, but that doesn’t stop you from using MailGet if you are big business.
If you have more than 1,00,000 contacts and are interested in using this service, you can contact MailGet, they will sculpt the best possible solution for you.
Verdict :
MailGet can be the best choice for a small and medium sized business focusing to market its product with minimum input and maximum ROI. With highly affordable prices and easy operations, MailGet surely can emerge as a market leader in existing email advertising services.
Fugo says, though there are improvements required in MailGet, which are obvious and necessary for any organization at any stage, they are constantly working to make it better for their clients, each passing day.
But anyhow, its simplicity, effectiveness and freshness are compelling and you will enjoy using it.
So, for what you are waiting, Check out MailGet – email service provider now and start experiencing awesome email marketing. But don’t forget to tell me how did you liked it…
For any other information regarding MailGet or any other query regarding email marketing, you can contact me i.e. Fugo at [email protected] .
CSS : active selector
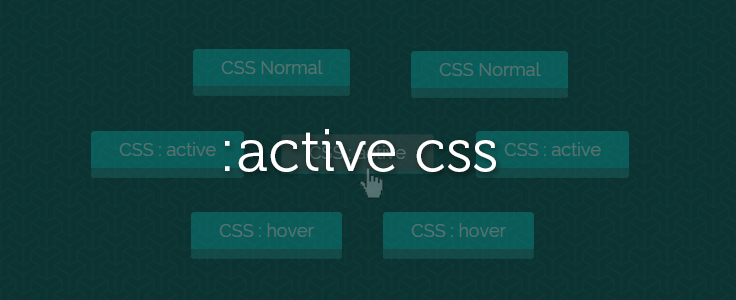
CSS : active selector is used to select and change the styles of the active link to make them attractive. A link or tag becomes active when clicked on it.
In this tutorial, we have applied CSS selector : active on link (which looks like a button) to show its effect. Here we have demonstrated to apply css on an element that has first normal selector, then : active selector and the last : hover selector to make its appearance more elegant and eye catching.
Syntax
Normal : In this element hover and active selectors are not applied.
HTML
<a href="#" class="normal-link">CSS Normal</a>CSS
.normal-link{
background: #237E7C;
}
Active Selector : It’s mainly used to create differences between normal and click visualization, or to create attractive styles for interface.
HTML
<a href="#" class="active-link">CSS : active</a>CSS
// Normal visualize of link

.active-link{
background: #237E7C;
}

// On click, it changes the background color

.active-link:active{
background: #5A5A5A;
}
Hover Selector : Hover selector is also used for attractive interface. It works when mouse is taken over link.
HTML
<a href="#" class="hover-link">CSS : hover</a>CSS
 // Normal visualize

.hover-link{
background: #237E7C;
}

// On hover, it change the background colour.

.hover-link:hover{
background: #437294;
}
You can also refer live demo or download the script file.
Extract the downloaded files, save it and run index.html on browser

HTML File
Copy below code in your HTML file.
<html>
<head>
<title>active and hover state of button</title>
<link rel="stylesheet" type="text/css" href="style.css">
</head>
<body>
<div class="main">
<h1>Example of :active and :hover selector </h1>
<div class="box">
<div class="normal_1"> <a href="#" class="normal-button teal">CSS Normal</a></div>
<div class="normal_2"> <a href="#" class="normal-button teal">CSS Normal</a></div>
<div class="active_1"> <a href="#" class="active-button teal">CSS : active</a></div>
<div class="active_2"> <a href="#" class="active-button teal">CSS : active</a></div>
<div class="active_3"> <a href="#" class="active-button teal">CSS : active</a></div>
<div class="hover_1"> <a href="#" class="hover-button teal">CSS : hover</a></div>
<div class="hover_2"> <a href="#" class="hover-button teal">CSS : hover</a></div>

</div>
</div>

<!-- Right side div -->
<div id="formget">
<a href=https://www.formget.com/app><img src="formget.jpg" alt="Online Form Builder"/></a>
</div>
</body>
</html>
CSS File
Copy below code in your CSS file, or inside style tag in HTML page.
@import url(http://fonts.googleapis.com/css?family=Raleway);

body{
margin:0 auto;
font-family: 'Raleway', sans-serif;
}

.main {
margin-left: 230px;
margin-top: 140px;
}

/* Hover */

.hover-button{
position: relative;
top: 0;
border-radius: 4px;
font-size: 18px;
padding: 8px 28px;
text-decoration: none;
border: 0px solid;
cursor: pointer;
border-bottom-width: 10px;
outline: none;
-webkit-transition: 0.3s background;
-moz-transition: 0.3s background;
transition: 0.3s background;
}

.hover-button.teal{
color: #fff;
border-color: #237E7C;
background-color: #08BBB7;
}

.hover-button.teal:hover{
background: #237E7C;
}

/* Active */

.active-button{
position: relative;
top: 0;
border-radius: 4px;
font-size: 18px;
padding: 8px 28px;
text-decoration: none;
border: 0px solid;
cursor: pointer;
border-bottom-width: 10px;
outline: none;
-webkit-transition: 0.3s background;
-moz-transition: 0.3s background;
transition: 0.3s background;
}

.active-button:active{
top: 3px;
}

.active-button.teal{
color: #fff;
border-color: #237E7C;
background-color: #08BBB7;
}

.active-button.teal:hover{
background: #0ACFCB;
}
.active-button.teal:active{
background: #5A5A5A;
border-bottom-width: 3px;
}

/* Normal Button */

.normal-button{
position: relative;
top: 0;
border-radius: 4px;
font-size: 18px;
padding: 8px 28px;
text-decoration: none;
border: 0px solid;
cursor: pointer;
border-bottom-width: 10px;
outline: none;
-webkit-transition: 0.3s background;
-moz-transition: 0.3s background;
transition: 0.3s background;
}

.normal-button.teal{
color: #fff;
border-color: #237E7C;
background-color: #08BBB7;
}
/* div set */

.box {
width: 588px;
height: 292px;
margin-top: 140px;
}
h1 {
margin-left: 30px;
}

.normal_1 {
margin-top: 50px;
margin-left: 132px;
}

.normal_2 {
margin-top: -19px;
margin-left: 350px;
}

.active_1 {
margin-top: 59px;
margin-left: 30px;
}

.active_2 {
margin-left: 220px;
margin-top: -21px;
}

.active_3 {
margin-left: 415px;
margin-top: -21px;
}

.hover_1 {
margin-left: 130px;
margin-top: 60px;
}

.hover_2 {
margin-left: 322px;
margin-top: -21px;
}
Conclusion:
In this tutorial we have learned about, how to create differences between visualization using :active, :hover selector. Hope you have benefited from it. Keep visiting our website in future for more knowledge and information.
For more related information check following blogs –
Generate Amazon SES Credentials
In this documentation, you will get the steps to generate Amazon SES credentials which you will be needing to connect to MailGet account with your Amazon SES account. This documentation assumes that you are already done with the below steps –
- Created an Amazon SES Account.
- Verified your Email Address.
- Moved your Amazon SES Account from SandBox mode.
Now that you have fulfilled all the above-mentioned requirements, you can now generate Amazon SES credential and can avail MailGet account with full access to your Amazon SES account
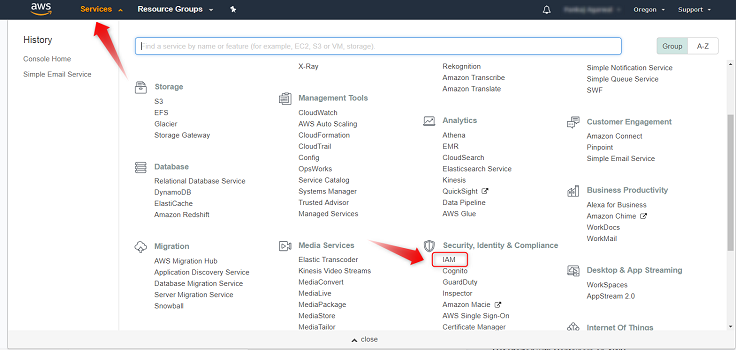
Step 1. To generate your IAM credentials, from above-mentioned console click on “Identity and Access Management(IAM)” button.
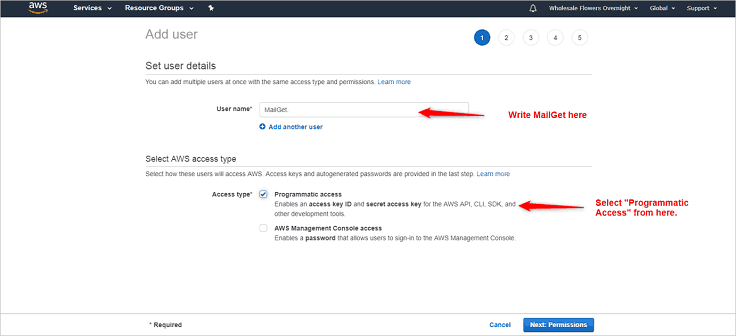
Step 2. Now here click on “User” and then on the “Create New Users” button.

Step 3. Type “MailGet” in the first box, then click on the “Create” button.
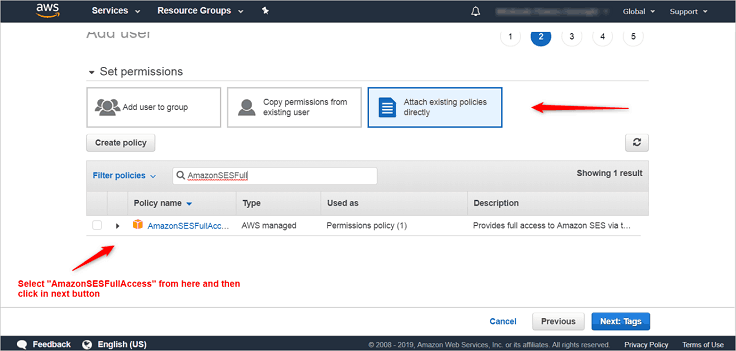
Step 4. On next page, you now need to Attach User Policy to your Access Credentials to avail MailGet full Amazon SES access. Go to the section named as “Attach existing policies directly“, where you will find a policy named as “Amazon SES Full Access“. Please select this policy and then click on the “Next” button available at the bottom left.
Step 5. You will now be redirected to an “Add Tags” page, where you don’t have do anything. You can simply click over the “Next” button available at the bottom left.
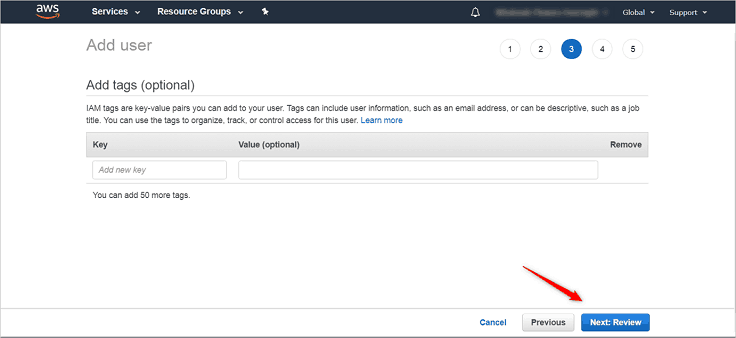
Step 6. Now you will be on a page, from where you can create the user and can get the SMTP details. You will simply have to click over the button named as “Create User”.
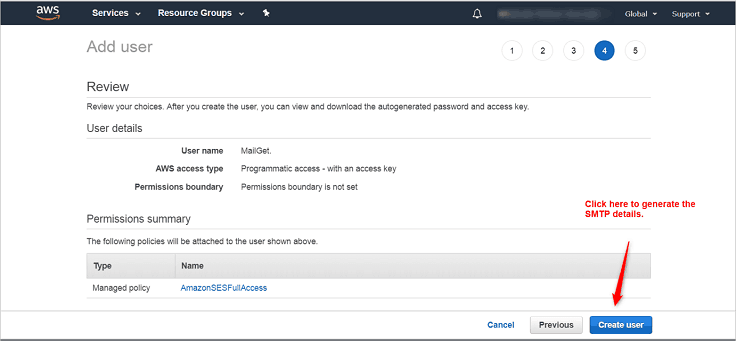
Step 7. Once you click over the button named as “Create User“, you will be able to get the SMTP details. You will be able to get the “Access Key ID” and “Secret Access Key”.
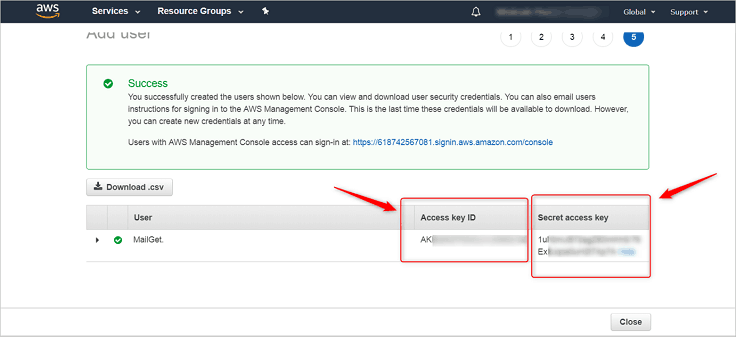
Step 8. Once you have the “Access Key ID” and “Secret Access Key” with you, then login to your MailGet account and under the SMTP section, you will find the Amazon SES section, where you can place the SMTP details
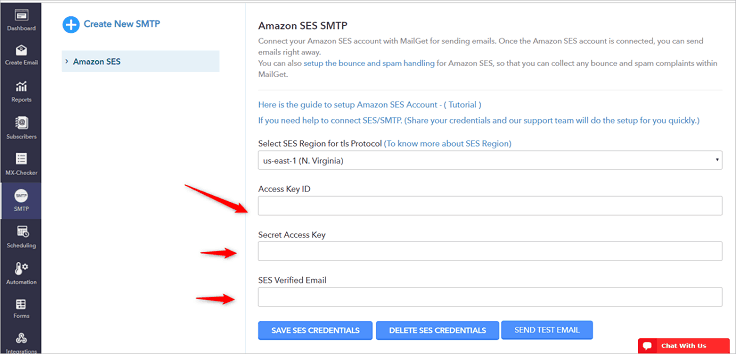
Now you have successfully generated your IAM Credentials, saved it in MailGet and allowed MailGet full access to Amazon SES. You can now send unlimited emails via MailGet connected to your Amazon SES account.
In case you still have any issues connecting your MailGet Account with Amazon SES, email us at [email protected] and we will help you out.
CSS Image Sprites
CSS sprites are used to reduce the number of HTTP requests send to server. The smaller images are combined into a larger one at defined X and Y coordinates. After assigning this generated image to relevant page elements, using the background-position CSS property we can then shift the visible area to the required component image.
Why we use image sprites:
1 : To lower down the bandwidth used to load multiple images in a webpage.
2 : To decrease the page loading time.
You can also refer live demo or download the script file.
Extract the downloaded files, save it and run index.html on browser

How to use image sprites:
Here we used simple social icons to show you as an example of image sprites. Now, the question is that, how to measure a visible part of the component. Let’s start with the Microsoft paint tool, it’s not a tool for measuring coordinate, but we can use it to get the position of the cursor.When the cursor moves, it generate (x, y) coordinate according to cursor position in ‘bottom left corner’.
Here are the steps that help you to get a background position of an image using Microsoft paint tool. We will give you idea using two icons.
Step 1 : Open the sprite image in the Microsoft paint tool, and find the background position of a specific part.
![]()
Above, we use the first row for the demo, here we show position of the first icon on Facebook. Now we can give width and height according to smaller images and differences of icons in sprite image.
Syntax
 background: url('imgs/image_sprites.png');
background-position:0 0;
width: 50px;
height: 50px;
Step 2 : On hover, change Facebook icon from image sprites. It’s also same as above step,
![]()
Syntax
 background: url('imgs/image_sprites.png');
background-position: -1px -64px;
width: 50px;
height: 50px;
Step 3 : Find the position of RSS icon.
![]()
Syntax
background: url('imgs/image_sprites.png');
background-position:-57px 0;
width: 50px;
height: 50px;
Step 4 : On hover, change RSS icon into image sprites.
![]()
background: url('imgs/image_sprites.png');
background-position:-57px -64px;
width: 50px;
height: 50px;
Graphical position of background.
![]()
Note : The coordinate system that is used in computer imaging is based on bitmaps, by definition, are based on a grid (rows and columns) with its origin (x = 0, y = 0) in the upper left corner (as opposed to the Cartesian coordinate system, which has the origin of its positive space in the lower left).
Therefore, in background-position we always assign the coordinate with a negative sign.
Row 1
![]()
HTML Code :
Copy below code in your HTML file.
 <div class="first">
<a href="#">
<div class="sprite_face_shift">
</div>
</a>
<a href="#">
<div class="sprite_rss_shift">
</div>
</a>
<a href="#">
<div class="sprite_linked_shift">
</div>
</a>
<a href="#">
<div class="sprite_pint_shift">
</div>
</a>
<a href="#">
<div class="sprite_share_shift">
</div>
</a>
<a href="#">
<div class="sprite_youtube_shift">
</div>
</a>
<a href="#">
<div class="sprite_twitter_shift">
</div>
</a>
</div>
CSS Code :
Copy below code in your CSS file, or inside style tag in HTML page.
/* first */

.first{
width: 440px;
height: 100px;
}

.sprite_face_shift {
background: url('imgs/image_sprites.png');
background-position:0 0;
width: 50px;
height: 50px;
float:left;
display: inline-block;
margin-right: 10px;
transform: perspective(1000);
transform-style: preserve-3d;
transition: all 400ms ease;
}
.sprite_face_shift:hover {
background: url('imgs/image_sprites.png');
background-position: -1px -64px;
width: 50px;
height: 50px;
transform: rotate(-90deg);
}

.sprite_rss_shift {
background: url('imgs/image_sprites.png');
background-position:-57px 0;
width: 50px;
height: 50px;
float:left;
display: inline-block;
margin-right: 10px;
transform: perspective(1000);
transform-style: preserve-3d;
transition: all 400ms ease;
}
.sprite_rss_shift:hover {
background: url('imgs/image_sprites.png');
background-position:-57px -64px;
width: 50px;
height: 50px;
transform: rotate(-90deg);
}

.sprite_linked_shift {
background: url('imgs/image_sprites.png');
background-position: -114px 0;
width: 50px;
height: 50px;
float:left;
margin-right: 10px;
display: inline-block;
transform: perspective(1000);
transform-style: preserve-3d;
transition: all 400ms ease;
}
.sprite_linked_shift:hover {
background: url('imgs/image_sprites.png');
background-position: -114px -64px;
width: 50px;
height: 50px;
transform: rotate(-90deg);
}

.sprite_pint_shift {
background: url('imgs/image_sprites.png') ;
background-position: -171px 0;
width: 50px;
height: 50px;
float:left;
margin-right: 10px;
display: inline-block;
transform: perspective(1000);
transform-style: preserve-3d;
transition: all 400ms ease;
}
.sprite_pint_shift:hover {
background: url('imgs/image_sprites.png');
background-position: -171px -64px;
width: 50px;
height: 50px;
transform: rotate(-90deg);
}

.sprite_share_shift {
background: url('imgs/image_sprites.png');
background-position:-227px 0;
width: 50px;
height: 50px;
float:left;
display: inline-block;
margin-right: 10px;
transform: perspective(1000);
transform-style: preserve-3d;
transition: all 400ms ease;
}
.sprite_share_shift:hover {
background: url('imgs/image_sprites.png');
background-position: -227px -64px;
width: 50px;
height: 50px;
transform: rotate(-90deg);
}
.sprite_youtube_shift {
background: url('imgs/image_sprites.png');
background-position: -282px -1px;
width: 50px;
height: 50px;
float:left;
display: inline-block;
margin-right: 10px;
transform: perspective(1000);
transform-style: preserve-3d;
transition: all 400ms ease;
}
.sprite_youtube_shift:hover {
background: url('imgs/image_sprites.png');
background-position: -282px -64px;
width: 50px;
height: 50px;
transform: rotate(-90deg);
}

.sprite_twitter_shift {
background: url('imgs/image_sprites.png');
background-position: -337px -1px;
width: 50px;
height: 50px;
float:left;
display: inline-block;
transform: perspective(1000);
transform-style: preserve-3d;
transition: all 400ms ease;
}
.sprite_twitter_shift:hover {
background: url('imgs/image_sprites.png');
background-position:-337px -64px;
width: 50px;
height: 50px;
transform: rotate(-90deg);
}
Row 2

HTML Code :
Copy below code in your HTML file.
 <div class="second">
<a href="#">
<div class="sprite_face_fade">
</div>
</a>
<a href="#">
<div class="sprite_rss_fade">
</div>
</a>
<a href="#">
<div class="sprite_linked_fade">
</div>
</a>
<a href="#">
<div class="sprite_pint_fade">
</div>
</a>
<a href="#">
<div class="sprite_share_fade">
</div>
</a>
<a href="#">
<div class="sprite_youtube_fade">
</div>
</a>
<a href="#">
<div class="sprite_twitter_fade">
</div>
</a>
</div>
CSS Code :
Copy below code in your CSS file, or inside style tag in HTML page.
/* second */

.second {
width: 440px;
height: 100px;
}

.sprite_face_fade {
background: url('imgs/Social_circle.png');
background-position:-47px -96px;
width: 55px;
height: 54px;
float:left;
}
.sprite_face_fade:hover {
background: url('imgs/Social_circle.png');
background-position: -47px -28px;
width: 55px;
height: 54px;
transform: scale(1.1);
}
.sprite_rss_fade {
background: url('imgs/Social_circle.png') ;
background-position:-106px -96px;
width: 56px;
height: 54px;
margin-left:5px;
float:left;
}
.sprite_rss_fade:hover {
background: url('imgs/Social_circle.png');
background-position: -106px -28px;
width: 56px;
height: 54px;
transform: scale(1.1);
}
.sprite_linked_fade {
background: url('imgs/Social_circle.png') ;
background-position: -167px -96px;
width: 56px;
height: 54px;
margin-left:5px;
float:left;
}
.sprite_linked_fade:hover {
background: url('imgs/Social_circle.png') ;
background-position: -167px -28px;
width: 56px;
height: 54px;
transform: scale(1.1);
}
.sprite_pint_fade {
background: url('imgs/Social_circle.png');
background-position:-229px -96px;
width: 56px;
height: 54px;
float:left;
margin-left:5px;
}
.sprite_pint_fade:hover {
background: url('imgs/Social_circle.png');
background-position: -229px -28px;
width: 56px;
height: 54px;
transform: scale(1.1);
}
.sprite_share_fade {
background: url('imgs/Social_circle.png') ;
background-position: -290px -96px;
width: 56px;
height: 54px;
float:left;
margin-left:5px;
}
.sprite_share_fade:hover {
background: url('imgs/Social_circle.png');
background-position: -291px -28px;
width: 54px;
height: 54px;
transform: scale(1.1);
}
.sprite_youtube_fade {
background: url('imgs/Social_circle.png') ;
background-position: -350px -96px;
width: 56px;
height: 54px;
margin-left:5px;
float:left;
}
.sprite_youtube_fade:hover {
background: url('imgs/Social_circle.png') ;
background-position: -350px -28px;
width: 55px;
height: 54px;
transform: scale(1.1);
}
.sprite_twitter_fade {
background: url('imgs/Social_circle.png');
background-position:-411px -96px;
width: 55px;
height: 54px;
margin-left:5px;
float:left;
}
.sprite_twitter_fade:hover {
background: url('imgs/Social_circle.png');
background-position:-411px -28px;
width: 55px;
height: 54px;
transform: scale(1.1);
}
Row 3
HTML Code :
Copy below code in your HTML file.
 <div class="third">
<a href="#">
<div class="sprite_face_rotate">
</div>
</a>
<a href="#">
<div class="sprite_rss_rotate">
</div>
</a>
<a href="#">
<div class="sprite_linked_rotate">
</div>
</a>
<a href="#">
<div class="sprite_pint_rotate">
</div>
</a>
<a href="#">
<div class="sprite_share_rotate">
</div>
</a>
<a href="#">
<div class="sprite_youtube_rotate">
</div>
</a>
<a href="#">
<div class="sprite_twitter_rotate">
</div>
</a>
</div>
CSS Code :
Copy below code in your CSS file, or inside style tag in HTML page.
/* Third */

.third {
width: 440px;
height: 100px;
}

.sprite_face_rotate {
background: url('imgs/Social_circle.png') ;
background-position: -47px -28px;
width: 55px;
height: 54px;
float:left;
-webkit-transition: -webkit-transform .8s ease-in-out;
-ms-transition: -ms-transform .8s ease-in-out;
transition: transform .8s ease-in-out;
}
.sprite_face_rotate:hover {
background: url('imgs/Social_circle.png');
background-position:-47px -96px;
width: 55px;
height: 54px;
-webkit-transform:rotate(360deg);
-moz-transform:rotate(360deg);
-o-transform:rotate(360deg);
-ms-transform:rotate(360deg);
transform:rotate(360deg);
}

.sprite_rss_rotate {
background: url('imgs/Social_circle.png') ;
background-position: -106px -28px;
width: 56px;
height: 54px;
margin-left:5px;
float:left;
-webkit-transition: -webkit-transform .8s ease-in-out;
-ms-transition: -ms-transform .8s ease-in-out;
transition: transform .8s ease-in-out;
}
.sprite_rss_rotate:hover {
background: url('imgs/Social_circle.png');
background-position: -106px -96px;
width: 56px;
height: 54px;
-webkit-transform:rotate(360deg);
-moz-transform:rotate(360deg);
-o-transform:rotate(360deg);
-ms-transform:rotate(360deg);
transform:rotate(360deg);
}
.sprite_linked_rotate {
background: url('imgs/Social_circle.png');
background-position: -167px -28px;
width: 56px;
height: 54px;
margin-left:5px;
float:left;
-webkit-transition: -webkit-transform .8s ease-in-out;
-ms-transition: -ms-transform .8s ease-in-out;
transition: transform .8s ease-in-out;
}
.sprite_linked_rotate:hover {
background: url('imgs/Social_circle.png');
background-position: -167px -96px;
width: 56px;
height: 54px;
-webkit-transform:rotate(360deg);
-moz-transform:rotate(360deg);
-o-transform:rotate(360deg);
-ms-transform:rotate(360deg);
transform:rotate(360deg);
}
.sprite_pint_rotate {
background: url('imgs/Social_circle.png');
background-position: -229px -28px;
width: 56px;
height: 54px;
float:left;
margin-left:5px;
-webkit-transition: -webkit-transform .8s ease-in-out;
-ms-transition: -ms-transform .8s ease-in-out;
transition: transform .8s ease-in-out;
}
.sprite_pint_rotate:hover {
background: url('imgs/Social_circle.png');
background-position:-229px -96px;
width: 56px;
height: 54px;
-webkit-transform:rotate(360deg);
-moz-transform:rotate(360deg);
-o-transform:rotate(360deg);
-ms-transform:rotate(360deg);
transform:rotate(360deg);
}
.sprite_share_rotate {

background: url('imgs/Social_circle.png');
background-position: -291px -28px;
width: 54px;
height: 54px;
float:left;
margin-left:5px;
-webkit-transition: -webkit-transform .8s ease-in-out;
-ms-transition: -ms-transform .8s ease-in-out;
transition: transform .8s ease-in-out;
}
.sprite_share_rotate:hover {
background: url('imgs/Social_circle.png') ;
background-position: -290px -96px;
width: 56px;
height: 54px;
-webkit-transform:rotate(360deg);
-moz-transform:rotate(360deg);
-o-transform:rotate(360deg);
-ms-transform:rotate(360deg);
transform:rotate(360deg);
}
.sprite_youtube_rotate {
background: url('imgs/Social_circle.png') ;
background-position: -350px -28px;
width: 55px;
height: 54px;
margin-left:5px;
float:left;
-webkit-transition: -webkit-transform .8s ease-in-out;
-ms-transition: -ms-transform .8s ease-in-out;
transition: transform .8s ease-in-out;
}
.sprite_youtube_rotate:hover {
background: url('imgs/Social_circle.png') ;
background-position: -350px -96px;
width: 56px;
height: 54px;
-webkit-transform:rotate(360deg);
-moz-transform:rotate(360deg);
-o-transform:rotate(360deg);
-ms-transform:rotate(360deg);
transform:rotate(360deg);
}
.sprite_twitter_rotate {
background: url('imgs/Social_circle.png');
background-position: -411px -28px;
width: 55px;
height: 54px;
margin-left:5px;
float:left;
-webkit-transition: -webkit-transform .8s ease-in-out;
-ms-transition: -ms-transform .8s ease-in-out;
transition: transform .8s ease-in-out;
}
.sprite_twitter_rotate:hover {
background: url('imgs/Social_circle.png');
background-position: -411px -96px;
width: 55px;
height: 54px;
-webkit-transform:rotate(360deg);
-moz-transform:rotate(360deg);
-o-transform:rotate(360deg);
-ms-transform:rotate(360deg);
transform:rotate(360deg);
}
Row 4
![]()
HTML Code :
Copy below code in your HTML file.
 <div class="fourth">
<a href="#">
<div class="sprite_face">
</div>
</a>
<a href="#">
<div class="sprite_rss">
</div>
</a>
<a href="#">
<div class="sprite_linked">
</div>
</a>
<a href="#">
<div class="sprite_pint">
</div>
</a>
<a href="#">
<div class="sprite_share">
</div>
</a>
<a href="#">
<div class="sprite_youtube">
</div>
</a>
<a href="#">
<div class="sprite_twitter">
</div>
</a>
</div>
CSS Code :
Copy below code in your CSS file, or inside style tag in HTML page.
/* fourth */

.fourth {
width: 410px;
height: 100px;
}
.sprite_face {
background: url('imgs/sprites_image.png');
background-position: 0 -64px;
width: 50px;
height: 50px;
float:left;
transition: all .2s ease-in-out;
}
.sprite_face:hover {
background: url('imgs/sprites_image.png') ;
background-position: 0 0;
width: 50px;
height: 50px;
transform: scale(1.1);
}
.sprite_rss {
background: url('imgs/sprites_image.png');
background-position: -57px -64px;
width: 50px;
height: 50px;
margin-left:10px;
float:left;
transition: all .2s ease-in-out;
}
.sprite_rss:hover {
background: url('imgs/sprites_image.png') ;
background-position: -57px 0;
width: 50px;
height: 50px;
transform: scale(1.1);
}
.sprite_linked {
background: url('imgs/sprites_image.png');
background-position: -114px -64px;
width: 50px;
height: 50px;
margin-left:10px;
float:left;
transition: all .2s ease-in-out;
}
.sprite_linked:hover {
background: url('imgs/sprites_image.png') ;
background-position: -114px 0;
width: 50px;
height: 50px;
transform: scale(1.1);
}
.sprite_pint {
background: url('imgs/sprites_image.png');
background-position:-171px -64px;
width: 50px;
height: 50px;
float:left;
margin-left:10px;
transition: all .2s ease-in-out;
}
.sprite_pint:hover {
background: url('imgs/sprites_image.png');
background-position: -171px 0;
width: 50px;
height: 50px;
transform: scale(1.1);
}
.sprite_share {
background: url('imgs/sprites_image.png') ;
background-position: -227px -64px;
width: 50px;
height: 50px;
float:left;
margin-left:10px;
transition: all .2s ease-in-out;
}
.sprite_share:hover {
background: url('imgs/sprites_image.png');
background-position:-227px 0;
width: 50px;
height: 50px;
transform: scale(1.1);
}
.sprite_youtube {
background: url('imgs/sprites_image.png');
background-position: -282px -64px;
width: 50px;
height: 50px;
margin-left:10px;
float:left;
transition: all .2s ease-in-out;
}
.sprite_youtube:hover {
background: url('imgs/sprites_image.png') ;
background-position: -282px -1px;
width: 50px;
height: 50px;
transform: scale(1.1);
}
.sprite_twitter {
background: url('imgs/sprites_image.png') ;
background-position: -337px -64px;
width: 50px;
height: 50px;
margin-left:10px;
float:left;
transition: all .2s ease-in-out;
}
.sprite_twitter:hover {
background: url('imgs/sprites_image.png');
background-position:-337px -1px;
width: 50px;
height: 50px;
transform: scale(1.1);
}
Conclusion:
In this tutorial we have learned about, how to use sprites images and calculate its background-position using Microsoft paint tool, and assigning negative or positive sign to its coordinate. Hope you have benefited from it. Keep visiting our websites for more knowledge and information.
More related information are avaliable here –
- CSS Active: Active Selector
- CSS Background Size
Designing CSS Lists
HTML lists appear as a bulleted (small black circles) format. Using css we can make them stylish and effective.
There are two types of list in HTML
- <ul> : Using unordered list items marked as bullets.
- <ol> : Using ordered list items marked as number or letters.
Using css we can make them stylish and effective, we can also use images as list item marker.
CSS List Properties
list-style : set all properties in one declaration.
list-style-type : set item marker type.
list-style-position : set list-item markers appear inside or outside of the content.
list-style-image : set image as the list-item marker.
In this tutorial we will learn about different css list property and how we can make a stylish and effective list using css3.
You can also refer live demo or download the Script file.
Extract the downloaded files, save it and run index.html on browser.

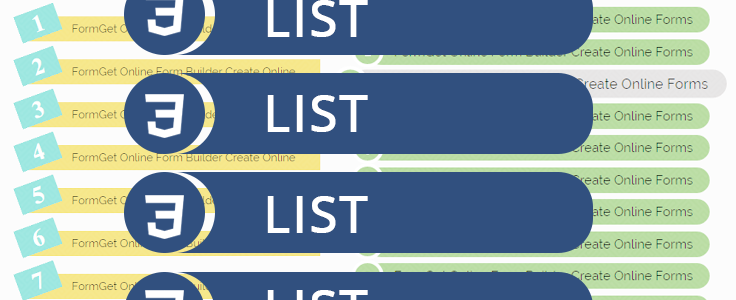
Below are the different styles for list. We have categorized as list-type1,list-type2….list-type6.
1 : List-type1

HTML Code :
Copy below code in your HTML file.
<div class="list-type1">
<ol>
<li><a href="#">Formget Online Form Builder Create Online Forms</a></li>
<li><a href="#">Formget Online Form Builder Create Online Forms</a></li>
<li><a href="#">Formget Online Form Builder Create Online Forms</a></li>
</ol>
</div>
CSS Code:
Copy below code in your CSS file, or inside style tag in HTML page.
.list-type1{
width:400px;
margin:0 auto;
}

.list-type1 ol{
counter-reset: li;
list-style: none;
*list-style: decimal;
font-size: 15px;
font-family: 'Raleway', sans-serif;
padding: 0;
margin-bottom: 4em;
}
.list-type1 ol ol{
margin: 0 0 0 2em;
}

.list-type1 a{
position: relative;
display: block;
padding: .4em .4em .4em 2em;
*padding: .4em;
margin: .5em 0;
background: #93C775;
color: #000;
text-decoration: none;
-moz-border-radius: .3em;
-webkit-border-radius: .3em;
border-radius: 10em;
transition: all .2s ease-in-out;
}

.list-type1 a:hover{
background: #d6d4d4;
text-decoration:none;
transform: scale(1.1);
}

.list-type1 a:before{
content: counter(li);
counter-increment: li;
position: absolute;
left: -1.3em;
top: 50%;
margin-top: -1.3em;
background:#93C775;
height: 2em;
width: 2em;
line-height: 2em;
border: .3em solid #fff;
text-align: center;
font-weight: bold;
-moz-border-radius: 2em;
-webkit-border-radius: 2em;
border-radius: 2em;
color:#FFF;
}
2 : List-type2

HTML Code :
Copy below code in your HTML file.
<div class="list-type2">
<ol>
<li><a href="#">Formget Online Form Builder Create Online Forms</a></li>
<li><a href="#">Formget Online Form Builder Create Online Forms</a></li>
<li><a href="#">Formget Online Form Builder Create Online Forms</a></li>
</ol>
</div>
CSS Code:
Copy below code in your CSS file, or inside style tag in HTML page.
.list-type2{
width:400px;
margin:0 auto;
}

.list-type2 ol{
counter-reset: li;
list-style: none;
*list-style: decimal;
font-size: 15px;
font-family: 'Raleway', sans-serif;
padding: 0;
margin-bottom: 4em;
}

.list-type2 ol ol{
margin: 0 0 0 2em;
}

.list-type2 a{
position: relative;
display: block;
padding: .4em .4em .4em 2em;
*padding: .4em;
margin: .5em 0;
background: #FC756F;
color: #444;
text-decoration: none;
transition: all .2s ease-in-out;
}

.list-type2 a:hover{
background: #d6d4d4;
text-decoration:none;
transform: scale(1.1);
}

.list-type2 a:before{
content: counter(li);
counter-increment: li;
position: absolute;
left: -1.3em;
top: 50%;
margin-top: -1.3em;
background:#FC756F;
height: 2em;
width: 2em;
line-height: 2em;
border: .3em solid #fff;
text-align: center;
font-weight: bold;
color:#FFF;
}
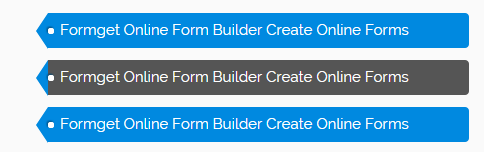
3 : List-type3
HTML Code :
Copy below code in your HTML file.
<div class="list-type3">
<ol>
<li><a href="#">Formget Online Form Builder Create Online Forms</a></li>
<li><a href="#">Formget Online Form Builder Create Online Forms</a></li>
<li><a href="#">Formget Online Form Builder Create Online Forms</a></li>
</ol>
</div>
CSS Code:
Copy below code in your CSS file, or inside style tag in HTML page.
.list-type3{
margin:0 auto;
width:500px;
}
.list-type3 li, .list-type3 a{
float:left;
height:35px;
line-height:35px;
position:relative;
font-size:15px;
margin-bottom: 12px;
font-family: 'Raleway', sans-serif;
transition: background-color 1.5s ease;
}
.list-type3 a{
padding:0 60px 0 12px;
background:#0089e0;
color:#fff;
text-decoration:none;
-moz-border-radius-bottomright:4px;
-webkit-border-bottom-right-radius:4px;
border-bottom-right-radius:4px;
-moz-border-radius-topright:4px;
-webkit-border-top-right-radius:4px;
border-top-right-radius:4px;
}

.list-type3 a:before{
content:"";
float:left;
position:absolute;
top:0;
left:-12px;
width:0;
height:0;
border-color:transparent #0089e0 transparent transparent;
border-style:solid;
border-width: 18px 12px 18px 0;
}

.list-type3 a:after{
content:"";
position:absolute;
top:15px;
left:0;
float:left;
width:6px;
height:6px;
-moz-border-radius:2px;
-webkit-border-radius:2px;
border-radius:2px;
background:#fff;
-moz-box-shadow:-1px -1px 2px #004977;
-webkit-box-shadow:-1px -1px 2px #004977;
box-shadow:-1px -1px 2px #004977;
}
.list-type3 a:hover{
background:#555;
}

.list-type3 a:hover:before{
border-color:transparent #0089e0 transparent transparent;
}
4 : List-type4

HTML Code :
Copy below code in your HTML file.
<div class="list-type4">
<ol>
<li><a href="#">Formget Online Form Builder Create Online Forms</a></li>
<li><a href="#">Formget Online Form Builder Create Online Forms</a></li>
<li><a href="#">Formget Online Form Builder Create Online Forms</a></li>
</ol>
</div>
CSS Code:
Copy below code in your CSS file, or inside style tag in HTML page.
.list-type4{
width:410px;
margin:0 auto;
}

.list-type4 ol{
counter-reset: li;
list-style: none;
*list-style: decimal;
font-size: 15px;
font-family: 'Raleway', sans-serif;
padding: 0;
margin-bottom: 4em;
}
.list-type4 a{
position: relative;
display: block;
padding: .4em .4em .4em 2em;
*padding: .4em;
margin: .5em 0;
background: #5975D9;
color: white;
text-decoration: none;
box-shadow:inset 0.5em 0 black;
-webkit-transition: box-shadow 1s; /* For Safari 3.1 to 6.0 */
transition: box-shadow 1s;
}

.list-type4 a:hover{
box-shadow:inset 2em 0 black;
}
5 : List-type5

HTML Code :
Copy below code in your HTML file.
<div class="list-type5">
<ol>
<li><a href="#">Formget Online Form Builder Create Online </a></li>
<li><a href="#">Formget Online Form Builder Create Online </a></li>
<li><a href="#">Formget Online Form Builder Create Online </a></li>
</ol>
</div
CSS Code:
Copy below code in your CSS file, or inside style tag in HTML page.
.list-type5{
width:410px;
margin:0 auto;
}
.list-type5 ol {
list-style-type: none;
list-style-type: decimal !ie; /*IE 7- hack*/
margin: 0;
margin-left: 1em;
padding: 0;
counter-reset: li-counter;
}
.list-type5 ol li{
position: relative;
margin-bottom: 1.5em;
padding: 0.5em;
background-color: #F0D756;
padding-left: 58px;
}

.list-type5 a{
text-decoration:none;
color:black;
font-size:15px;
font-family: 'Raleway', sans-serif;
}

.list-type5 li:hover{
box-shadow:inset -1em 0 #6CD6CC;
-webkit-transition: box-shadow 0.5s; /* For Safari 3.1 to 6.0 */
transition: box-shadow 0.5s;
}

.list-type5 ol li:before {
position: absolute;
top: -0.3em;
left: -0.5em;
width: 1.8em;
height: 1.2em;
font-size: 2em;
line-height: 1.2;
font-weight: bold;
text-align: center;
color: white;
background-color: #6CD6CC;
transform: rotate(-20deg);
-ms-transform: rotate(-20deg);
-webkit-transform: rotate(-20deg);
z-index: 99;
overflow: hidden;
content: counter(li-counter);
counter-increment: li-counter;
}
6 : List-type6

HTML Code :
Copy below code in your HTML file.
<div class="list-type6">
<ul>
<li><a href="#">Formget Online Form Builder Create Online Forms</a></li>
<li><a href="#">Formget Online Form Builder Create Online Forms</a></li>
<li><a href="#">Formget Online Form Builder Create Online Forms</a></li>
</ul>
</div>
CSS Code:
Copy below code in your CSS file, or inside style tag in HTML page.
.list-type6{
width:410px;
margin:0 auto;
}
/* LIST #8 */
.list-type6 { }
.list-type6 ul {
list-style:none;
}
.list-type6 ul li {
font-size:15px;
font-family: 'Raleway', sans-serif;
}
.list-type6 ul li a {
display:block;
width:390px;
margin-left: -40px;
height:24px;
background-color:#03B3CB;
border-left:5px solid #222;
border-right:5px solid #222;
padding-left:10px;
padding-top:7px;
text-decoration:none;
color:white;
margin-bottom: 7px;
transition: all .2s ease-in-out;
}
.list-type6 ul li a:hover {
-moz-transform:rotate(-5deg);
-moz-box-shadow:10px 10px 20px #000000;
-webkit-transform:rotate(-5deg);
-webkit-box-shadow:10px 10px 20px #000000;
transform:rotate(-5deg);
box-shadow:10px 10px 20px #000000;
}
Conclusion:
In this tutorial we have learned about, how we can make stylish and attractive list designs. Hope you have benefited from it. Keep visiting our websites for more knowledge and information.
Get more related stuff here –
FormGet Coding Script Marketplace

FormGet is a marketplace platform for selling your coding scripts. Here we will be going to accept and sale a wide range of quality scripts focused on PHP, JavaScript, CSS, HTML, jQuery, AJAX and CodeIgniter framework.
Developers and website owners can easily sell or purchase quality scripts all over the world , that in turn helps to improve coding skills and website optimization of end users.
Requirements and Guidelines To Submit Your Codes:-
Why Sell on our Marketplace??
We have a 50,000+ users base and we ensure you that your product will get a good positive response at FormGet.
We will provide a great exposure to your scripts to make huge sales and earn good money.
Apart from the above mentioned, we have great SEO experience that can grab user attention instantly to your scripts.
Who Will Decide The Script Pricing ?
You can decide the price of your script. But our team will have the power to vary it if required and set to suitable one.
When Do I Get Paid?
We will pay 50% of each sell and it get paid between first to second week of every month subjected to sales of your script.
How We Will Pay You?
We will pay you through online payment system like PayPal, NEFT/Bank deposit.
For NEFT, you have to provide your bank details that will include your Bank name, Account holders name, Account No., IFSC code.
How Do I Submit Script?
You can submit a script via FormGet contact form.
Does Demo Link Required?
Yes, we require the demo link of the scripts along with features, main requirements to run it and snapshots if required. Also if your scripts includes any kind of login system then the login credentials also required.
What Languages Do We Accept For Marketplace?
Accepted languages to submit your scripts will be:-
- PHP
- JavaScript
- jQuery
- AJAX
- HTML/CSS
- CodeIgniter
What Points To Keep In Mind Before Submitting?
- One should submit quality code i.e. error free, proper documentation etc.
- Its motive and implementation
- It should fullfills users objective
- Authors need to update their script time to time, to make it error free and compatible .
What Script Do I Need To Sell?
The script should be coded with a prospective that any coders and designers can easily start using it in their application.
The script items should be easy to use and understandable for beginners or the one who has little programming knowledge.
How Do I get Script Ideas?
You can explore a lot many technical forums over the web where you will find the issues that users are facing or got stuck while developing.
For eg :- Can someone please guide me to create login page through PHP. You can take such points as an idea and scribble down it on your notepad.
Does My Scripts Need Documentation?
Yes, all scripts are required to have the proper documentation. It should cover all the respective points mentioned below:-
- Proper installation guidelines
- Proper Syntax
- Its objective and where to implement
- The scripts should be self explanatory, like it should have proper commenting system that should explain what the block of code is all about and what its function and need
- Supporting screenshot if require
- Demo part
Do I Need To Provide Support ?
Yes, each developer is responsible for providing support related to their scripts. Queries and suggested ideas of users will be directed to you.
Do I require An approval Before Submission?
Yes, for better user experience and to maintain quality of script, it will has to go from an approval stage where our review team will test it thoroughly as per guidelines.
If it satisfy the user experience then it will be accepted for marketplace. But if any errors found and it gets disapproved then you don’t have to worry, we will revert it back with proper feedback and area of improvements. After making the suggested changes, you can resubmit it for the approval.
What If I Have Script That Does Not Match Your Categories?
In case, if you have a script that does not fit in our focused scripting category then you can send us an email at [email protected] . Our team will review and revert it with some alternative.
For further assistance or any other query you can contact us at any time, we will respond you shortly.
Get more related stuff here –
- Lead Generation – The Exhaustive Guide
- Joomla Contact Form Plugin
How I reduced my monthly Email Marketing expenses from $369 to just $64

If you are running a business, It is critical for your success to look into all your expenses and find ways to reduce them every once in a while.
In my case, I look into all my expenses every 6 months and do a cleaning of the non-essential expenses. That also includes finding smarter ways to reduce expenses for existing services that we can’t say no to.
Let me start this post with a small question…
How much do you spend on your email marketing?
Well, if you ask me, I spend $369/month on email marketing services I use. I personally used Mad Mimi for my email marketing and I subscribed with them all throughout 2022 and 2022
Receipt of the payments made in Feb’14. At that time, I was on their 75,000 subscribers plan.
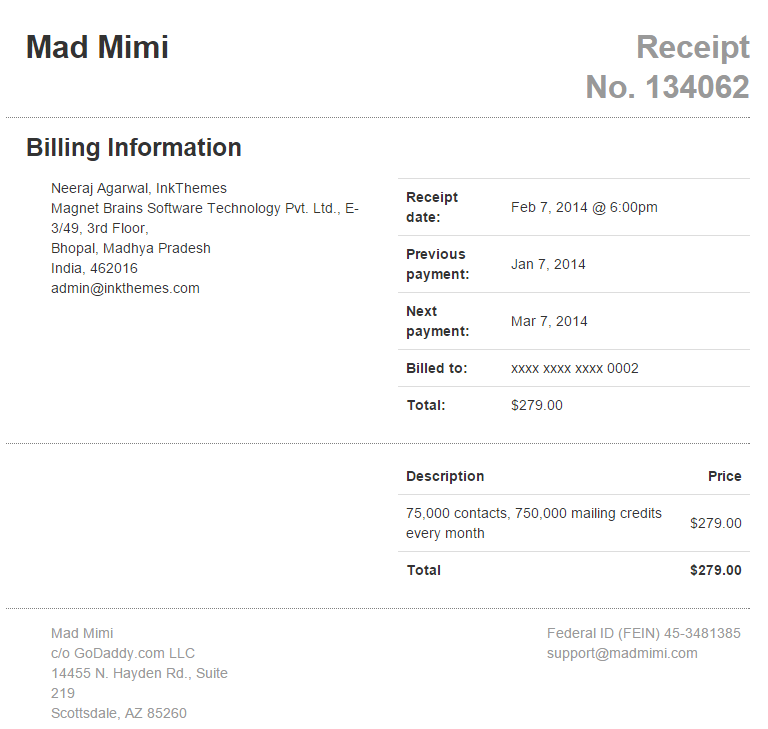
My Background & How I Reduced my Expenses
First, A little bit of my background :
I run two separate internet businesses :
InkThemes & FormGet.
- At InkThemes, we sell WordPress Themes & Plugins and we have about 45,000 email subscribers.
- FormGet is an online form building tool and we have about 35,000 email subscribers.
So, in total we have a combined subscribers base of 80,000 subscribers.
While choosing the email service I looked around for several options like Aweber, MailChimp, Campaign Monitor etc. At last I settled for Madmimi email marketing service.
I chose MadMimi primarily because of 3 reasons :
- Simple user interface for creating and sending email campaigns
- Analytics was nice and I can track all the stats easily
- Their service was little affordable compared to other email marketing services like MailChimp & Campaign Monitor.
Madmimi charged $279/month for sending emails to 75,000 subscribers.
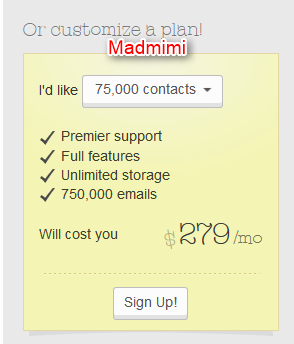
MailChimp charges about $375/month and above for the exact same volume of 75,000 subscribers.
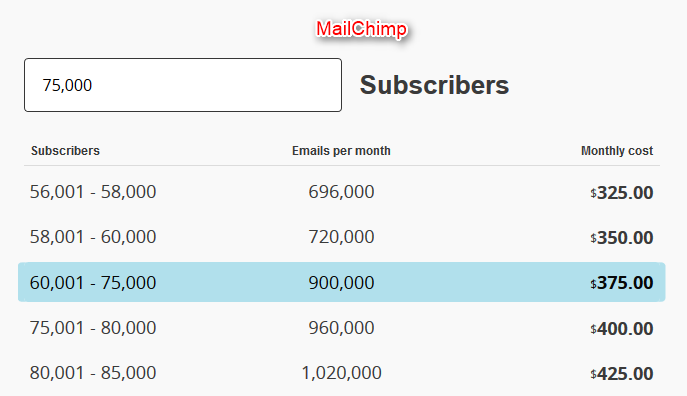
Although, I found the little affordable alternative as Madmimi, I still wanted to reduce my costs for sending emails.
My subscribers were growing fast and so do my costs and I really wanted to control my expenses.
I realized due to increasing cost concerns, I was not focusing on growing my leads. I was afraid that if I reach above 100,000 subscribers than I would have to pay even more.
This kind of thinking was indeed restricting my growth.
My Research
In the mid 2022, I decided to take hold of my email marketing costs. I started researching different ways to deliver emails campaigns.
During my research, I found Amazon SES as the most promising way to deliver emails. Reason, their inbox delivery was high and I had to pay just $1 per 10,000 emails.
I used to send nearly 6-8 campaigns every month to all my subscribers.
Based on the cost of $1 per 10,000 emails:
Sending a total of “8 campaigns” a month to my “80,000 subscribers” in both businesses combined:
I just had to pay $64 …
And I was paying a huge $369 to Madmimi at that point in time.
If I had used MailChimp or Aweber, I would even have to pay more than that.
I made a decision that I would be sending all my email campaigns using Amazon SES going further.
But there was a little problem with Amazon SES:
Amazon SES simply offered a server to send emails via their SMTP email service …
- It didn’t offered the feature for creating email templates like what I had in MadMimi.
- They didn’t have the mechanism to track email opens, clicks etc.
- They didn’t have the list management system.
- Lastly, Didn’t offered any web forms that I could integrate on my website to capture and store leads.
I was getting this all at MadMimi.
My Ultimate Decision
I was pretty desperate to reduce my email marketing costs.
So, I decided to take the matter in my own hands and decided to build MailGet – Email Service Provider.
MailGet was build keeping in mind all the problems that I mentioned above with Amazon SES.
I summoned my team at FormGet, shared the idea and asked them whether they could build an email marketing software which has everything that could make email creation and delivery easy.
Plus it should connect with Amazon SES to send emails to enable best inbox deliverability and should be able to track opens, clicks, unsubscribes etc.
Sitting together, We outlined things that we needed in the first phase:
- Easy Email Template Builder
- List Management (Including Email Importing System)
- Web forms embedding to capture new leads from website
- Analytics module (Track of opens, clicks and unsubscribes.)
- Connect with Amazon SES and any other popular SMTP service.
It took nearly 6 months for a team of 4 amazing members to build MailGet, along with all the features, that I wanted to have in an email marketing software which I can use myself.
One of the biggest challenges during building the software didn’t came from the coding front but rather how to manage our servers during peak emailing hours.
We learned a lot on Linux server management about how to manage out CPU resources and database at the time of heavy loads.
MailGet Launched
We learned a lot from the whole MailGet experience and after lots of extensive testing, we launched MailGet in the end of Dec’ 14.
I sent an introduction email to all my subscribers for MailGet using the very same software that we had built. To my amazement more than 5 people bought the package right away.
This validated the idea right there.
People were looking for a way to reduce their own email marketing costs.
Slowly, MailGet started gaining traction and more people started using it. We realized everyone who started using MailGet starts to love it entirely.
I have already started reducing my average monthly bills to $64. Which comes out to yearly savings of $3660.
Sorry MadMimi, I have unsubscribed from your monthly $369 plan. I still love you guys, but seriously I have better option. 🙂
In Your Case
Not every business want to engage their resources in creating an email marketing solution of its own.
However, since I have felt the huge pain of unnecessary expenses myself, I’ve tried to keep the pricing of MailGet as low as possible.
It has the highest plan of merely $79 for sending emails to 100,000 subscribers and what more you need to pay is only the Amazon SES charges ($1 per 10,000 emails).
What I personally feel is that by switching from your existing email marketing service to MailGet you will have all the necessary features you require plus a flexibility and affordability of prices.
How are you controlling your expenses ?
Let me know, your thoughts in comments. How are you controlling your expenses … Would you be taking some steps to reduce your overall business costs this year? Do share your thoughts and ideas by which you would be reducing your costs this year.
CodeIgniter Tutorial

This section is particularly focused on the most popular development framework CodeIgniter that is based on PHP platform. For you we have organized these tutorials in such a way, so that you can use it as a complete guideline for learning.
It covers basic to advance level tutorials in a way that you can easily get familiar with and can develop beautiful and robust application using CodeIgniter.
So before getting started with the the sequential tutorial list, will let you know a gist about CodeIgniter and its usage.
What Is CodeIgniter And Why Use It?
CodeIgniter is one of the best PHP based framework to develop web applications. Its a toolkit for PHP developers to built or create dynamic robust and powerful web applications.
Since its an open source and follows Model-View-Controller development architecture, its become easy for a coder to maintain the pages more efficiently.
Reasons to use it:-
MVC design – Today each software or web application needs better user interface implementation so it fullfills it. It separates application into three interconnected parts Model-View-Controller.
Performance – Its performance like speed and other functionality is better among other PHP frameworks.
Database abstraction – It has a Active Record Database class so you can easily perform insert, update and delete statements without needing to write SQL queries. You can also handle connections to multiple databases within one application.
Excellent documentation – Documentation of CI is the biggest advantage over other frameworks. The CI knowledgebase covers every topic that a user require.
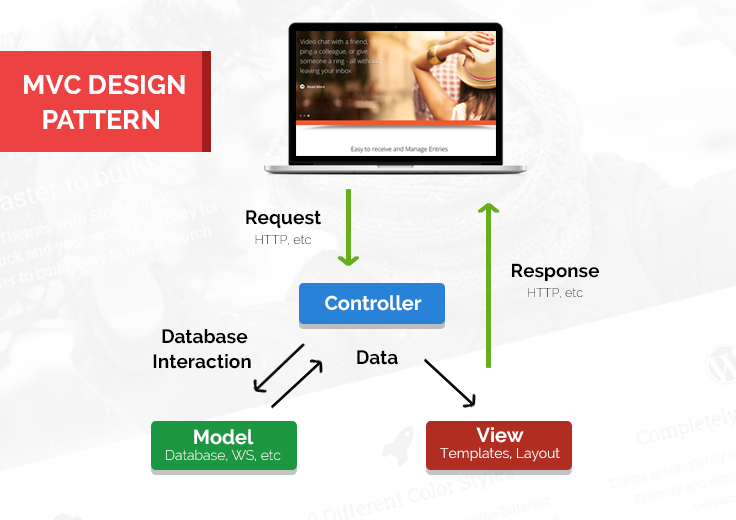
So follow the Sequential tutorial steps mentioned below and get started :-
This tutorial will let you know a brief introduction to MVC pattern.
This tutorial is a step by step guide or a way to download/install CI along with a sample program to set up a basic controller/view.
Here with the help of .htaccess file you will learn how to remove index.php from url.
This tutorial will demonstrate how to configure helpers in CodeIgniter processing. It has various pre-defined settings in config.php file so one can configure parameter settings to autoload or can do manaully.
This post is all about most frequently used “Form Helper” and its implementation.The process of making a form in CodeIgniter is quite different as we used in html. So, a user must have proper knowledge about it in order to use it properly.
Form Validation And Its Types: –
Here you will learn types of validation rules and how to validate form fields using CI.
In this tutorial we are going to explain how we can use the URI class in CodeIgniter to retrieve information from URI segment.
Sometimes in application we needed a url structure and want to route it to proper controller functions so at that time we require URL rounting or maping. So this tutorial will guide you how one can route their requests.
Select Data From Database In CodeIgniter:-
In this tutorial we are going to explain you how to perform CodeIgniter select query to fetch data from database.
Insert Data Into Database Using Model In CodeIgniter:-
In this tutorial we are going to explain you how to perform CodeIgniter Insert operation using Model.
Upload Files And Images In CodeIgniter:-
This tutorial will demonstrate you, how to perform Upload operation to upload files and images using CodeIgniter framework.
Update Records In Database using CodeIgniter:-
Now, this tutorial demonstrates you, how to perform Update operation on database using CodeIgniter framework.
Deleting Database Records In CodeIgniter:-
In this tutorial we will explain you how to delete data from database using URI segment in CodeIgniter framework.
Populate Single And Multiple Dropdown Selection In CodeIgniter:-
With the help of form helper functions you will learn the use of codeigniter form dropdown and its interaction with database to select and insert data.
Create Simple Contact Form Using CodeIgniter:-
Its all about creating simple contact form using codeigniter MVC framework.
Create Captcha Using CodeIgniter Captcha Helper To Avoid Spam:-
Mostly in web applications their is a need to protect your website from getting spammed. So we need to create a Captcha spam protection to stop the spamming activities.
URL Helper To Create And Maintain URL In CodeIgniter: –
In this tutorial we will give you brief description about how to use “URL Helper” in CodeIgniter which will help you in making ,calling and creating url.
Loading External CSS and JS In CodeIgniter:-
In this tutorial we are going to explain how we can use external CSS and JSin CodeIgniter.
Perform GET And POST In CodeIgniter Using Input Class:-
In this tutorial we will give you brief description about CodeIgniter GET and POST method, this is most important part of a web application.
Validate Date Format Using CodeIgniter Validation Library:-
This tutorial is very useful if you are looking to validate date format through CodeIgniter form validation library.
Learn Session Class And Its Handling Through Example In CodeIgniter:-
Sessions are one of the most important part for any web applications, as it helps to maintain user’s “state” and to track their activity when they visit your website.
Use CodeIgniter’s Security Class To Perform Secure Input Operations:-
Here you will learn the XSS technique commonly used to trigger JavaScript or other types of malicious code that attempt to hijack runnable code. Tis technique comes from CodeIgniter’s security class.
Encrypt Data Using Encryption Class In CodeIgniter:-
Data encryption and decryption is nothing but just converting a plain text into something that appears to be random and meaningless and vice verse. So, through this post you will be able to encrypt data for your application.
Perform Login And Logout Operations With Sessions In CodeIgniter:-
This tutorial is all about performing login and logout operation on a page with the use of session. In login form, we made registration module, login module and admin panel using sessions.
Perform “Remember Me” Functionality On Login Page In CodeIgniter:-
In this tutorial, we will learn to activate “remember me” checkbox while login a page.
Adding Header And Footer to Pages In CodeIgniter:-
In this tutorial we are going to explain how we can create a header, footer and sidebar menu ,three different pages in CodeIgniter MVC and call them in different pages.
Create Pagination To Navigate From Page To Page In CodeIgniter:-
This tutorial will demonstrate how to make “Pagination in CodeIgniter”. In this post we used CodeIgniter pagination class by initializing pagination library.
Do Image Manipulation Using Image Library In CodeIgniter:-
In this tutorial we are going to explain an example, which shows how to use CodeIgniter’s image library for Image Manipulation.
Create HTML Table Using Table Library In CodeIgniter:-
In this tutorial we are going to explain you how we can use CodeIgniter Table Library efficiently to create HTML table.
Create Dynamic Calendar Using Calendar Class In CodeIgniter:-
In this tutorial we are going to explain an example, which shows how to use CodeIgniter’s Calendar class which enables you to create dynamic calendars.
Use Of Language Class In CodeIgniter:-
In this tutorial, we will learn how to use CodeIgniter Language Class. Using this class we can create application in any language we want.
Use JavaScript Class Client Side Scripting In CodeIgniter:-
Here you will learn how one can use CodeIgniter’s JavaScript class after loading the provided JavaScript library.
Example To Submit Data Using jQuery In CodeIgniter:-
Now, with this tutorial you can learn how to include external jQuery file in your CodeIgniter framework for form submission.
Post A Data using jQuery Ajax In CodeIgniter:-
With the help of an example you will learn how to post data to a controller using the CodeIgniter jQuery Ajax method.
Send Emails Via Multiple Protocols In CodeIgniter:-
In this tutorial we are going to explain it with an example which will demonstrate you “How to use Email class library in CodeIgniter” to send emails via various protocols like Gmail, Yahoo.
Use Of cURL Library With Example In CodeIgniter:-
In this tutorial we will give you brief description about how to fetch server side information of a website using PHP cURL library or function in CodeIgniter.
Perform OAuth Login With Google In CodeIgniter:-
In this tutorial, we are going to explain how you can implement Google open authentication to connect with your website using CodeIgniter.
Perform OAuth Login With Facebook In CodeIgniter:-
In this tutorial, we are going to explain how you can implement Facebook open authentication to connect with your website using CodeIgniter.
Learn How To Create Your Own Helper In CodeIgniter:-
In this tutorial we are going to explain how you can create your own helper class. Here we have created helper called imagetodata.
Create Online Shopping Cart In CodeIgniter:-
In this tutorial, we are going to explain how we can use “Cart class in CodeIgniter”. This cart class allows us to add and remove products to a shopping cart and to update them.
Conclusion:
Thus the above tutorials will help you to give a boost start for a web development or to improve your skills to advance level. Hope you have benefited from it. Keep visiting our websites for more knowledge and information. You can even share your opinion/suggestions.
CSS3 Box Shadow

The box shadow property allows web designers to design multiple drop shadow(outer or inner) for any box element ,using values for color,size and offset etc.
In this tutorial we are going to explain how we can use the box shadow property for drop shadow effect.
The box shadow property can be assigned through comma separation in order to specify horizontal offset, vertical offset, optional blur distance and optional spread distance of the shadow.
Color value and inset(to create an inner shadow) are optional.
Box Shadow Compatibility
The number in the below browser’s image shows the first browser version, that supports the property of box shadow.

You can also refer live demo or download the Script file.
Extract the downloaded files, save it and run index.html on browser
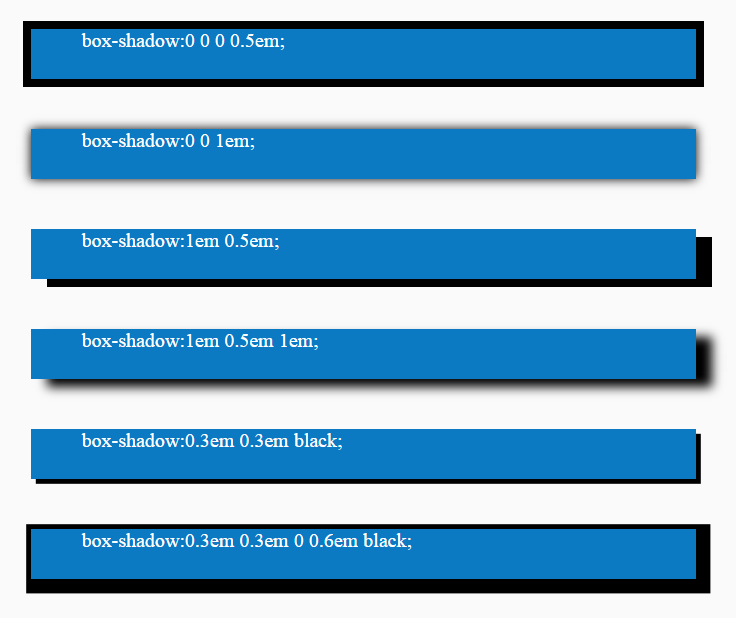
Box Shadow General Description

Horizontal offset : The horizontal offset means shadow in x-axis. When it is positive the shadow is drawn to the right side of the element and when its negative it is drawn to the left side.
Vertical offset : The vertical offset means shadow in the y-axis. When offset is positive the shadow is drawn below the element and when its negative it is drawn above.
Color Value : You can also define the color value of the shadow i.e. rgba/hsla color values are possible.
Optional : Inset is a optional attributes. Using inset we can draw the shadow inside the element.
Optional : This blurs radius define how big and how much blurred the shadow you want. If the value is larger then shadow is lighter.Negative values are not allowed if value is not set, set 0 defaults for sharp edges.
Optional : This attribute defines the spread distance for bigger shadow. The shadow is expanded by the given value
Note : Here we are showing some basic css3 box shadow example with code. For more css3 box shadow style, please visit our live demo section, there is approx 40 different css3 box shadow style with code.
Box Shadow Type 1:

HTML Code
Copy below code in your HTML file.
<div id="box1"></div>CSS Code
Copy below code in your CSS file, or inside style tag in HTML page.
#box1{
width:700px;
height:50px;
background-color:#0C79C3;
margin: 50px auto 50px auto;
box-shadow:1em 0.5em 1em;
}
Box Shadow Type 2:

HTML Code
Copy below code in your HTML file.
<div id="box2"></div>CSS Code
Copy below code in your CSS file, or inside style tag in HTML page.
#box2{
width:700px;
height:50px;
background-color:#0C79C3;
margin: 50px auto 50px auto;
box-shadow:inset 0 0 2em black;
}
Box Shadow Type 3:

HTML Code
Copy below code in your HTML file.
<div id="box3"></div>CSS Code
Copy below code in your CSS file, or inside style tag in HTML page.
#box3{
width:700px;
height:50px;
background-color:#0C79C3;
margin: 50px auto 50px auto;
box-shadow:0.2em 0.2em 0.7em black, inset 0 0 0.7em #b5e1ff;
}
Box Shadow Type 4:

HTML Code
Copy below code in your HTML file.
<div id="box4"></div>CSS Code
Copy below code in your CSS file, or inside style tag in HTML page.
#box4{
width:700px;
height:50px;
background-color:#0C79C3;
margin: 50px auto 50px auto;
box-shadow:inset 11em 0 black;
}
Box Shadow Type 5:

HTML Code
Copy below code in your HTML file.
<div id="box5"></div>CSS Code
Copy below code in your CSS file, or inside style tag in HTML page.
#box5{
width:700px;
height:50px;
background-color:#0C79C3;
margin: 50px auto 50px auto;
box-shadow:inset 0 0.3em black;
}
Conclusion:
So, this way you can use CSS3 Box Shadow property to create different shadow style , for more blogs keep following us.
For more related information you can also check out following blogs –
- CSS Active: Active Selector
- CSS Background Size
30+ Best Email Marketing Services 2022 (Pricing Comparison)

Comparison Of Top Email Marketing Software
| Services | Cost per 10k Subscribers | Free Trial | Unique Features | Ratings of Services |
| Pabbly Email Marketing | $29 | ✔ | Email Customizer | 5/5 |
| MailGet | $29 | ✔ | Advanced Report/Analytics | 4.6/5 |
| Sendinblue | $25 | ✔ | No daily sending limit | 4.6/5 |
| Moosend | $70 | ✔ | Excellent Dashboard | 4.3/5 |
| Constant Contact | $195 | ✔ | Drag & Drop Editor | 3.8/5 |
| SendPulse | $24 | ✔ | Automation 360 | 4.1/5 |
| AWeber | $69 | ✔ | Multiple Follow Up Emails | 4.2/5 |
| Benchmark Email | $79.88 | ✔ | Drag & Drop Builder | 4.4/5 |
How email marketing will benefit you?
Well, it’s obvious if you let your users know about what you’ve got in store for them, there are chances people will give your product a thought.
Via email marketing software, you can do this easily by sending the emails to the users and tell them about your product, updates, offers & discounts, and a lot more.
Hence, enhance your customer retention & increase revenue.
FYI- For every dollar you spend on email marketing, you can expect a return of $38!
Isn’t it amazing? It covers the basic rule of business- Less Input, More Output! You can effortlessly commence a campaign and watch a positive incline in your sales by promoting your products & services.
Now that you know the importance of email marketing, I am sure you want to know how to do email marketing yourself?
Lemme tell you, it’s not a big deal for you to get in touch with the audience. All you need is a good email marketing software. Rest is done by the software itself.
We have covered the following Best Email Marketing Services & Software in our review.

- Pabbly Email Marketing
- MailGet
- Moosend
- SendinBlue
- GetResponse
- SendPulse
- Mailjet
- Constant Contact
- EasySendy
- AWeber
- Wishpond
- iContact
- MailChimp
- Benchmark Email
- ActiveCampaign
- Mad Mimi
- Campaign Monitor
- Campaigner
- VerticalResponse
- Redcappi
- Zoho Campaigns
- ConvertKit
- Customer.io
- SendGrid
- Salesforce Marketing Cloud
- Emma
- dotdigital
- Klaviyo
- Adestra
- Vision6
- Lead Squared
- ActiveTrail
- Elastic Email
- Vero
- Listrak
- SendBlaster
- Bronto
- Emarsys
1. Pabbly Email Marketing – Cost Effective Email Marketing Tool
Pabbly Email Marketing is an efficient self-hosted email marketing service that helps you in sending emails via a secured server. You don’t have to worry about your emails landing in the spam box as the software assures 100% inbox delivery rate.
It allows you to simply design the emails by dragging the fields and dropping the editor, add personalized tags, redirect links and much more. Further, you can align the emails in a drip and send them in automation at a desired time & date.
No Hosting, No Complex Setup. Send Emails Instantly!
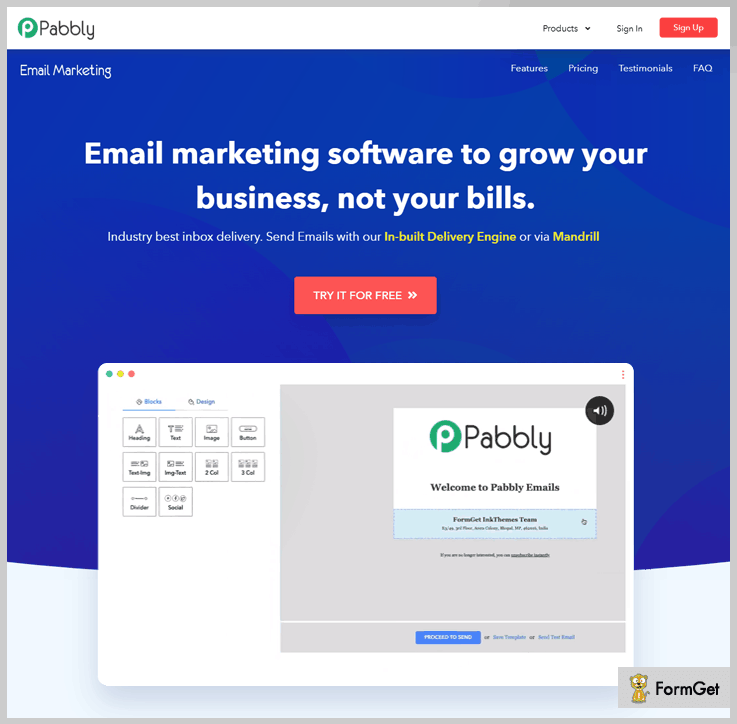
Best Feature: Email Customiser
Pabbly Email Marketing offers you an intriguing email customizer wherein you can create personalized emails for your marketing campaign without any hassle. Additionally, you get a more than 500 template that you can clone and customize accordingly.
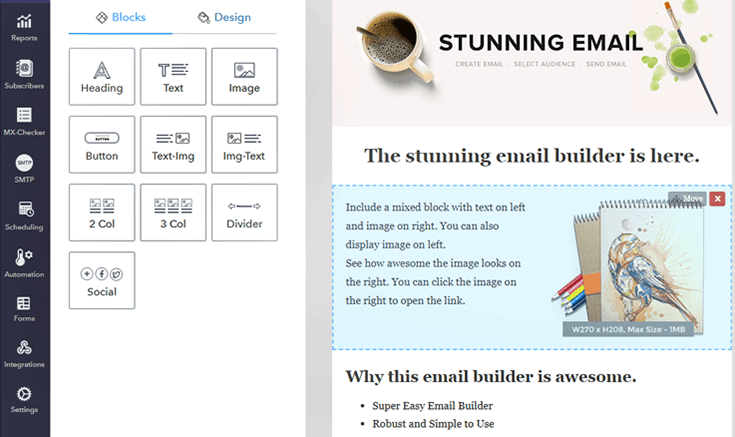
Features of Pabbly Email Marketing –
- Track your emails without any hassle and get to know about the open rate, click-through rate, sent, etc. Also, you can add an option to add the ‘Unsubscribe’ option so that the users can unsubscribe by clicking on the link.
- For sending emails, you can either enter the emails manually and import the CSV files of emails contacts. You can even manage the email list and clean the email list by filtering out the duplicate, bounce & suspended emails.
- With subscription forms, you can effortlessly collect leads and related information.
- Use autoresponders and communicate with the users without any manual efforts. So, you can welcome your clients, apologize for the inconvenience, and much more.
Cost Of Email Marketing Service – Pabbly Email Marketing
- Free Plan offers a 7-days trial where you can send emails to 100 subscribers completely FREE and connect 3 SMTPs.
- Rookie for $29 per month & you can send unlimited emails to 5000 subscribers.
- Pro – You can buy this plan at the cost of $49 per month where you can send emails up to 15,000 subscribers.
- Advance Plans – Send emails to subscribers ranging from 50,000 to 10,00,000 at just $99/m & $1599/m respectively.
Note: You’ll get a 20% OFF on a yearly subscription
On sending transactional emails, Pabbly Email Marketing got – 99% Open Rate
On sending promotional bulk emails, Pabbly Email Marketing got – 43.64% Open Rate
So, go with Pabbly Email Marketing & always get more than a 15% open rate for your email marketing campaigns.
2. MailGet – High Inboxing With Cost-Effective Pricing
MailGet is one of the best automated email marketing services for sending bulk emails directly in your client’s inbox and get a minimum bounce & spam rate.
The specialty of this emailing service is that it offers 500+ free HTML email templates on multiple niches like Christmas, Diwali, lawyers, holiday, real estate business, etc.
Best Feature: Advanced Report/Analytic
MailGet comes with the best analytics feature that helps you to monitor email campaigns overall performance in real time. With this report, you can easily track the overall statistics of your campaign.
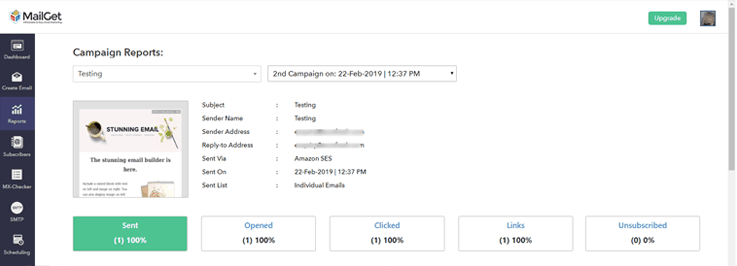
Special Features Of MailGet –
- MailGet provides list cleaning feature that removes all the email addresses which are not verified or can cause bounce.
- It provides you with the best lead capture tools that will help you to garner more leads.
- Features like an autoresponder, simple list management, subscription forms are the strongest attributes of this software.
Pricing Plans –
- The Rookie plan is for $29 per month for sending emails to 5000 subscribers.
- MailGet provides Pro plan emails to 15,000 subscribers in just $49 a month.
- Advance plans range from just $99 to $1599 per month gives you access to send emails from 50k to One million subscribers.
Now, this is interesting, if a yearly subscription is taken for the above plan you get a straight discount of 2 months.
Deliverability + Opens = No more fear of getting blocked!
MailGet does bulk emailing with multiple servers at the same time which assures 99% deliverability rate and fewer chances of blocking.
So, integrate MailGet with any of the SMTP’s like SendGrid, Mailjet, Postmark, etc & send 10,000 emails at just $30. Cheapest among all..isn’t it?
3. Moosend – Send Automated Emails
Moosend an unrivaled email marketing tool for creating, sending and tracking e-mail campaigns. It allows sending marketing as well as transactional email. It has many features to increase your delivery of – free spam test, free inbox inspector, send-time optimization, automatic A/B testing, personalization, and dynamic content, etc.
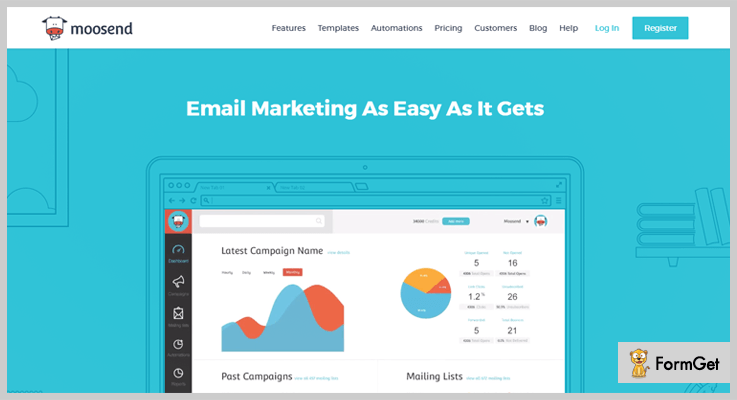
Best Feature: Automation
Moosend empowers you to send emails in automation via creating a drip. Here, you can easily schedule the campaign at a specific time & date. Further, the emails are delivered on the given time.
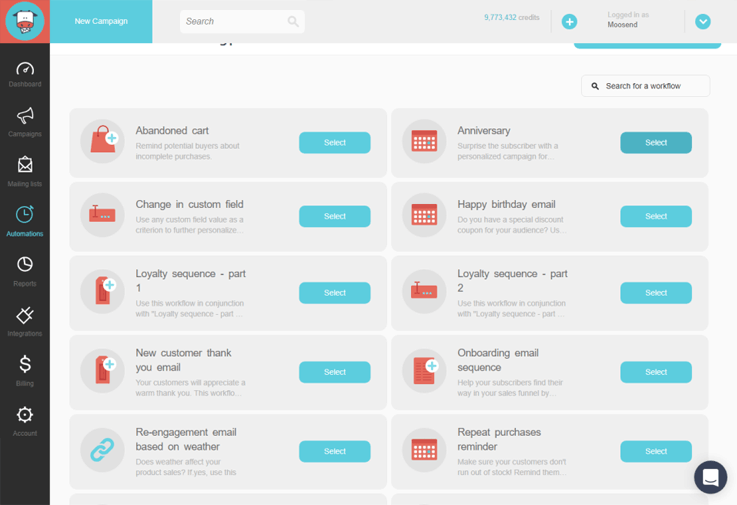
Features Of Moosend –
- Easily import contacts from different formats like CSV .xls, or upload contacts from Google, Basecamp, or other online resources as well. It automatically removes any duplicate data within.
- You get real-time data on bulk email marketing campaigns which lets you know the opened rate, number of clicks and other important factors.
- Moosend spam tester ensures that your email lands in the inbox of users and with this you can testing before actually sending it.
Pricing Plan –
Offers a free trial of unlimited emails up to 5,000 subscribers for every plan.
Further, it consists of multiple pricing plans which starts from $10 for up to 5,000 subscribers to $2880 for 1,000,000 subscribers & in pay as you go, you can go as per your need.
4. SendinBlue – Email Marketing Automation Software
SendinBlue is an all-in-one, simple and powerful platform that enables any beginner to manage promotional campaigns, transactional emails, and promotional emails with ease. This email marketing service will best suit Entrepreneur, Growing business & High volume senders.
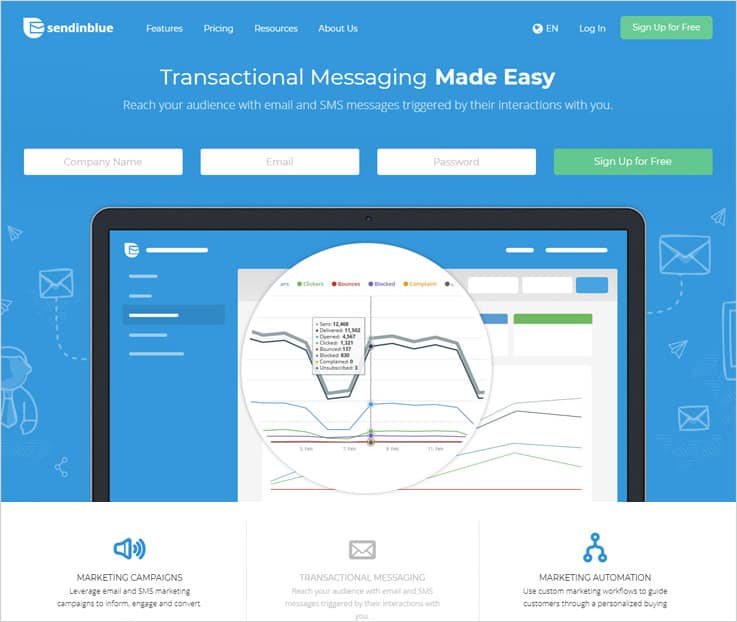
Best Feature: List Segmentation
SendinBlue also has list segmentation that allows you to group similar email contact based on similar interests & easily manage all your list to boost your email campaign.
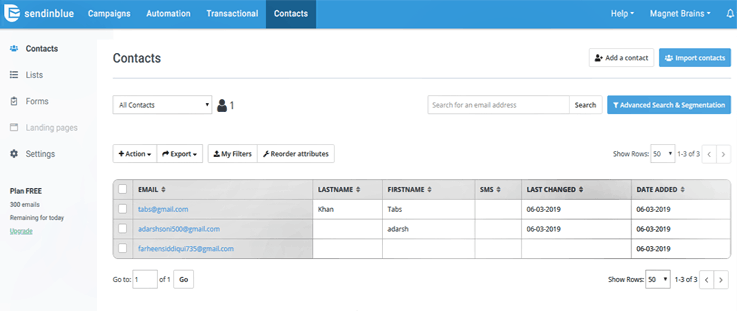
Features Of SendinBlue –
- You can import contacts from multiple sources, search & segment contacts from the list and also customize unsubscribe forms.
- For support you can go through tutorials available online or can get instant support via phone or email.
- Create emails that are responsive in design, hold images, social sharing, and other media content as well.
Pricing Plans –
It has 3-different plans namely, Email plans, SMS plan, and IP plan.
Get a free trial of SendinBlue with 9,000 emails/month & unlimited contacts. Further, you get Micro, Bronze & silver plan on the basis of a number of emails. Micro is a cheaper plan that costs $7.37/month for sending up to 40,000 emails.
5. GetResponse – Track Email Campaign Performance
GetResponse helps to build email marketing strategies that are effective and works in a few simple steps. Choose from 500+ pre-designed templates which are fully customizable and 1,000 free images to design attractive emails.
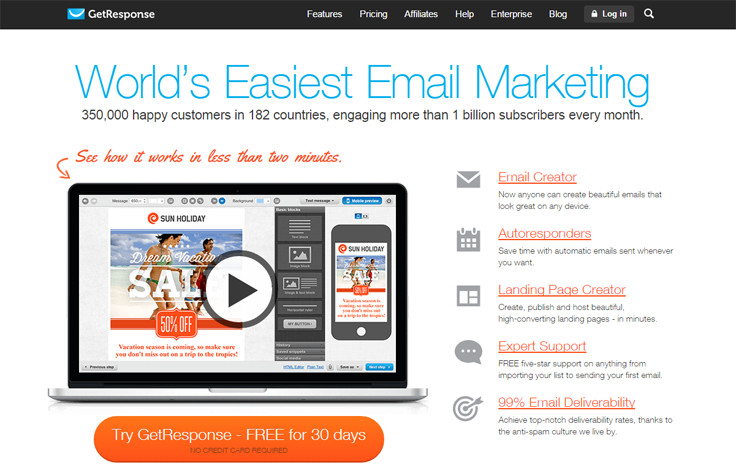
Best Feature: Form Creation
GetResponse is a widely used email marketing service. In this, you get an amazing form builder that you can use to create forms using amazing features like custom color, font, etc. and send there then.
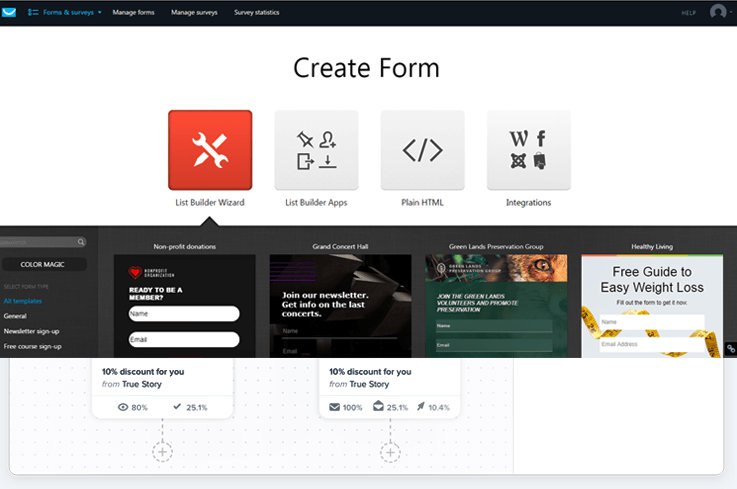
Special Functionalities Of GetResponse –
- Optimize email delivery to ensure that the email lands in the inbox of the receiver at times when they are most available to get engaged.
- The dynamic content feature of GetResponse you can send emails that are highly-personalized to the audience.
- With this amenity, you can simply create groups of similar contacts and send emails that are more targeted.
Pricing Package –
Four plans are available here – Email, Pro, Max & Enterprise starting from $12 to $679/month with an e-mail list size of 1,000 to 1,00,000+.
6. SendPulse
SendPulse offers tons of features to create, customize and scale your email marketing campaign. Send simple bulk email blasts, scheduled drip campaigns, elaborate triggered emails and everything in between with this marketing automation platform.
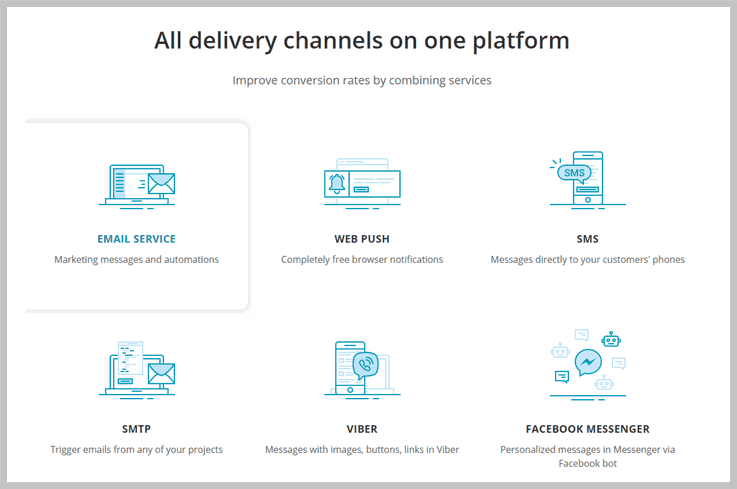
Best Feature: Automation 360
Build a custom messaging flow by adding events and then send emails, web push notifications or SMS triggered by your subscribers’ actions like cart abandonment, purchase, registration, etc.
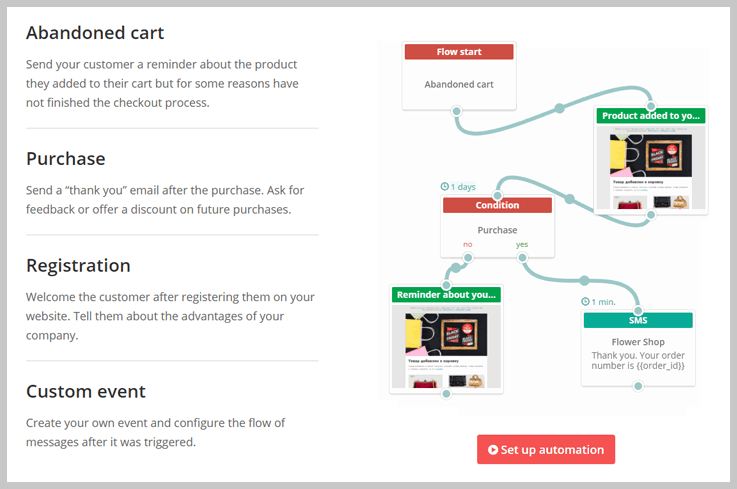
SendPulse features:
- Subscription forms – create an eye-catching subscription form to collect your customer’s contact information.
- Drag-and-Drop editor – design beautiful, adaptive emails or choose a pre-designed template from a SendPulse gallery.
- Transactional emails – SendPulse enables you to send emails to your subscribers from your website or CRM.
- FaceBook chatbot – take a step back from email marketing and reach your customers on social media.
- A/B testing, email campaign statistics, segmentation options and a lot more with SendPulse.
Pricing Plan:
Forever free plan with up to 2,500 subscribers or 15000 emails per month.
Paid plans start at $7.88 mark if your marketing needs exceed the free plan limitations.
7. Mailjet
Mailjet is an all-in-one platform to send, track and deliver both marketing as well as transnational emails. Its perceptive performance tools let you focus on creating tempting, successful emails campaigns that increase customer engagement.
Best Feature: Real-Time Dashboard
Mailjet provides you with real-time reports of the email campaigns and lets you know as and when the user performs some kind of actions on sent emails like clicks, opens, unsubscribes, etc.
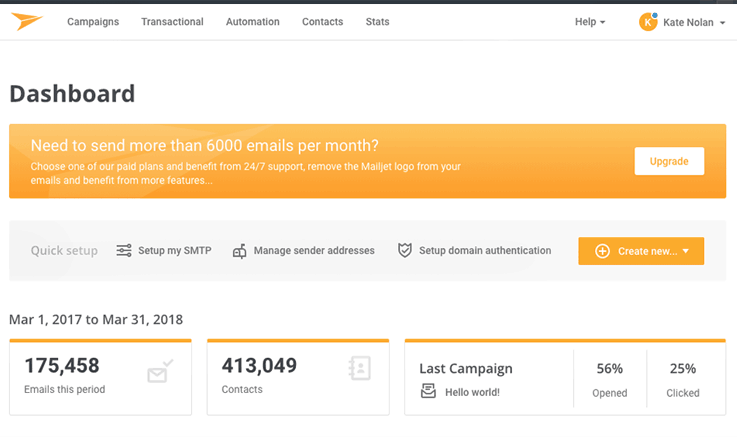
See What Features Mailjet Offers –
- Mailjet comes preloaded with free e-mail templates and newsletters that are responsive. You can also build your own emails with intuitive drag and drop editor which is extremely user-friendly.
- Advanced reporting feature allows to track the delivery of your emails and know the user actions as well.
- A/B testing permits you to test 10 different variation and build emails which are flawless and bring success to your business.
Pricing Packages –
Free trial of 30 days, (no credit card, no contract) 6000 emails/month (200 emails/day)sending limit too.
Further, you will get Bronze, Crystal, Silver, Gold, Platinum, and Diamond plans for per month.
8. Constant Contact
Constant Contact is a powerful online mailing tool that is easy to use it has advanced features, comes loaded with multiple templates and is perfectly suitable for small and medium-sized businesses.
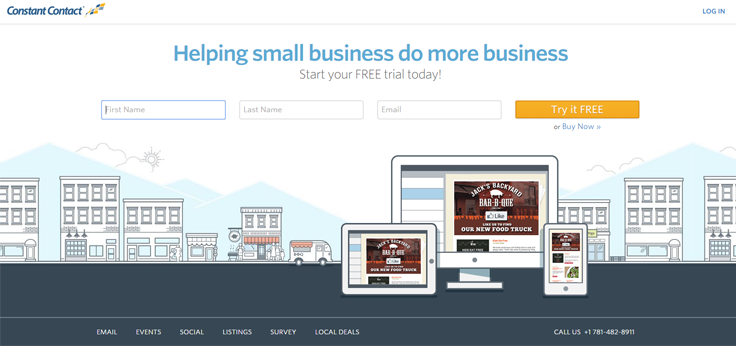
Best Feature: Drag & Drop Editor
Constant Contact offers you a wide range of templates to choose from along with an easy to use drag and drop editor to effortlessly create emails for your campaigns.
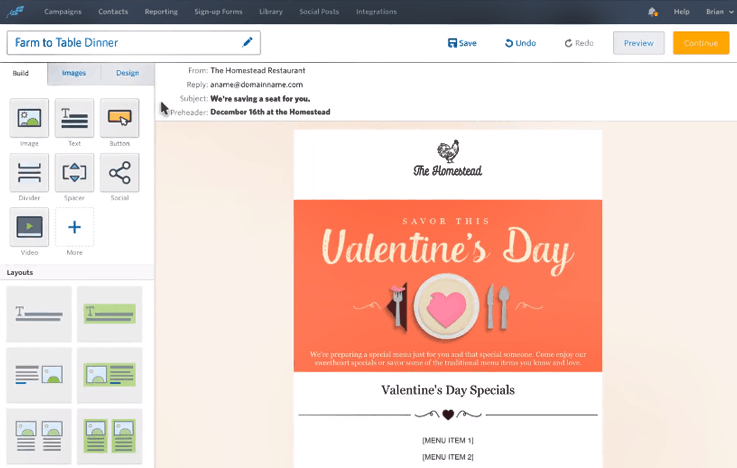
See What You Can Do With Constant Contact –
- Manage all your contacts here just upload the contact list from Excel, Gmail, Outlook, and this amenity will automatically remove unsubscribes, bounces, and inactive emails from your contact list.
- Campaigns conducted using Constant Contact are more effective as higher inbox delivery is received.
- This e-mail marketing service also provides professionally designed templates which are easy to customize.
Pricing –
It offers a number of plans depending on subscriber base size.
The cheapest plan of Constant Contact is for 0 to 500 subscribers, where it costs $20/month for unlimited emails sent. Moreover, for 10,000 subscribers, it costs $115/month.
Know More About Constant Contact
9. EasySendy – Hybrid Email Marketing
EasySendy is a hybrid email marketing tool for marketers. It enables them to implement different email campaigns like autoresponder, regular, and drip email campaigns efficiently. Further, it’s suitable for individual and small and medium businesses.
The platform has numerous features to assist you with email marketing needs: such as smart segmentation, advanced reporting analytics, dynamic content, etc.
Best Feature: Micro Email Delivery
EasySendy equips you to split email deliveries across different relay servers for good email delivery. Also, you can easily track email clicks and check open rate reports for various email campaigns, which majorly plays a crucial role in your ROI.
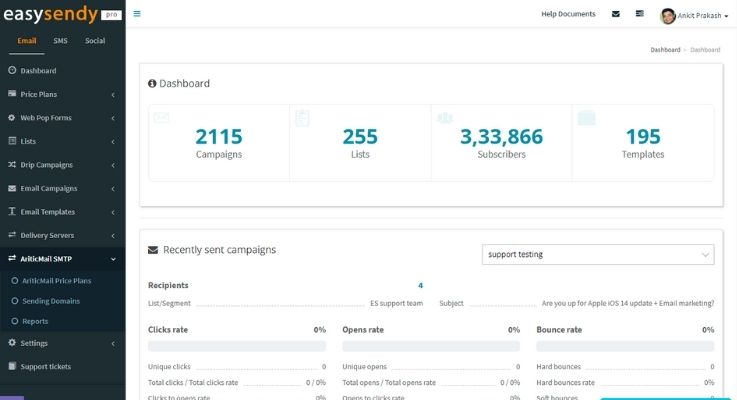
Features Of EasySendy –
- Provides bulk uploading of contacts and easy-to-schedule emails to non-opening contacts.
- You get complete capabilities for upping your game in terms of personalization and quickly creating campaigns.
- The software is easy to use, and setting up mailer campaigns is simple due to the convenient drag and drop editor.
Pricing Plan –
EasySendy offers a free trial of unlimited emails up to 2,000 subscribers.
It provides different pricing plans based on the subscriber’s list. Pricing plans will start from $19 for 10000 subscribers, and based on your need, you can choose your pricing plans.
10. Wishpond – High Deliverability, Intelligent Automation
Wishpond is an easy to use email marketing platform with that packs a big punch with advanced segmentation, automation, and analytics tracking built into one.
Featuring a drag-and-drop email editor and the ability to trigger emails based on page views, email opens, cart abandonment, and more, there’s a reason Wishpond is one of the highest rated email platforms out there today.
Best Feature: Lead Tracking and Automation
Imagine knowing exactly where in the world all of your contacts were located without having to ask. Then combine that with information on clicks, website views, and more to create highly customized email marketing lists.
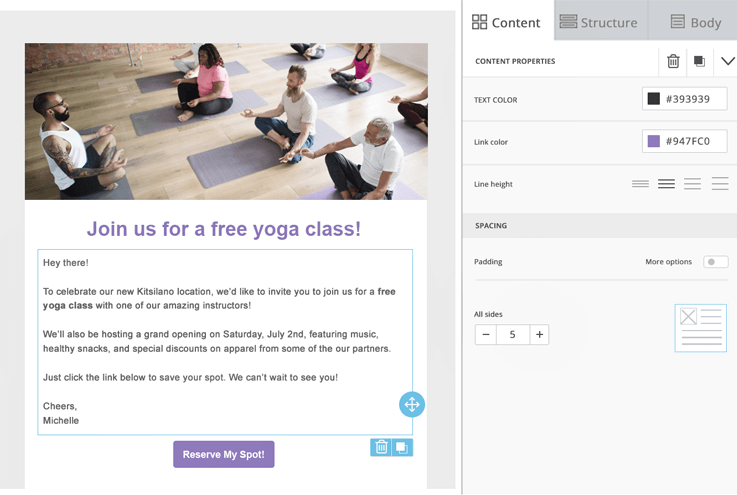
Wishpond Features:
- Drag-and-drop email editor – easily create beautiful emails in minutes or choose from a a list of pre-designed templates
- Marketing automation – Trigger emails based on opens, clicks, website engagement and more to create highly personalized experiences for your contacts
- Lead tracking – Track the movement of your contacts over time and set conversion goals for purchases on your website
- A/B testing – Quickly setup email A/B tests for subject lines, body copy, images, email sender, and more
- Full lead generation suite – Use Wishpond to grow your email list using popups, landing pages, opt-in bars, forms, and social contests
Pricing Plans –
Get a free 14-day trial to test Wishpond out today. Prices start as low as $49 / month for up to 1000 contacts and have managed options which include a dedicated project manager and help with onboarding starting at $199 / month.
11. iContact
iContact is one of the most user-friendly emailing tool available in the market. Emails delivered using this marketing platform appear great on a different device as they are responsive, plus they are created with ease as well.
Integration with third-party apps is never a problem with iContact, it’s user-friendly and comes in two different languages English & Spanish.
Best Feature: Performance Reporting
You can start email campaigning side by side with sending messages on Facebook, Twitter, and LinkedIn, etc. With iContact, you can also get tracking reports to review the results of email campaigns.
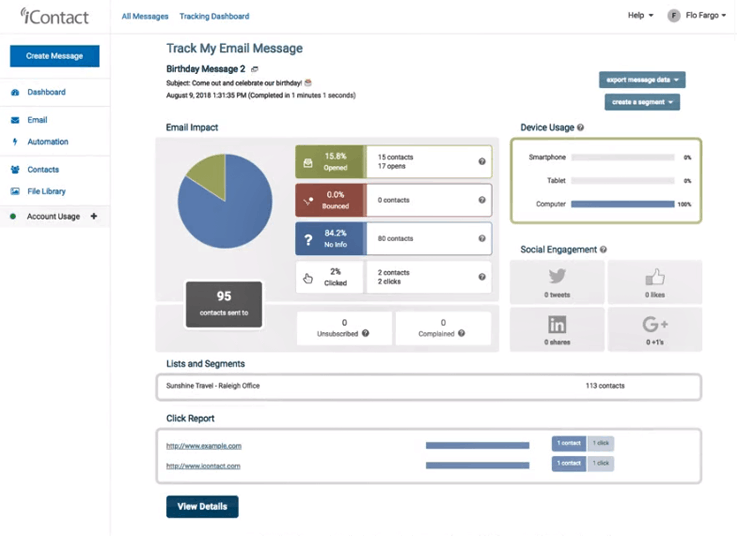
Other Attention Grabbing Features Of iContact –
- Spamcheck is a top class facility which inspects every message to ensure that it reaches the inbox of customers.
- Provides phone assistance, webinars, video tutorials and other types of supports.
Pricing Plans –
iContact offers two plans essential and professional the price of both these plans may easily be calculated just by defining the number of users you want to send emails to the scale places on the website.
Professional plan is the extension of the essential plan as it has additional features which are not there in the essential package.
I would like to quote that if you want to avail a discount, in that case, you have to pre-pay for 12 months and the annual price will get reduces by 15%.
12. MailChimp
We all are aware of MailChimp as it is a big name in the email marketing industry. With this platform, you can track email campaigns, schedule mail delivery, manage contacts with ease, perform list cleaning and most importantly deliver emails to customers inbox’s that to at an affordable cost.
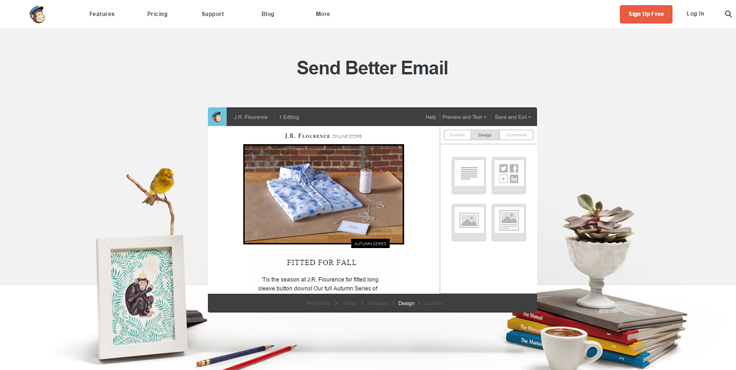
Best Feature: Excellent Dashboard
MailChimp provides very simple and easy to use dashboard. It has prebuilt templates, reports, lists, email automation & much more.
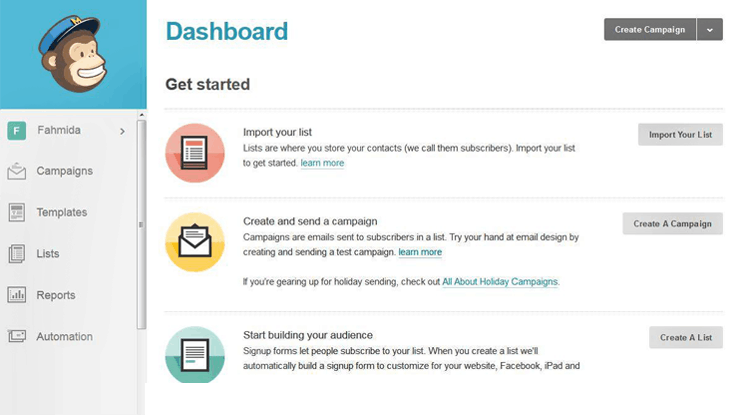
Amazing Functionalities Of MailChimp –
- With MailChimp, you can send messages not just to e-mail clients, but can also do the promotion on Facebook, Instagram and other social platforms.
- Get flawless reports on the open, clicks, spammed, unsubscription and other tracking essentials.
- Send emails that collect better sales by focusing on welcome, greeting and follow-up emails.
Pricing Structure –
Whatever is the size of your business MailChimp has got a plan for your online mail promotion needs.
You can begin with forever free plan which allows delivering of 12,000 every month to 2,000 subscribers.
There are two paid plans which can be bifurcated on the basis of features. The bill for these plans is generated on the basis of the number of subscribers that you are willing to include.
13. Benchmark Email
Benchmark a premium email marketing service which helps you create and send emails that are responsive, mobile-friendly and look attractive on different devices. It also lets’ you know all about email campaigns with real-time reports.
Best Feature: Drag & Drop Builder
Easy to use mail editor, just drag & drop what is needed in your emails and create eye-catchy emails within a minutes.
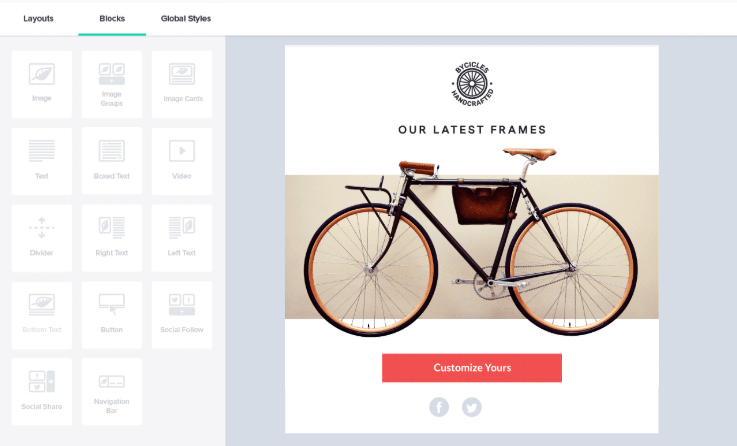
Check Out The Functionalities Of Benchmark –
- Get detailed reports on the opened, clicked, unsubscription and other customer essentials.
- Add multiple effects and edit your images right from the mail editor.
Pricing –
Get a free trial for 30 days with 250 contacts.
It offers 3 plans based on the number of emails, number of subscribers and high volume. In a List-Based plan, for 0 to 600 contacts, it cost $11.95/month while for 10,000 contacts, it costs $73.95/month.
14. ActiveCampaign
If you are using ActiveCampaign email marketing tool then get the privilege to enjoy multiple advanced and futuristic feature that comes preloaded with this emailing system. Free templates, free image hosting, autoresponder and more will help your emails reach inboxes of the receivers.
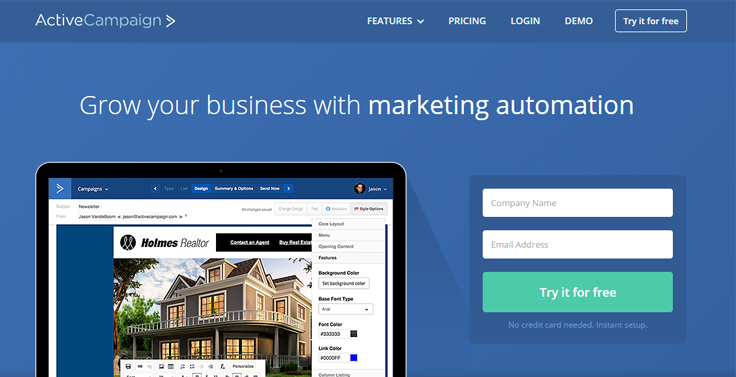
Best Feature: Campaign Tracking
It gives an insight report of your visitor activity on your website. It automatically creates a personalized experience for different users.
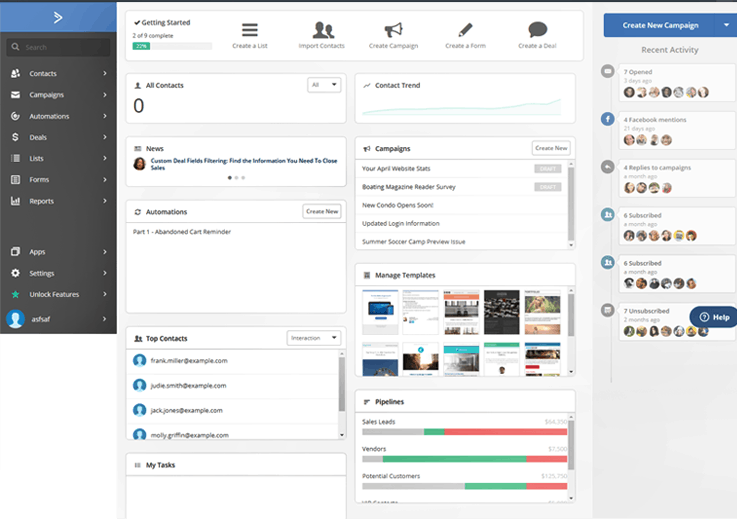
Interesting Properties Of ActiveCampaign –
- User-friendly dash to view the full history of your contacts from a single window.
- Access real-time reports that display tracking essentials like geo-location, opened rates, unsubscription and bounce details.
- Create conditional content for your emails and integrate with hundreds of other platforms as well.
Pricing Structure ->
It has 3 plans namely, Lite, Small Busines & Enterprise.
If 500 subscribers are there in your e-mail list, then it costs $9/month under the Lite plan, $49 for Small Busines Plan & $149 for Enterprise.
Know More About ActiveCampaign
15. Mad Mimi
With Mad Mimi, you can easily create, send, share and track newsletters, campaign follow-ups, as well as individual emails. This email marketing platform provides world-class customer support, high-end features which are easy to use and all this at an affordable price.
Best Feature: Social Share Feature
Mad Mimi empowers you to share your emails on various famous social platforms such as Facebook, Twitter, LinkedIn, Google+ and many more.
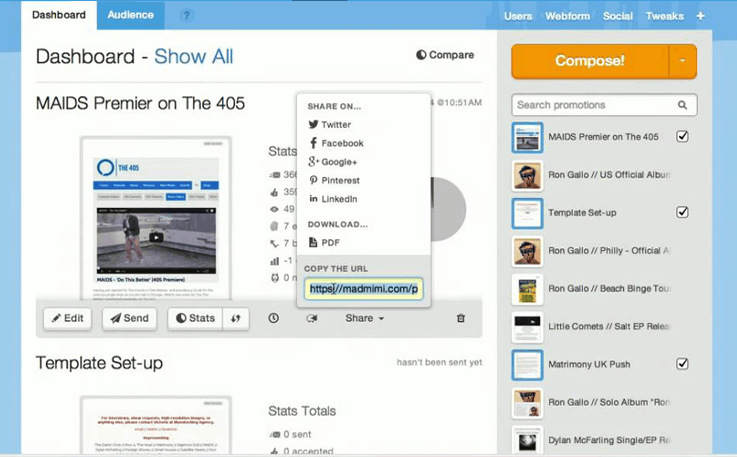
Specialties Of Mad Mimi –
- Mad Mimi helps to re-organize your contact lists appropriately by removing unsubscribes and bounce contacts.
- With this service, you can focus on features like autoresponders, integrations and other additional amenities.
- High deliverability & security is provided in the service. It also has both chat and mail support options.
Pricing Packages –
Mad Mimi offers 4-different plans named Basic, Pro, Silver, and Gold based on the number of subscribers & business sizes.
Under its least plan named, Basic, it costs $10/month for sending unlimited emails up to 500 contacts. Similarly, the cost goes high for other plans like Pro, Silver, and Gold.
16. Campaign Monitor
Another email marketing service which holds it’s position in the top 10 list is Campaign Monitor. This system is user-friendly, guarantees inbox delivery and moreover, it is best for fast-growing businesses.
Best Feature: Email Tracking
Campaign Monitor provides you with the best analytics about the emails and shows the list of subscribers and the date on which they subscribe to, etc.
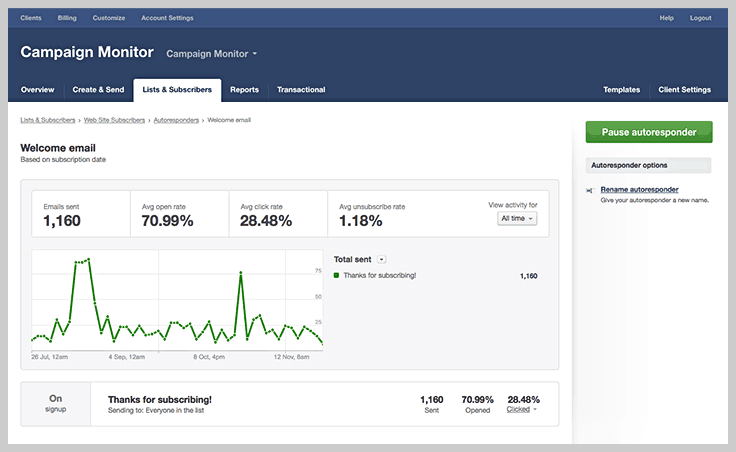
Special Features Of Campaign Monitor –
- Campaign Monitor has some of the most advanced tools that will assist you to track the success of the email advertising campaigns conducted.
- Simply manage your contact list and upload contacts from multiple sources and file formats.
- You can deliver targeted emails by giving a personal touch to the emails which can influence the readers for sales and result in long-term customers.
Pricing Plans –
It comes with three plans, Basic, Premier, and Unlimited and these plans offer different functionalities.
In the Basic plan, for 0 to 500 contacts, it cost $9/month for 2500 emails sent, the unlimited plan costs $29/month for unlimited emails sent up to 500 people, & so on.
Know More About Campaign Monitor
17. Campaigner
Campaigner a robust email marketing software which helps small, medium and large businesses strengthen customer relationships and drive sales. It offers features like professional email campaign creation, advanced list management & segmentation tools, and also targeted mail autoresponders and workflows.
Best Feature: Powerful Dashboard
Campaigner provides an efficient dashboard where you get all the details about the campaigns like last modified, growth and other related activities.

Functionalities Of Campaigner –
- Track your emails and advertising campaigns with advanced email tracking facility that generates reports on user actions like opened emails, clicks and more.
- In case of any questions and queries, it offers 24/7 assistance via phone as well as email.
- Plus you can integrate this emailing service with multiple SMTP relays, social media platforms and more, along with segmentation & geo-location as well.
Pricing –
The cheapest plan of campaigner is for 0 to 1000 contacts, where it costs $19.95/month for unlimited emails sent and for 10,000 contacts, it costs $79.95/month.
It also offers other plans based on the volume of the subscribers.
18. VerticalResponse
VerticalResponse email marketing service renders a huge list of powerful features utilizing which higher-performing emails can be created. It’s an elite amenity with which you can design, create, send, track and schedule email marketing campaigns with ease.
Best Feature: Overall Stats
With VerticalResponse, you get overall statistics about the open rates and click rates at one place. Thereby, you can easily compare the results right from the dashboard.
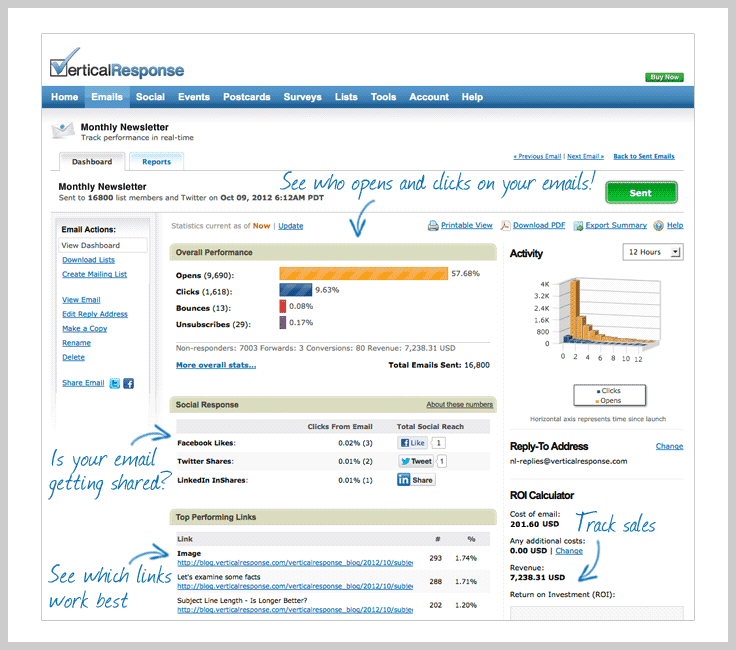
Let’s Have A Look At Amazing Features Of VerticalResponse –
- Design and deliver emails that look professional with customizable emails templates. Just add, delete, move and modify pre-designed templates to build attractive emails.
- Another important feature of VerticalResponse is mail automation through which you can deliver emails at times when they are most likely to get opened.
- You can also extract contacts from multiple sources, formats and add them to your list for effective list management.
Pricing –
Get 300 contacts and send 4,000 emails per month for free with VerticalResponse.
It has 3 plans namely Basic, Pro, Pro+ where the smallest plan costs $11/month for 5000 contacts with unlimited emails.
So, choose the plan based on your requirement or budget.
Know More About Vertical Response
19. Redcappi
RedCappi is simple and innovative, easy to use social and email marketing software. With this online promotional service, you can create emails that are extremely responsive and transfer bulk marketing campaigns within a few minutes.
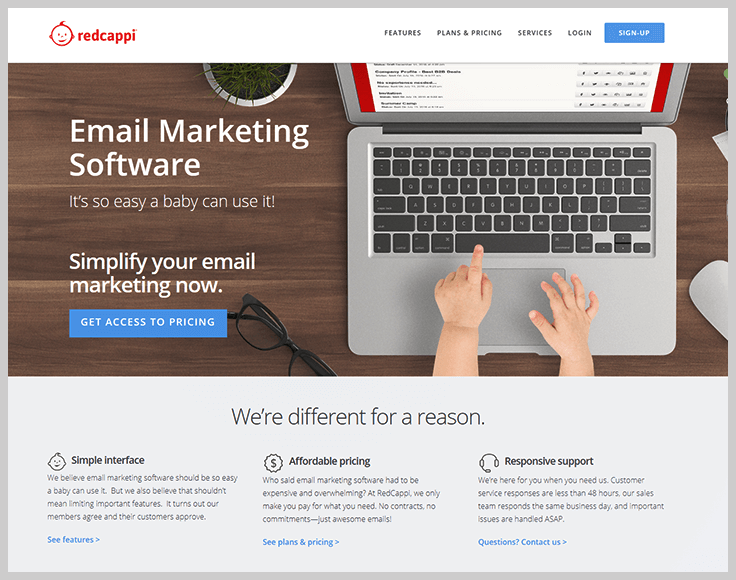
Best Feature: Direct Social Media Sharing
You can share the created emails directly from the dashboard on platforms like Facebook & Twitter.
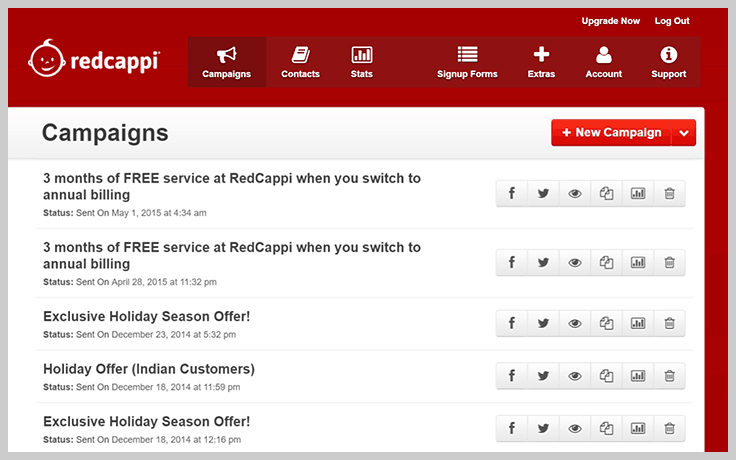
Functionality Of RedCappi–
- With RedCappi you can enhance user engagement by adding video, surveys, RSS and more to your emails.
- RedCappi, this Campaign Creator puts you in charge of creating personalized emails that connect with your subscribers. Also get the ability to generate reports about various marketing campaigns and their progress rate, bounce, and unsubscription.
- Autoresponder is truly helpful for create schedules to automatically send a series of emails to your contact list. RedCappi makes it easy to keep customers engaged with minimal real-time effort.
Pricing –
The lowest plan of RedCappi starts from $10, 500 contacts. The largest volume plans offer a low-cost, professional email broadcasting software solution for businesses with lists larger than 10,000 or high-volume sending requirements.
20. Zoho Campaigns
Design, customize, send, track and analyze email campaigns effectively with Zoho Campaigns. Email campaigns directed using this e-mail marketing solution helps to increase customers engagements and reach out to more clients around the globe easily.
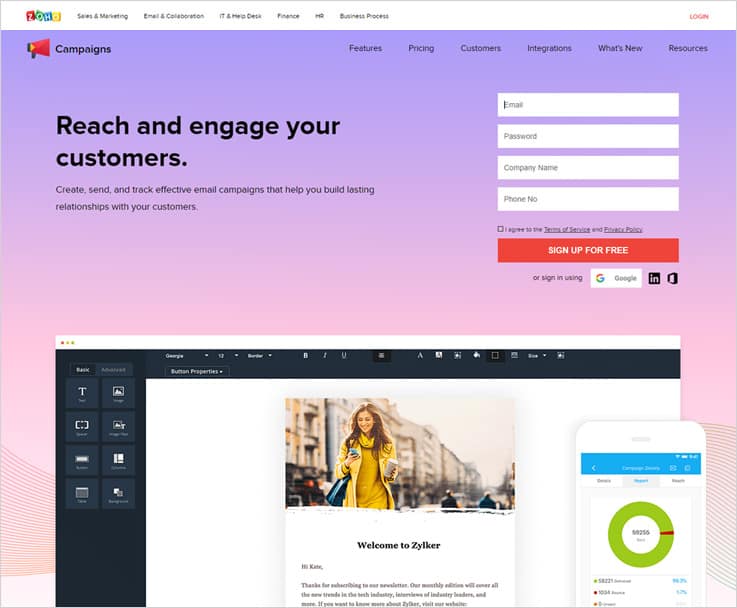
Best Feature: Autoresponders
With Zoho Campaigns, you can automate the response that triggers various actions like signup, based-on date fields like a yearly one-off, and much more just within a few clicks.
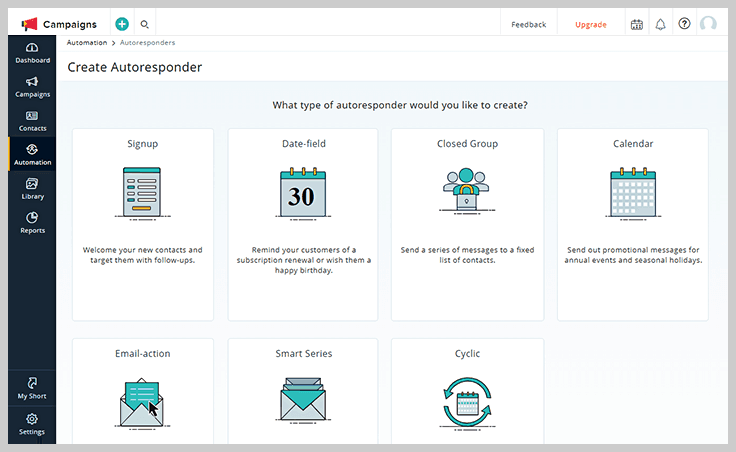
Attractive Features Of Zoho Campaigns –
- Send the right emails at the right time to the right client using email workflows and autoresponders facility.
- Easily connects with 25 popular business applications through which you can add subscribers, segment them and manage quickly.
- With A/B Testing you can test before sending campaign emails and get maximum results.
Pricing Plans –
Get a Free Plan for up to 2,000 subscribers with an email sending limit of 12,000/month.
It’s monthly prices vary from $5 to $350 for a range of 0 to 10000 subscribers. Also, you can pay on the basis of a number of emails you use.
Know More About Zoho Campaigns
21. ConvertKit
ConvertKit is one of the best email advertising solutions for professional bloggers and creators. It’s wrapped with amazing features that are easy to use, helpful in lead generating and user-friendly for absolute beginners.
Best Feature: Landing Pages
It allows you to create landing pages that will help you in capturing leads without any hassle. Moreover, you also get a list of templates that you can easily customize accordingly.
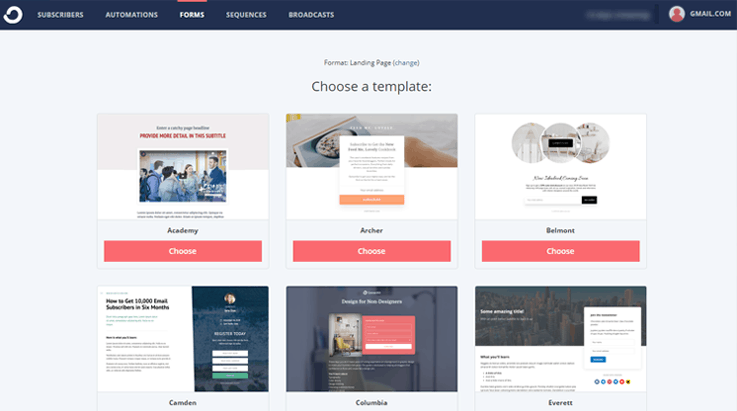
Speciality Of ConvertKit –
- Send personalized, timely and targeted emails that increase your conversion rate with automated emails.
- Easy-to-embed, customizable opt-in forms helps you turn the readers into regular customers.
- Other than the listed features you can also use third-party apps as well, which are easily integrated into this service.
Pricing Plan –
ConvertKit offers 4 pricing plans. The plan starts from $29/month up to 1000 subscribers and the biggest plan for up to 8000 subscribers it charged $99/month.
22. Customer.io
With Customer.io you get access to real-time data on customer behavior data which is a great help in creating automated campaigns that benefit your business. It also offers A/B testing, friendly editor, tracking facility and more.
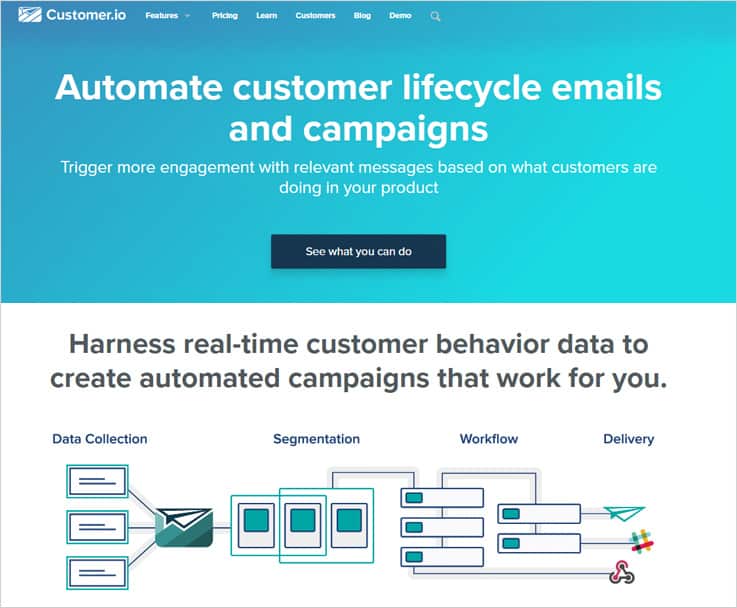
Best Feature: Workflow Automation
Customer.io has email marketing strategy which says ‘no lists to manage’, instead, it creates profiles of subscribers and automatically sends emails on behavior-basis.
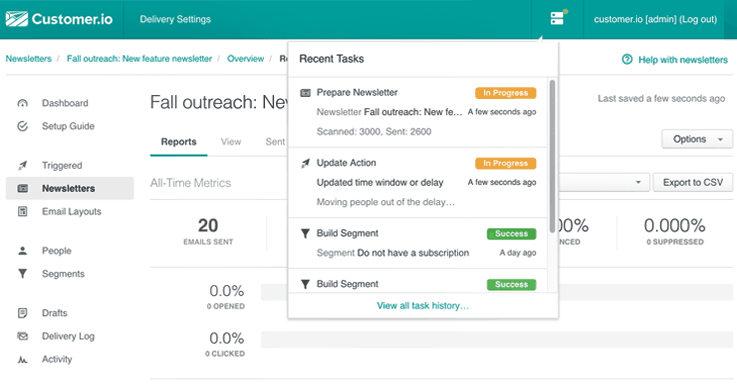
Attention Grabbing Features Of Customer.io –
- Analyze the success rate of your email campaign by knowing the opens, clicks, and most importantly: conversions received on the mails.
- You can send a different type of emails like newsletters, transactional and segment emails that land in the inbox of users.
Pricing –
It has a free plan for up to 200 people and 400 emails. Further, it has four plans, Growth, Small Business, Startup, and Enterprise.
The growth plan costs $100 and includes 30,000 emails for 15,000 profiles. For additional email credits or profiles, it charges you separately.
23. SendGrid
SendGrid has a good e-mail infrastructure as a service provider. this platform aims to improve marketing as well as transactional email’s delivery and perfectly suitable for a small, medium and large organization. It can easily integrate with any cloud-based email infrastructure to send high content emails for email promotion, marketing, and other advertising purposes.

Best Feature: Responsive
Create emails that are eye-catchy and look attractive in various screen sizes.
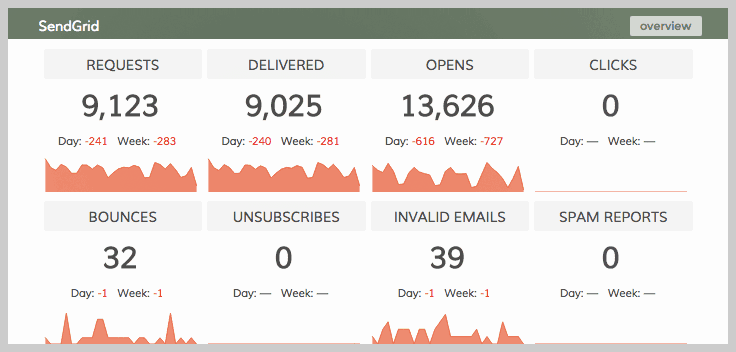
Features Of SendGrid –
- Optimize your emails to deliver them in the inbox of the receiver and enhance user engagement.
- It provides phone, chat and email assistance as well as 24/7 critical incident help.
Pricing –
It offers 3 sections namely Essential, Pro, Premier in which you get multiple plans.
Under the essential plan, you get two plans of $9.95 that offer 40,000/month and $19 for 1,00,000 emails per month. Further, you get other two plans starting from $79.95 to $399.95 and so on.
24. Salesforce Marketing Cloud
Salesforce Marketing Cloud offers many features like – campaign management, conversion tracking, reporting, social media publishing and more. It also guarantees 100% inbox delivery and the emails designed are also fully responsive.
Best Feature: Pre-Designed Templates
Design best-in-class emails which are responsive and grab the attention of the readers by using customizable templates.
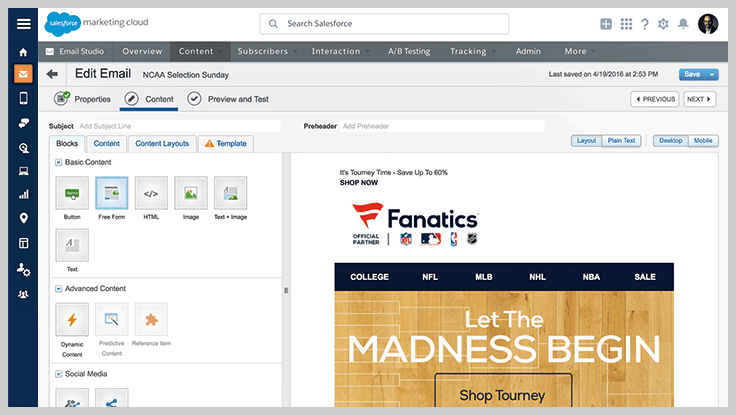
Have A Glimpse On Highlighted Features Of Salesforce –
- Schedule email campaigns, distribute reports, extract data automatically with this email marketing service.
- Test and send emails to receive more open rate, with A/B testing feature you can test the working of the emails at the user end.
Pricing Structure –
It offers plans under 4 categories namely, basic, pro, corporate, enterprise. The pricing starts from $400/month and so on. You have to send requests to find the other details of the plan that suits best for your business.
Know More About Salesforce Marketing Cloud
25. Emma
Emma is a perfect email marketing platform designed for small and medium-sized businesses & industries. It comes with features like segmenting & triggering emails and claims inbox delivery rate of 99.2%.
Best Feature: Dynamic Content
Deliver emails that influences the readers by sending unique content to every subscriber using the dynamic content feature.
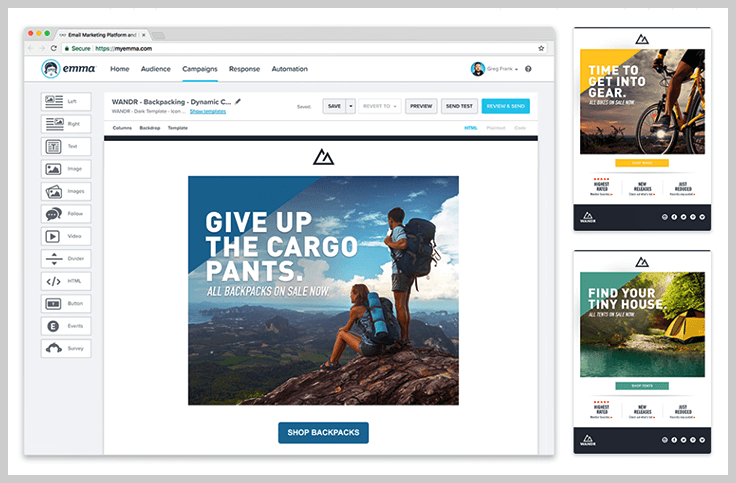
Attractive Features That Emma Possesses –
- Drag & Drop editor is one of the best features which is a helping hand to create eye-catchy emails with only a few clicks.
- Use HTML code templates to build emails and preview design, test, customize and more.
Pricing Of Emma –
Three plans are available Pro, Plus & Premium starting from $89/month for 1000 contacts and increases based on your contact list.
26. dotmailer
dotdigital is an automated email promotional platform that is empowering global marketers with the tools and services which are easy to use and generate great results. It has got multiple advanced features, numerous templates and also supports various integrations.
Best Feature: Drag And Drop Interface
Create personalized & attractive emails that grab the attention of readers with few clicks by using the drag & drop facility.
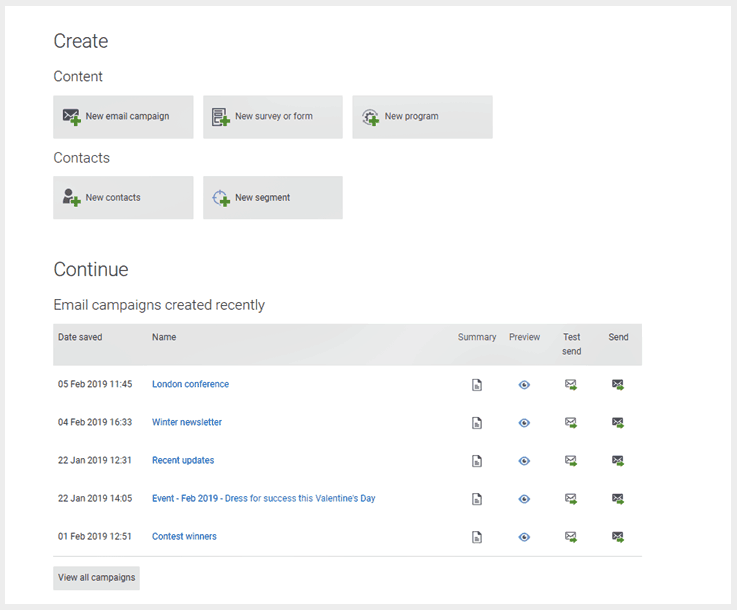
Check Out The Functionalities Of dotdigital–
- Create personalized & attractive emails that grab the attention of readers with few clicks by using the drag & drop facility.
- Multi-application integration helps you access data and other important resources for different applications with ease.
- Design and send emails that are fully responsive and looks great on different size screens.
Pricing Plan –
Comes with three packages namely – Essential, Professional & Ultimate where the smallest package charges you $675 per month for 30,000 contacts and so on.
27. Klaviyo
This email marketing platform mainly helps e-commerce marketers to personalize, target, measure and optimize email campaigns to convert leads into regular customers.
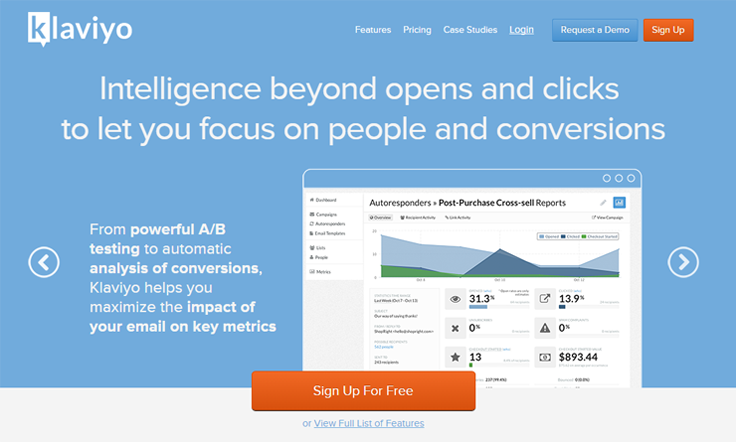
Best Feature: Efficient Admin Panel
Klaviyo provides a hassle-free dashboard where you can view all the recent campaigns based on days, total revenue and much more.
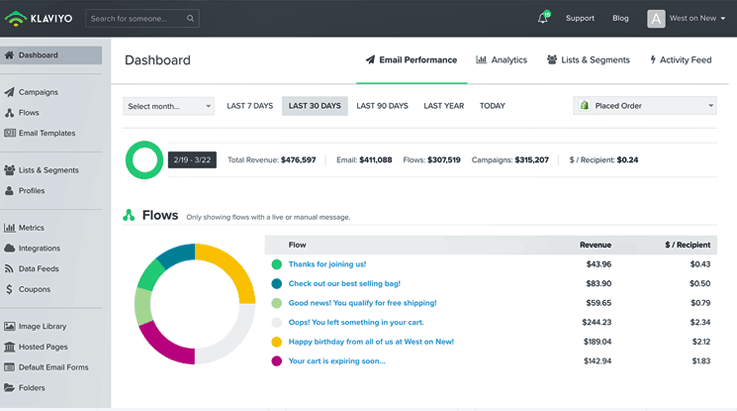
Klaviyo Highlighted Features –
- One of the important tools is segmentation using which you can segment your audience and send emails to relevant customers on the basis of behavior and transactional data.
- Start your email campaigns with pre-built email templates which can be fully customized according to your needs.
- Use an autoresponder to send automatic emails to your audience. Plus you also get 24/7 highly responsive email, chat and calls support.
Pricing Structure –
Offers four plans namely Starter, Growth, Professional, High Volume and all the account are free up to 250 contacts with 500 mail limit.
It charges $25 /month up to 500 subscribers, $350 for 15,000 contacts and so on.
28. Adestra
This is yet another leading email advertising service which powerful, easy-to-use, and comes loaded with enterprise level technology. Features like analytics, tracking, in-depth reporting, deliverability, and data security make this service a good option.
Best Feature: Tracking & Analyzing
Improve your email performance by analyzing the results of the tracking feature.
Adestra Functionalities –
- Conversion tracking is an advanced tracking tool that delivers every essential detail about your emails campaign. Opens, clicks, bounces and more that allows you to measure the success rate of any campaign.
- Compare and test different emails designed for various campaigns through split and A/B testing to send emails that are responsive, attractive and unique.
- Unlock your contacts and other essential data from multiple integrations.
Pricing –
For pricing and other details, you need to contact them to ask for a customized plan.
29. Vision6
Create, send, track and analyze all your email marketing campaigns using professional templates provided by Vision6 email marketing tool. It has got customizable web forms and allows automation of email sending. You can also send SMS, business reminders, and confirmations through it.
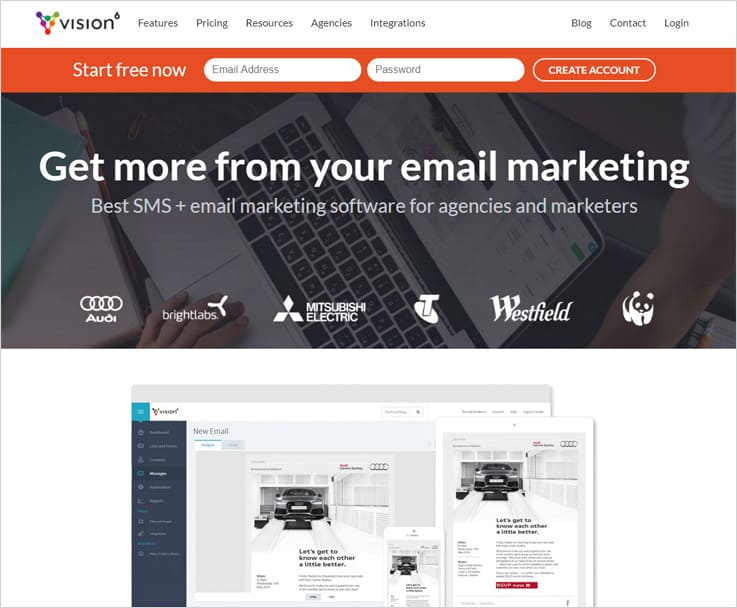
Best Feature: API Management
Vision6 lets you add API endpoints and manage them all under one section that makes it a lot easier to maintain for the users.
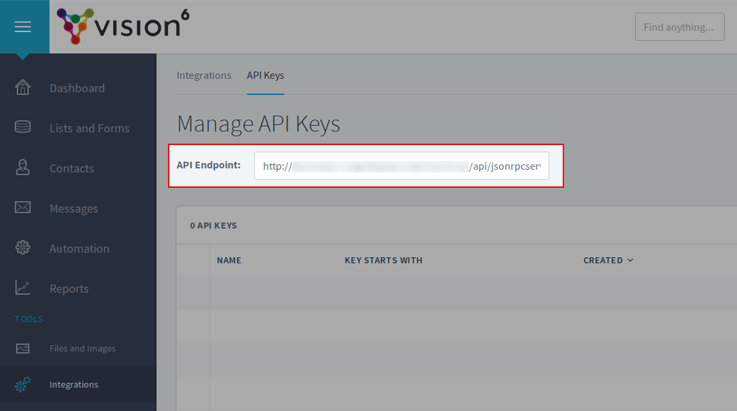
Attractive Features Of Vision 6 –
- Choose from 70+ free pre-designed email templates that are mobile-friendly and easy to customize according to your campaign needs.
- Drag & Drop builder and inbuilt image editor make it super simple to design emails from scratch.
- Vision6 provides technical support, training and other types of online help which is available 24/7.
Pricing –
The cheapest plan starts from $9 for up to 500 subscribers with 2,500 emails which is a Starter plan. The other two plans are – Business & Pro Marketer suitable for large subscriber list.
30. Lead Squared
Lead Squared is one of the best email marketing services that has helped dozens of small businesses in online marketing. This service offers high e-mail deliverability and easily integrates with several tools to create mail campaigns, landing pages & forms, lead management, lead scoring, lists & segmentation, tasks & reminders, and much more.
Best Feature: Tracking & Analysing
Improve your email performance by analyzing the results of the tracking feature.
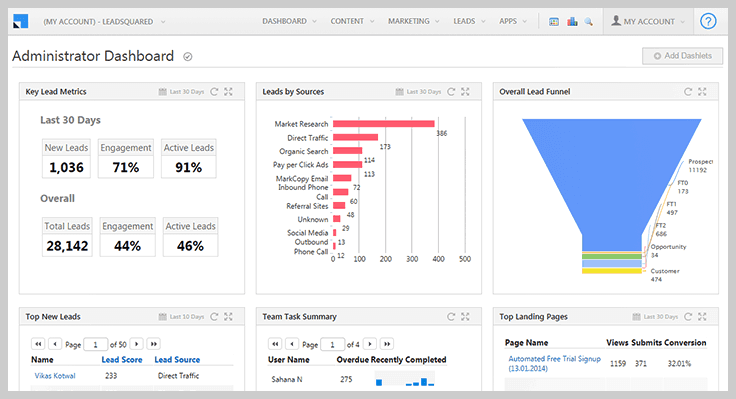
Attention Grabbing AttributesOf Lead Squared –
- Drip emailing is a feature that encourages more leads to get converted into regular customers by sending the right text at the right time.
- Conduct personalized emails marketing campaigns and send emails that produce higher open rates, click rates, and more responses.
Pricing –
It offers three plans namely, Basic, Standard, and Enterprise based on a number of contacts and users. Under its Basic plan, it allows 5 users to send emails up to 5000 contacts and cost Rs. 10,000 ($149.89) per month.
31. ActiveTrail
Target Hero is now been acquired by ActiveTrail e-mail marketing service and it is offering a 25% discount to all old subscribers of TargetHero. Attributes like reporting & analytics tools help you check the delivery of emails, bounces, spams and more.
Best Feature: Pre-Made Templates
Select from dozens of pre-designed, ready to use templates which are fully customizable as well.
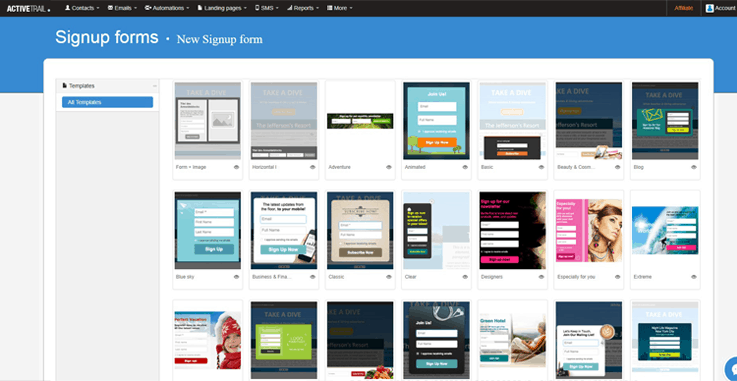
Main Features That TargetHero Possesses–
- Emails delivered using ActiveTrail are 100% mobile-responsive and look great on different screens.
- There are various tools like autoresponders, triggers, and A/B testing to automate many manual processes.
Pricing –
It offers 3 plans named, Minihero, Hero, & Superhero. The lowest plan is Minihero, which costs $9.90/month for sending emails to 1000-3000 recipients.
32. Elastic Email
Elastic Email is a simple and fast email delivery service that specializes in transactional as well as marketing email delivery. It allows you to upload contacts from different sources, manage subscribers and send newsletter campaigns, etc. In addition to this, you can also start with the free sign-up.
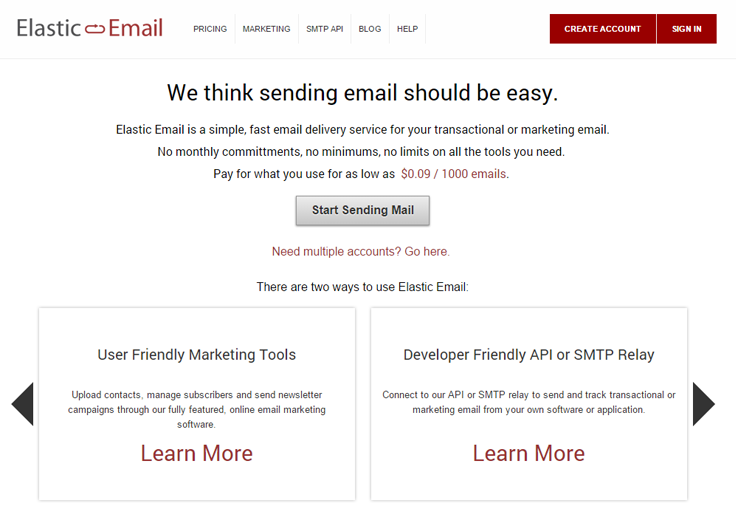
Best Feature: Ready Made Templates
Make an impression by sending emails that look attractive by using pre-designed templates that will land in the inbox of users and steal the subscriber’s attention.
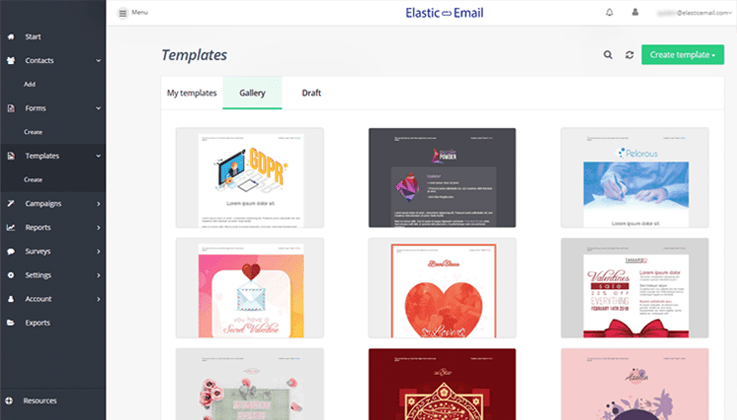
Specialty Of Elastic Email –
- With autoresponders and drip campaigns, features send email to your clients at times when they are most available.
- Take decisions that are most beneficial by viewing the real-time reports and statistics about different email campaigns.
Pricing –
Elastic Email’s cost plan is on the basis of per thousand mail sent. First 150000 emails are free per month, after that you have to pay $0.09/thousand emails and so on. The price will be low as the number of emails sent increases.
33. Vero
Vero email marketing service is an event-driven platform. It focuses on drip marketing and particularly on behavioral email sending. It sends a user, triggered emails based on their actions, behavior, and responses. Here you can track clicks and also personalize emails with data from your web server.
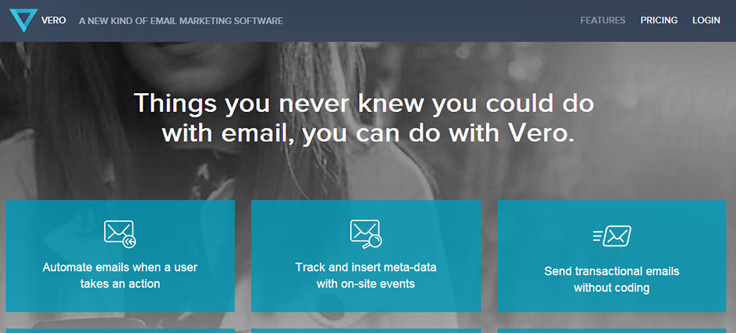
Best Feature: Workflow In Automation
Segment your contacts & target the right customer by sending relevant emails customers.
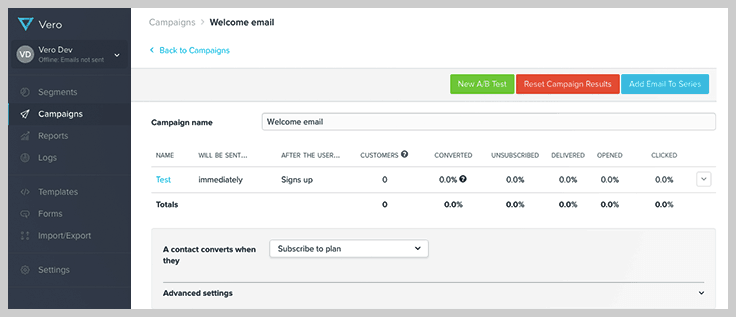
Functionalities Of Vero –
- Send email in different languages as this software supports multiple languages.
- Track the actions of users performed on emails that you deliver like clicks, open rate and more.
Pricing & Plans –
Four pricing plans are available with monthly as well as annually package namely Starter, Growth, Pro Enterprise.
The cheapest monthly plan started from $99 with 12500 customers and 25,000 emails/month whereas the annual plan started from $999 with 12000 customers and 30,000 emails/month.
34. Listrak
Listrak is a top-notch email promotion agency, that offers omnichannel marketing across email, mobile and social using personalized campaigns. It has a single and integrated marketing platform that increases customer engagement which results in an increase in sales.
Best Feature: Easy To Use Dashboard
Listrak provides a very easy to use dashboard with excellently management dashboard.
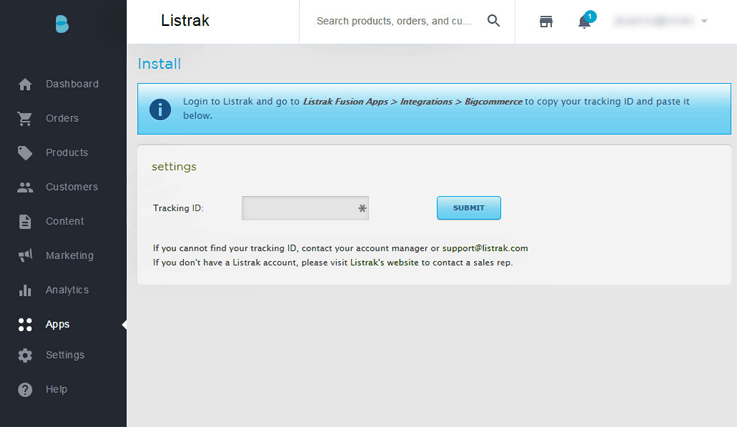
Main-Features Of Listrak –
- Use drag-and-drop editor to quickly create responsive emails that look attractive without writing a single line of HTML code.
- It provides a 24/7 phone and e-mail support. Plus an account manager is assigned that helps you throughout your campaign.
- This service makes you capable of sending customer oriented and targeted emails just by segmenting your customers & audience.
Pricing –
Listrak serves its customers individually and so its prices too are custom-tailored for each user, therefore no plans are available on the homepage.
35. SendBlaster
SendBlaster is a bulk email sending software that will manage all your mailing lists and set up email marketing campaigns in just a few easy steps. It provides a complete set of features like creating graphics templates, list management, sending the newsletter, analyzing campaign statistics, etc.
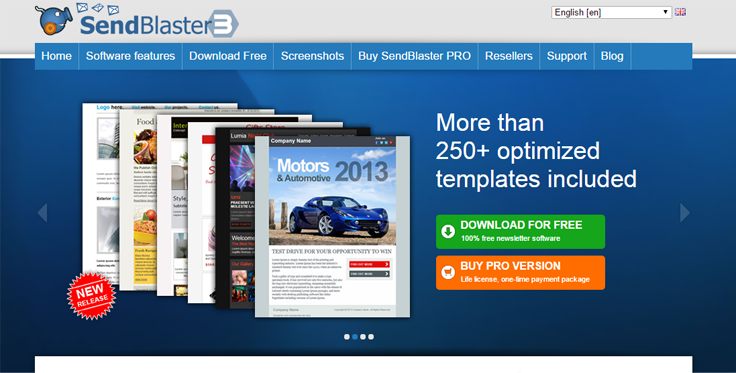
Best Feature: Templates
SendBlaster an email marketing service that comes with some awesome emails templates that can easily be customized.
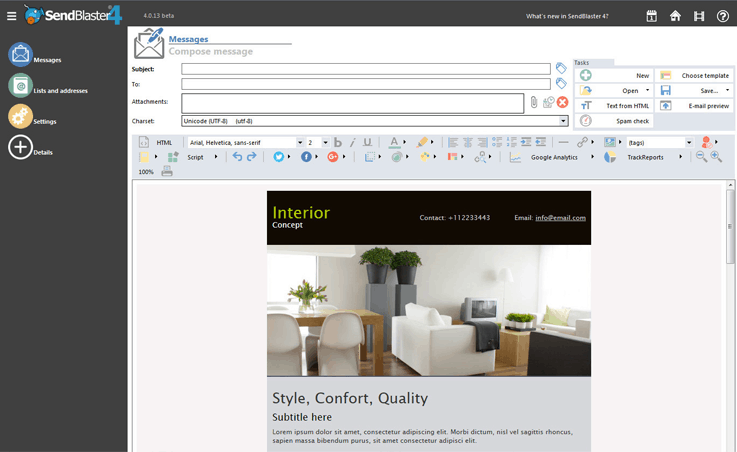
Properties Of SendBlaster –
- Import contacts from any source and formats like. CSV and more. You can also extract a contact list from MS Outlook, Excel, Access, Gmail Contacts, Windows Live/Hotmail contacts, Yahoo mail, etc.
- Send personalized emails to each customer with an advanced feature and get more customers.
Pricing –
You need to purchase a PRO license of SendBlaster that costs $129 and is valid for a lifetime. However, if you extend attributes like protection against license key, upgrade the current release, add MailStyler base, MailStyler Pro, professional email templates, etc, then charges will go up to $500.
36. Bronto
Bronto is a marketing automation tool which increases your revenue by sending the targeted email to customers. It emphasizes on revenue driven campaigns which are conducted based on past campaign data. Bronto has some of the premium analysis and tracking tools as well.
Best Feature: Customization Options
Personalized campaigns by using customers behavioral data which lets you target the right user at the right time.
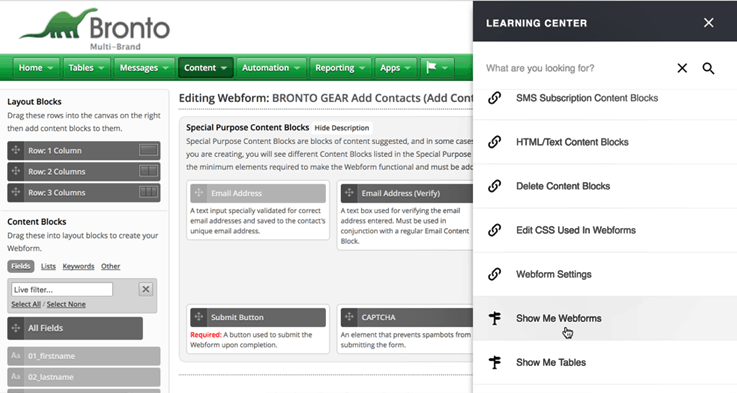
Check Out The Special Attributes Of Bronto –
- Drag-and-drop email builder is also available through which you can create attractive emails. workflows.
- Track and refine your email campaigns by features like Analysis and reporting.
Pricing –
Bronto has yearly plans and that too on the basis of email credits. The core edition allows 60000 emails per year at $995. The prices are really high here.
37. Emarsys
Design, create and send emails that enhance your customer engagement with Emarsys email marketing solution. Run all your advertising strategy and multiple campaigns with ease by the real-time email marketing automation platform.
Best Feature: Analytics Reports
Track the campaign’s performance & analyze how your emails are performing.

Emarsys Properties –
- Automate different type of responses like welcome notification and more with automation tool.
- Deliver emails and messages that reach the inbox of users and look good on any device.
Pricing –
It has personalized plans, different for each user, you need to contact them to know the pricing package.
38. AWeber
AWeber is another email marketing services for small business that allows creating professional-looking emails within a few clicks.
It offers autoresponder functionality to automate follow-ups, fully customizable email templates that can be used by several businesses, signup forms, RSS-to-email (create emails automatically from your latest blog posts), a full-featured API and much more.

Best Feature: Multiple Follow Up Emails With The Same List
AWeber provides a single dashboard for sending multiple follow up emails with a single list.
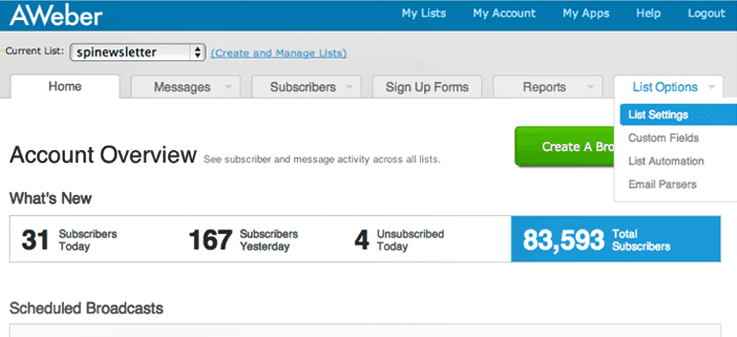
Other Functionalities That AWeber Offers Are –
- AWeber’s drag-n-drop mail editor helps you create perfect emails for advertising and promotion.
- Keep a check on how the email marketing campaigns are performing with AWeber’s mobile app.
- Integrate multiple third-party apps which you already have to enhance your workflow.
Pricing Package –
You can try AWeber free trial for 30 days in which you can explore all the features that it offers.
The paid plans start with a price of $19 for a month in which you can send unlimited emails to 500 users.
Other than the above plan there are 5 more plans with the price tag starting at $29 and end at $149 a month. These plans may vary in the number of user count. But they offer similar properties.
One of the exciting things about these plans is that if you choose a quarterly or yearly subscription you get an extra discount of 14% and 14.9%.
Last Words.
Now that you have gone through the comparison of all the 30+ best email marketing services 2022, you can now decide which is the best email promotional tool that can increase your business productivity.
For more information, you can go through following blogs:-
- Cheapest Email Marketing Services
- Paid Email Service Providers
- Best Email Deliverability Services
- Email Marketing Service India
- Bulk Email Marketing Services
How do you like this review? Do mention your thoughts in the comment box below…
Hr CSS Style – Change Color Border Style
The HTML <hr> element represents a Horizontal-rule and it is used for page break via line. It creates horizontal line, which makes someone to understand that there is an end of the page or a sentence break.
We can also design the hr (horizontal-rule) tag to create attractive user-interface.
In this tutorial, we are going to design different and styling hr tag, using images and text. It’s simple and easy to use where each style code is different from other style.
You can also refer live demo or download the Script file.
Extract the downloaded files, save it and run index.html on browser

Below are the different <hr> styles. We have categorized them into styles and types. All from the first category are created using css codes with few background images to give a design whereas in the second one, all the <hr> designs are pure images.
Category One : “Styles”
1. Style One :
HTML Code :
Copy below code in your HTML file.
<hr class="style-one">CSS Code:
Copy below code in your CSS file, or inside style tag in HTML page. Check property and values to learn in proper way.
/* Gradient color1 - color2 - color1 */

hr.style-one {
border: 0;
height: 1px;
background: #333;
background-image: -webkit-linear-gradient(left, #ccc, #333, #ccc);
background-image: -moz-linear-gradient(left, #ccc, #333, #ccc);
background-image: -ms-linear-gradient(left, #ccc, #333, #ccc);
background-image: -o-linear-gradient(left, #ccc, #333, #ccc);
}
2. Style Two :
![]()
HTML Code :
Copy below code in your HTML file.
<hr class="style-two">CSS Code:
Copy below code in your CSS file, or inside style tag in HTML page.
/* Inset */

hr.style-two {
border: 0;
height: 0;
border-top: 1px solid rgba(0, 0, 0, 0.1);
border-bottom: 1px solid rgba(255, 255, 255, 0.3);
}
3. Style Three :

HTML Code :
Copy below code in your HTML file.
<hr class="style-three">CSS Code:
Copy below code in your CSS file, or inside style tag in HTML page.
/* Flaired edges */

hr.style-three {
height: 30px;
border-style: solid;
border-color: black;
border-width: 1px 0 0 0;
border-radius: 20px;
}
hr.style-three:before {
display: block;
content: "";
height: 30px;
margin-top: -31px;
border-style: solid;
border-color: black;
border-width: 0 0 1px 0;
border-radius: 20px;
}
4. Style Four :
![]()
HTML Code :
Copy below code in your HTML file.
<hr class="style-four">CSS Code:
Copy below code in your CSS file, or inside style tag in HTML page.
/* Text between <hr> tag */

hr.style-four {
padding: 0;
border: none;
border-top: medium double #333;
color: #333;
text-align: center;
}
hr.style-four:after {
content: "www.formget.com";
display: inline-block;
position: relative;
top: -0.7em;
font-size: 1.5em;
padding: 0 0.25em;
background: white;
}
5. Style Five :

HTML Code :
Copy below code in your HTML file.
 <div class="style-five"></div>
<hr class="style-five">
CSS Code:
Copy below code in your CSS file, or inside style tag in HTML page.
/* Image in left corner of <hr> tag */

div.style-five {
height: 75px;
background: #fff url(image/cartoon.png) no-repeat scroll left;
background-size: 80px 75px;
margin-left: -40px;
}
hr.style-five
{
width: 95%;
margin-top: -40px;
border: 0;
border-bottom: 1px dashed black;
background: #70A8FF;
}
6. Style Six :

HTML Code :
Copy below code in your HTML file.
<hr class="style-six">CSS Code:
Copy below code in your CSS file, or inside style tag in HTML page.
/* Images between <hr> tag */

hr.style-six {
padding: 0;
border: none;
height: 1px;
background-image: -webkit-linear-gradient(left, rgba(0,0,0,0), rgba(0,0,0,0.75), rgba(0,0,0,0));
background-image: -moz-linear-gradient(left, rgba(0,0,0,0), rgba(0,0,0,0.75), rgba(0,0,0,0));
background-image: -ms-linear-gradient(left, rgba(0,0,0,0), rgba(0,0,0,0.75), rgba(0,0,0,0));
background-image: -o-linear-gradient(left, rgba(0,0,0,0), rgba(0,0,0,0.75), rgba(0,0,0,0));
color: #333;
text-align: center;
}
hr.style-six:after {
content:" ";
display: inline-block;
position: relative;
top: -2.1em;
font-size: 1.5em;
padding: 19px 1.75em;
background: #fff url(image/cartoon_1.png) no-repeat scroll center;
background-size: 90px 90px;
height: 50px;
}
7. Style Seven :
![]()
HTML Code :
Copy below code in your HTML file.
<hr class="style-seven" />CSS Code:
Copy below code in your CSS file, or inside style tag in HTML page.
/* dashed border <hr> tag */

hr.style-seven {
height:8px;
border: 2px dashed #999;
}
8. Style Eight :
![]()
HTML Code :
Copy below code in your HTML file.
<hr class="style-eight" />CSS Code:
Copy below code in your CSS file, or inside style tag in HTML page.
/* Border Shadow in <hr> tag */

hr.style-eight {
height: 10px;
border: 1;
box-shadow: inset 0 9px 9px -3px rgba(11, 99, 184, 0.8);
-webkit-border-radius: 5px;
-moz-border-radius: 5px;
-ms-border-radius: 5px;
-o-border-radius: 5px;
border-radius: 5px;
}
Below are the designs that are created using images.
Category Second : “Types”
1. Type One :

HTML Code:
Copy below code in your HTML file.
<hr class="type_1">CSS Code:
Copy below code in your CSS file, or inside style tag in HTML page.
/*  Background Image */

hr.type_1 {
border: 0;
height: 55px;
background-image: url(image/type_1.png);
background-repeat: no-repeat;
}
2. Type Two :

HTML Code:
Copy below code in your HTML file.
<hr class="type_2">CSS Code:
Copy below code in your CSS file, or inside style tag in HTML page.
/*  Background Image */

hr.type_2 {
border: 0;
height: 55px;
background-image: url(image/type_2.png);
background-repeat: no-repeat;
}
3. Type Three :
![]()
HTML Code:
Copy below code in your HTML file.
<hr class="type_3">CSS Code:
Copy below code in your CSS file, or inside style tag in HTML page.
/*  Background Image */

hr.type_3 {
border: 0;
height: 25px;
background-image: url(image/type_3.png);
background-repeat: no-repeat;
}
4. Type Four :
![]()
HTML Code:
Copy below code in your HTML file.
<hr class="type_4">CSS Code:
Copy below code in your CSS file, or inside style tag in HTML page.
/*  Background Image */

hr.type_4 {
border: 0;
height: 55px;
background-image: url(image/type_4.png);
background-repeat: no-repeat;
}
5. Type Five :
![]()
HTML Code:
Copy below code in your HTML file.
<hr class="type_5">CSS Code:
Copy below code in your CSS file, or inside style tag in HTML page.
/*  Background Image */

hr.type_5 {
border: 0;
height: 55px;
background-image: url(image/type_5.png);
background-repeat: no-repeat;
}
6. Type Six :
![]()
HTML Code:
Copy below code in your HTML file.
<hr class="type_6">CSS Code:
Copy below code in your CSS file, or inside style tag in HTML page.
/*  Background Image */

hr.type_6 {
border: 0;
height: 55px;
background-image: url(image/type_6.png);
background-repeat: no-repeat;
}
7. Type Seven :
![]()
HTML Code:
Copy below code in your HTML file.
<hr class="type_7">CSS Code:
Copy below code in your CSS file, or inside style tag in HTML page.
/*  Background Image */

hr.type_7 {
border: 0;
height: 55px;
background-image: url(image/type_7.png);
background-repeat: no-repeat;
}
8. Type Eight :

HTML Code:
Copy below code in your HTML file.
<hr class="type_8">CSS Code:
Copy below code in your CSS file, or inside style tag in HTML page.
/*  Background Image */

hr.type_8 {
border: 0;
height: 55px;
background-image: url(image/type_8.png);
background-repeat: no-repeat;
}
9. Type Nine :
![]()
HTML Code:
Copy below code in your HTML file.
<hr class="type_9">CSS Code:
Copy below code in your CSS file, or inside style tag in HTML page.
/*  Background Image */

hr.type_9 {
border: 0;
height: 55px;
background-image: url(image/type_9.png);
background-repeat: no-repeat;
}
10. Type Ten :
![]()
HTML Code:
Copy below code in your HTML file.
<hr class="type_10">CSS Code:
Copy below code in your CSS file, or inside style tag in HTML page.
/*  Background Image */

hr.type_10 {
border: 0;
height: 55px;
background-image: url(image/type_10.png);
background-repeat: no-repeat;
}
Conclusion:
In this tutorial we have learned about, how we can use images and styles to make attractive hr designs. Hope you have benefited from it. Keep visiting our websites for more knowledge and information.
You may also like –
- CSS list Design Stylish List
- CSS Radio Button And Checkbox
PHP PDO Insert Data Into Database

PHP Data Objects ,PDO is a PHP extension to use PHP’S database connections. It is a consistent way to access databases. Using PDO we can make a code for different types of database and platform as well.
Why PDO use?
- Use by many databases : PDO use by numbers of database system supported by PHP.
- OOPS : PDO use object-oriented methodology.
- Write one run anywhere : Using PDO just write one code and run anywhere means you don’t need to write code for each database.
- Speed : PDO written in compiled language so speed is good.
Databases does PDO support :
- MYSQL (http://www.mysql.com/): MySQL 3.x/4.0
- OCI (http://www.oracle.com): Oracle Call Interface
- PGSQL (http://www.postgresql.org/): PostgreSQL
- SQLITE (http://sqlite.org/): SQLite 3.x
- INFORMIX – IBM Informix Dynamic Server
- IBM (IBM DB2)
- Firebird (http://firebird.sourceforge.net/): Firebird/Interbase 6
- DBLIB: FreeTDS / Microsoft SQL Server / Sybase
All of these drivers are not necessarily available on your system, way to find out which drivers you have:
<?php print_r(PDO::getAvailableDrivers());?>In this tutorial we are going to explain how we can use PDO for mysql. In this tutorial we are demonstrate how we can insert data on database using PDO.
Connection to MySQL Using PDO.
Here we are using PDO Object-Oriented method to Open a Connection to MySQL.
Syntax :
<?php
$servername = "localhost";
$username = "username";
$password = "password";

try {
//Creating connection for mysql
$conn = new PDO("mysql:host=$servername;dbname=myDB", $username, $password);
// set the PDO error mode to exception
$conn->setAttribute(PDO::ATTR_ERRMODE, PDO::ERRMODE_EXCEPTION);
echo "Connected successfully";
}
catch(PDOException $e)
{
echo "Connection failed: " . $e->getMessage();
}
?>
You can also refer our live demo or download the Script file. Extract the downloaded files, save it in your local server and run it using given path
http://localhost/pdo/index.php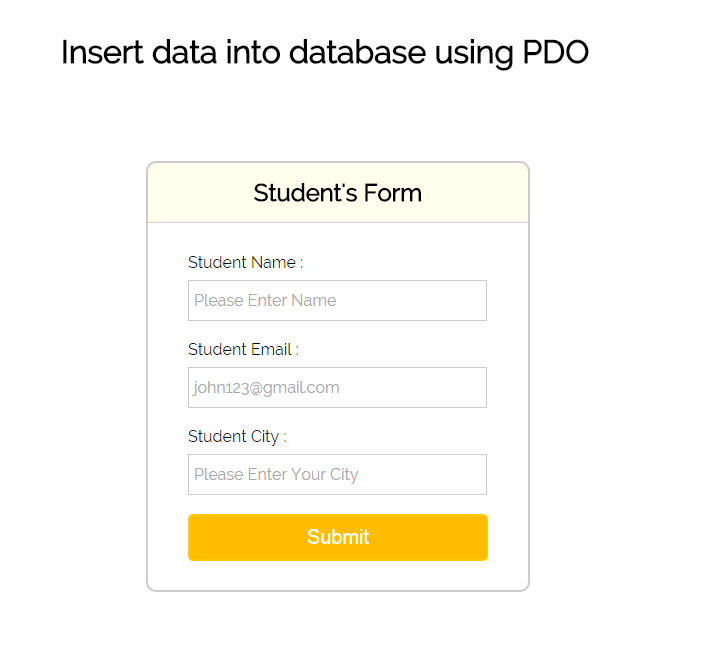
My SQL code segment
To create database and table, execute following codes in your My SQL.
//First create database
CREATE DATABASE 'college';
//Then create table
CREATE TABLE 'students' (
 'student_id' int(11) NOT NULL AUTO_INCREMENT,
 'student_name' varchar(255) NOT NULL,
'student_email' varchar(255) NOT NULL,
'student_city' varchar(255) NOT NULL,
PRIMARY KEY ('student_id')
)
PHP File : index.php
Copy the below code in your file and save as view.php
<html>
<head>
<title>insert data in database using PDO(php data object)</title>
<link rel="stylesheet" type="text/css" href="style.css">
</head>
<body>

<div id="main">
<h1>Insert data into database using PDO</h1>
<div id="login">
<h2>Student's Form</h2>
<hr/>
<form action="" method="post">
<label>Student Name :</label>
<input type="text" name="stu_name" id="name" required="required" placeholder="Please Enter Name"/><br /><br />
<label>Student Email :</label>
<input type="email" name="stu_email" id="email" required="required" placeholder="[email protected]"/><br/><br />
<label>Student City :</label>
<input type="text" name="stu_city" id="city" required="required" placeholder="Please Enter Your City"/><br/><br />
<input type="submit" value=" Submit " name="submit"/><br />
</form>
</div>
<!-- Right side div -->
<div id="formget">
<a href=https://www.formget.com/app><img src="formget.jpg" alt="Online Form Builder"/></a>
</div>

</div>
<?php
if(isset($_POST["submit"])){
$hostname='localhost';
$username='root';
$password='';

try {
$dbh = new PDO("mysql:host=$hostname;dbname=college",$username,$password);

$dbh->setAttribute(PDO::ATTR_ERRMODE, PDO::ERRMODE_EXCEPTION); // <== add this line
$sql = "INSERT INTO students (student_name, student_email, student_city)
VALUES ('".$_POST["stu_name"]."','".$_POST["stu_email"]."','".$_POST["stu_city"]."')";
if ($dbh->query($sql)) {
echo "<script type= 'text/javascript'>alert('New Record Inserted Successfully');</script>";
}
else{
echo "<script type= 'text/javascript'>alert('Data not successfully Inserted.');</script>";
}

$dbh = null;
}
catch(PDOException $e)
{
echo $e->getMessage();
}

}
?>
</body>
</html>
CSS File : style.css
Styling HTML Elements.
@import url(http://fonts.googleapis.com/css?family=Raleway);

#main{
width:960px;
margin:50px auto;
font-family: 'Raleway', sans-serif;
}

h2{
background-color: #FEFFED;
text-align:center;
border-radius: 10px 10px 0 0;
margin: -10px -40px;
padding: 15px;
}

hr{
border:0;
border-bottom:1px solid #ccc;
margin: 10px -40px;
margin-bottom: 30px;
}

#login{
width:300px;
float: left;
border-radius: 10px;
font-family:raleway;
border: 2px solid #ccc;
padding: 10px 40px 25px;
margin-top: 70px;
}

input[type=text],input[type=email]{
width:99.5%;
padding: 10px;
margin-top: 8px;
border: 1px solid #ccc;
padding-left: 5px;
font-size: 16px;
font-family:raleway;
}

input[type=submit]{
width: 100%;
background-color:#FFBC00;
color: white;
border: 2px solid #FFCB00;
padding: 10px;
font-size:20px;
cursor:pointer;
border-radius: 5px;
margin-bottom: -12px;
}

#formget{
float:right;
}
h1 {
margin-left: -85px;
}
Conclusion:
So, this was all about accessing database server using php data object PDO.Hope you might have understood it properly, keep reading our other blogs posts for more coding tricks.
PHP MySQLi Insert Data Into Database
PHP MySQLi, where i denotes to “Improved”. Using MySQLi function you can access the database server. Mysqli is the enhanced version of Mysql.
In this tutorial we are demonstrate how we can use MySQLi to access mysql database server.
Before accessing the MySQL database.First we need to connect them using MYSQLi .
Connection to MySQL Using MySQLi
Here we are using MySQLi Object-Oriented method to Open a Connection to MySQL.
Syntax :
<?php
$servername = "localhost";
$username = "username";
$password = "password";
$dbname = "database";
// Create connection
$conn = new mysqli($servername, $username, $password,$dbname);

// Check connection
if ($conn->connect_error) {
die("Connection failed: " . $conn->connect_error);
}
echo "Connected successfully";
?>
Insert Data Using MySQLi
preparing a insert query and run query by connection object.
Syntax :
$sql = "INSERT INTO students (student_name, student_email, student_city)
VALUES ('John', '[email protected]','los angeles')";

if ($conn->query($sql) === TRUE) {
echo "New record created successfully";
} else {
echo "Error: " . $sql . "<br>" . $conn->error;
}$conn->close();
You can also refer our live demo or download the Script file. Extract the downloaded files, save it in your local server and run it using given path
http://localhost/mysqli/view.php 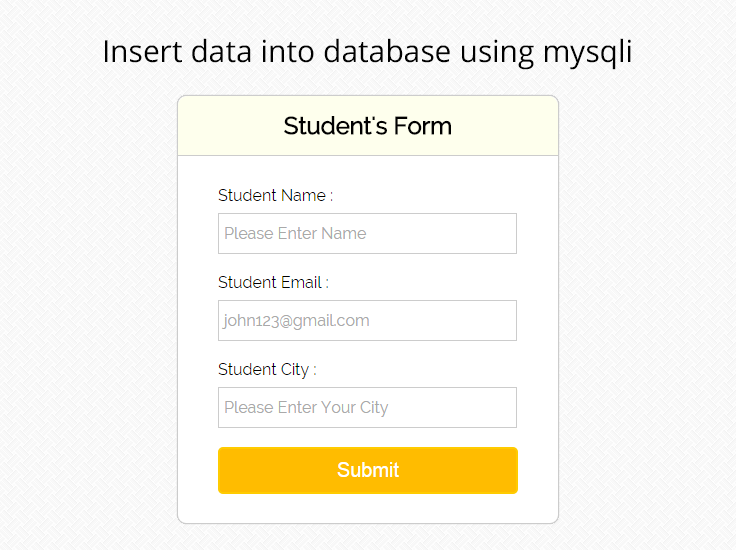
My SQL Code Segment :
To create database and table, execute following codes in your My SQL.
//First create database
CREATE DATABASE 'college';
//Then create table
CREATE TABLE 'students' (
'student_id' int(11) NOT NULL AUTO_INCREMENT,
'student_name' varchar(255) NOT NULL,
'student_email' varchar(255) NOT NULL,
'student_city' varchar(255) NOT NULL,
PRIMARY KEY ('student_id')
)
Php File : view.php
In view.php file ,we are using student information form there are only three filed student name, email and address.Using mysqli functions we are inserting data on student table.
Copy the below code in your file and save as view.php
<html>
<head>
<title>insert data in database using mysqli</title>
<link rel="stylesheet" type="text/css" href="style.css">
</head>
<body>

<div id="main">
<h1>Insert data into database using mysqli</h1>
<div id="login">
<h2>Student's Form</h2>
<hr/>
<form action="" method="post">
<label>Student Name :</label>
<input type="text" name="stu_name" id="name" required="required" placeholder="Please Enter Name"/><br /><br />
<label>Student Email :</label>
<input type="email" name="stu_email" id="email" required="required" placeholder="[email protected]"/><br/><br />
<label>Student City :</label>
<input type="text" name="stu_city" id="city" required="required" placeholder="Please Enter Your City"/><br/><br />
<input type="submit" value=" Submit " name="submit"/><br />
</form>
</div>
<!-- Right side div -->
<div id="formget">
<a href=https://www.formget.com/app><img src="formget.jpg" alt="Online Form Builder"/></a>
</div>

</div>
<?php
if(isset($_POST["submit"])){
$servername = "localhost";
$username = "root";
$password = "";
$dbname = "college";

// Create connection
$conn = new mysqli($servername, $username, $password, $dbname);
// Check connection
if ($conn->connect_error) {
die("Connection failed: " . $conn->connect_error);
}

$sql = "INSERT INTO students (student_name, student_email, student_city)
VALUES ('".$_POST["stu_name"]."','".$_POST["stu_email"]."','".$_POST["stu_city"]."')";

if ($conn->query($sql) === TRUE) {
echo "<script type= 'text/javascript'>alert('New record created successfully');</script>";
} else {
echo "<script type= 'text/javascript'>alert('Error: " . $sql . "<br>" . $conn->error."');</script>";
}

$conn->close();
}
?>
</body>
</html>
CSS File : style.css
Styling HTML Elements.
@import url(http://fonts.googleapis.com/css?family=Raleway);

#main{
width:960px;
margin:50px auto;
font-family: 'Raleway', sans-serif;
}

h2{
background-color: #FEFFED;
text-align:center;
border-radius: 10px 10px 0 0;
margin: -10px -40px;
padding: 15px;
}

hr{
border:0;
border-bottom:1px solid #ccc;
margin: 10px -40px;
margin-bottom: 30px;
}

#login{
width:300px;
float: left;
border-radius: 10px;
font-family:raleway;
border: 2px solid #ccc;
padding: 10px 40px 25px;
margin-top: 70px;
}

input[type=text],input[type=email]{
width:99.5%;
padding: 10px;
margin-top: 8px;
border: 1px solid #ccc;
padding-left: 5px;
font-size: 16px;
font-family:raleway;
}

input[type=submit]{
width: 100%;
background-color:#FFBC00;
color: white;
border: 2px solid #FFCB00;
padding: 10px;
font-size:20px;
cursor:pointer;
border-radius: 5px;
margin-bottom: -12px;
}

/*-----------------------------------------------------------------
css settings for right side advertisement
------------------------------------------------------------------*/
#formget{
float:right;
}
h1 {
margin-left: -85px;
}
Conclusion:
So, this was all about accessing database server using php mysqli.Hope you might have understood it properly, keep reading our other blogs posts for more coding tricks.
Include CSS File Using @import

The @import is a rule allowing you to import one style sheet into another.When you are working on a complex website and stuck to managed many stylesheet, then @import is very helpful .The @import rule is another way of loading a CSS file.
In this tutorial we are going to explain,How we can use @import for importing one style sheet into another.
Loading a CSS file using @import you can do this by two ways.The simplest way is load CSS file within the header of your document, like so:
@import with in header
Here we are importing style.css file in index.html header section.

CSS file : Style.css
Copy the below code on your style.css file
#box{

width:200px;
height:200px;
background-color:rgb(14, 179, 142);

}
HTML file : index.html
In index.html we are importing style.css in header section inside style tag
<!DOCTYPE html>
<html>
<head>
<title>CSS @Import</title>
<style type="text/css">

@import url('css/style.css');

</style>

</head>
<body>

<div id="box"> </div>

</body>
</html>
Note : That is not a best method for keeping @import inside HTML. @import very useful when we import a style sheet within another stylesheet. if you want to use any css file on HTML page, then use below style for importing them.
<link rel="stylesheet" type="text/css" href="css/style.css" />@import with in another style-sheet
Here we are importing style_for_text.css and style_for_border.css in style.css file and linking style.css in index.html
CSS file : style_for_text.css
copy below code in style_for_text.css
#box{

font-size:20px;
color:white;

}
CSS file : style_for_border.css
copy below code in style_for_border.css
#box{

border: 5px solid gray;
border-style: ridge;
padding:5px;

}
CSS file : style.css
Here we are importing style_for_text.css and style_for_border.css in style.css
@import url('style_for_text.css');
@import url('style_for_border.css');
#box{

width:200px;
height:200px;
background-color:rgb(14, 179, 142);

}
HTML file : index.html
In index.html linking, style.css file
<!DOCTYPE html>
<html>
<head>
<title>CSS @Import</title>

<link rel="stylesheet" type="text/css" href="css/style.css" />

</head>
<body>

<div id="box">
CSS @import example
</div>

</body>
</html>
Conclusion:
In this tutorial we have learned about, how we can use @import in header and within another style sheet . Hope you have benefited from it. Keep visiting our websites for more knowledge and information.
For more related blogs check below –
- How To Make Simple Responsive Form Using CSS